


How to Rip DVD with MakeMKV: Guide for Beginners
 190
190
 0
0


Want to digitize your DVD collection? MakeMKV gets the job done for free. It creates an MKV with the original video, audio, and subtitle tracks, no re-encoding needed. Plus, it handles commercial discs with copy protection. After testing 20+ DVDs, I'll share what you need to know about ripping DVDs with MakeMKV, along with a real example from one of the discs I tested.
 Cisdem VideoPaw
MakeMKV Alternative to Rip & Compress DVD to MP4
- Rip home/copy-protected DVDs, folders, and ISO files
- Output to MP4, MKV, MOV, HEVC, and 600+ formats
- Batch ripping for TV series or multiple titles
- Compress DVD with smaller file size, good quality
- Keep original titles, subtitles, audio tracks
- Fast ripping process
- Built-in merge, trim, crop, chapter, and watermark tools
- Also a video converter, downloader, and recorder
 Free Download Windows 10 or later
  Free Download macOS 10.15 or later
What You Need Before Ripping a DVD
Before starting, prepare:
- A DVD disc, home or commercial
- A DVD drive, internal or external
- MakeMKV installed, on your Windows or Mac
- Enough storage space, a typical DVD rip may require 3-8 GB for a full DVD movie and more storage if keeping multiple titles or extras
How to Rip a DVD with MakeMKV
Here's what I used for this test:
- Movie DVD Mission: Impossible - Ghost Protocol (2:12:56)
- Windows 11 PC (Intel Celeron G6900, 16GB RAM)
- ASUS ZenDrive SDRW-08U9M-U external DVD drive
- MakeMKV v1.18.4 for Windows
Now, let me show the exact process I followed.
Step 1. Install and open MakeMKV
1. Insert the disc into your computer’s DVD drive.
2. Download MakeMKV from https://www.makemkv.com/download/ and install it.
3. Launch the software and it will scan CD-ROM devices.
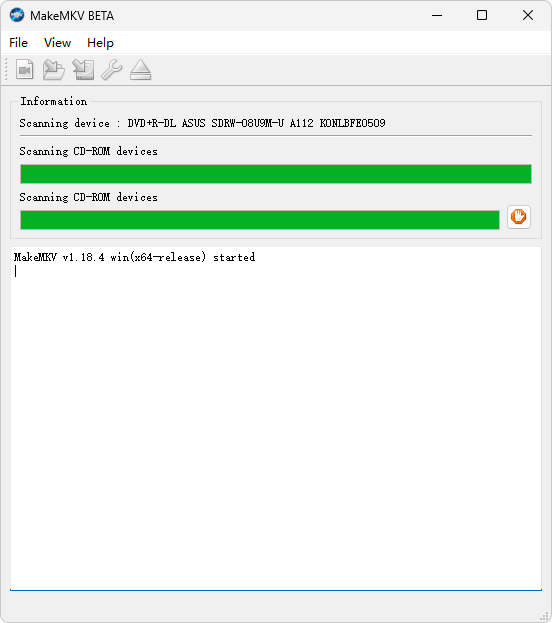
MakeMKV scanned my DVD in about 8 seconds and detected it as a 7.58 GB dual-layer disc.
Step 2. Scan the DVD
Click the large "Open DVD disc" icon on the left side of the screen, MakeMKV will start decrypting and parsing disc structure including:
- Main movie
- Trailers
- Bonus features
- Menus
- Other short clips
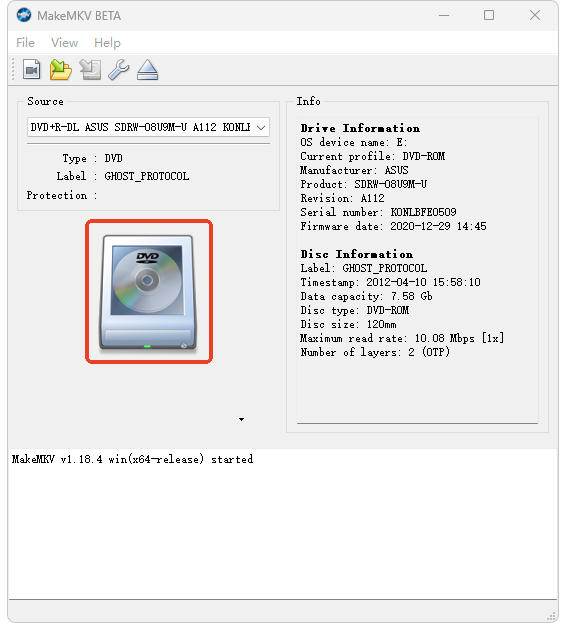
The scan took about 37 seconds and came back with 5 titles total. Anything under two minutes, like trailers and splash screens, got filtered out automatically.
Step 3. Choose the main title
All detected titles are selected by default. For a movie DVD, keep only the main feature and deselect the extras.
Tips to identify the main movie:
- Check the duration: usually the longest title
- Check the file size: usually the largest title
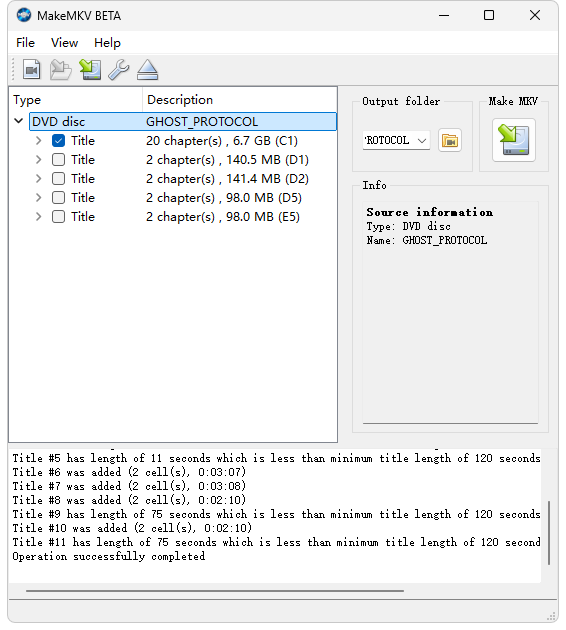
My example:
| Category | Title | Duration | Size | Content |
|---|---|---|---|---|
| Main feature | Title 1 | 02:12:39 | 6.7GB | Main movie |
| Displayed titles | Title 6, 7, 8, 10 | 00:02:10 - 00:03:08 | 98MB - 141.4MB | Extras and short clips |
| Filtered titles | Title 2, 4, 5, 9, 11 | Under 2 minutes | Very small | Very short clips |
Note: MakeMKV displayed the main movie as 02:12:39, while my original disc is 02:12:56. This small difference is likely due to variations in DVD timing metadata rather than missing content.
Step 4. Select video, audio, and subtitle tracks
Expand the selected title to view available tracks. MakeMKV allows you to choose:
Video track: keep the default video track selected.
Audio and subtitle tracks: keep the languages you need. If English is all you want, uncheck other languages to reduce the final MKV file size.
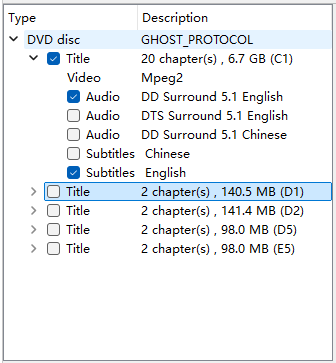
Note: MakeMKV is designed for 1:1 backups. Most rippers limit you to one audio and one subtitle track per rip. MakeMKV doesn't. It preserves everything on the disc.
Step 5. Start ripping the DVD
Choose the output folder and click the “Make MKV” button. MakeMKV will extract the selected content and save as MKV. Just wait until it finishes.
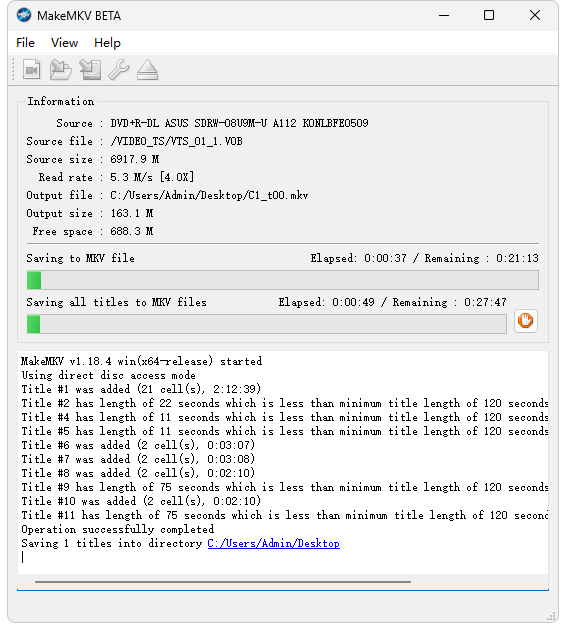
The ripping time depends on:
- DVD drive speed
- Disc condition
- Computer performance
- Amount of selected tracks
My Test Result
The whole rip took about 19 minutes to complete. MakeMKV generated a 6.7GB MKV file at 852×480 resolution and saved it to my specified output folder. No errors or hiccups during the process.
Verify the Ripped MKV File
I opened MKV movie with VLC to verify that the rip was successful.
✓ The MKV file opened successfully in VLC
✓ The ripped MKV file contained the full main movie
✓ Video playback was smooth
✓ Audio playback was synchronized correctly
✓ The selected English subtitle track was available and displayed properly
Troubleshooting MakeMKV: Issues and Fixes
1. "This application version is too old" or beta key expired
Update to the latest version from the official website first .
If the error persists, grab the current beta key from the MakeMKV forum announcement thread, then go to "Help > Register" and paste it in. The beta key needs to be updated every two months. And the beta key forum goes down pretty often. When it's down, you have to wait until it comes back online.
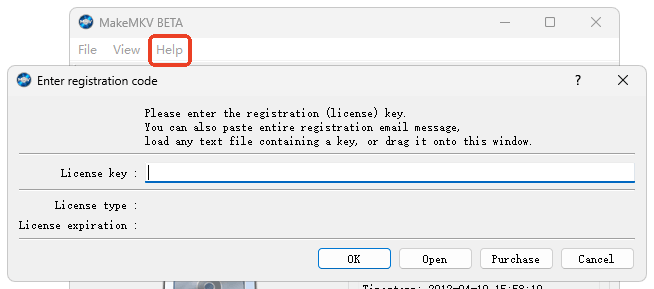
Actually, ripping DVDs with MKVMake is completely free. Only if you want to rip Blu-rays requiring a license key after a 30-day trial.
2. Scanning freezes or takes forever
MakeMKV may pause for a few minutes retrying unreadable sectors on scratched discs. Be patient, or wipe the disc clean before scanning. For a brand new disc that won't read, restart MakeMKV or update to the latest version.
3. Read errors during ripping (SCSI / CRC / HashCheck)
Errors like "SCSI error", "CRC error", or "HashCheck Error" popping up mid-rip . The rip might fail or extract a file with missing or corrupted sections.
These errors always come from the disc or the drive, not the software. You can clean scratches and smudges on the disc. Or try a different drive that handle scratched discs better than others.
4. "MakeMKV is damaged" or fatal error on launch on Mac
Since MakeMKV is an open-source software that can bypass disc encryption, Gatekeeper blocks it on newer Macs. You should go to "System Settings > Privacy & Security", under the "General" tab, click "Open Anyway" when you see the blocked message.
For recurring permission issues, open Terminal and run: codesign --force --deep --sign - /Applications/MakeMKV.app to create a local trusted signature.
Limitations: When MakeMKV Is Not Enough
You need MP4 or other formats
MakeMKV only outputs MKV files. It isn't as widely supported as MP4. You can't open MKV video in Apple's native player or iMovie, so editing and sharing are more of a hassle. And if all you need is the audio track? MakeMKV can't do that either.
You need smaller video files
MakeMKV doesn't compress video. It just remuxes the DVD into an MKV container. So the output is basically a direct copy of what's on the disc, which is not good for sharing and saving computer space.
You need edit or merge titles
If you need to trim intros and outros, crop black bars, adjust audio levels, or merge multiple episodes into one file, you'll need DVD ripping software with basic editing features. MakeMKV doesn't do any of that.
MakeMKV Alternatives for More Flexible DVD Ripping
If MakeMKV's limitations bother you, there are other options. Some are free, some aren't. Here's one - Cisdem VideoPaw, I've used that covers most of what MakeMKV can't do.
The app rips any DVDs and Blu-rays, including copy-protected discs, while keeping high video quality with smaller file sizes. It lets you rip directly to MP4, MOV, MP3, or whatever format you need, not just MKV. It can also edit, merge, and compress DVD videos.
Cisdem VideoPaw is not free. The price starts at $49.99/year. There's a trial, but it only gives you the first 5 minutes of a DVD for test.
I ripped the same DVD with VideoPaw. Here's how it went.
Step 1. Download and install Cisdem VideoPaw.
Free Download Windows 10 or later Free Download macOS 10.15 or later
Step 2. Open the software and go to the DVD Ripper module.
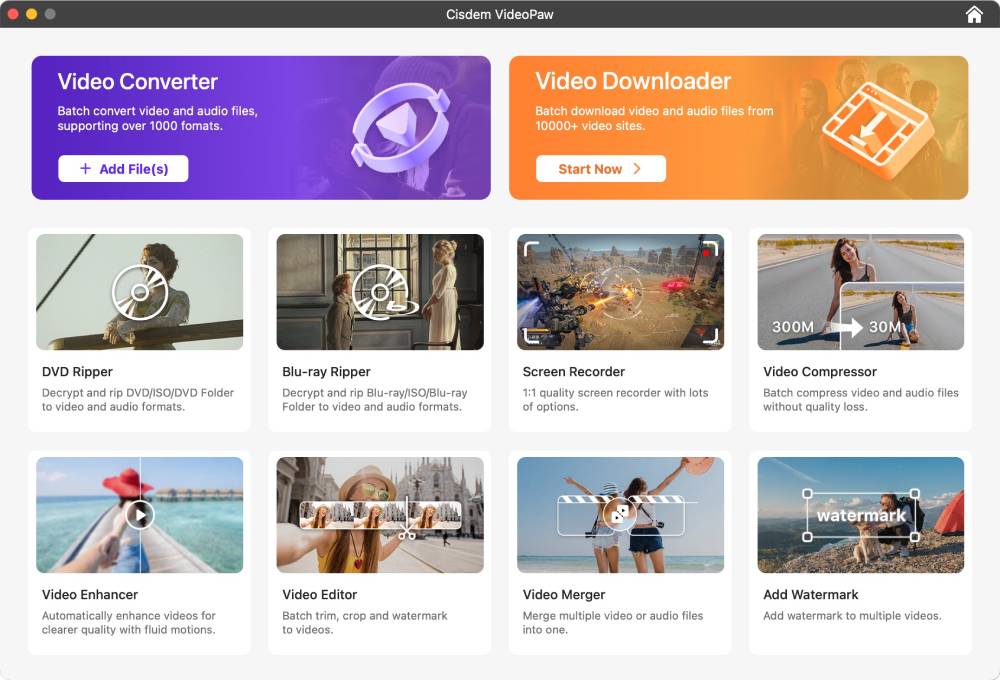
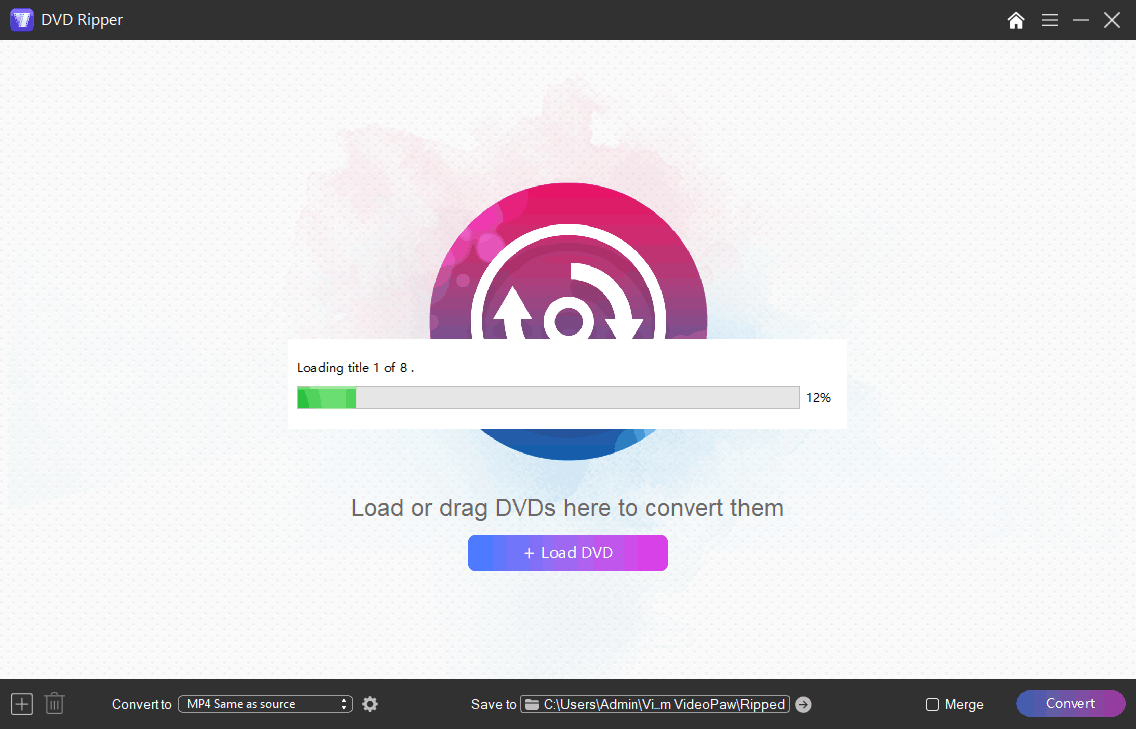
Step 3. Click the "Load DVD" button to import the DVD or drag-n-drop the DVD folder into the DVD Ripper interface.
Testing notes:
VideoPaw doesn't auto‑detect the disc, you need to add it manually. But you only scan once, not twice.
First scan ran about 43 seconds. Scanning the same disc again without rebooting was much faster.
My disc displayed 8 titles during loading, but only 5 titles were available in the end, same result as MakeMKV.
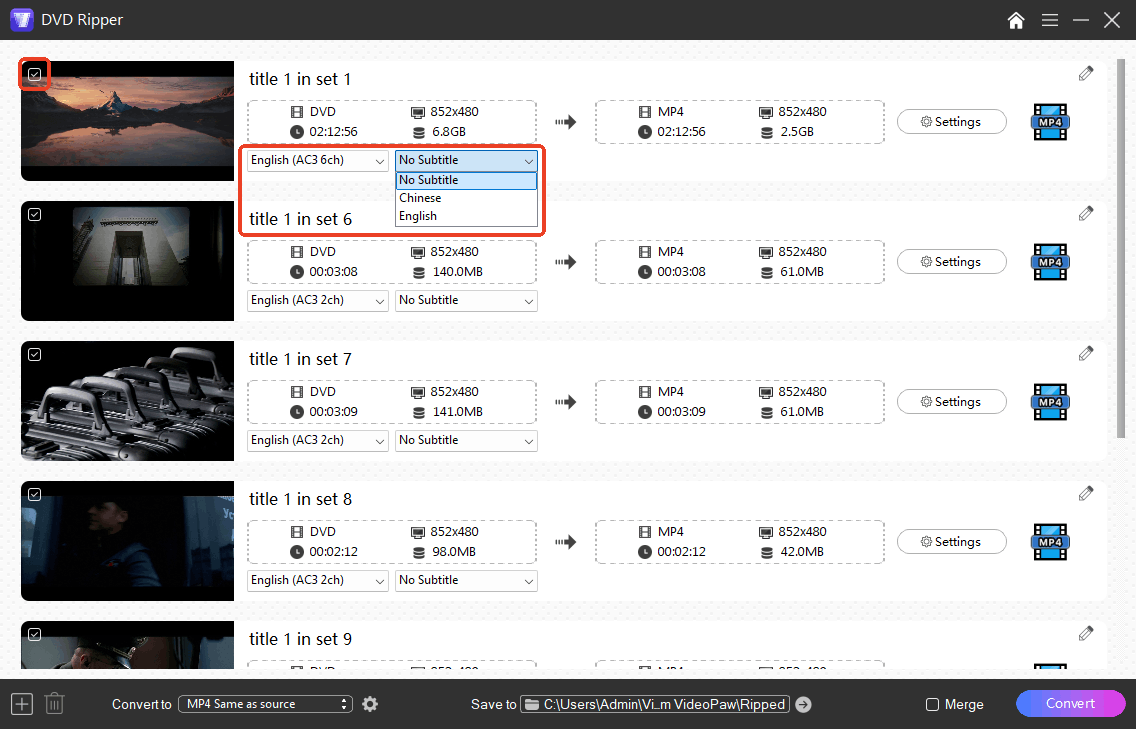
Step 4. Choose the titles, audio tracks, and subtitles.
All detected titles are selected by default. Preview each title by clicking the video thumbnail, then uncheck any unwanted ones.
If the DVD includes multiple audio or subtitle tracks, select your preferred options from the Audio and Subtitle dropdown menus.
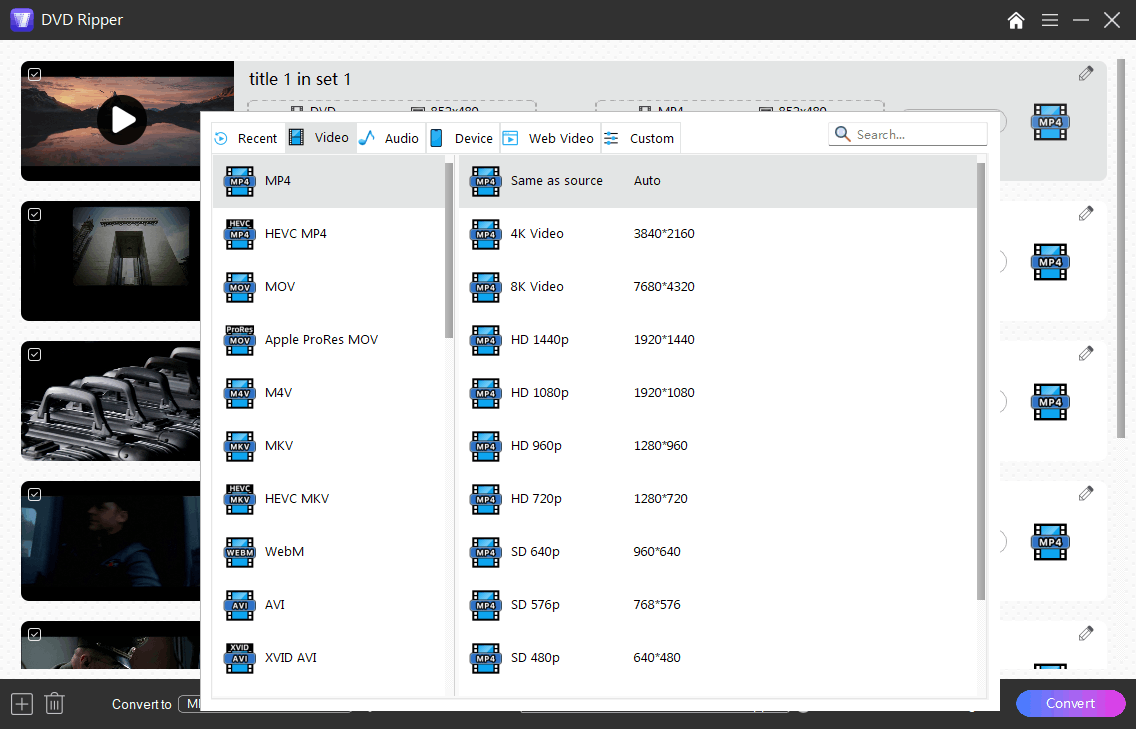
Step 5. Open the format panel and choose the output format.
I choose the option - “MP4” (h264) > “Same as source”.
Step 6. Click the “Convert” button to start DVD ripping.
Tips: If you want merge & edit
- Select multiple titles and check “Merge” at the bottom to output one file.
- Click the edit icon to trim or crop. I didn't need them for this movie rip, but they're useful for TV series or cleaning up intros and credits.
My Test Result
The rip finished in about 17 minutes. The main title completed without issues and played smoothly from start to finish. VideoPaw compressed the file to roughly two‑thirds smaller than MakeMKV's output, while maintaining good image quality.
Output video details:
| Property | Output |
|---|---|
| Format | MP4 (H.264) |
| Duration | 2:12:56 |
| File Size | 2.5 GB |
| Resolution | 852 × 480 |
FAQs
Can MakeMKV rip Blu-ray?
Yes, MakeMKV fully supports Blu-ray ripping. But after the 30-day trial, the Blu‑ray feature stops working unless you have a key. MakeMKV has been in beta for years, and the developer regularly posts free beta keys on the official forum, usually valid for 1- 2 months. Due to technical issues, the paid version is temporarily paused, so you can only use the beta key for now.
Any free MakeMKV alternative to rip a DVD?
Yes, there are, such as Handbrake. It's also an open-source DVD ripper and compatible with multiple platforms. It supports compressing DVDs and outputting them as MP4. However, its ripping speed is a bit slow.
Can I use MakeMKV rips with Plex or NAS?
Yes, MakeMKV outputs standard MKV files that work with Plex, Jellyfin, or any NAS-based media server. Simply save the file to your NAS and point to that folder in Plex to complete the setup.
Copyright Disclaimer:
The above guide is intended to show what is technically possible for educational and personal use. Please note that ripping DVDs without legal ownership or permission may violate copyright laws in your country. Use this information at your own risk and never for illegal distribution.

Jenny is a technology editor who has been blogging since she was a student. Since joining Cisdem, she focuses on writing articles about video software and how-to guides. She loves exploring new tools and techniques.

Ryan Li is a senior developer at Cisdem. Since joining the company in 2017, he has led the development of Cisdem VideoPaw and now serves as the editorial advisor for all articles related to Video Converter.