

How to Save a DVD Video to Your Mac Computer: 3 Easy Ways
 24.5K
24.5K
 0
0


Saving DVD to Mac can prevent it from being lost or damaged. Once DVD is digitized, moreover, it can not only be played on Mac, but also can be transferred to various Apple devices such as iPhone, iPad, Apple TV, etc., so that you can watch DVD video anytime, anywhere. This article will show you how to save a DVD video to your Mac computer easily.
Note: Mac no long has built-in optical drive since June 2012. The last model to include it was 13-inch MacBook Pro mid 2012. To insert a DVD into MacBook Pro/Air, Mac mini, Retina 5K iMac, etc., you will need to purchase an Apple USB SuperDrive or other external DVD drives.
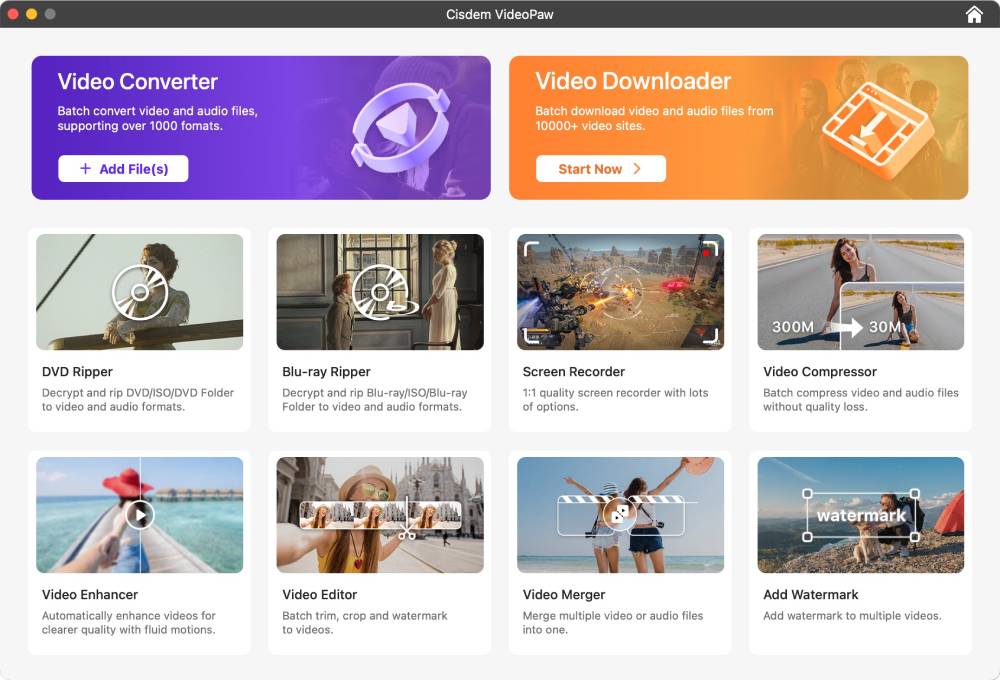
 Cisdem VideoPaw
The Best App to Save DVD Video to Mac
- Rip a full or partial DVD to Mac with fast speed
- Save a DVD video to any digital format
- Manually configure output file codec, sample rate, frame rate, etc.
- Auto unlocked all protected DVD discs
- Compress DVD to smaller-size videos without losing quality
- Edit DVD videos with Trim, Crop, Effects, Rotate, Subtitles, Volume, etc. and merge individual episodes before ripping them out
- View DVD files with built-in video player
- Also rip 1080p Blu-rays
- Convert digital files between 350+ formats
- Download movies, music, or any video from YouTube or other 10000+ sites
 Free Download macOS 10.15 or later
  Free Download Windows 10 or later
DVD we used in the test
We tested 3 methods to save a DVD video to your Mac computer. In our tests, we used a DRM-free DVD because the tools - Handbrake and Disk Utility covered in the article don’t support encrypted DVDs. This DVD contains three videos, each with a different length and size.
| Length | Size | |
|---|---|---|
| VIDEO_TS 1 | 0:13:57 | 798.9MB |
| VIDEO_TS 2 | 0:03:41 | 211.46MB |
| VIDEO_TS 3 | 0:02:59 | 171.44MB |
| All DVD videos | 0:19:57 | 1.43GB |
Testing results
In the first method, we rip DVD to h264 MP4. Of course, you can choose any other format. And when we use QuickTime to record DVD, the video was automatically saved in MOV format and can’t be converted to other formats.
| Method | Rip DVD | Copy DVD | Record DVD | ||
|---|---|---|---|---|---|
| Cisdem VideoPaw | Handbrake | Disk Utility | DVD Copy | QuickTime | |
| Required time | 11 min | 9 min | 25 min | 23min/21min | 20 min |
| Digitized video | Yes | Yes | No | No | Yes |
| Output file type | MP4 video | MP4 video | CDR file | DVD folder/ISO | MOV video |
| Output size | 323.6MB | 244.7MB | 1181.8MB | 1550MB/1566.72MB | 972.6MB |
| Quality | Original | Lossy | Original | Original | Lower than original |
| Bypass DVD protection | Yes | No | No | Yes | Yes |
Rip DVD to Mac, Digitize It Quickly with Better Compression
Rip DRM-protected or unprotected DVD
DVD ripping software can help you digitalize a DVD on Mac and save it as video or audio formats. Cisdem VideoPaw is a program enabling you to rip DVD to Mac computer with original quality.
With a video converter included, it’s able to convert DVD to MP4, MKV, HEVC, H.264, M4V, MP3, iPhone, USB, Xbox One, etc. The app supports any type of DVD and Blu-ray discs, whether old recently released or damaged DVD. Also, it’s good at decrypting DVDs locked by CSS, Disney X-Project, region code, UOP, RCE, 99 fake titles, bad sector, and so on.
Free Download macOS 10.15 or later
How to save a DVD video to your Mac computer with VideoPaw:
- Insert DVD that you want to save to Mac into the optical drive. Open Cisdem VideoPaw, and click on DVD Ripper.
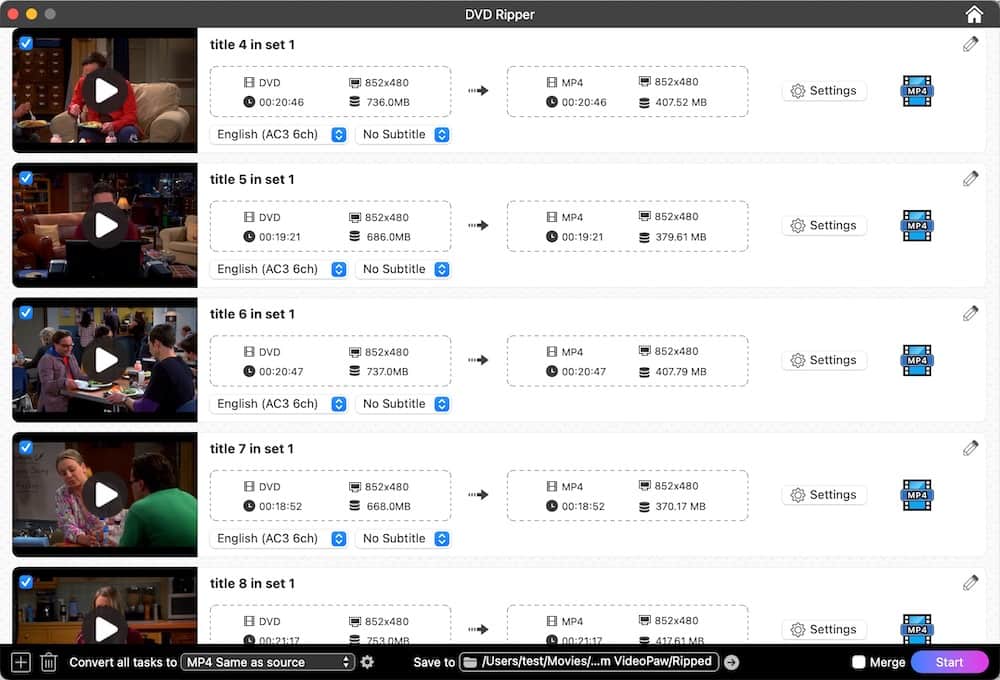
- Import DVD disc.
Directly drag-n-drop the VIDEO_TS folder or the disc into the interface, and videos in the DVD will be decoded quickly.![add dvd titles]()
- Select the output format.
Open the format drop-down menu and choose your desired output format.![choose output format]() Click the"gear" icon, and the settings window will appear to let you adjust file parameters.
Click the"gear" icon, and the settings window will appear to let you adjust file parameters.![video parameters]()
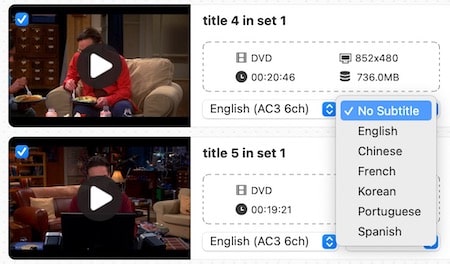
- Choose a speaking language and subtitle language.
If your DVD movie comes with multiple audio tracks and subtitles, choose the desired one you want.![]()
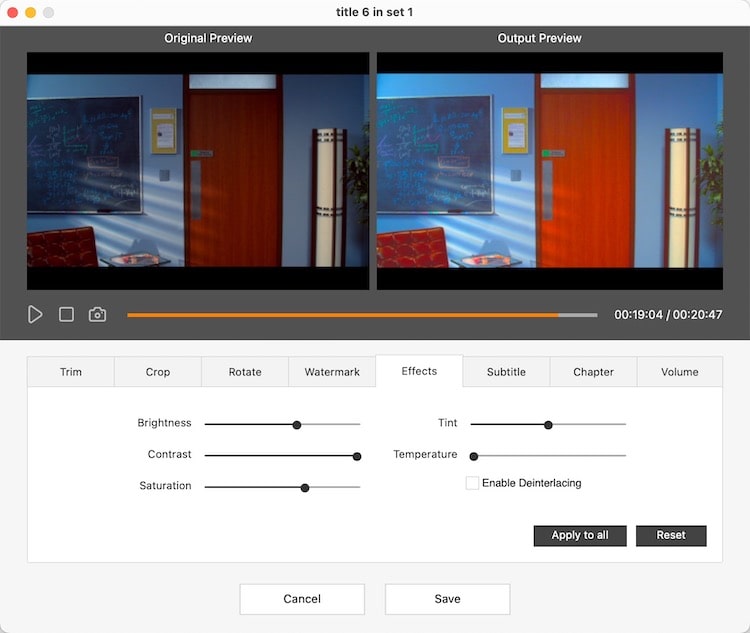
- Edit the DVD movie.
If necessary, click pencil icon to go to the video editing window and touch up your movie with provided tools.![]()
- Click the “Start” button to digitalize a DVD on Mac.
 Click the"gear" icon, and the settings window will appear to let you adjust file parameters.
Rip unprotected DVD
Handbrake, known as a video transcoder, was originally designed to create digital copies of DVDs. It is free and can download DVD to Mac in MP4 and MKV format, however, no other export formats are supported.
You can install libdvdcss for Handbrake to bypass DVD encryption. Note that it will only unlock partial CSS-protected DVDs. For more sophisticated encryptions, such as Disney X-project DRM and AACS 2.0, it won't work.
How to save DVD to Mac computer using Handbrake:
- Put the disc on your disc drive. Get the latest version of Handbrake and launch it.
- Click on "Source" > "Open" to load the DVD. HandBrake will begin to scan DVD titles.
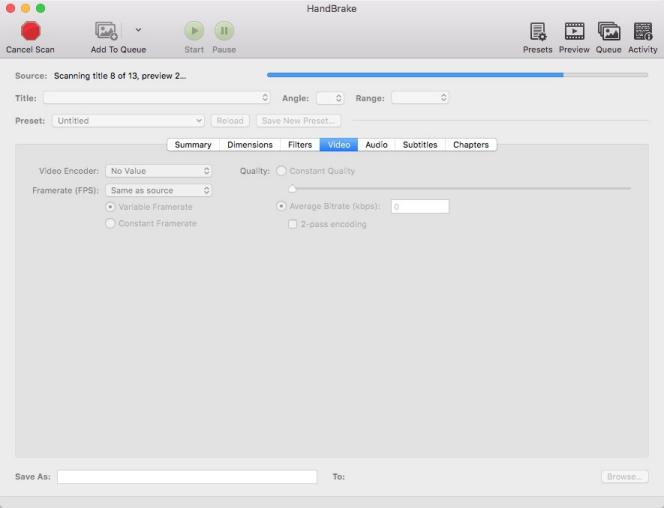
- Choose a title from the drop-down menu. Press the "Add to Queue" button.
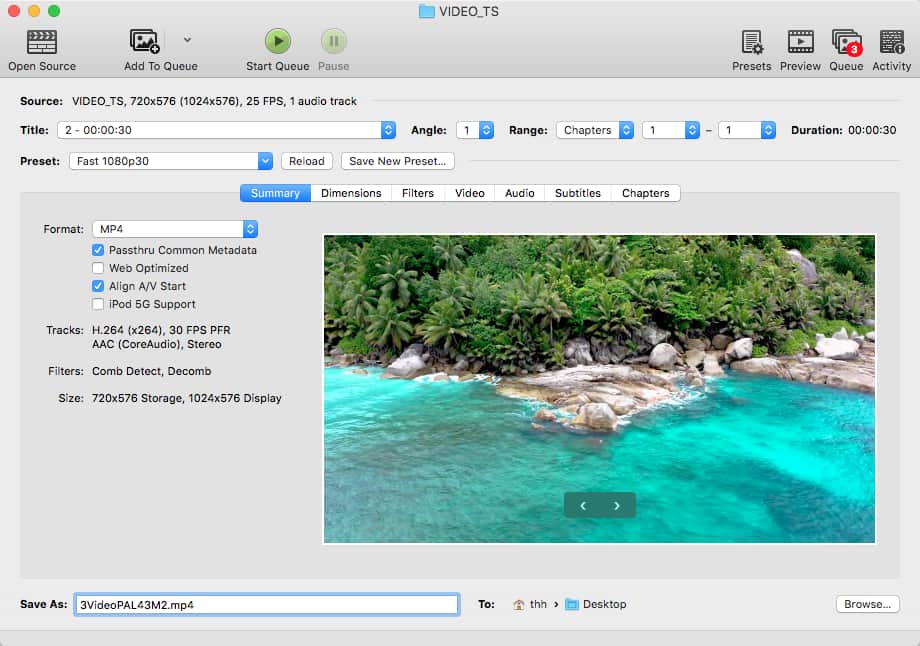
- Set the output format to MP4.
- Set up the ripping settings, including the encoder, subtitles, and audio tracks.
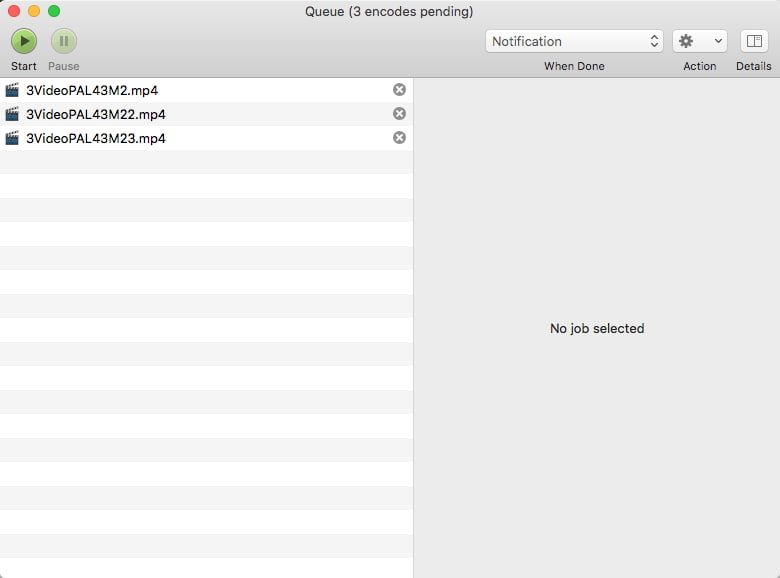
- From the "Destination" section, click "Browse" to select the output folder. If you have multiple titles to rip, make sure you give each title a different name before adding them to the ripping queue, otherwise, the output file will be overwritten.
![]()
- Click on the "Start" button to let Handbrake import DVD to Mac.
![]()
Copy DVD to Mac, Backup DVD with 1:1 Quality
Copying a DVD to Mac means not changing the DVD's structure. But disk images are the same size as DVDs, and you usually need to free up several gigabytes of storage to save image files. Moreover, DVD copy files can only be played by DVD media players.
Copy DRM-protected or unprotected DVD
iFunia DVD Copy is a minimalistic app that has the ability to replicate DVD discs to DVD discs, VIDEO_TS folders, and ISO images in a 1:1 ratio, as well as copy VIDEO_TS folders to blank DVD discs. Despite its simplicity, it is capable of accessing and copying DVDs encrypted with CSS, region codes, FBI warnings, Disney DRM, etc.
How to download DVD to Mac with iFunia DVD Copy:
- Place the disc you want to back up into the DVD drive. Download iFunia DVD Copy from its official website and run it.
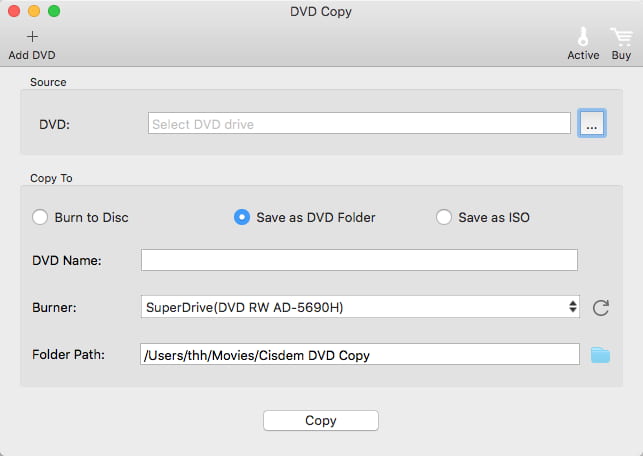
- Click "Add DVD" to pick up your source DVD, and click "Open".
- Choose "Save as DVD Folder" or "Save as ISO".
- Name your output file and choose a destination route.
- Click "Copy" to save DVD to Mac.
![]()
Copy unprotected DVD
Disk Utility, built into macOS, is a useful tool that can create a disk image of files. It will save your DVD to .cdr for transferring to another device, archiving, or backing up. If you want to re-burn the .cdr to DVD, first change the file extension to .iso.
How to copy DVD to Mac computer via Disk Utility:
- Insert the DVD into the disk drive.
- Open Disk Utility tucked away in the Applications > Utilities.
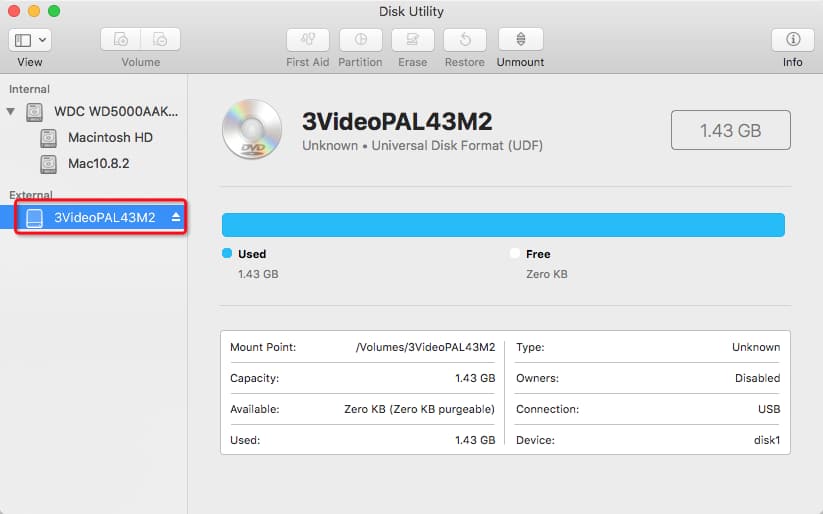
- From the left panel, you will see your DVD appearing under the "External" header. Click it.
![]()
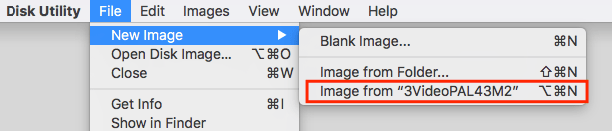
- Navigate to menu bar, click “File” > “New Image” > “Image from [your DVD name]”.
![]()
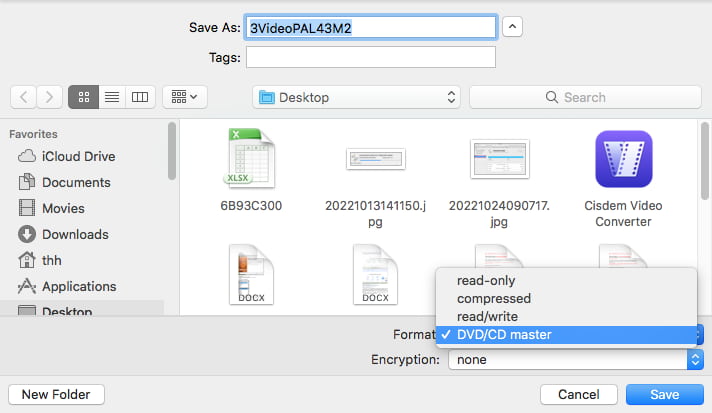
- Rename the DVD. Choose “DVD/CD master” as the format, and “none” for encryption.
![]()
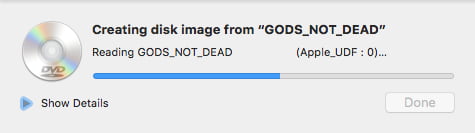
- Hit “Save”. Disk Utility will start creating a disk image from your DVD. You'll obtain an image file that ends with a .cdr file extension, mounting like a hard drive.
![]()
Record DVD to Mac Hard Drive, Start and End Anytime
Unlike the above two methods, DVD ripping and copying technology is not applied here. Recording a DVD video on Mac is easy to understand. The time taken by this method and the size of the exported videos are between ripping DVD and copying DVD, but the output video quality is lower than theirs.
You can try these free video recorders and their output formats are various: QuickTime (MOV), Blu-ray Master Free Online Screen Recorder (WMV), and Apowersoft Free Online Screen Recorder (WebM). We used QuickTime in our test because MOV is a format supported by all Apple devices.
How to save a DVD to Mac computer via QuickTime:
- Place your empty DVD into the optical drive.
- Open a DVD video with a DVD player program.
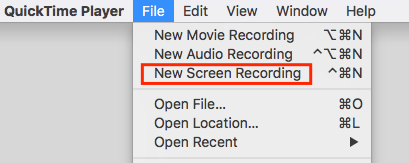
- Launch QuickTime. Go to “File” > “New Screen Recording”.
![]()
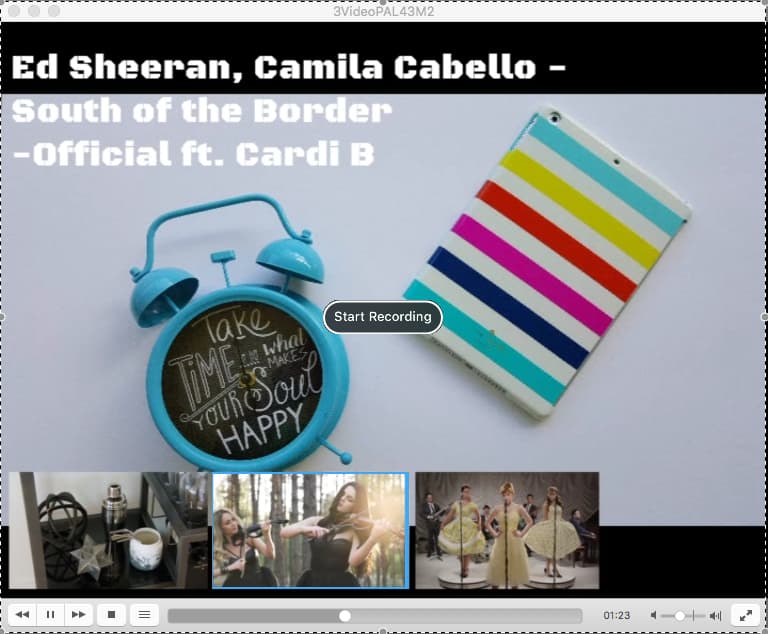
- Hit the record button.

- Drag over the section to record a part of the screen and click "Start Recording".
![]()
- At the same time, start to play the video on your DVD.
- Once finished, hit the stop icon in the top menu bar on the right.
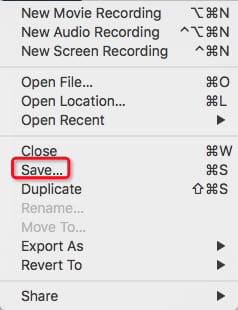
- Finally, head to “File” > “Save”. A popup will appear on your video, give your video a name and click "Save".
![]()
FAQs
1. What’s the difference between DVD ripping and DVD copying?
DVD ripping - The process of converting part or all of the data on the disk into video or audio files in various formats. It removes menus, commercials, and trailers from DVD, merely keeping the main video content of the disc. You can store ripped files on Mac hard drives, USB sticks, mobile phones, iPad, etc., and play them anywhere.
DVD copying - Backup DVD video files to Mac computer in a DVD folder or ISO image file, which behaves the same as the original disk.
2. Can VLC save DVD to Mac?
Yes, but the result is not good. VLC boasts excellent performance in terms of playing and transcoding media files. Regarding DVD ripping to Mac, VLC can't bypass DVD copy protections. Further, you may experience some issues such as audio being out of sync, choppy playback, inability to rip a full DVD, and loss of quality.
3. How to view DVD files on Mac?
When you insert a DVD into the SuperDrive, the DVD player preinstalled on your Mac will automatically open to run the DVD disc. You can simply switch to the menu, titles, and chapters. Additionally, you can view DVD files with other DVD player software such as VLC.
Conclusion
That’s all for how to save a DVD video to your Mac computer. If you only expect to back up your DVD disc to Mac, just copy DVD and maintain the original DVD structure. If you desire to digitalize a DVD on Mac, ripping or recording DVD is able to help you. A good DVD ripping software lets you select any output format, while a video recorder won't and leads to lower quality.
Copyright Disclaimer:
The above guide is intended to show what is technically possible for educational and personal use. Please note that ripping DVDs without legal ownership or permission may violate copyright laws in your country. Use this information at your own risk and never for illegal distribution.

Jenny is a technology editor who has been blogging since she was a student. Since joining Cisdem, she focuses on writing articles about video software and how-to guides. She loves exploring new tools and techniques.

Ryan Li is a senior developer at Cisdem. Since joining the company in 2017, he has led the development of Cisdem VideoPaw and now serves as the editorial advisor for all articles related to Video Converter.