

How to Fix WD External Hard Drive Not Showing up on Mac or Windows 11/10?
 410
410
 0
0


WD (Western Digital) external hard drive is massively popular and generally a simple storage device. It is fairly straightforward to connect and show up a WD external hard drive on a Mac or Windows, but that doesn’t mean this process is completely error-free. What if your WD hard drive, no matter it is Element, My Passport, BLACK or others, is not showing up on your device? Don’t worry, here is what you will need to fix it.
- Quick Fixes for Western Digital External Hard Drive Not Showing up
- How to Fix WD External Hard Drive Not Showing up on Mac?
- How to Fix WD External Hard Drive Not Showing up on Windows 11/10?
- Still Not Fixed? Format The Disk and Recover Data from WD Drive
- Extended: The Most Popular WD External Hard Drive Models in 2023~2024
 Best Data Recovery for Mac and Windows
WD External Hard Drive Files Missing? Restore NOW!
- Restore missing files, deleted/formatted/corrupted files from WD hard drive
- Recover files from different internal and external hard drive or memory card
- Support 1000+ files recovery: video, photo, audio, document, email, archive
- Repair corrupted videos, photos and office documents
- Create backup from disk image and restore files easily
- Preview files to recover data efficiently
- Recover files to local folder or cloud platforms
 Free Download macOS 10.9 or later
  Free Download Windows 11/10/8/7
Quick Fixes for Western Digital External Hard Drive Not Showing up
There is more than one reason why your WD external hard drive is not showing up, and you have to test or check each potential issue until you find out the cause of the problem. It can occur due to hard drive glitch, defective hardware or USB cable, incorrect driver/system setting up. Before moving to the advanced troubleshooting steps in the following parts, here are some quick fixes for you.
- Power off your Mac or Windows PC, and restart the machine to check if this issue persist.
- Remove those unnecessary devices from your computer, especially other external hard drives, restart the Mac or PC, plug the WD hard drive to your computer again.
- Change to a new USB port or cable when connecting the WD hard drive to your computer, and check if this issue persists.
- Plug the Western Digital hard drive to another Mac or PC
- Run the anti-virus software on your machine to have a complete scan and clean, then plug the hard drive again to your computer to see if the issue has been fixed.
- Clean the drive’s plug and USB port on your computer with a alcohol isopropyl dipped cotton or
- Contact technical support from Western Digital company, you can find contact information on this page: https://www.westerndigital.com/company/contact-us
How to Fix WD External Hard Drive Not Showing up on Mac?
If above quick fixes don’t work either, then the software-related issue is the likely cause, and there are several fixes that may solve “WD external hard drive not showing up”.
For a Mac users, there are 3 ways recommended: check Finder’s settings, repair WD hard drive in Disk Utility, and update macOS to the latest version.
1. Check Finder’s Settings
Finder is the home base on a Mac, it is used by Mac users to interact with file system, so they can easily organize and access to everything on a Mac. It can show, hide, delete, copy, move a file, an app, a download, even an external hard disk. If you have set up the Finder on your Mac to hide the external disk, your WD external hard drive may not show up on your Mac and here is how we can fix:
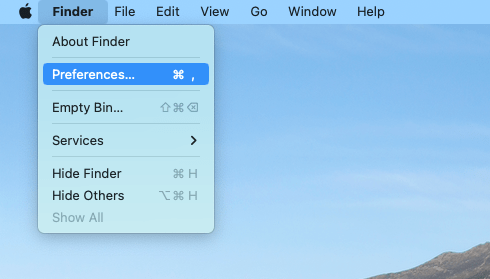
- Go to Finder > Preferences.
![finder settings 01]()
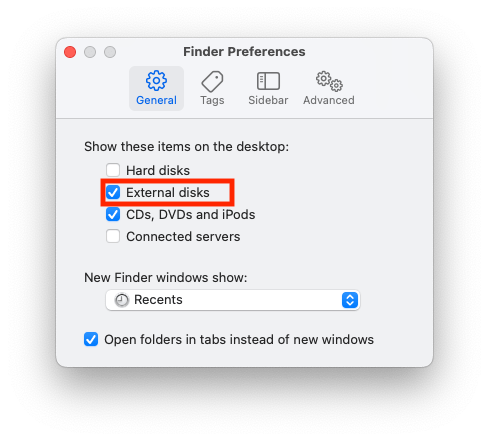
- Go to General, tick the checkbox before "External disks".
![finder settings 02]()
- Plug the Western Digital hard drive to your Mac and check if it shows up.
2. Repair the Drive in Disk Utility
If your WD external hard drive is not showing up on Mac’s desktop or in Finder’s left column, it doesn’t mean your Mac cannot see or recognize it, maybe your Mac is just not able to mount and show. We can use the Disk Utility tool in macOS to repair and mount it.
- Plug the hard drive to your Mac.
- Open Disk Utility.
![first aid 01]()
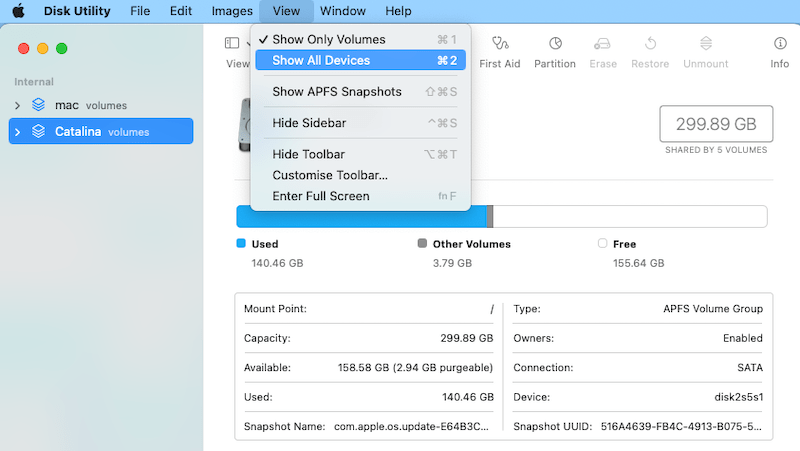
- Go to View > Show All Devices.
![first aid 02]()
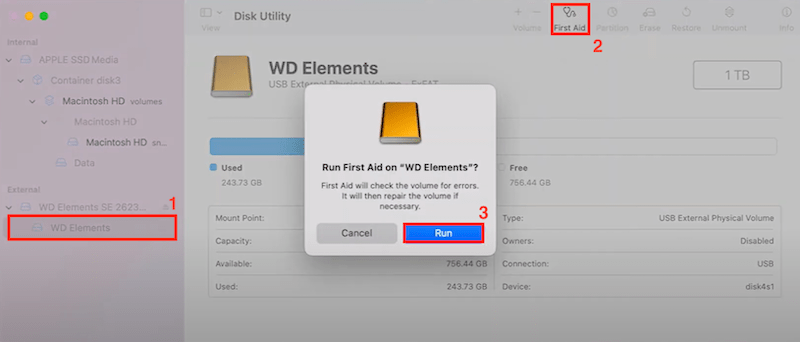
- Select WD external hard drive, choose First Aid and click Run button.
![first aid 03]()
- Wait for the repairing to finish, then check if the WD hard drive shows up on your Mac.

3. Update macOS
Or the "WD external hard drive not showing up on Mac" occurs due to bugs in the current OS version, updating to the latest version may be a potential solution.
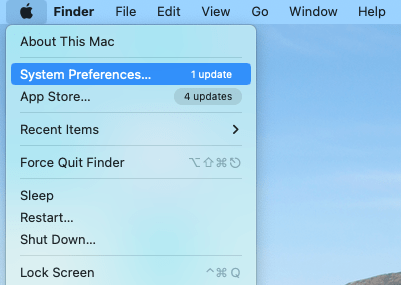
- Go to System Preferences.
![update macos 01]()
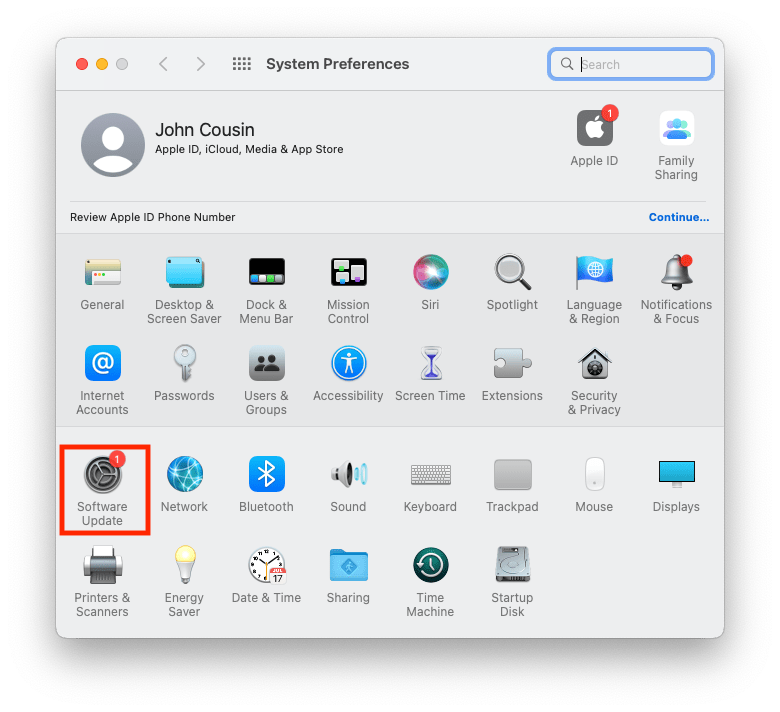
- Choose Software Update and update your macOS to the latest version.
![update macos 02]()
- Plug the hard drive to your Mac and check if it shows up.
If these 3 fixes didn’t solve your problem, please jump to part 4 to format and recover data from the hard drive that doesn’t shows up on your Mac.
How to Fix WD External Hard Drive Not Showing up on Windows 11/10?
It usually doesn’t matter which platform you plug the WD external hard drive in, but if your drive doesn’t show on a Windows 11 or 10 PC, we generally have more possible fixes, because Windows offers more flexibility in configuring system with different components.
There are 6 fixes to make your Western Digital external hard drive show up on the Windows 11 or 10, from updating the hard disk driver to have a upgrade of Windows update that you never thought about for the time being.
1. Update WD Hard Disk Driver
The physical WD hard drive and the driver that Windows automatically loads onto your PC will work together to show up and access to the disk data, if the driver is outdated and runs into errors, your hard drive may not show up.
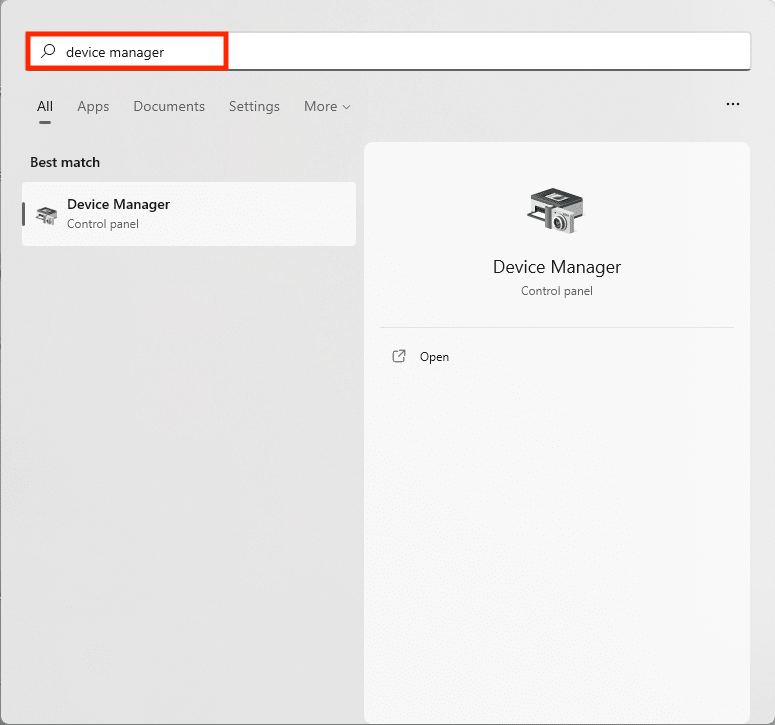
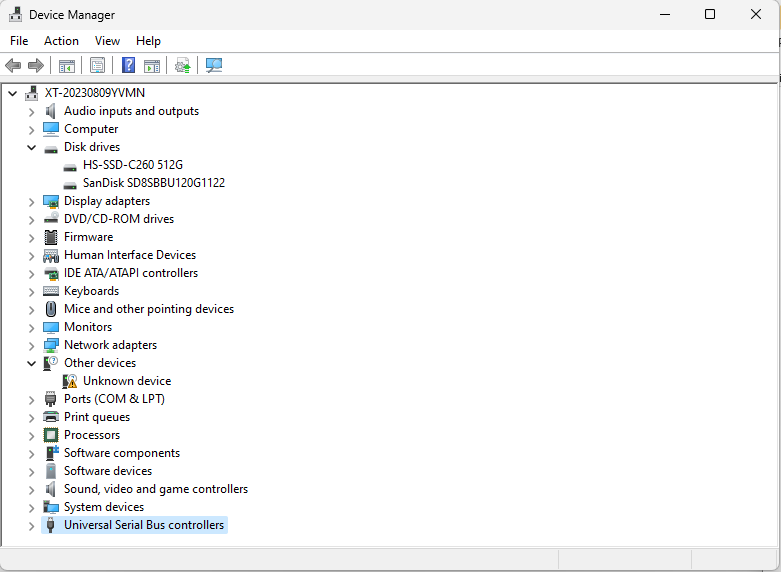
- Search Device Manger in Windows in Start menu.
![update driver 01]()
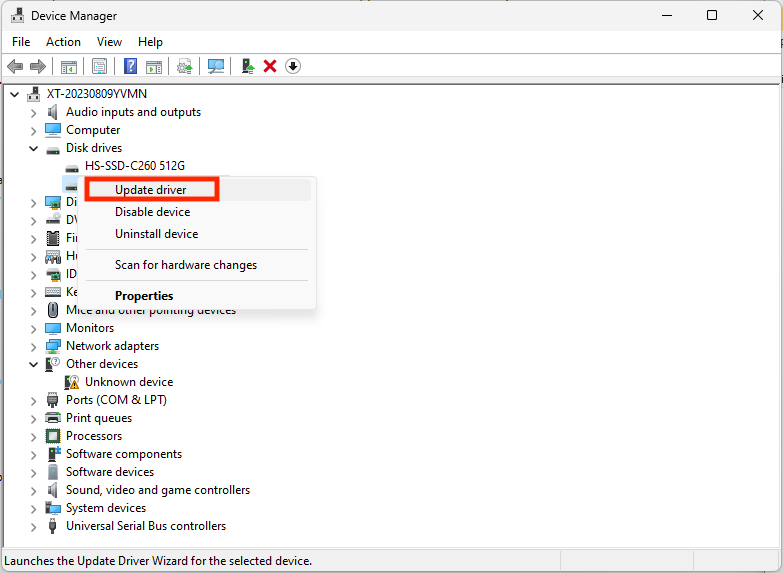
- Once the Device Manager is opened, go to Disk drives, select your WD external hard drive, right click and select Update driver.
![update driver 02]()
- After the updating, plug the WD drive to your PC and check if it shows up.
2. Reset USB Root Hub
The USB root hub is designed to monitor the insertion and removal of a device from the port, also to manage and control to each port. If your WD hard drive is not showing up, resetting this USB root hub may solve your problem.
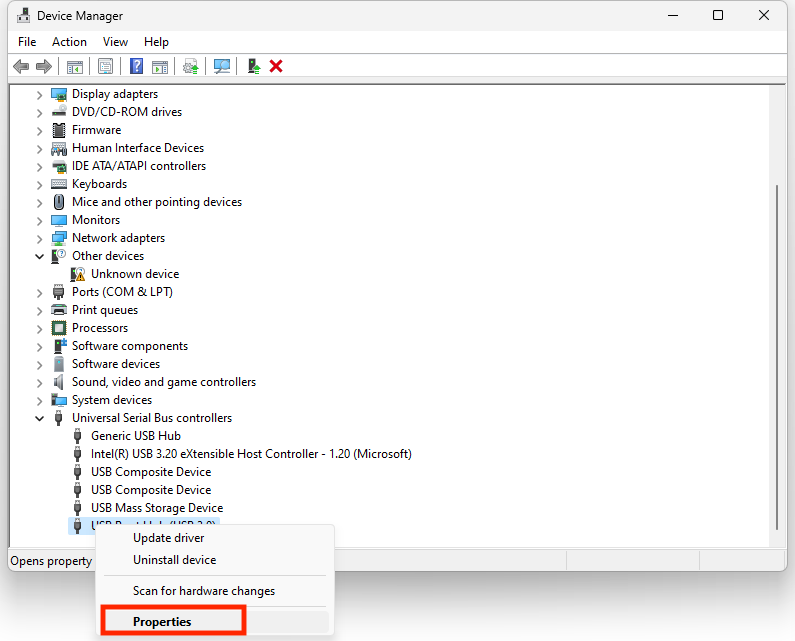
- Search Device Manager in Windows Start menu, open it.
- Go to Universal Serial Bus controllers, expand the list by clicking the down arrow.
![reset usb 01]()
- Choose USB Root Hub, right click and select Properties.
![reset usb 02]()
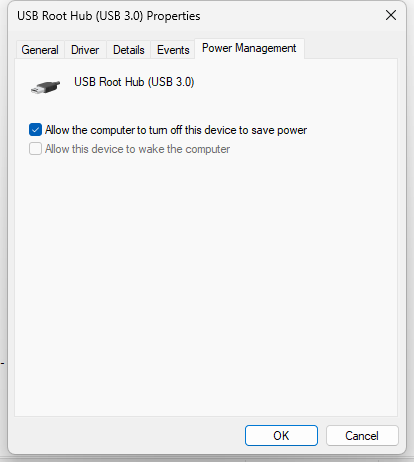
- Go to Power Management, uncheck Allow the computer to turn off this device to save power. And click OK.
![reset usb 03]()
- Restart your PC. Plug the WD drive to your PC.
- If the issue persists, check Allow the computer to turn off this device to save power again and restart your PC to see if the issue is solved.
3. Reinstall USB Controller
An USB controller is used to maintain the connection between removable devices such as external hard drive, keyboard, mouse, printer and the computer system, so Windows can recognize these devices without installing individual drivers for each device connected to the PC.
By reinstalling the USB controller under this WD hard drive, we may be able to remove the glitches and show the drive up on the Windows PC.
- Plug the WD hard drive to your PC.
- Search Device Manager in Windows Start menu, open it.
- Choose the WD hard drive, go to View > Devices by connection.
![reinstall usb controller 01]()
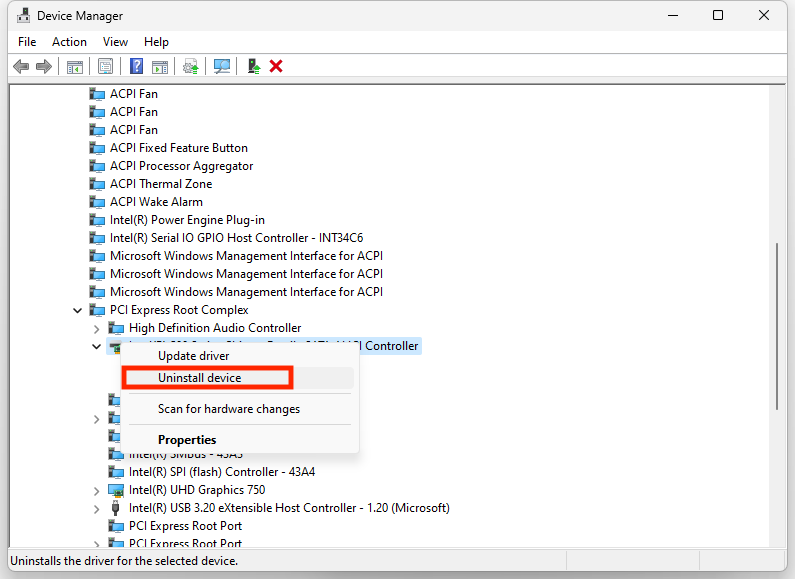
- Select the parent of the WD hard drive from the device tree, right click to choose Uninstall Device.
![reinstall usb controller 02]()
- Eject the WD hard drive safely by right clicking on the drive icon.
- Restart PC, plug the drive to your PC again, Windows will auto reinstall the USB controller and you can check if the issue persists.

4. Change Drive Letter
Still not showing up? Try changing the letter of your WD hard drive, in case that your Windows assigned a drive letter that was in use to your drive and hence couldn’t recognize it.
- Plug your WD hard drive to the Windows PC.
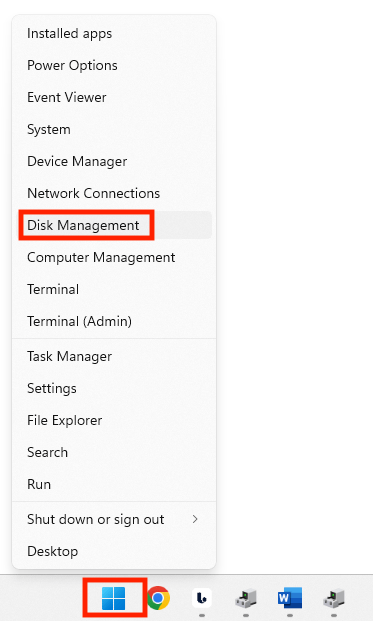
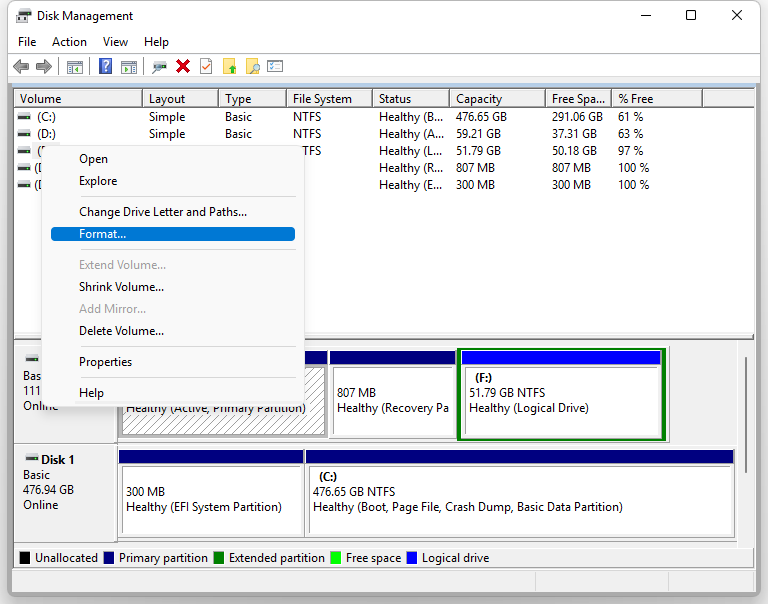
- Search Disk Management in Windows Start menu.
![disk management]()
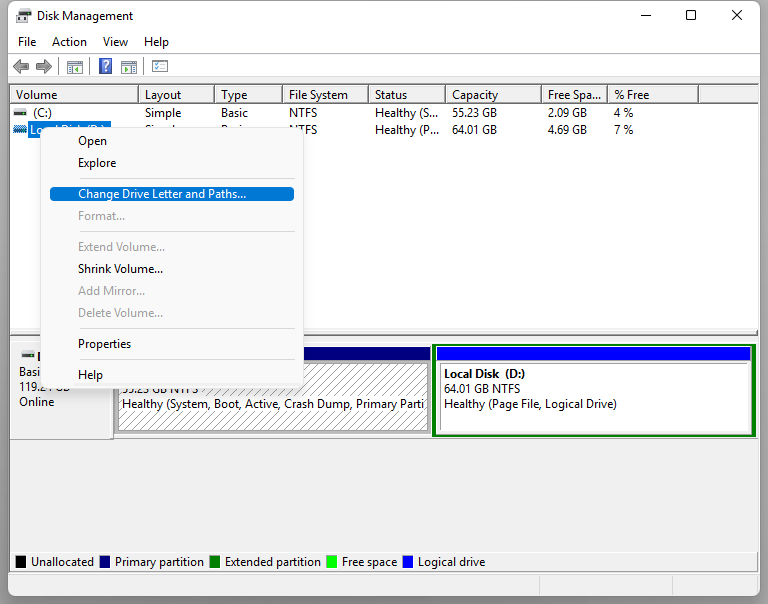
- Right-click the WD external hard drive and choose Change Drive Letter and Paths.
![change drive letter 01]()
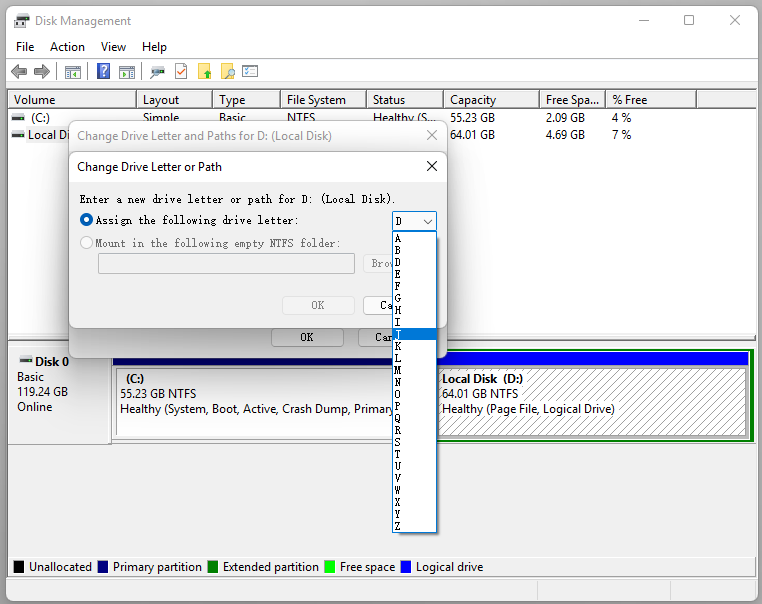
- Chose Assign the following drive letter: from the pop-up box, and select a letter you want to use and continue with OK.
![change drive letter 02]()
5. Use Troubleshooter Tool
Windows is used to build in a native fix tool in version 10 and earlier, trying to find and fix problems if something isn’t working on your Windows PC. It is called Troubleshoot and it has been removed from the Settings panel for some time. But luckily, Windows 10 or 11 doesn’t remove this feature completely, you can still run this tool to fix common issues on your PC by using command line.
- Plug your WD hard drive to the PC.
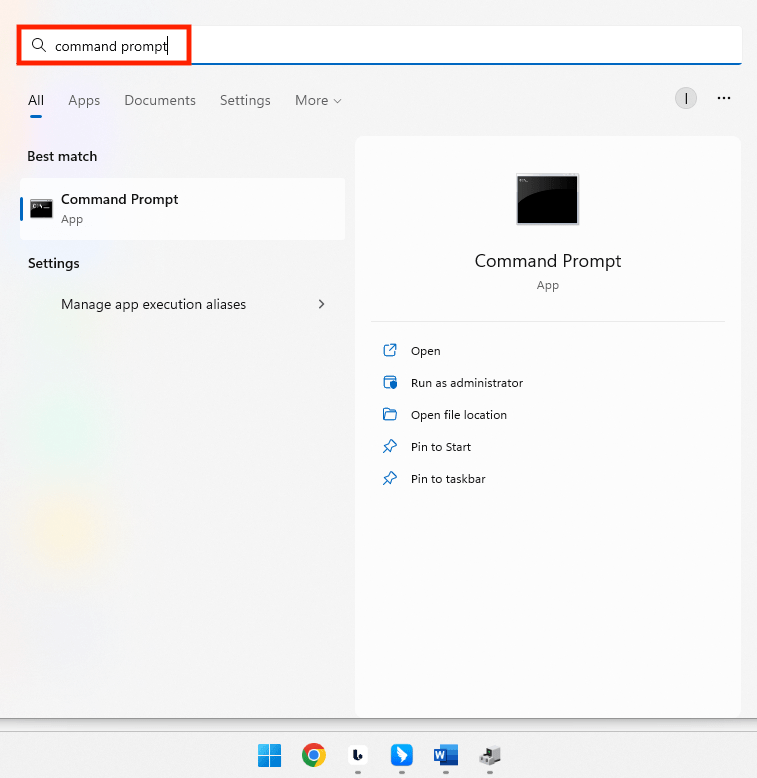
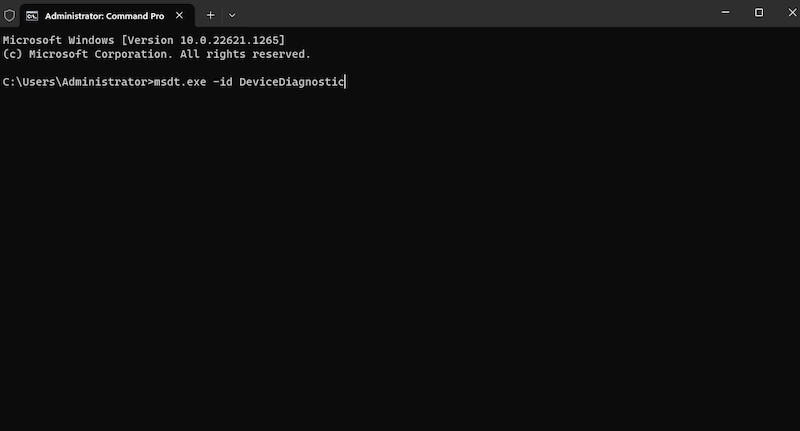
- Open Command Prompt from the control panel or search in Start menu.
![command prompt]()
- Copy and paste msdt.exe -id DeviceDiagnostic to it, then press Enter.
![enter command]()
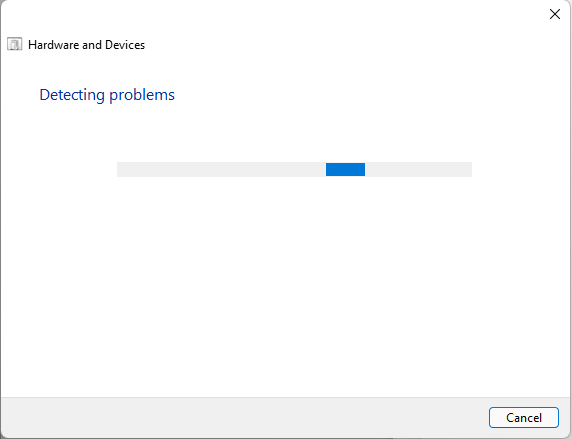
- Once the troubleshooter tool launches, click Next.
![detect problems]()
- Then check if the issue persists, if yes, unplug your drive first, then plug again to check if it shows up.
6. Update Windows
If none of these fixes help to solve this issue, you may need to update your Windows to the latest system, if the bugs and glitches in current operating system is the cause of this issue.
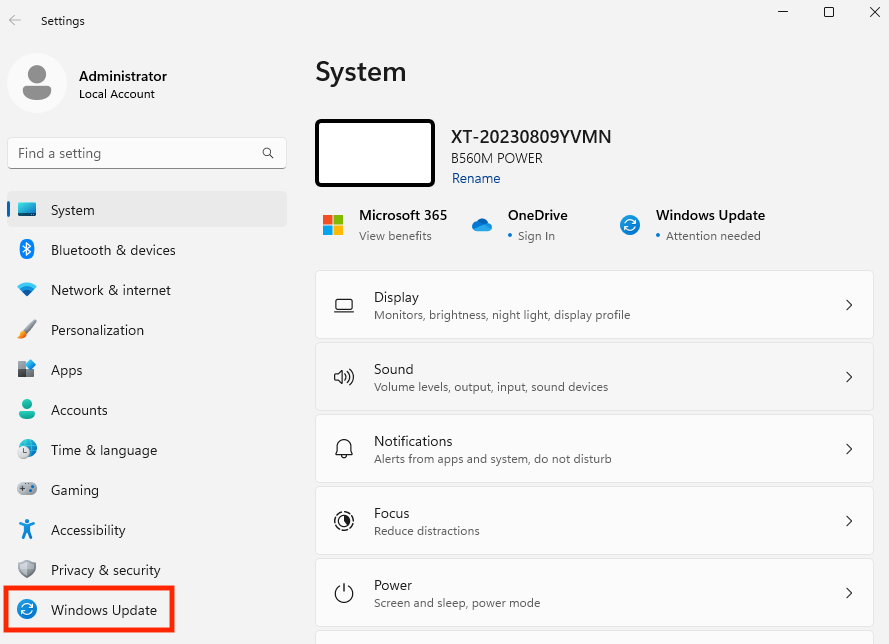
- Go to Settings, select Windows Update.
![update windows 01]()
- Update your Windows to the latest version.
Still Not Fixed? Format The Disk and Recover Data from WD Drive
The last thing to try, if above listed solutions didn’t fix this issue but you still can find the WD hard drive in Disk Utility on Mac, or in Disk Management on Windows, you can format the hard drive and then recover data from it using a dedicated data program. This solution can apply to the case that possible data corruption leads to WD hard drive not showing up.
Here we will use Cisdem Data Recovery to restore data from the formatted WD hard drive, and it offers more:
- Restore files from deleted, formatted and corrupted hard drive
- Support all kinds of internal and external hard drive in different brands and file systems
- Recover 1000+ files, including video, audio, photo, document, email, compressed files, etc.
- Recover unsaved office documents
- Repair damaged videos, photos and office documents
- Filter files quickly
- Preview recoverable items
- Recover files to cloud storage accounts and local folder
Step 1. Format the WD external hard drive
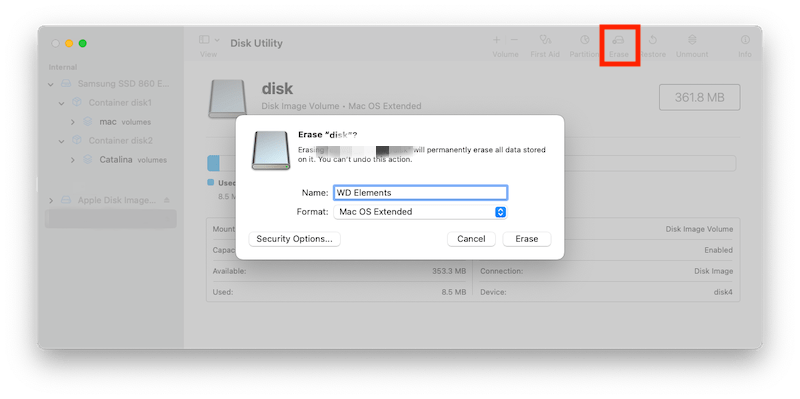
For Mac users, open Disk Utility, go to View > Show all devices, then select WD external hard drive and click Erase to format the drive.
For Windows users, open Disk Management by right clicking on Windows Start button, then select the WD hard drive and right click Format.
Step 2. Recover data from formatted WD external hard drive
- Download and install Cisdem Data Recovery on your Mac or Windows PC.
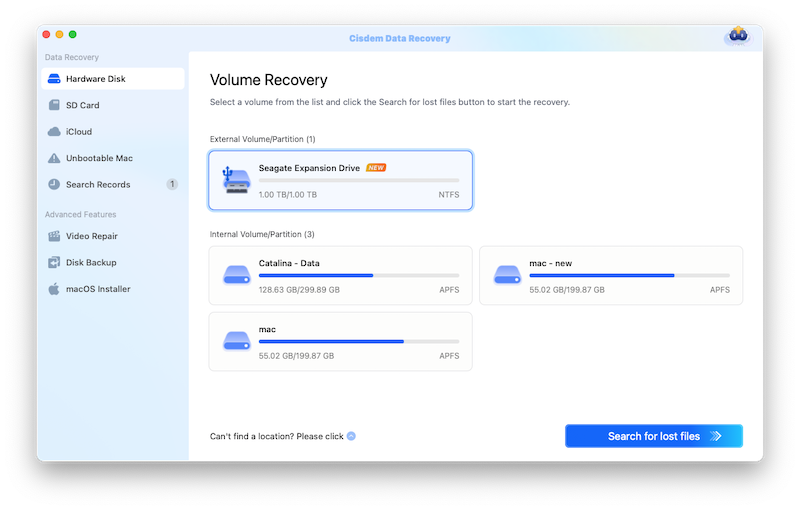
Free Download macOS 10.9 or later Free Download Windows 11/10/8/7 - Choose Hardware Disk, select WD external hard drive and click Search for lost files.
![recover formatted wd drive 01]()
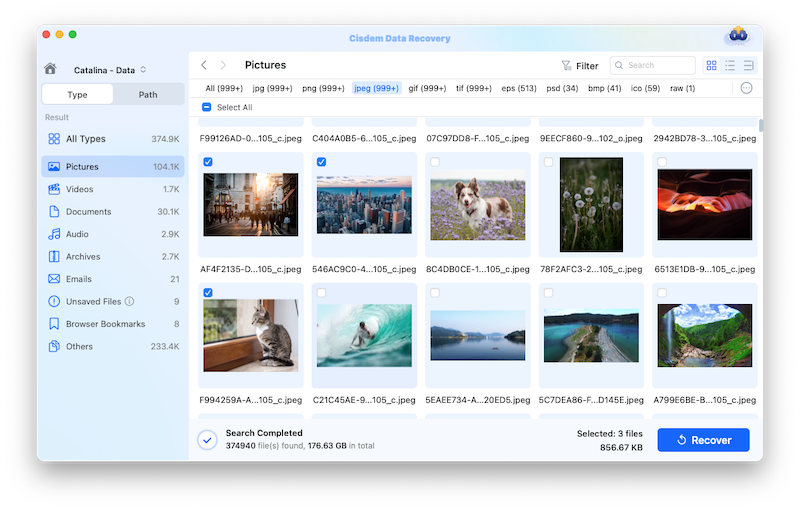
- All the recoverable items will be displayed in Cisdem, go to Type, select a folder or sub-folder to check the files as you need. You can also use the filter tool to quickly locate a deleted file.
![recover formatted wd hard drive 02]()
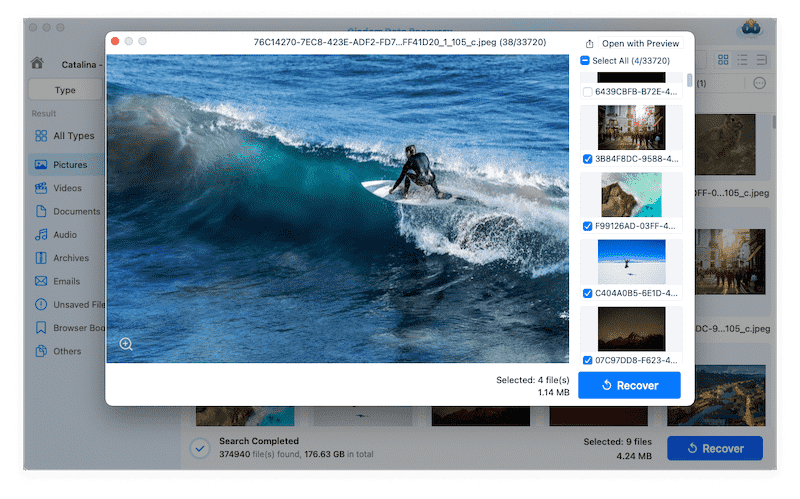
- Double click on the file to preview, and select them to Recover.
![recover formatted wd hard drive 03]()
Extended: The Most Popular WD External Hard Drive Models in 2023~2024
By considering the purchases and feedback on both Western Digital and Amazon, here we compile a list of the most popular WD external hard drive as follows. They comes with stable quality and performance, if you are considering buying a new, check the list:
- WD Elements Portable (Starting $44.99)
- WD Elements Desktop (Starting $124.99)
- My Passport Portable (Starting $64.99)
- My Passport Ultra (Starting $69.99)
- My Book (Starting $134.99)
- My Book Duo (Starting $529.99)

Connie Yu has been a columnist in the field of data recovery since 2011. She studied a lot of data loss situations and tested repeatedly to find a feasible solution tailored for each case. And her solutions are always updated to fix problems from the newest systems, devices and apps.

JK Tam is the lead developer at Cisdem, bringing over two decades of hands-on experience in cross-platform software development to the editorial team. He is now the lead technical approver for all articles related to Data Recovery and DVD Burner.