

How to Install macOS 15 Sequoia on Unsupported Mac (Step-by-step Guide)
 2.4K
2.4K
 1
1


macOS Sequoia is now available for developers to have a fresh bite of its new features, you may want to keep up with the latest advantages and get ready to upgrade your Mac, but only to find your Mac doesn’t support this version.
macOS Sequoia has strict system requirements, only Macs in following models can upgrade to Sequoia.
- iMac: 2019 and later
- iMac Pro: 2017
- MacBook Air: 2020 and later
- MacBook Pro: 2018 and later
- Mac Pro: 2019 and later
- Mac Studio: 2022 and later
- Mac mini: 2018 and later
But luckily, there is a way around this strict requirement, using the open source tool OpenCore Legacy Patcher, which is also the only way to install macOS on an unsupported Mac so far. And before the installation, let’s be clear: if your Mac has already been in a bad condition, we recommend against updating your macOS to Sequoia to make it worse.
 Cisdem Data Recovery
Files Lost after Sequoia Update? Recover Now!
- Restore files lost due to macOS update, downgrade, reinstallation, crash, etc.
- Recover videos, audios, documents, archives, photos, etc. 200+ formats
- Repair damaged videos with ease
- Preview files before recovery
- Restore files from both internal and external storage devices
- Filter files by keyword, size, type and date
- Resume scanning and recovering files
- Support iCloud data recovery
- Recover data to local drive or cloud services
- Quick access to Trash bin, Desktop, Documents, Downloads, Unsaved Files, etc.
 Free Download macOS 10.9 or later
Items Needed for Sequoia Installation
3 items are needed to install Sequoia on an unsupported Mac, and each has specification requirements as follows. Upgrading to Sequoia on an unsupported Mac is a long and complicated process, we should make sure these equipments in good behavior to avoid bugs or any negative consequences.
1. A Mac
For the reason that we need to use OpenCore Legacy Patcher for the installation, which supports Metal GPU Mac 2012 and later, any Mac in the model 2012 or later with 8 GB Ram will be good to use. In addition, we need to make sure there is enough space to install Sequoia on our Mac, at least 40 GB left. It is never a good idea to force install Sequoia on a Mac that runs very slow or works improperly.
2. An USB Drive
When your Mac doesn’t comply with the hardware requirement for installing Sequoia, the safest way to force install is to create a macOS installer on a USB drive. By doing so, even if some of Sequoia’s features cannot work normally, or the system gets corrupted after installation, you can still revert to the previous macOS easily.
You will need a 16-GB USB drive or larger, the newer version it is, the better. It is recommended to use a spared USB drive that you don’t use to backup file very often, since we need to format the USB to create a clean macOS installer.
3. OpenCore Legacy Patcher
OpenCore Legacy Patcher is the indispensable tool, and the only tool helping us install Sequoia on an unsupported Mac.
What is OpenCore Legacy Patcher?
According to the official, OpenCore is a sophisticated boot loader used to inject and patch data in memor. Instead of modifying macOS directly, it loads an OS, scans the system and adds support for unsupported hardware, while the legacy patcher is a utility tool to configure and install OpenCore, using a template for users to automate installing OpenCore on Mac.
What is the latest version for OpenCore Legacy Patcher?
The latest version of OpenCore Legacy Patcher is 2.0.1, which was released on September 17th, 2024. According to its official release page, 2.0.1 supports macOS X Yosemite through Sequoia. With it, 83 unsupported Mac models will be able to run Apple's latest operating system.
Preparations Before macOS Sequoia Installation
Forcing installing macOS Sequoia on an unsupported Mac won’t guarantee the system’s stability and compatibility, therefore, we cannot anticipate the problems that we are going to encounter in this process, but some preliminary work will help us to bypass glitches and prevent data loss as much as possible.
1. Back up All Data
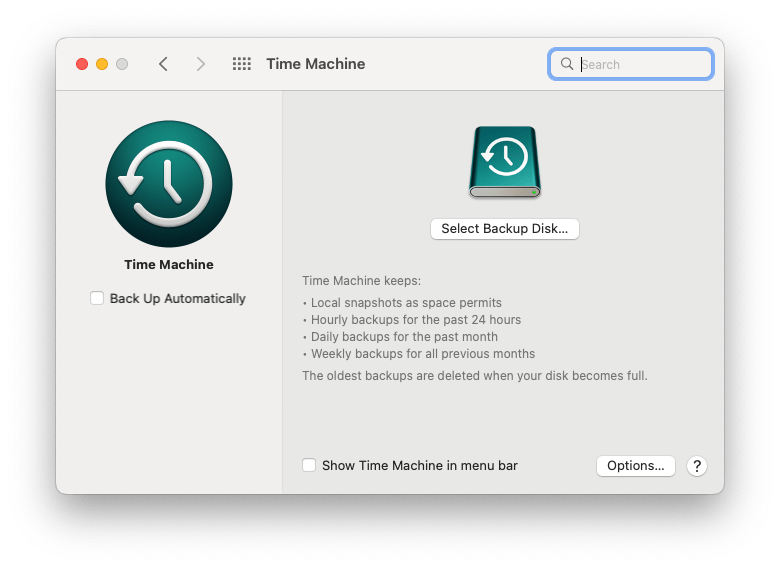
The most secure way to minimize negative consequences of upgrading Sequoia on unsupported Mac is to back up all your important data at the very beginning. You can directly copy some of files to an external storage device, or use Time Machine to back up the data as following:
- Connect an external storage device to your Mac.
- Open Time Machine. Click Select Backup Disk and select the plugged external storage device.
![back up with time machine]()
- Choose a back up mode, you are recommended to back up automatically.
- Wait for the backup to be finished, it may take a long time.
2. Format the USB Drive
Formatting a drive can erase all the data to have full space available, and it can also scan and repair the drive for bad sectors, which is the best way to troubleshoot if there is anything wrong about this drive. To create macOS installer via USB and install Sequoia without failure, we recommend to using a clean and formatted USB drive with Mac-exclusive allocation system.
- Connect the USB drive to your Mac.
- Open Disk Utility and select the USB drive from External devices list.
- Click Erase, and confirm to erase.
![format usb drive]()

3. Download OpenCore Legacy Patcher
You should download the latest version of OpenCore Legacy Patcher, it is 630MB and can be downloaded from this page: https://github.com/dortania/OpenCore-Legacy-Patcher/releases
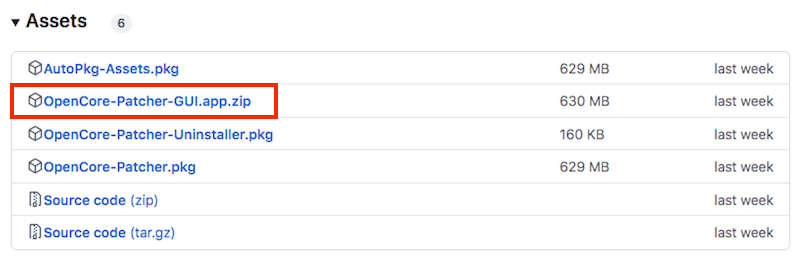
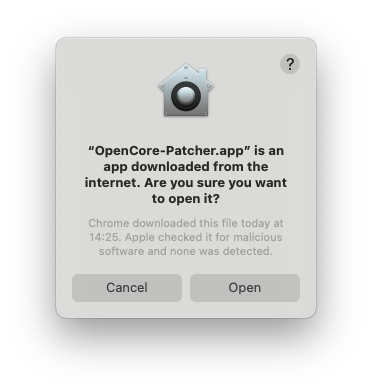
After downloading, extract the zip file and double-click to open up the app. Just click Open when seeing following message.
Step-by-step Guide to Install macOS Sequoia on Unsupported Mac
Now, let’s check how to install Sequoia on an unsupported Mac, please follow our guide step by step to avoid any possible error.
- Connect the USB drive to your Mac.
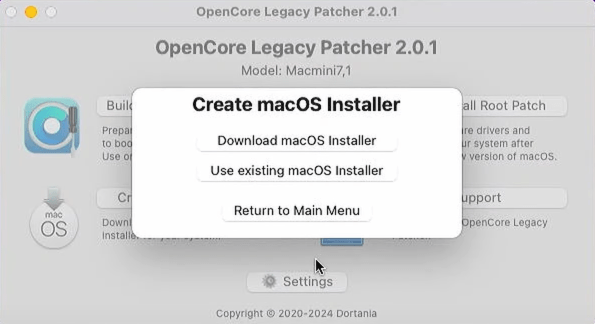
- Open OpenCore Legacy Patcher, click Create macOS Installer > Download macOS Installer.
![install sequoia unsupported mac 01]()
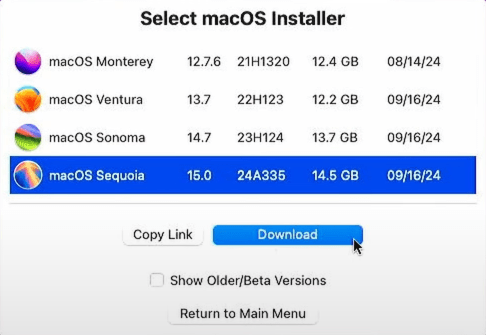
- Choose macOS Sequoia from the list and click Download to start.
![install sequoia unsupported mac 02]()
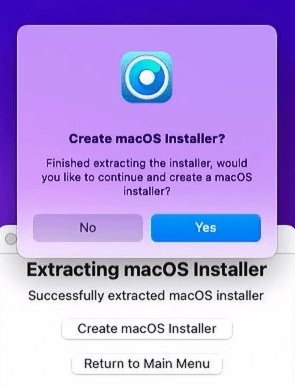
- Once the installer is downloaded, it still needs to be verified and extracted, which again takes some time.
![install sequoia unsupported mac 03]()
- Once the process is finished, click Yes to continue and create a macOS installer.
![install sequoia unsupported mac 04]()
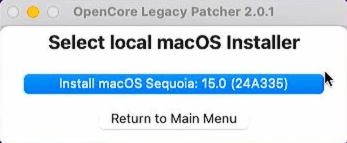
- Click Install macOS Sequoia 15.0.
![install sequoia unsupported mac 05]()
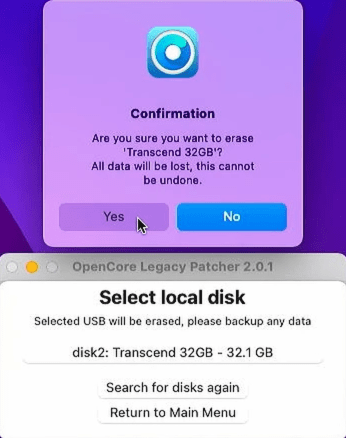
- Choose your USB drive and click Yes on the Confirmation.
![install sequoia unsupported mac 06]()
- Wait for the macOS installer creating to finish. Then the validating process will start automatically.
![install sequoia unsupported mac 07]()
- Continue and choose Yes to install OpenCore to your USB drive.
![install sequoia unsupported mac 08]()
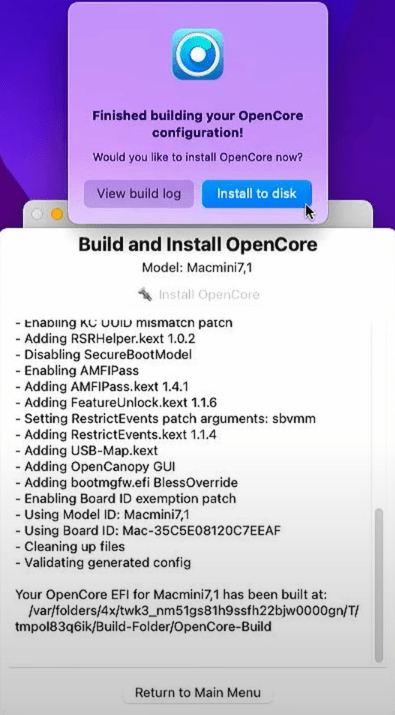
- It will build an OpenCore configuration, click Install to disk.
![install sequoia unsupported mac 09]()
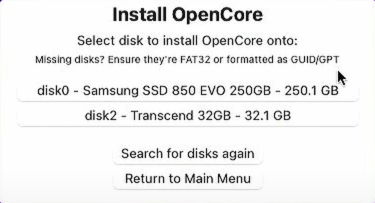
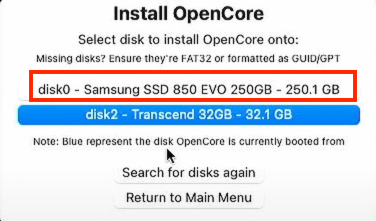
- Select USB drive again to install OpenCore.
![install sequoia unsupported mac 10]()
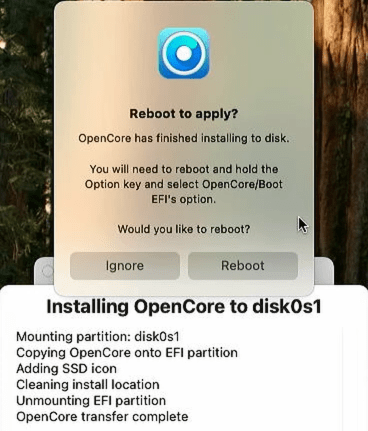
- Click Reboot.
![install sequoia unsupported mac 11]()
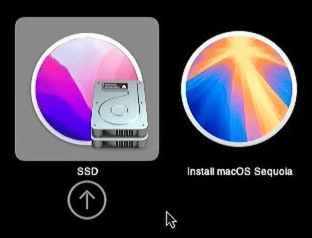
- Hold down the Option key until you see the boot menu.
- Use the arrow keys to select EFI Boot option and press Enter.
![install sequoia unsupported mac 12]()
- On the next menu, click on Install macOS Sequoia.
![install sequoia unsupported mac 13]()
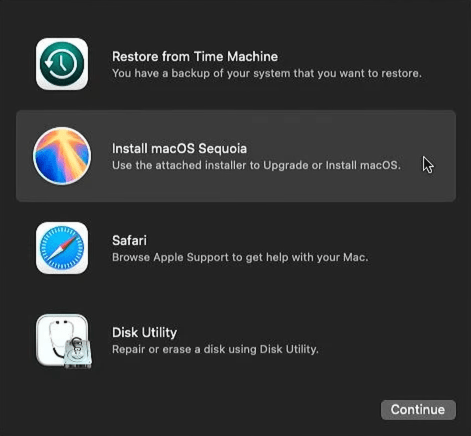
- After booting to Recovery mode, choose Install macOS Sequoia and click Continue.
![install sequoia unsupported mac 14]()
- Click Continue again to set up the installation.
![install sequoia unsupported mac 15]()
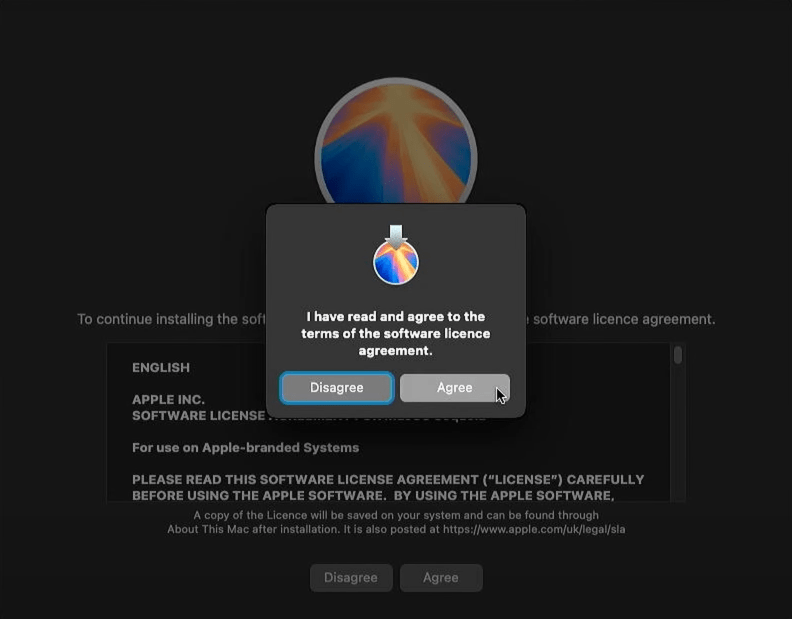
- Agree to the software license agreement.
![install sequoia unsupported mac 16]()
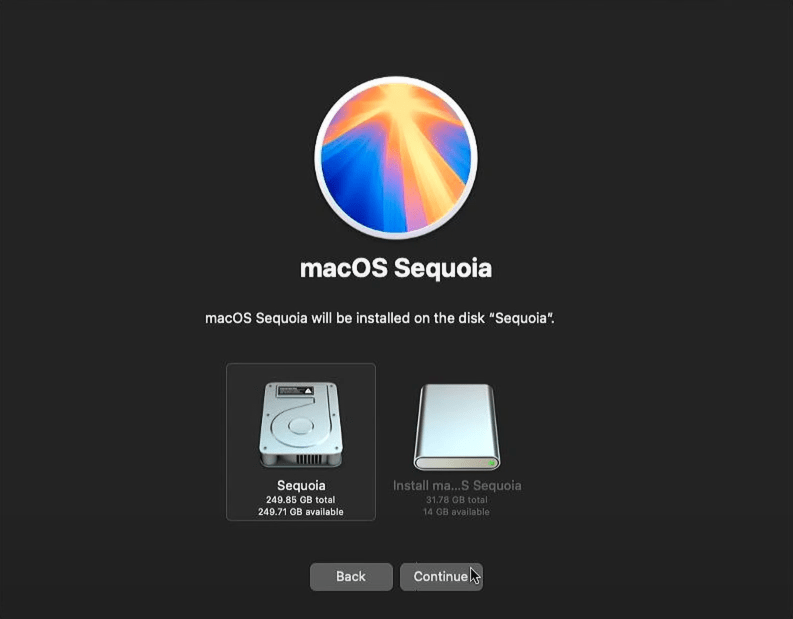
- Select the internal hard drive to install macOS Sequoia and click Continue to copy the installer to that drive.
![install sequoia unsupported mac 17]()
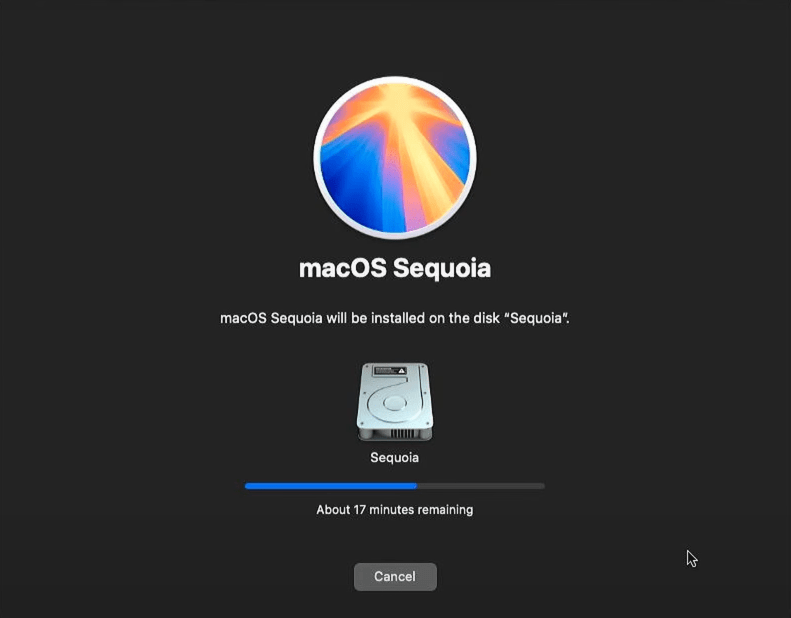
- You Mac will reboot automatically for several times to install Sequoia, you don’t need to hold or click anything.
![install sequoia unsupported mac 18]()
- Login into your Mac account after Sequoia is installed on the unsupported Mac.
-
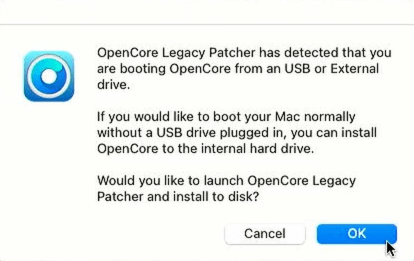
Once Mac loads up, click OK from the pop-up window.
![install sequoia unsupported mac 19]()
-
Click Install to disk.
![install sequoia unsupported mac 20]()
-
Choose the actual computer hard drive this time, not your USB drive.
![install sequoia unsupported mac 21]()
-
Eject the USB drive from your Mac.
-
Go ahead to click Reboot to apply the changes.
![install sequoia unsupported mac 22]()
-
When your Mac restarts, log back in with your account.
- Open OpenCore Legacy Patcher, choose Post-Install Root Patch > Start Root Patching.
![install sequoia unsupported mac 23]()
- Once it finishes, a pop-up will ask you to reboot the computer.
- After it boots back up, log in and you are done.


Lost Files after Sequoia Install? Recover Your Files Now!
macOS update brings new features and performance improvement, but sometimes, it causes troubles as well. It is reported that some files on Mac have been deleted or lost for unknown reasons after installing new macOS, this may be even common to install macOS on an unsupported Mac.
Luckily, there is an easy way to recover lost files in the event of Sequoia installation deleting your files, using Cisdem Data Recovery.
Cisdem Data Recovery is designed to recover files lost under any kind of data loss situation, including trash emptying, deleting, formatting, partition loss, system crash, system update, system downgrade, virus attach, unmounted drive, wrongly restored macOS, damaged drive, general human errors and so on. It can not only recover files from Mac internal hard drive, but also recover data from external storage devices like media player, SD Card, USB drive...
How to Recover Files after Sequoia Installation on Unsupported Mac?
- Download and install Cisdem Data Recovery on your Mac.
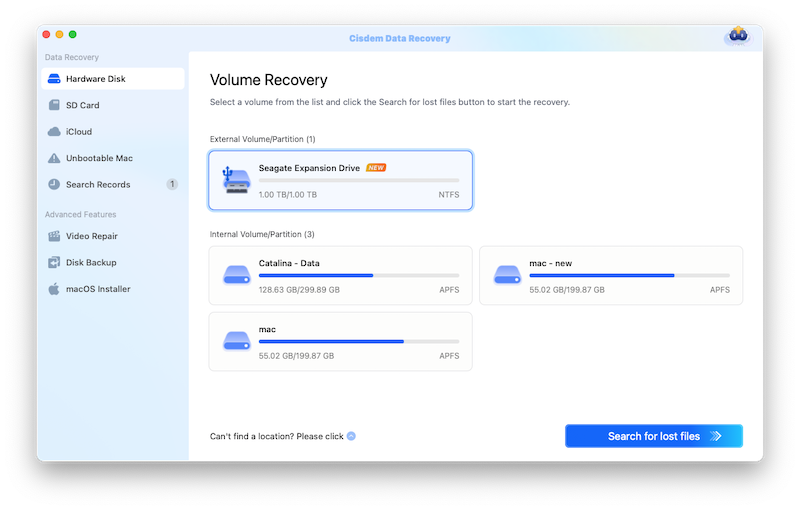
Free Download macOS 10.9 or later - Cisdem will list out all the hard drives, select the disk where you lost the files, click Search for lost files.
![recover after sequoia install 01]()
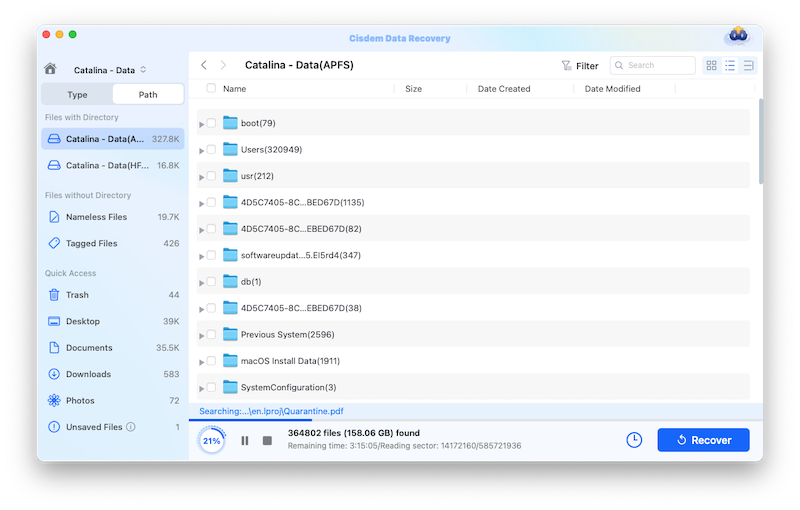
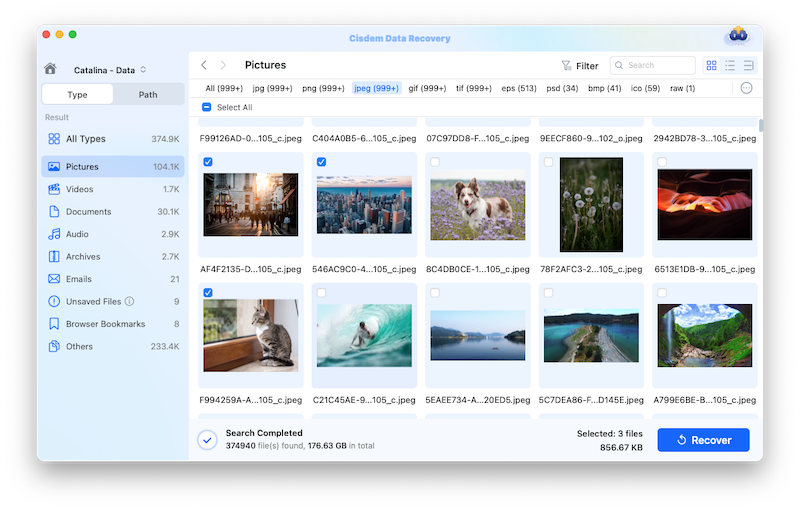
- Go to Type or Path to check the scanning result, also you can use the filter tool to find a recoverable file at soonest.
![recover after sequoia install 02]()
- Double click on the file to preview, select all the files you want to recover and click Recover to restore to local drive or save to your cloud storage services.
![recover after sequoia install 03]()
Final Words
By installing Sequoia on your unsupported Mac, you will be able to experience all of its new features and give your Mac a boost to work better. But it is a challenging job, where the success rate will depend on a lot of factors. Those preliminary works in the preparation guidelines are very important to avoid potential problems. And no matter how complicated it is to install Sequoia on your Mac would be, you should always back up your data before any action.

Connie Yu has been a columnist in the field of data recovery since 2011. She studied a lot of data loss situations and tested repeatedly to find a feasible solution tailored for each case. And her solutions are always updated to fix problems from the newest systems, devices and apps.

JK Tam is the lead developer at Cisdem, bringing over two decades of hands-on experience in cross-platform software development to the editorial team. He is now the lead technical approver for all articles related to Data Recovery and DVD Burner.
Kathryn Rider
Unbelievable, i just followed the guide step by step and it worked, i never thought i would succeed. I get a new Mac and just run a testing to install Sonoma on my old iMac, now all my Macs can work on the latest system, that's great.