

How to Password Protect OneNote on Computer and Phone
 7.9K
7.9K
 0
0


Key Takeaways
With the built-in features of Microsoft OneNote, you can password-protect specific sections, but not the entire OneNote app.
If protecting individual sections isn’t enough, you can use AppCrypt, which allows you to lock the entire OneNote app for better privacy.
Microsoft OneNote is one of the most popular note-taking apps. It’s available across multiple platforms. There’s also a web version. You can use it to take notes by typing or handwriting, record audio notes, capture web pages and do other cool stuff. It can be used for almost everything from personal journals to work projects, some of which you may want to keep private. This article shows you how to password protect OneNote on Windows, Mac, iOS and Android.
 Cisdem AppCrypt
Lock Apps with Password
- Lock individual apps, like OneNote, with password
- Offer an option to automatically re-lock apps after a period of inactivity
- Record failed attempt to open locked apps
- Also block websites and pages with password
- Let you block specific sites, URLs with certain words, or all sites except a few
- Let you block popular sites in certain categories, like social media, with 1 click
- Let you lock apps and block websites permanently or at certain times
- Easy to use
- Hard to bypass
- Support Windows, Mac, Android, iPhone and iPad


How to password protect OneNote on Windows PC
You can create notebooks in OneNote, sections in a notebook, and pages in a section, which can be an efficient way to organize information. To help protect sensitive or personal information, OneNote allows you to add password to sections. You can keep your private notes secure by putting them together in a section and then password protecting the section.
Below are the steps.
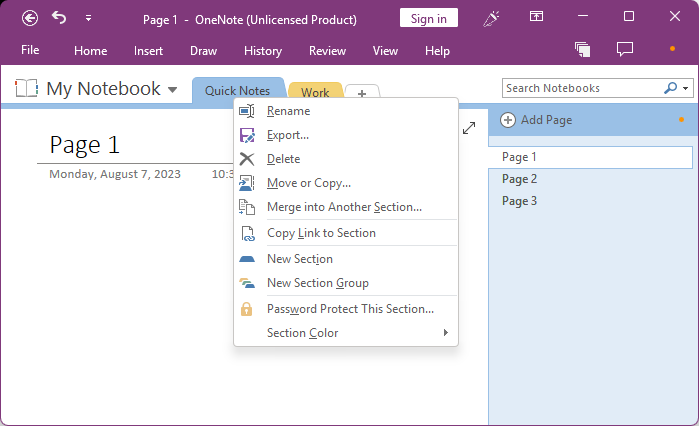
1. In OneNote, right-click the name of the section that you want to keep private.
2. Choose Password Protect This Section. The Password Protection screen will appear.
3. Click Set Password.
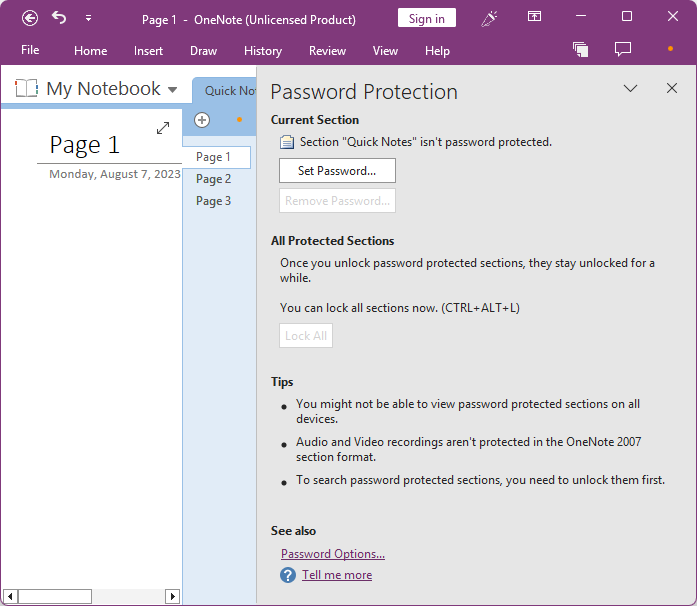
4. Enter the password and confirm it. Click OK.
This section will be immediately protected and locked. The information in it will be hidden and not searchable. You will only see a “This section is password protected” message. If sync is turned on, you will find that this section is also protected elsewhere.
To unlock the section, press the Enter key. In the Protected Section dialog that appears, enter the password. And the section will be unlocked and accessible as usual.
To make the password protection more effective, OneNote will automatically lock an unlocked section if it is inactive for a while. You can customize the amount of time. Before you step away from your computer, you can lock all the protected OneNote sections immediately by going to the Password Protection screen and then clicking Lock All or by using the shortcut CTRL + ALT + L.
To remove the protection from a section, go to the Password Protection screen and then click Remove Password.
Note: The above-mentioned tool AppCrypt can lock the entire OneNote app, which can add an extra layer of protection. But if you add OneNote to lock, other Microsoft Office apps on your Windows PC will also be locked due to the fact that Microsoft Office apps (OneNote is one of them) are installed in the same directory in Windows. AppCrypt can effectively password protect non-Microsoft-Office apps.
How to password protect OneNote on Mac
Section password protection is also available in OneNote on Mac. Thanks to it, you can easily keep certain notes safe from prying eyes. It’s easy to set up and use. Below are the steps.
1. In OneNote, open the notebook that contains the section you want to protect.
2. Control-click the name of the section.
3. Choose Password Protection > Protect This Section.
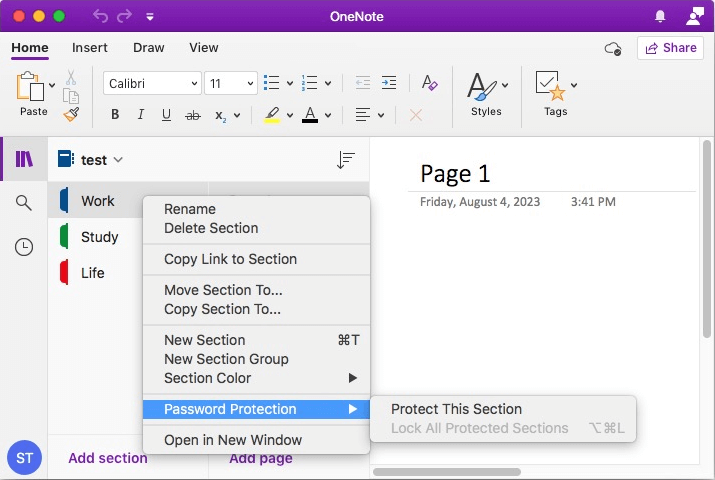
4. Set a password. A lock icon will appear next to the name of the section.
In my case, the password protection is not activated until I quit OneNote and reopen it. You can manually activate the protection by clicking the lock icon or choosing Password Protection > Lock Section. You can choose Lock All Protected Sections to immediate lock all sections you put a password on.
To unlock the section, click the lock icon or press the Enter key and then enter the password. To remove the protection, choose Password Protection > Remove Password.
Tip: If locking certain section isn’t enough or practical, you can use AppCrypt to password protect OneNote app. To do so, follow the steps below.
1. Download and install AppCrypt.
 Free Download macOS 10.15 or later
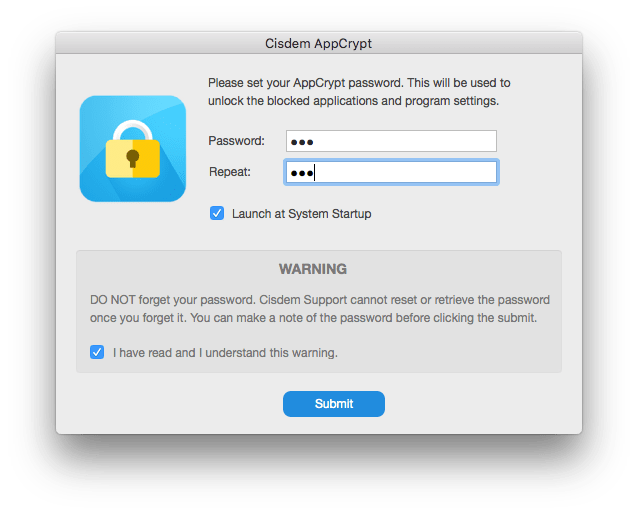
2. When you open it for the first time, set a password.
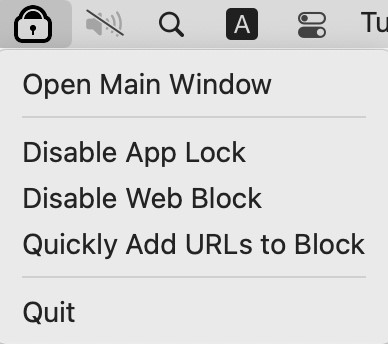
3. Click the lock icon in the menu bar and choose Open Main Window.
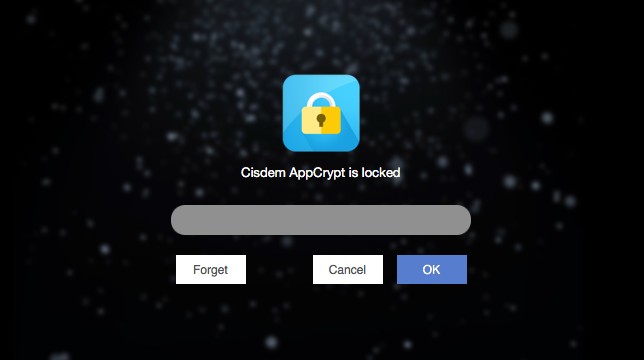
4. Enter the password to access the main window.
5. Click the big plus icon, select OneNote, and click Open.
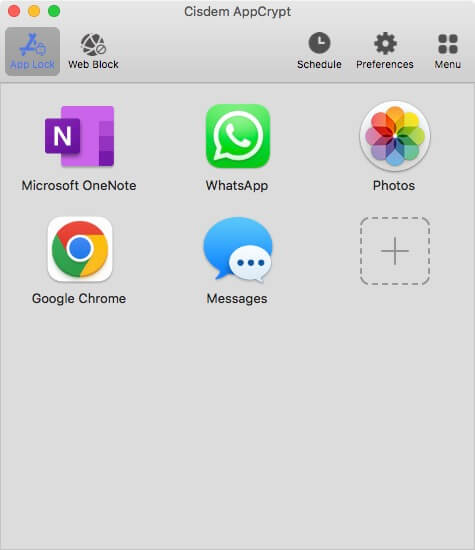
Now OneNote is locked. You can use the same way to lock other apps on your Mac.
How to password protect OneNote on iPhone
Microsoft OneNote is also available for iPhone. With it, you can easily take notes and make plans and do more. It’s designed with your privacy in mind and allows you to lock the sections in your notebooks.
1. Long press the name of the section that contains that information you want to keep private.
2. At bottom of the screen, tap the lock icon.
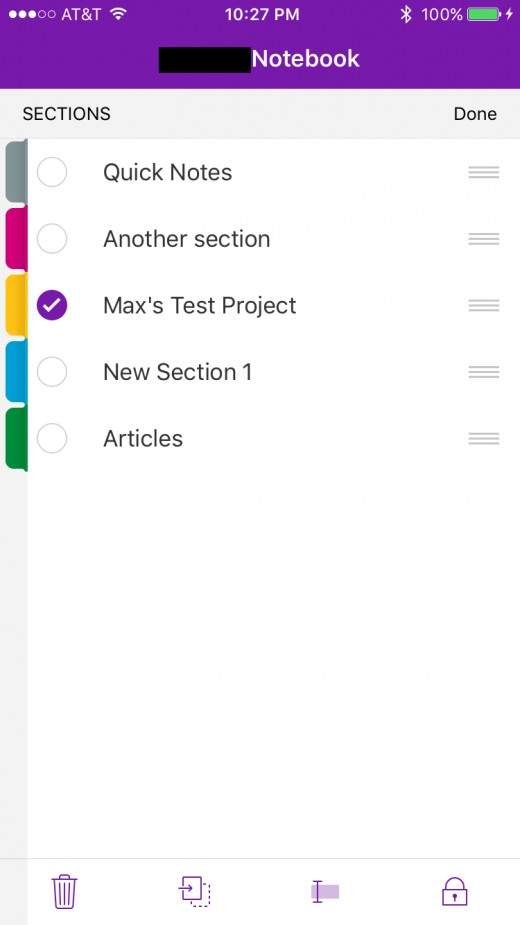
3. Tap the Protect This Section option that pops up.
4. Enter a password and confirm it.
You will see a lock icon next to the name of the section. Your notes in it are locked.
Tip: If you want to protect the entire OneNote, you can use the Shortcuts app, which is included with iOS. In Shortcuts, you can create a personal automation to lock OneNote. Note that it requires iOS 16.4 or later.
If you prefer a simpler solution, consider using Cisdem AppCrypt for iOS. It allows you to lock OneNote directly with a password and is available on iOS 16.0 or later.

How to put password protection on OneNote on Android
You can easily password protect OneNote on Android at the section level, which should be enough in most cases. If you want an extra layer of security, you can an app lock to lock the OneNote app.
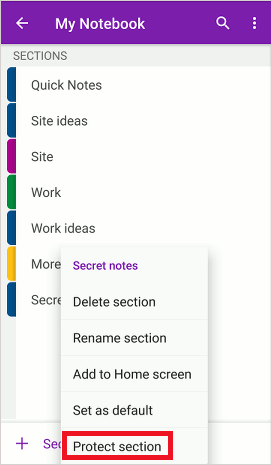
1. Long press the OneNote section that you would like to lock.
2. Tap the Protect section option.
3. In the Protect section screen that appears, enter the password.
4. Confirm the password by entering it again.
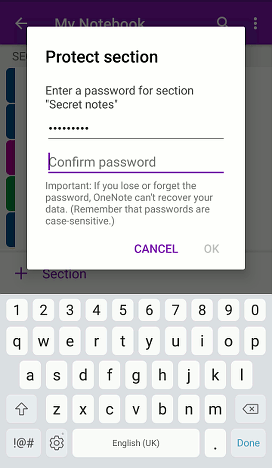
5. Tap OK.
If a section is password protected, you can find a lock icon displayed. To lock all protected notes, just press and hold on a protected section and tap the Lock All option.
Tip: To lock the entire OneNote app, use Cisdem AppCrypt for Android. It also allows you to password-protect other privacy apps on your Android, such as Photos, Messages.

FAQs
Can I password protect an OneNote notebook or page?
While many OneNote users have been requesting the ability to password protect notebooks, such a feature is not available yet. The only solution now is to first separately password protect every single section in a certain notebook and then lock them all at once. It’s not a good idea when it comes to notebooks with lots of sections. You can neither lock pages.
How can I lock all my OneNote notes at once?
OneNote doesn’t offer a built-in option to lock the entire app. The best way to lock all your OneNote notes at once is to use an app locker like Cisdem AppCrypt. It lets you lock OneNote completely with a password.
How can I lock OneNote pages from editing?
Only the OneNote Class Notebook allows you to use page locking. Once a page is locked, the student won’t be able to edit it.
Conclusion
Many OneNote users use it on a daily basis to take notes about almost everything. Certain information such as bank details and websites passwords is private, and you definitely don’t want others to view them. Luckily with the built-in password protection, you can efficiently password protect OneNote. You can lock sections and even the app itself. If you are very cautious, it’s highly recommended to lock OneNote app with the help AppCrypt or other tools alike.

Norah Hayes likes to share her tips on how to improve focus and stay motivated at work. She believes it is essential to eliminate all online distractions during work hours.

Ethan Long joined Cisdem in 2015 as a developer and now serves as the editorial advisor for Cisdem AppCrypt. He actively tests and uses Cisdem AppCrypt and other screen-time management tools to ensure AppCrypt meets its promises in real-world scenarios.