I want to partition an external hard drive (3TB) into 3 partitions. I want to use one for PC storage, one for Mac storage and the last for Mac backup. Is this possible and how can I do it?
Many computer users want to partition internal, external hard drives for different purposes. In this tutorial, we'll show you why and how to partition a hard drive on Mac and how to deal with Mac partition recovery to avoid data loss.
There are four common reasons why Mac users might want to partition a hard drive on Mac.
1. Separate system files from user files
The main reason why users want to partition a hard drive is to separate system files from user files. Partitioning a hard drive, or an SSD drive, involves creating multiple volumes from one physical storage medium. The volumes appear separately in the Finder and are treated separately by your Mac. You can format or erase them independently and use one of them as a Time Machine backup storage for troubleshooting. Even one of the partitions corrupts, and others will not be affected, so this is one of the ways to deal with hard disk failure.
2. Run multiple operating systems
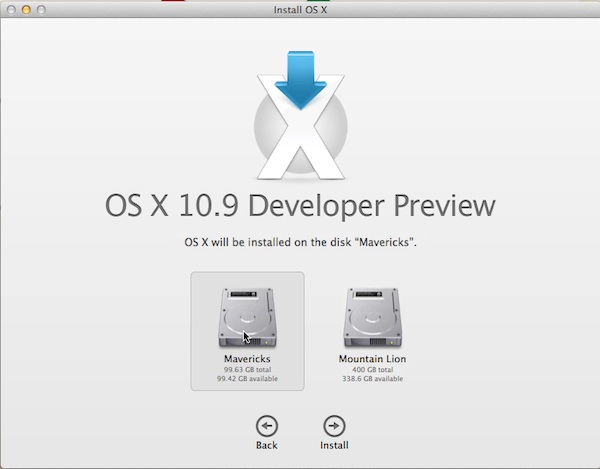
It's more likely that users want to partition a hard drive in order to run multiple operating systems or multiple versions of the same operating system without needing a second hard drive. This is especially useful if your Mac is your only computer, because each operating system needs a separate partition of its own.
3. Improve Performance
Hard disk drives usually work better on smaller chunks of data rather than one big partition. You also improve performance after partitioning. For example, having a partition that is about 20%-30% the size of the total hard disk allows short stroking, meaning that a performance consuming process is greatly reduced.
4. Organize Your Data easily
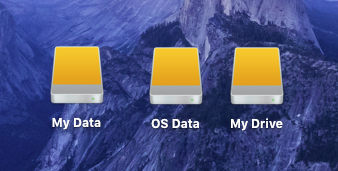
You will be able to precisely organize the data on these partitions, especially on large hard disk drives (1TB or more). After you partition your hard drive, you can store your videos, photos, music, documents, and other files in different partitions as you like.
Partitioning a hard drive also has some disadvantages and one of the real risks when you partition your hard drive is data loss. You will lose everything on your hard drive, so we strongly recommend backing up to an external hard drive which is the most economical and the fastest backup method or cloning your disk by using Carbon Copy Cloner or some other app that can clone your hard drive to the backup drive before partitioning, or repartitioning.
If you desire to partition a hard drive, or even repartition it, the below steps can help you to do so, using Disk Utility on Mac. Disk Utility is the application of choice for dividing a hard drive into multiple partitions. It’s straightforward and easy to use. Best of all, it’s free and is included with Mac.
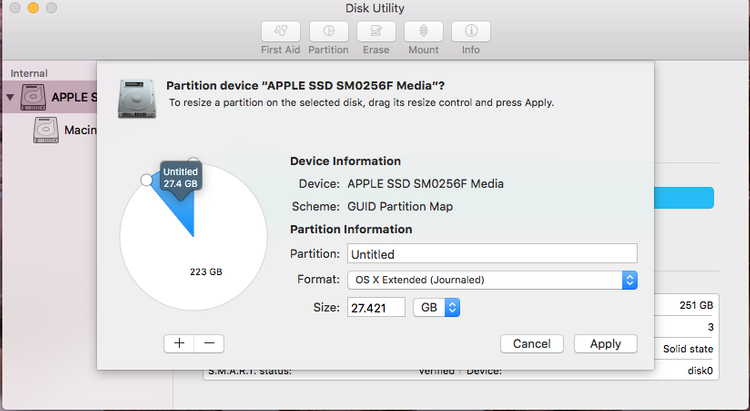
.png)
The above steps can be used to partition internal hard drive, external hard drive or USB drives, etc. If you don't want to partition your main hard disk, there are other ways you can safely run a different version of MacOS or a beta of a new version like Sierra. The simplest is to install it on an external hard drive, or even a USB drive.
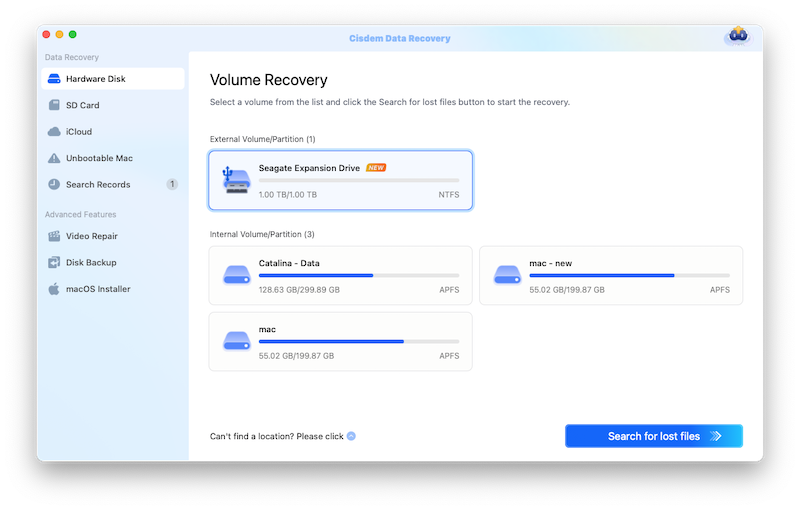
If you forget to backup the hard drive before partitioning, you can perform partition recovery with Cisdem DataRecovery. This tool is able to recover any data including photos, documents, videos, audios, and any other files from the lost, erased, deleted, resized or corrupted partition.
Compared to other competitors, it has a competitive price-$69.95. The recovery process is very easy and fast. You do not have to wait for a long time to get your data back from your partition. Please download this partition data recovery tool for Mac below and start your partition recovery process.
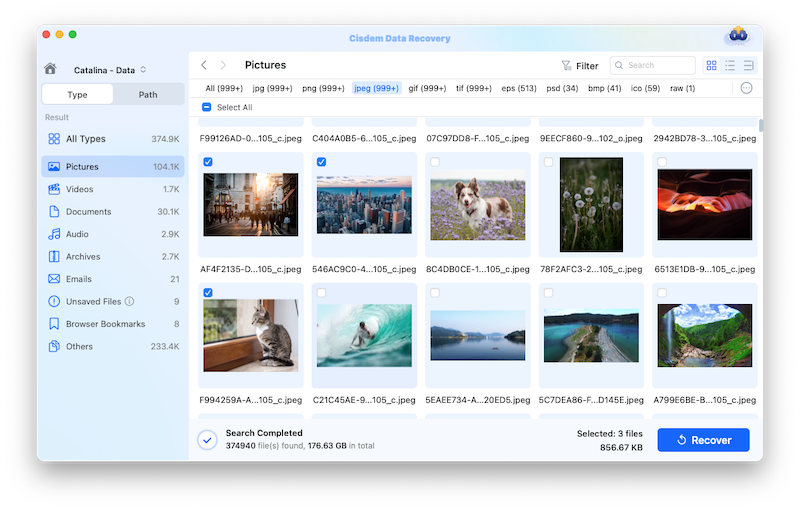 Note: Please don't save the retrieved files in the original partition in case the lost data are overwritten permanently.
In conclusion, you can follow above guides to partition a hard drive. And don't forget to backup your hard drive's data first. If you have any other ideas about how to partition a hard drive, share them with us.

Connie Yu has been a columnist in the field of data recovery since 2011. She studied a lot of data loss situations and tested repeatedly to find a feasible solution tailored for each case. And her solutions are always updated to fix problems from the newest systems, devices and apps.


 Free Download
Jorsary
Is it possible to partition an external 1TB drive (new drive) using the same way? The new external drive is currently NTFS format. I would like to partition the drive to use at least half of the 1TB for Time Machine backup, while leaving the other half as is.
Rosa Reyes
Yes, you can try this way to partition an external hard drive.