

How to Clean Install macOS Sequoia or Sonoma: 4 Steps
 7.6K
7.6K
 0
0


The official version of macOS Sequoia has been released. It always makes us excited to install and try the new features & enhanced performances of an updated macOS, especially this macOS brings us: windows tiling, changed background of video conference, preview mode for screen sharing, enhanced Safari app, redesigned iCloud setting, access to different calculators, iPhone mirroring, etc.
Instead of upgrading, you may have decided to clean install macOS, for the reason that you want to erase your Mac for a new start, or for the reason that you are going to transfer the Mac’s ownership. In this post, we will show you how to clean install macOS Sequoia or Sonoma from a bootable USB drive, also give the solution if files lost after macOS install.
 Cisdem Data Recovery for Mac
Recover Lost Data After macOS Clean Install
- Restore lost files after macOS update, downgrade, reinstallation
- Restore deleted and formatted files
- Repair corrupted or unplayable videos: mp4, mov, avi, mkv, m4v, etc.
- Support data recovery from Mac internal and external hard drive
- Support recovering 200+ files: video, audio, photo, document, archive, email, etc.
- Filter files quickly
- Preview files, including video, photo, pdf, word, excel, powerpoint, text, audio, etc.
- Recover files to local drive or cloud platforms
 Free Download macOS 10.9 or later
Requirements to Clean Install macOS Sequoia/Sonoma
Not all Apple laptop and desktop can have a clean install of macOS 15 or 14.
macOS 15 Sequoia can run on following models:
- iMac --- 2019 and later
- iMac Pro --- 2017 and later
- MacBook Air --- 2020 and later
- MacBook Pro --- 2018 and later
- Mac Pro --- 2019 and later
- Mac Studio --- 2022 and later
- Mac mini --- 2018 and later
macOS 14 Sonoma can run on following models:
- iMac --- 2019 and later
- iMac Pro --- 2017 and later
- MacBook Air --- 2018 and later
- MacBook Pro --- 2018 and later
- Mac Pro --- 2019 and later
- Mac Studio --- 2022 and later
- Mac mini --- 2018 and later
The installer of both macOS Sequoia and Sonoma is about 15GB, but you still need extra space to get it work properly and leave enough space to install some important apps on your Mac to check if your workflow can be elevated efficiently. So, make sure at least 16 GB available on your hard drive to clean install this new version.
Also, prepare 2 external drives, one to back up files, the other one to create a bootable installer (at least 16GB). When cleaning install macOS, we are often recommended to install from a bootable USB, which is able to install the OS from scratch, especially in the case that our current OS runs slowly/improperly, or you want to install macOS on different devices.
How to Clean Install macOS Sequoia or Sonoma on Mac from Bootable USB?
There are 4 steps to clean install macOS, the first, also the most important step is always to back up your files to external hard drive or cloud-based accounts. Now, let’s check out the steps.
Step 1. Back Up File to External Drive or iCloud
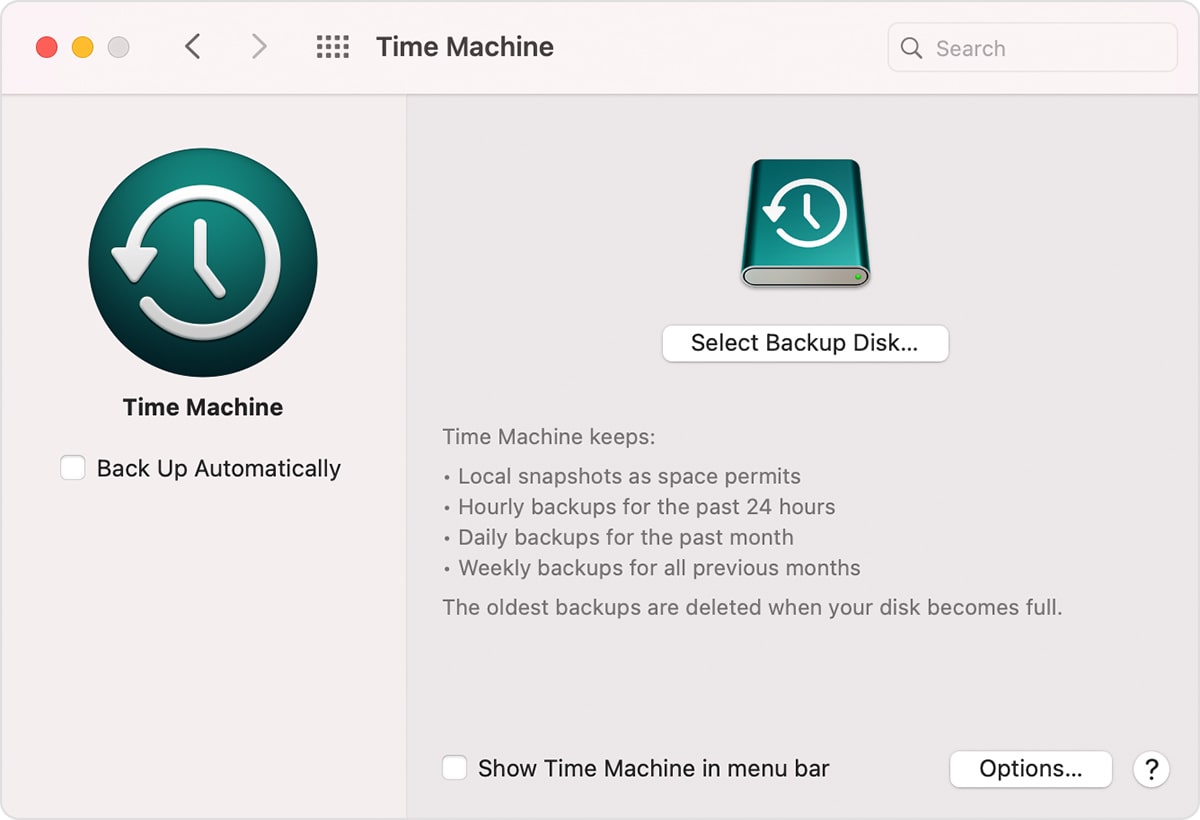
Option 1. Back up all files to external drive via TimeMachine
- Connect the external drive to your Mac.
- Click on Apple menu > System Preferences > Time Machine.
- Click on Backup Disk.
![backup file]()
Option 2. Backup important files online
- Click on Apple menu > System Preferences > iCloud.
- Login in with Apple ID.
- Tweak the settings.
Step 2. Create A Bootable Installer for macOS Sequoia/Sonoma on USB
- First, download macOS Sequoia or Sonoma to your Mac on Apple's official website or from AppStore.
- Run Terminal app in Finder > Application.
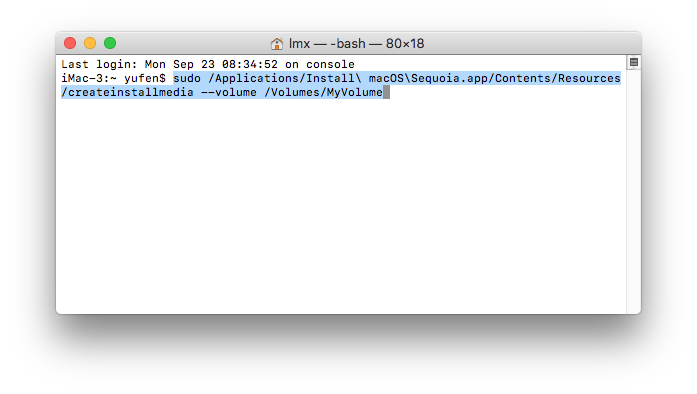
- Copy and paste the command line as following.
For Sequoia: sudo /Applications/Install\ macOS\Sequoia.app/Contents/Resources/createinstallmedia --volume /Volumes/MyVolume
For Sonoma: sudo /Applications/Install\ macOS\Sonoma.app/Contents/Resources/createinstallmedia --volume /Volumes/MyVolume in Terminal.
You need to replace MyVolume with the name of your USB drive, check the next step.![terminal command]()
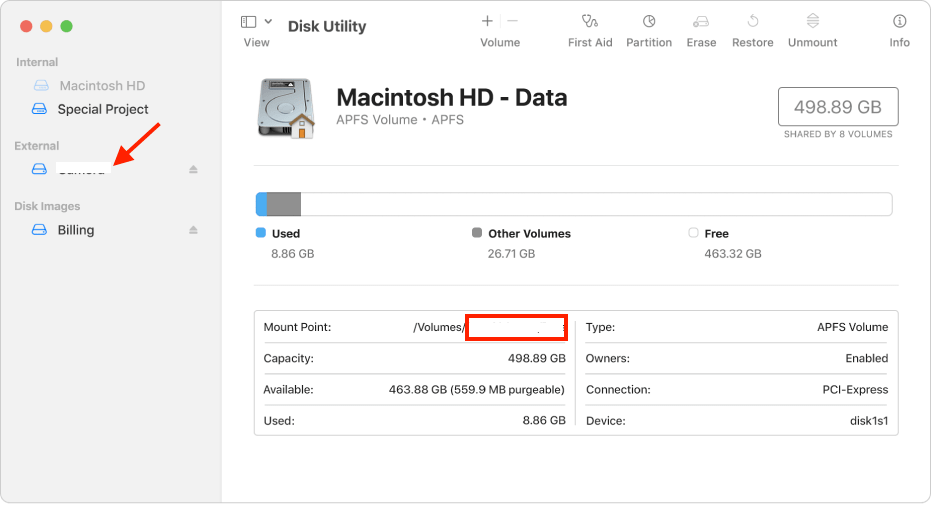
- Now, connect your USB to Mac, open Disk Utility, click on External > USB Drive > Find the name in Mount Point, and input to replace MyVolume in Terminal.
![usb drive name]()
- Back in the Terminal interface, press Return and enter your password to run the command.
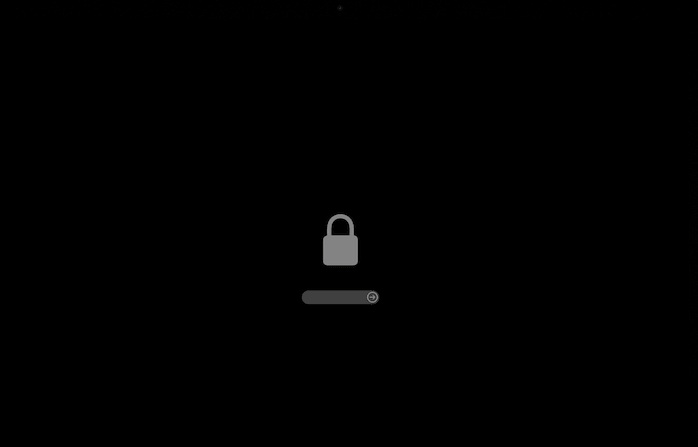
Step 3. Adjust Startup Security Options to Enable Booting from USB
- Press and hold Command+R, you will see the apple logo and then the interface prompting you to enter password.
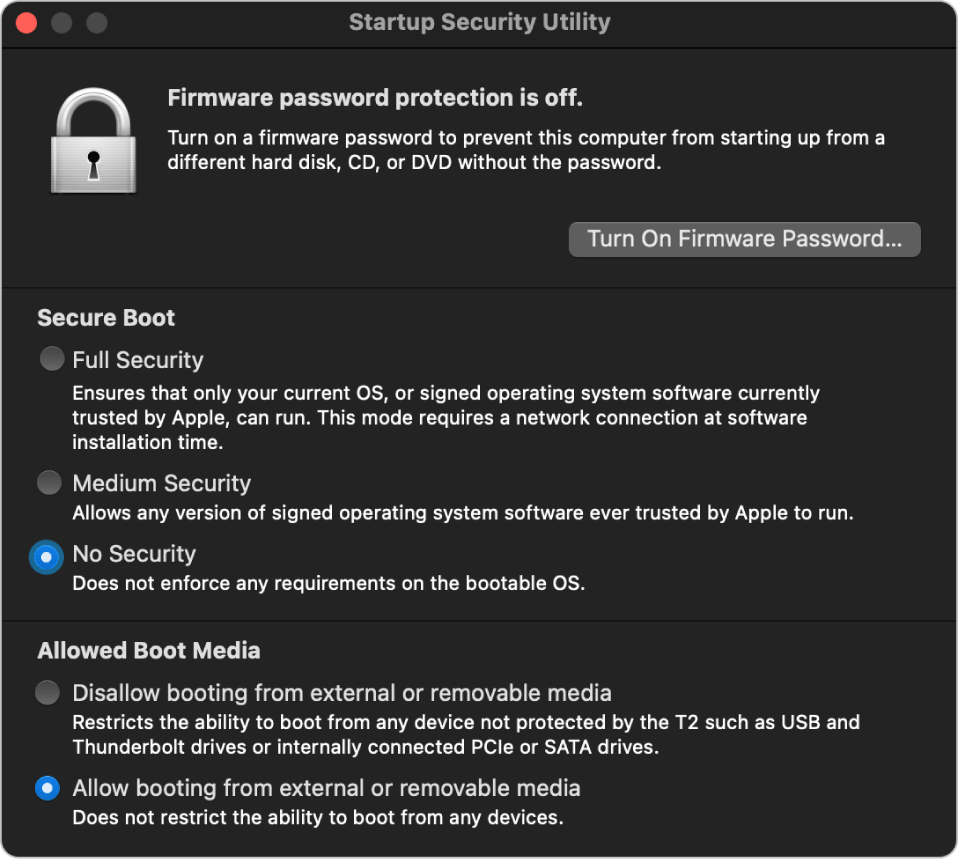
- After you have entered the Recovery Mode, click on Utilities > Startup Security Utility.
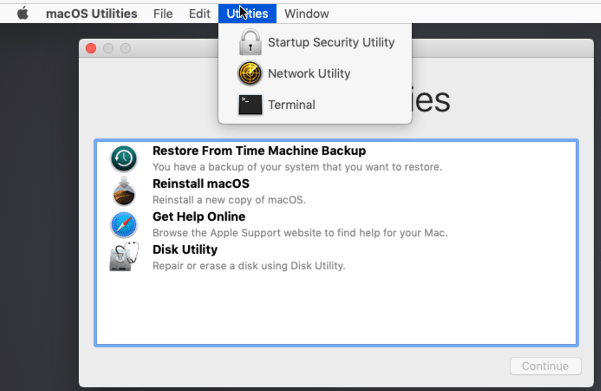
- Then check before the box No Security and Allow booting from external or removable media, click the Close button to save the settings.
![startup security options]()
- Click on Apple logo > Shut down.
Step 4. Clean Install macOS Sequoia/Sonoma
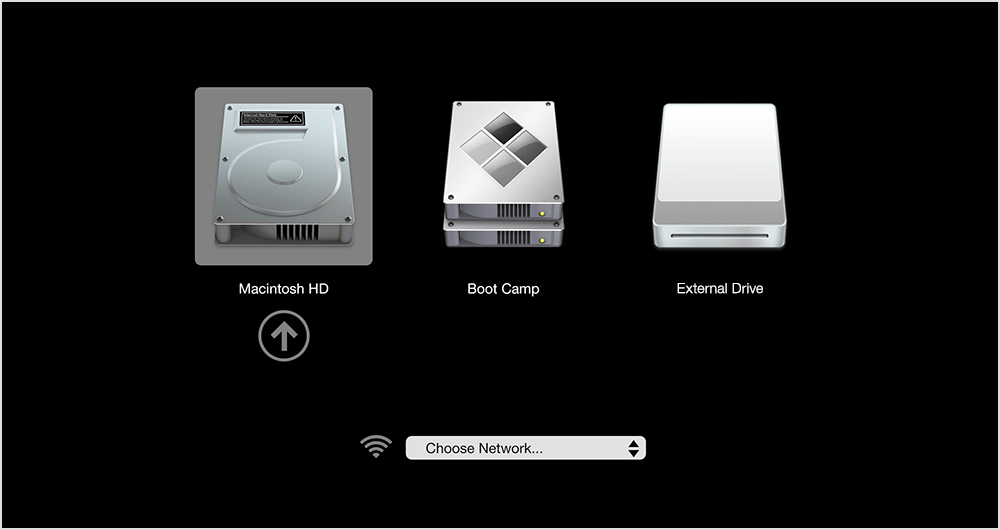
- For M1, M2 Macs, press and hold the Power button until you see the bootable options;
For Intel Mac, press Power button, then immediately press Command+R and hold it until you see the bootable options. - Choose the bootable USB drive and enter your password.
![choose usb drive boot]()
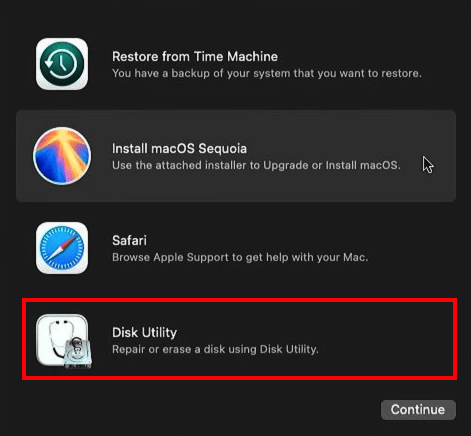
- Choose Disk Utility and click Continue.
![goto disk utility]()
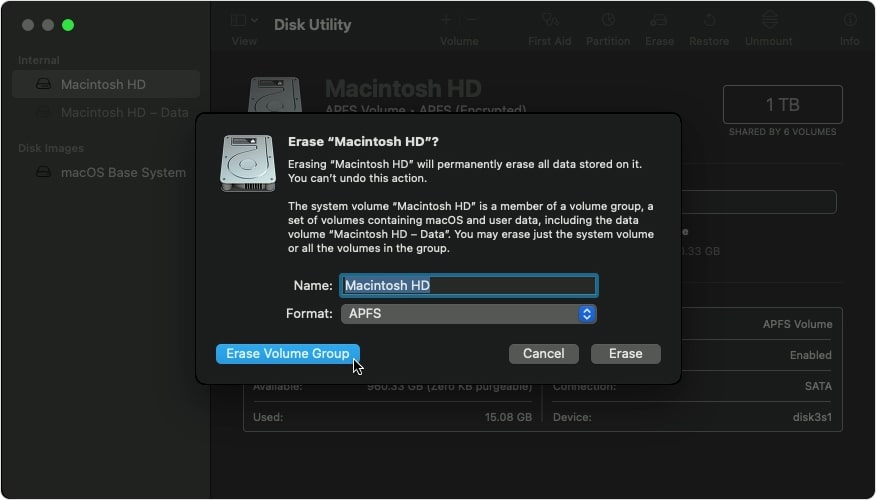
- Select your Mac internal hard drive and click Erase to clean the entire disk up for macOS Sequoia/Sonoma installation.
![erase mac]()
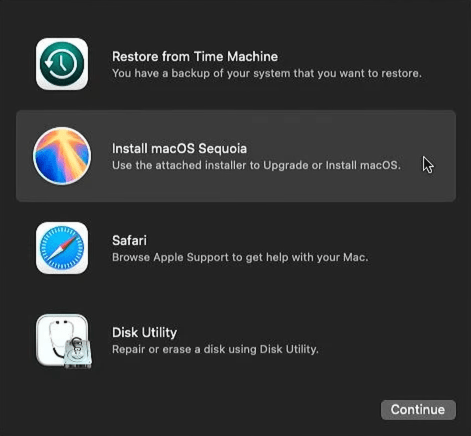
- When the erasing is done, close the Disk Utility Windows and click on Install macOS Sequoia or Sonoma to start the clean installation from your USB.
![install beta]()
- Follow the instructions and tweak the OS settings according to your needs.
What If Files Lost After Clean Installing macOS?
Generally speaking, if you have backed up your files and do the installation properly, it is not likely to lose files. But if you get the bad luck and lost files ater macOS update, try Cisdem Data Recovery, the best mac recovery tool to get your files back.
Cisdem Data Recovery for Mac is designed to recover lost, deleted and formatted files on mac, under different situations like macOS update, downgrade, hard drive formatting, accidental file deletion, etc. It not only supports recovering files from Mac internal hard drive, but recovers files from Mac external storage devices (SD Card, USB, removable device, etc.)
Main Features of Cisdem Data Recovery
- Recover lost, deleted, formatted files
- Restore files from Mac internal and external drive
- Support recovery on 200+ files: documents, videos, audios, photos, archives, etc.
- Repair corrupted videos: mp4, mov, avi, mkv, m4v...
- Preview recoverable files (video, photo, document, audio, etc.)
- Quickly search files with filter tool
- Recover files to local drive or cloud platforms
- Fast and easy to use
How to Recover Lost File After Clean Installing macOS?
- Download and install Cisdem Data Recovery on your Mac.
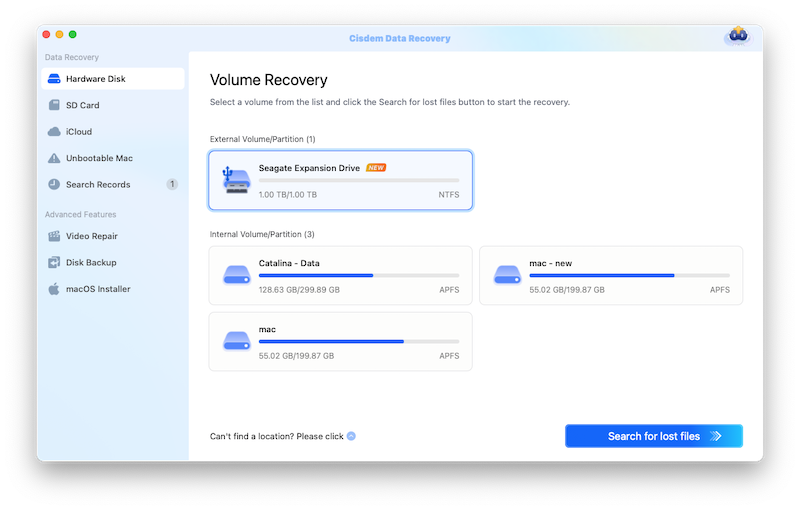
Free Download macOS 10.9 or later - Choose the hard drive and click Search for lost files to start scanning the disk.
![recover files after monterey install 2]()
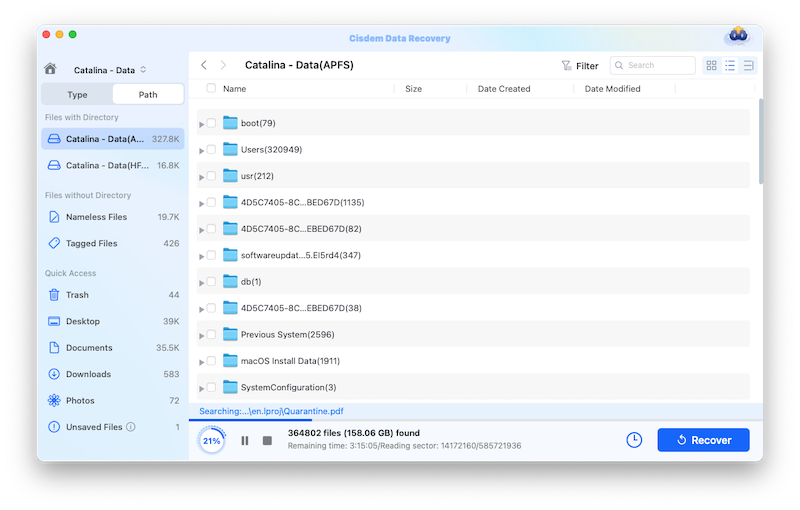
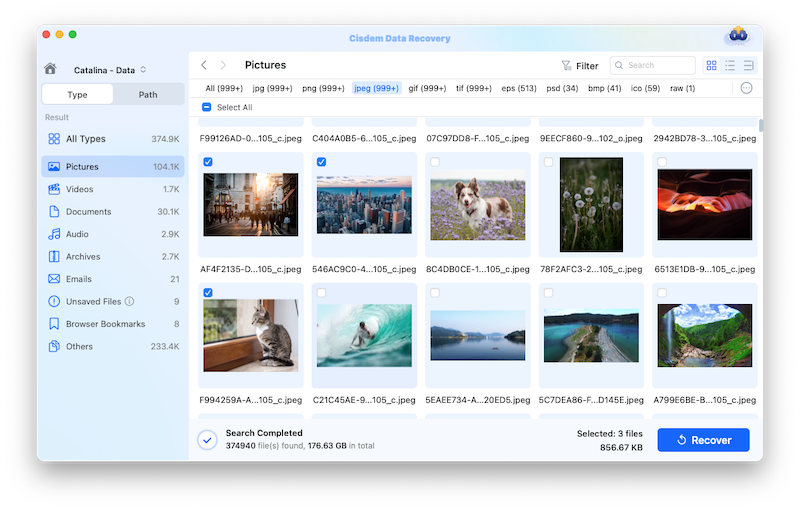
- Go to Type or Path to check the found files, or you can use the filter tool to quickly search specific files. Preview the recoverable files and select them.
![recover files lost after install 02]()
- Click Recover to get them all back to your Mac.
![preview files]()
Conclusion
If you have decided to clean install macOS Sequoia or Sonoma on your device, keep in mind to back up your files before any action. A clean install macOS make your Mac brand new and run faster, but any data loss would be a tragic, so, never overlook the backup step.

Connie Yu has been a columnist in the field of data recovery since 2011. She studied a lot of data loss situations and tested repeatedly to find a feasible solution tailored for each case. And her solutions are always updated to fix problems from the newest systems, devices and apps.

JK Tam is the lead developer at Cisdem, bringing over two decades of hands-on experience in cross-platform software development to the editorial team. He is now the lead technical approver for all articles related to Data Recovery and DVD Burner.