

How to Burn iMovie to DVD for Any DVD Player with or without iDVD
 23.9K
23.9K
 0
0


Hi, I have just bought an iMac and have done a short video in iMovie. How to burn a dvd from imovie? I would appreciate any advice. - a question from Macrumors.com
This article will show you how to burn iMovie to DVD with ease using different tools. In the age of streaming and online sharing, it’s still a good idea to burn DVDs from iMovie or other sources. Burning videos to DVD means more accessible playback, better preservation, and wider distribution and sharing.
 Cisdem DVD Burner
The Best App to Burn DVD from iMovie
- Burn iMovie to DVD to play on TV or any playable devices
- Intelligently compress iMovie to fit on a 4.7 GB or 8.5 GB DVD
- Also, burn iMovie to ISO or DVD VIDEO_TS Folder
- Burn videos in any format like MP4, MOV, MKV, etc.
- Create professionally designed menu templates with various themes
- Edit video before burning with Crop/Watermark/Effect/Subtitle/Chapter/etc.
- Edit DVD title and add background picture & music
- Real-time preview of all the changes and adjustments
- Burn a looping DVD
- Fast burning speed and good quality
 Free Download macOS 10.15 or later
  Free Download Windows 10 or later
How to Burn DVD from iMovie with iDVD
We usually use iMovie to browse, share, create a new video with photos and clips, edit video for better refinements, and enhance the visual looking with special effects, etc. When it comes to how to playback iMovie videos, we can enjoy them on Apple TV by using the iMovie Theater for smaller videos or share the file through iTunes & Home Sharing. But as for the iMovie videos that are pretty important, we can burn them to DVD. As mentioned above, by doing so, we can preserve our video works better and playback them on the DVD player, Xbox, PS3, etc.
To export an iMovie project to disc, we will need an iMovie to DVD creator. One of the most popular choices is iDVD.
iDVD Availability
To burn iMovie to DVD with iDVD, you, of course, will need iDVD available on your computer. The bad news is that iDVD has been discontinued since 2011. It was 14 years ago as of 2025.
iDVD is becoming a thing of the past, so it’s:
- No longer preinstalled on Macs shipping with OS X 10.7 Lion or later
- Not compatible with macOS Catalina or above, as iDVD is a 32-bit program
- Not available on the Mac App Store with all of the other iLife apps
Now the only way to install iDVD on Mac (running Lion to Mojave OS) is to purchase a copy of iLife '09 from third-party sources.
If your Mac comes with iDVD, you can directly export and burn iMovie to DVD in one go.
Step-by-step Instructions
The steps below will show you how to export your movie from iMovie and burn it to DVD using iDVD for playback on your home DVD player.
Step 1.Export iMovie Videos from Videos to iDVD
After finishing the iMovie project, go to iMovie's top menu bar. Choose Share > iDVD. Wait for iDVD to open the iMovie project, which may take a few minutes.
.jpg)
Note: While export iMovie to iDVD, it works best with videos of less than 60 minutes.
Step 2.Make DVD Menu
iDVD interface appears now. If you want to make DVD menu, click Themes at the right bottom. Additionally, if you want to add more local videos together with your iMovie videos before burning iMovie to DVD, You can click Media.
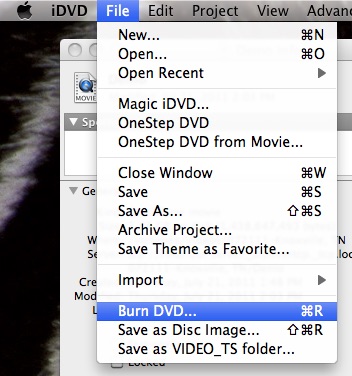
Step 3.Start burning iMovie to DVD
After all are finished, insert a blank DVD into your Mac's CD-ROM/DVD drive. Go to the iDVD menu bar and choose File > Burn DVD.
Tip: "iDVD needs a lot of free hard drive space in order to buffer and burn a DVD. Remove absolutely all non-essential data and files from your Mac so that you free up some hard drive space. If that doesn't work, reduce the burning speed to 2x and if you're still having problems after that, you'll have to simply reduce the size of your iDVD project which may mean having to go into iMovie and re-edit it." So, there are some bugs while burning large iMovie video with Idvd, for safety, make sure that your video size is no more than 1 hour.
How to Burn iMovie to DVD to Play on Any Player without iDVD
DVD burned from iMovie won't play on DVD player?
Here’s a scenario. You have successfully burnt a movie to DVD using a DVD burning tool. You are able to play it without a problem on your computer. However, when you try playing the DVD on a DVD player, it doesn’t play. You try again with a different player, and it fails to play too. This scenario is actually very common and can also occur when you burn iMovie to DVD.
Why this happens
When it comes to burning DVDs, there are two primary types: data DVD and video DVD. You are supposed to play a data DVD on the computer and a video DVD on DVD players.
If your iMovie project is burnt to a data DVD, you won’t be able to play and enjoy it on a regular player because the player can’t decode the video data. The fact is that most freely available DVD burning tools only burn videos to data DVDs.
Can I burn iMovie to DVD to play on any DVD player?
Yes. You can.
With the help of professional DVD burning software for Mac, you are able to burn videos shot by mobile phones or camcorders to DVD, so that you can play them on TV or other playable devices. You can use Cisdem DVD Burner to efficiently burn any video files (including iMovie projects) to DVD for any DVD player. This DVD burner for Mac provides easy DVD burning solutions to meet your needs.
Free Download macOS 10.15 or later
#1 Burn any video files regardless of video formats
It supports almost all video types such as iMovie projects, MP4, HD MKV (H.264, MPEG-2 HD), iTunes Video (M4V), Quick Time Video (MOV, QT), etc.

#2 Burn videos to DVD-Video disc, DVD folder, or ISO files for any DVD player
Burn iMovie project to DVD in the most dominant format DVD-Video so that you won’t have any problems playing the burned DVD on DVD player or computer.
#3 Different modes to control the burning size, speed, and quality
Burning modes include six types: Fit to disc, Best, High, Normal, Low, and Lowest.
As shown in the figure, in the "Best" mode, the iMovie video I imported will occupy 4.48G. Burning in this mode takes a longer time and produces better quality. In "Normal" mode, the same video only takes up 2.65G, indicating that it is compressed, but the video quality is still good.


"Fit to disc" will automatically increase or decrease bitrate based on video size. If your iMovie video is more than 4.7GB, you can choose this mode.
#4 Edit videos before burning
Before burning DVD, you can easily do editing such as rotating, cropping, adding effects/music/subtitles, etc.
#5 Advanced DVD burning settings
Set to burn DVD based on disc volume (DVD5, DVD9, or DVD10), TV system (NTSC or PAL), display ratio (16:9 or 4:3), 4 playback modes, etc.
Free Download macOS 10.15 or later
Instructions: how to burn iMovie to DVD to play on any DVD player
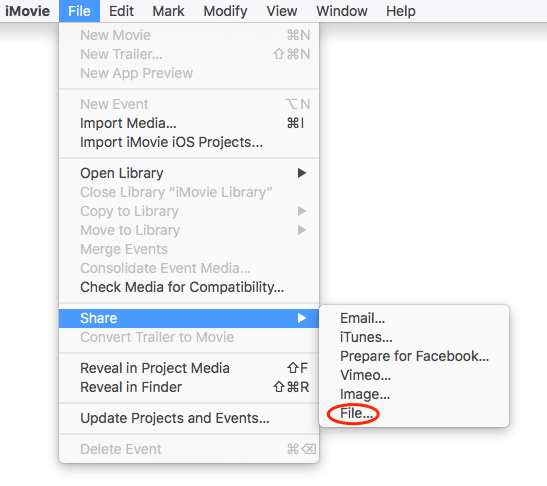
Step 1.Export from iMovie as a Video File
Insert a blank disc into your Mac. Choose “File” > “Share” > “File”. The File dialog box will show up.
From the "Format" dropdown menu, select Video and Audio. From the Resolution menu, choose the resolution you prefer. It's recommended to select a high resolution such as 1080p 60. Click “Next” and select a folder to keep the exported file. Click "Save".
Step 2.Load iMovie Video to Cisdem DVD Burner
It is very simple to load video files. Straightly drag iMovie video files to the DVD burner. Then, set TV standard and DVD quality at the bottom.

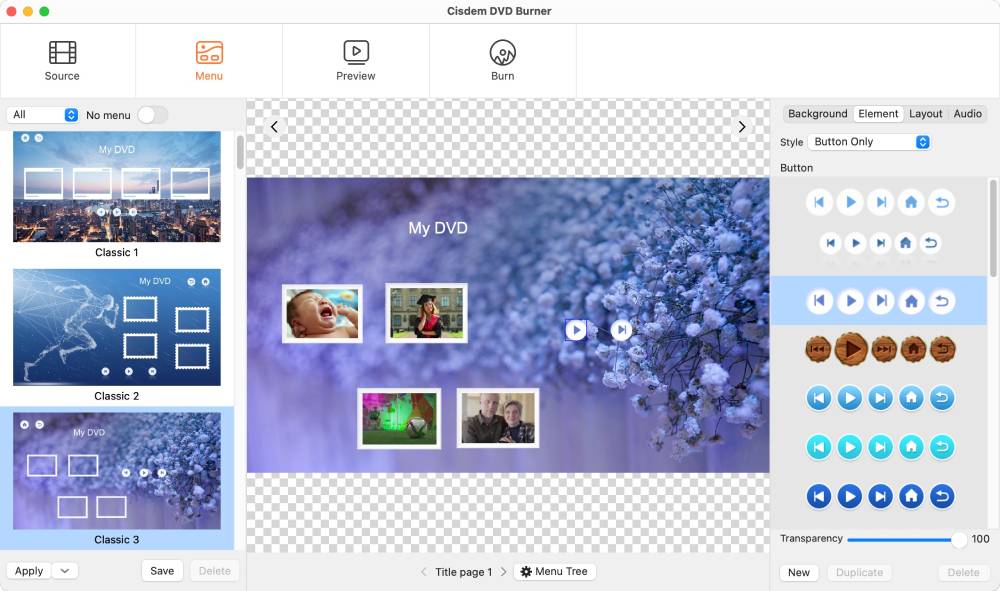
Step 3.Customize DVD Menu for Better Playing Navigation
In the top tab, click the "Menu" tab to display the menu design window.
choose a template, set a background (image, color, or custom image), customize buttons and frames with various style options, and style text with different fonts, colors, and sizes. You can also add background music and apply it to all menus.
Once done, your DVD menu will look more stylish and beautiful.
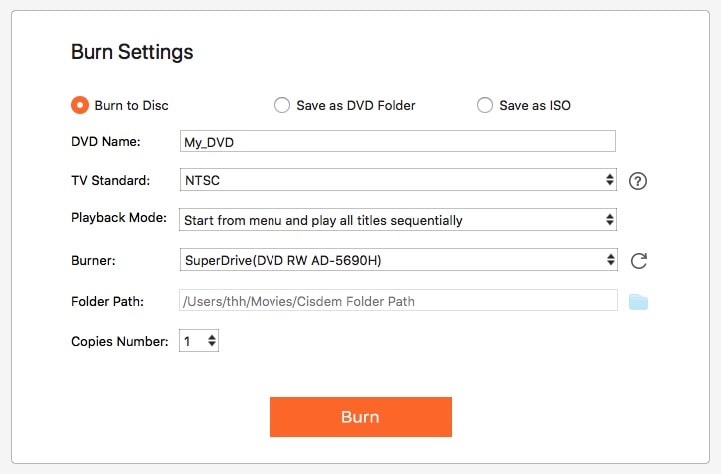
Step 4.Export iMovie Video to Disc
Before you burn iMovie to DVD, you can preview the work by clicking  to check it if goes within your requirements.
Then click  to switch to the DVD output window, which allows you to configure settings like DVD format, copies number, etc.
Now you can click "Burn" to start.
Free Way to Burn iMovie to DVD without iDVD
If your Mac doesn’t have iDVD, you can also use free iDVD alternatives.
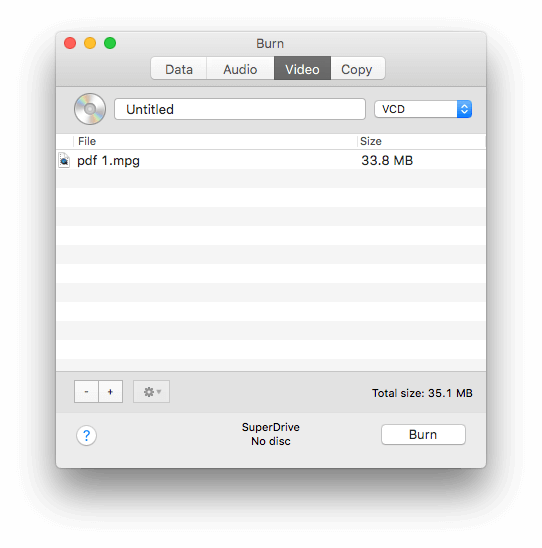
Burn is a free and open-source DVD burning app for macOS. This iMovie to DVD creator allows you to create discs effortlessly. Coming with a very simple interface, Burn lets you easily select the type of DVD or CD you want to burn. But some burned DVDs won’t work with new DVD players and the app may crash unexpectedly.
Below is a brief tutorial on how to export iMovie project to DVD using this DVD creator.
- Start iMovie and export your video project. Place an empty disc on the DVD tray.
- Download and install Burn on your Mac. Launch the app.
- In the bottom-left corner, click the "+" symbol. Browse and select the iMovie project file you’ve just exported.
If the video file is not supported by Burn, the One incompatible file dialog box will show up asking if you want to convert the file to the supported format. Click "Convert". The conversion will take a while. - After the conversion is finished, the file will appear in Burn. Click "Burn", and this app will start burning iMovie project to the disc inserted into your computer.
![burn for mac]()
What If You Wish to Burn iMovie to a Data DVD?
When you burn iMovie project to data DVD, the burned DVDs won’t play on a regular DVD player. Here are 3 easy methods that don't need to install DVD software, and support different disc formats.
#1 How to burn iMovie to DVD with iTunes
iTunes allows you to create various types of discs including DVDs. The instructions below will show you how to burn iMovie project to DVD using iTunes.
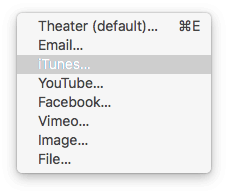
- Launch iMovie. Select the iMovie project you are going to burn to DVD. Go to "File" > "Share" > "iTunes". The iTunes dialog box will appear.
![export imovie project to itunes]()
- From the "Resolution" dropdown menu, it’s recommended to choose the highest resolution available. Click "Share". Wait for the exporting to finish.
- Launch iTunes. Choose "Movies" > "Library" > "Home Videos". The iMovie video should appear there.
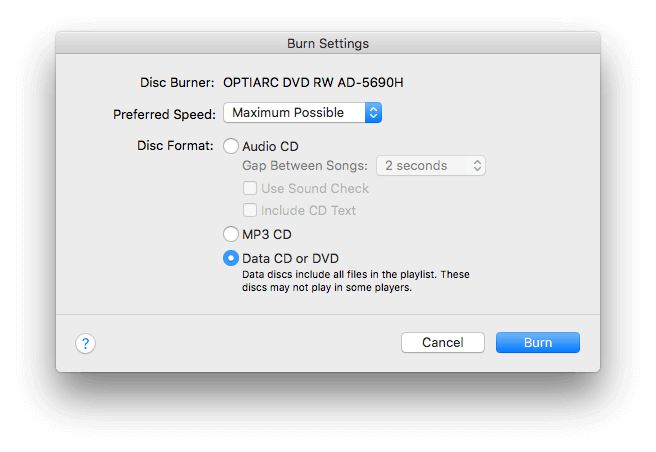
- Create a playlist that contains the iMovie video. Insert a blank disc. Select the said playlist. Choose "File" > "Burn Playlist to Disc".
- In the "Burn Settings" dialog box, select "Data CD" or "DVD". Click "Burn". This is how to burn a DVD from iMovie using iTunes.
![itunes burning settings]()
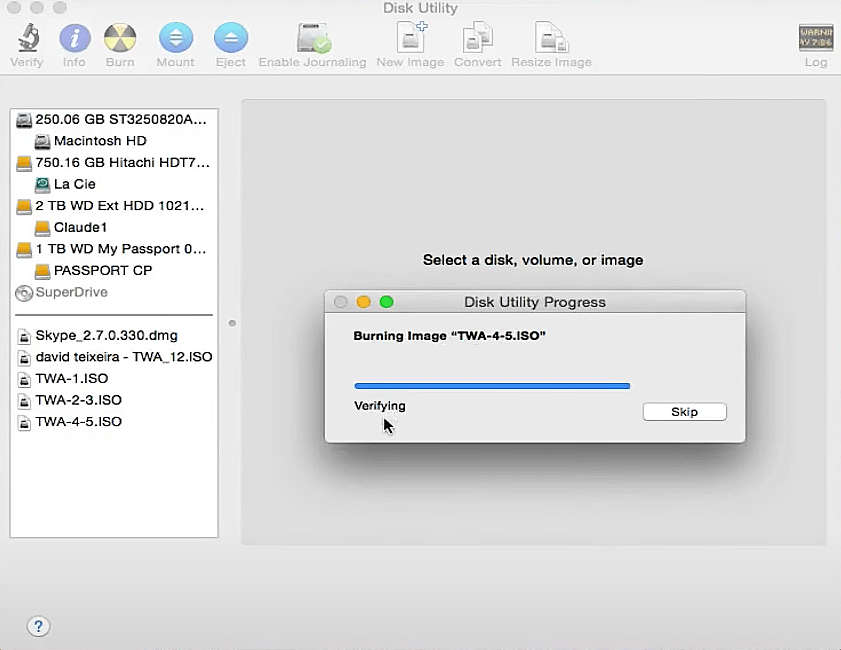
#2 How to put iMovie on DVD with Disk Utility
On Mac OS X 10.10 or older
- Put a blank DVD in the drive, a dialog box will pop up.
- Choose the action “Open Finder”, then Hit “OK”.
- Start Disk Utility. Go to use the “Burn” function.
- Locate and select iMovie media files. Press “Burn”.
On Mac OS X 10.11 or later
- Find the iMovie projects you exported to your Mac.
- Right-click them and pick “Burn ‘xxx’ to a disc" from the menu that comes up.
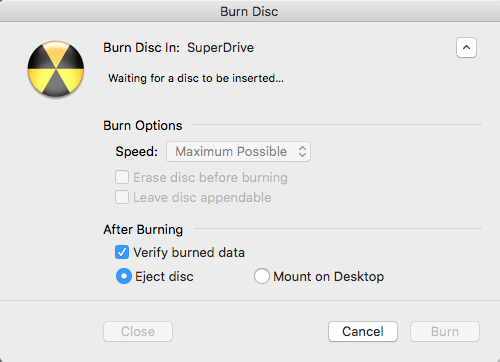
- Set the speed and after-burning options.
- Insert a disc and start making a DVD from iMovie videos.
#3 How to burn iMovie to DVD with Windows Media Player
You can also burn iMovie to DVD on a Windows PC. You can do the burning by using Windows Media Player or WMP, the built-in media player on Windows 10, Windows 7, and the previous versions.
- Export your iMovie project as a video file using the step mentioned above.
- Transfer the iMovie project file to a PC using the flash drive, cloud service, or a different method you prefer.
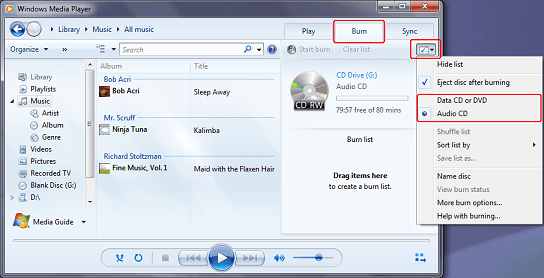
- Launch WMP. In the upper-right corner, click "Switch to Library".
- In Library, click "Burn". Go to the "Burn" tab. From the dropdown list in the upper-right corner, select "Data CD" or "DVD".
- Insert a black disc. If you see the "AutoPlay" dialog box, click "Close".
- In the "Player Library", choose "Organize" > "Manage libraries" > "Videos". Click "Add" to add the iMovie project file transferred to PC.
- Create a burn list that contains the iMovie file. Click "Start" to start burning iMovie to DVD.
![burn imovie to dvd on windows pc]()
Conclusion
Hopefully, these tools and instructions on how to burn iMovie to DVD can be helpful to you. After burning DVD from your iMovie projects, you can easily play them on DVD player, distribute and share them with your parents, friends, etc. The physical copies can also serve as a reliable backup.

Jenny is a technology editor who has been blogging since she was a student. Since joining Cisdem, she focuses on writing articles about video software and how-to guides. She loves exploring new tools and techniques.

JK Tam is the lead developer at Cisdem, bringing over two decades of hands-on experience in cross-platform software development to the editorial team. He is now the lead technical approver for all articles related to Data Recovery and DVD Burner.