

How to Record Voice Memos on Mac (2026 Guide)
 108
108
 0
0


Want to quickly jot down ideas, lectures, meetings at school or work? Record them instead of typing. Luckily, your Mac comes with a free app called Voice Memos for this. Read the article how to record a voice memo on Mac with the built-in Voice Memos app, plus two alternatives (and also work for Zoom calls and YouTube audio).
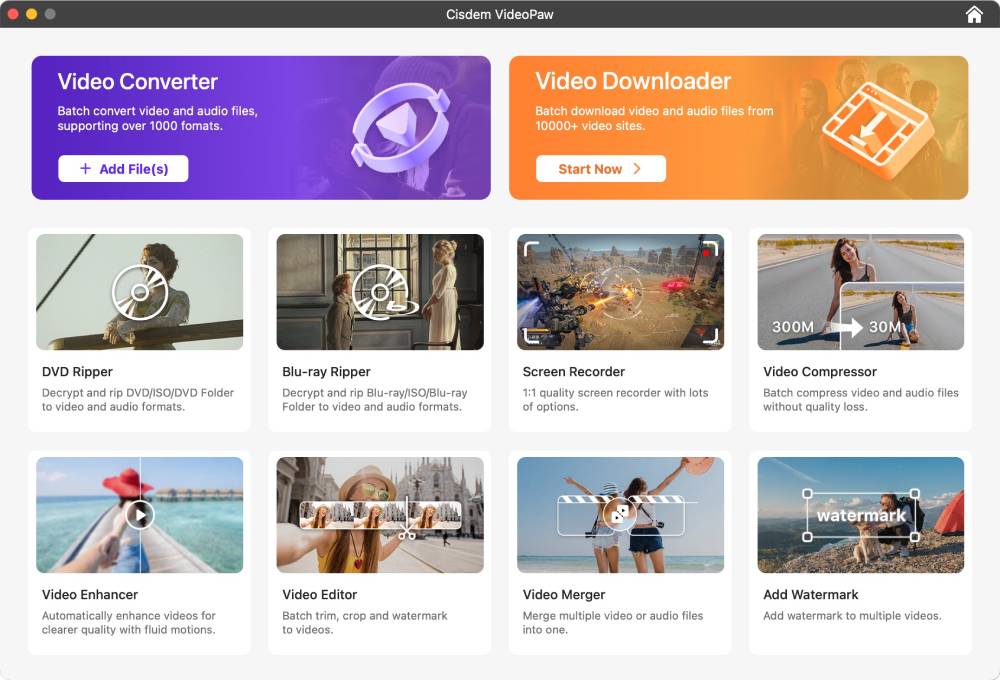
 Cisdem VideoPaw
Record Voice Memo & System Audio Easily
- Record microphone, internal audio, or both
- No extra setup or plugins needed
- Save recordings to MP3/M4A/WAV or convert to any popular audio format
- Record in high quality
- Record YouTube audio, Zoom meetings, and more
- Capture your screen and webcam
- Schedule recordings to start and stop automatically
- Trim, merge, and compress recordings
- Extra: video and audio converter/downloader, DVD and Blu-ray ripper
 Free Download macOS 10.15 or later
Use Voice Memos App on Mac to Record and Save Audio
Already use Stickies or Notes to jot things down? But recording a voice memo is even faster. Voice Memos app is also built in since Mojave, just a voice version of sticky notes. It's free and simple to use.
Steps to Record a Voice Memo on Mac Computer
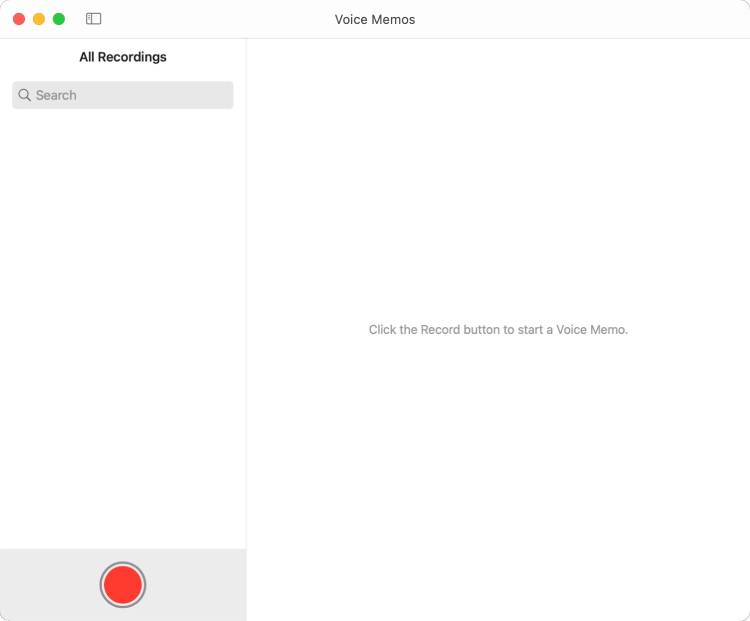
Step 1. Launch Voice Memos
Find the app in one of these ways:
- Your Applications folder
- Launchpad
- Press Command + Space and type Voice Memos
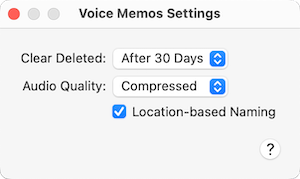
Step 2. Configure settings
Click “Voice Memos > Settings (Preferences)” in the top menu bar or press Command + comma key to open the settings window.
- You can set how many days before deleted recordings are permanently removed.
- Choose the “Compressed” or “Lossless” option from Audio Quality. The former is to get a smaller output file size (about 60MB per hour), while the latter is to get better audio quality (about 300-400MB per hour).
- “Location-based Naming” is turned on by default, so your voice memos are named after your current location. If you uncheck it, memos will name as “New Recording”, “New Recording 2" and so on.
Step 3. Start recording your memo
Back to the main interface, click the red record button to get started. The waveform moves when your Mac picks up sound. You can pause and resume anytime.
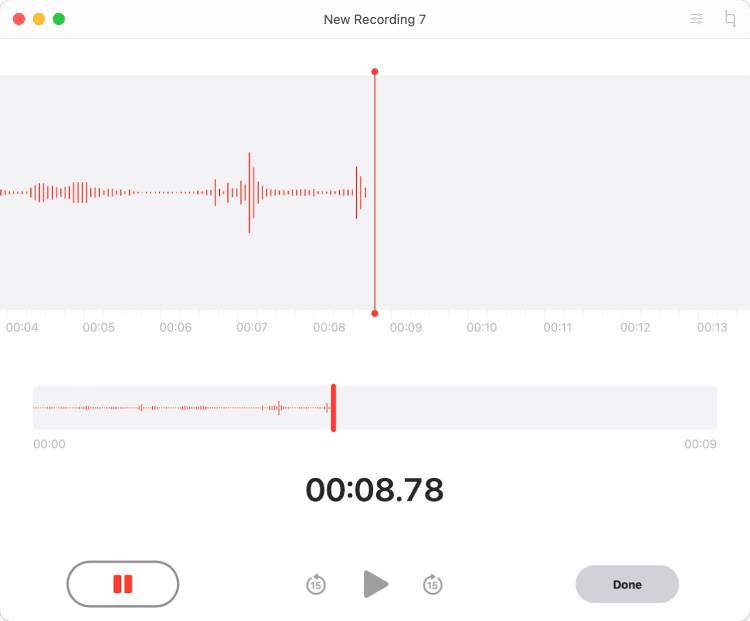
Step 4. Finish recording
Once finished, click the “Done” button. Your recording will appear in the list.
Tips for Recording Voice Memos
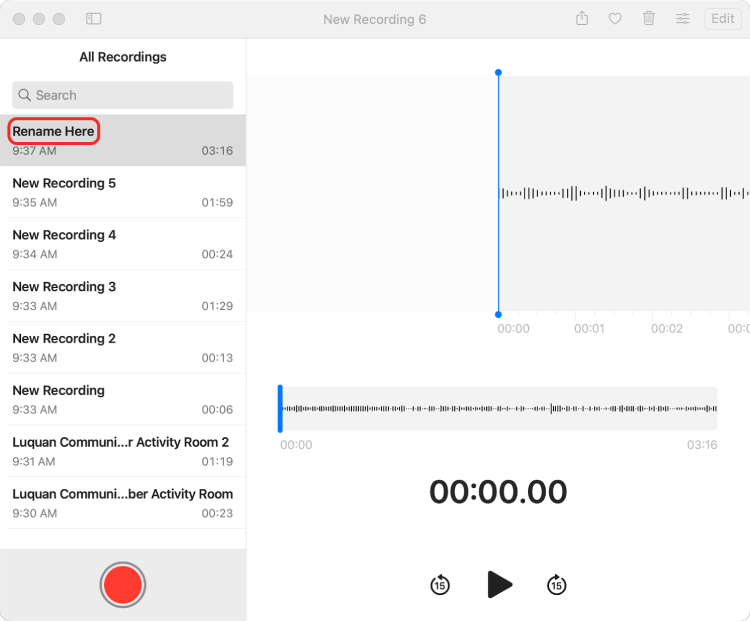
1. Rename manually
If you want to give your recording a custom name, double-click the title in the list and enter the name.
2. Find and export the recording file
Press Shift + Command + G, then look for the recordings at following paths.
For macOS Ventura and later: ~/Library/Group Containers/group.com.apple.VoiceMemos.shared/Recordings/
For macOS Mojave through macOS Monterey: ~/Library/Application Support/com.apple.voicememos/Recordings/
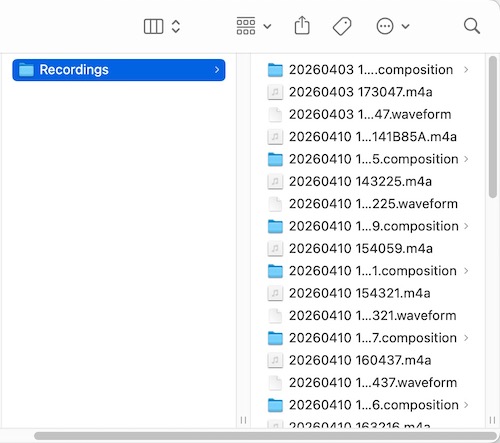
Note: All recordings are automatically named with timestamps by default (e.g., 20260403 173047.m4a). If you’ve many recordings, it’s hard to tell which file is which. You can just drag a memo out of the list into any folder, and it saves as an M4A file with whatever name you gave to it.
3. Edit voice memos quickly
Trim: Cut silence from the start or end
Delete: Remove any unwanted sections
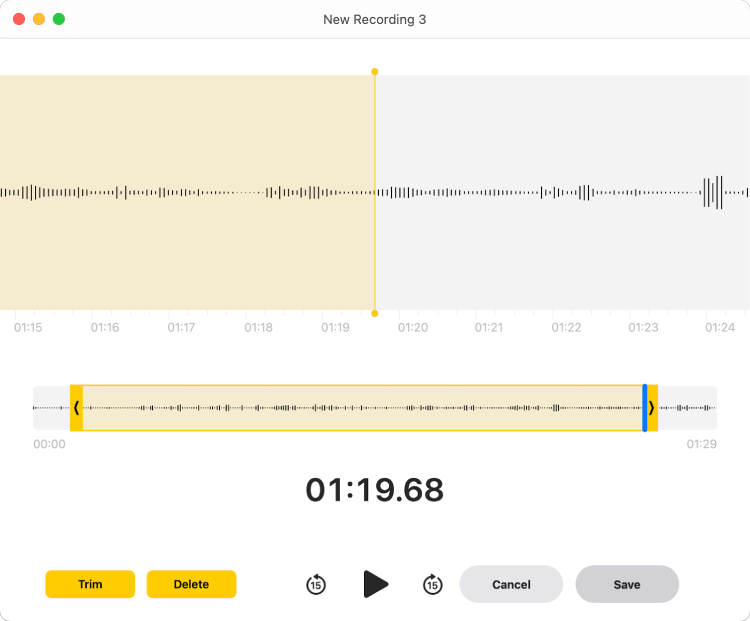
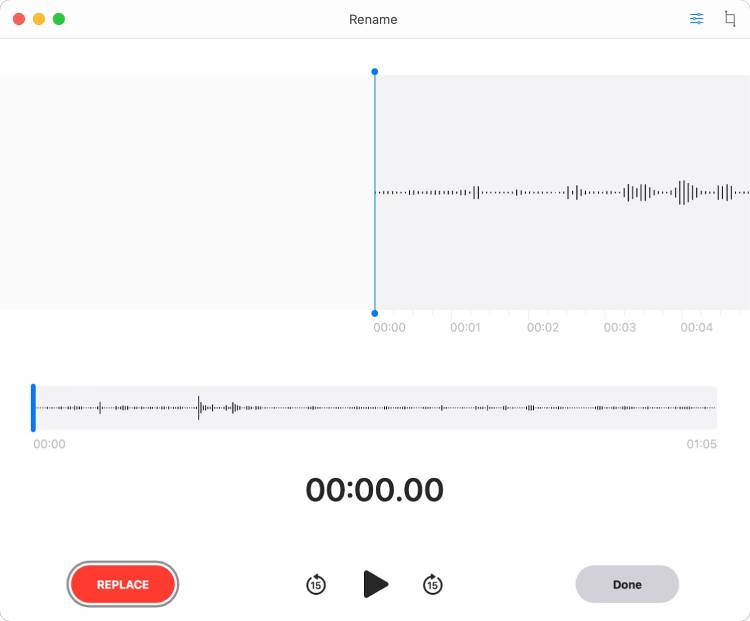
Replace: Fix mistakes by re-recording only specific parts, no need to redo the whole recording
Enhance Recording: One-click noise reduction for clearer voice
Skip Silence: Auto-jumps pauses during playback

Note: Trim/Delete/Replace can permanently change the file or save as new recording. Playback speed/Enhance/Skip Silence are just playback filters, and only work inside Voice Memos. If you export and play the recording anywhere else, you'll hear the unprocessed audio.
4. Sync voice memos to other Apple devices via iCloud
Turn on Voice Memos in “System Preferences or Settings > your name > iCloud” on your Mac and other Apple devices. Recordings will appear on all your devices automatically.
Fix Voice Memos Not Recording on Mac
If no waveform appears after you start recording, Voice Memos isn’t actually recording audio. Follow these three fixes.
Fix 1: Close conflicting apps
The problem: App like Zoom or Teams, is using the microphone and blocking Voice Memos.
The fix:
- Quit any apps that might be using the microphone.
- reopen Voice Memosit.
- Try recording again
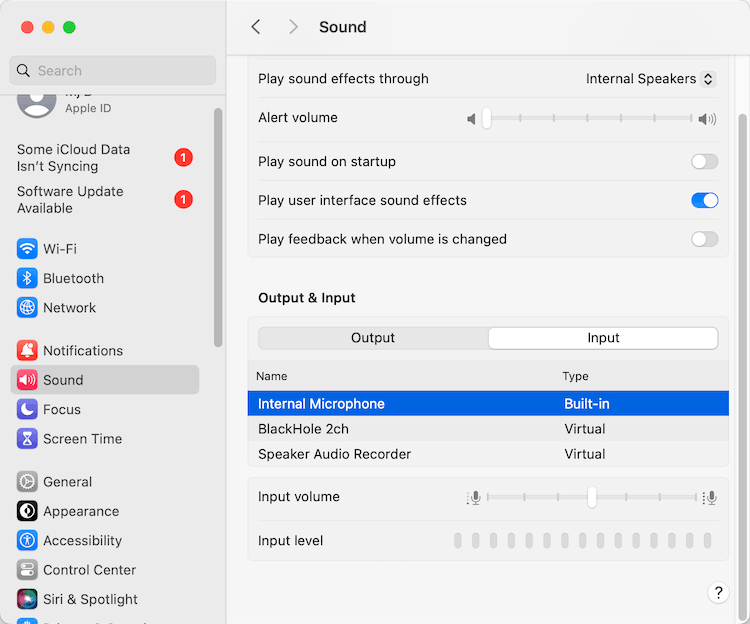
Fix 2: Check your input device
The problem: Your Mac is using the wrong input.
The fix:
- Open "System Settings > Sound > Input".
- Choose Built-in, External USB, or Headset microphone.
- Speak into your mic. You should see sound waves jumping around in the input level bar.
- If the level is low, drag the input volume slider up until you see it respond.
![make sure choose mic as sound input]()
Fix 3: Restart Core Audio or Restart Your Mac
The problem: A system-level audio issue.
The fix:
1. Search Activity Monitor in Launchpad and open it.
2. Type coreaudiod in the search box.
3. Select it and click the "X" button to quit the process.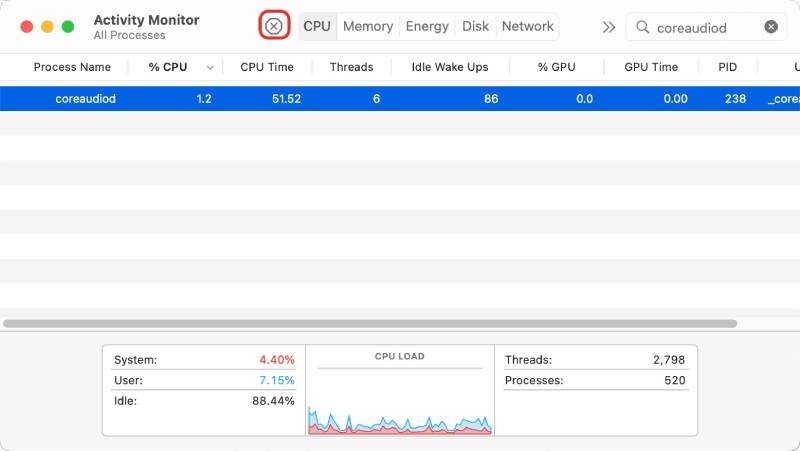
If it still doesn’t work, restart your Mac. That usually fixes most audio issues.
Note: When Voice Memos won’t record on a Mac, some users try to enable it in "System Settings > Privacy & Security > Microphone", but Voice Memos won’t show up there. As a built-in and trusted Apple app, it already has the permissions, no need manually turn on the Microphone.
If these fixes don’t help, Voice Memos may not be the ideal option for you. Consider giving some other tools a try.
FAQs
How long can Voice Memos record?
No time limit. You can record continuously, but be sure to check if your Mac has sufficient storage space.
Can Siri capture a voice memo?
Yes. Give a voice command to Siri, such as "Hey Siri, start recording a voice memo". Siri will open the Voice Memos app and start recording instantly. It makes recording voice memos on your Mac more efficient.
Can you combine recordings in Voice Memos?
No. Voice Memos doesn't have a merge feature. You can use QuickTime Player (go to "Edit > Add Clip to End" to merge recordings in M4A format), or Cisdem VideoPaw (use its Video Merger module to save all recordings in any audio format you want).
Can Voice Memos record a Zoom meeting?
No. Voice Memos only records sound coming into your microphone. It can’t record audio playing from your Mac (called internal audio or system audio), including the other person's voice in Zoom.
Alternative Tools for More Advanced Voice Memo Recording on Mac
Voice Memos app on Mac not recording?Can't record audio internally? Want to merge memos, save in other audio formats, or access more advanced features? Use QuickTime and VideoPaw. Here's when to switch to them.
Capture Voice Memos with QuickTime Player on Mac
QuickTime is another built-in tool for Mac to record audio and screen. It can split, trim, and merge memos, and can also be used to remove audio or video from a file.
Use it when:
- Voice Memos failed to record your microphone and you need a free alternative
- You want to record Mac internal audio and don’t mind spending some time setting up BlackHole
- You need to combine two or more Voice Memos recordings
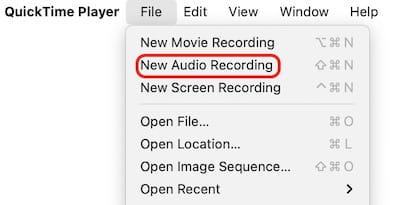
How to use it to record a voice memo from external mic:
- Launch QuickTime Player on your Mac.
- In the upper-left corner of your screen, click "File > New Audio Recording".
![create new audio recording]()
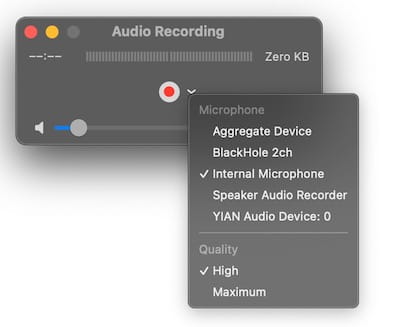
- Click the small downward arrow next to the red record button. Pick a microphone from the dropdown menu, e.g. Built-in or Internal microphone.
![choose microphone]()
- Adjust the volume slider to monitor your input level.
- Start recording a voice memo.
![start audio recording with quicktime]()
- Stop it whenever you want.
![stop audio recording in quicktime]()
- Go to "File > Save" to name and save your recording as an .m4a file.


What if you need to capture your Mac’s system audio with QuickTime?
QuickTime also can't record voice memos internally by default, but with a free, open-source tool called BlackHole, you can route your Mac's internal audio into QuickTime. Download BlackHole from https://existential.audio/blackhole/ (more details) and then use Audio MIDI Setup to complete the configuration (more details). While recording, choose BlackHole as your audio input source.
Record Voice Memos on Mac Using Cisdem VideoPaw
VideoPaw is a versatile third-party multimedia tool. It records microphone, system audio, screen, or webcam, separately or all together. Plus, you can schedule recordings to start automatically at a specific time and stop after a set duration. In the free version, you can record voice memos for up to one minute.
Use it when:
- You want to record internal audio without complicated setup
- You want to convert and save voice memos recordings to MP3, M4A, WAV, or any format
- You need to quickly merge multiple recordings
- You need a dedicated recorder that can capture your screen with audio, camera, and annotations
- You want to directly download audio from YouTube or other websites
How to record microphone or internal audio on Mac easily via VideoPaw:
- Download and install VideoPaw.
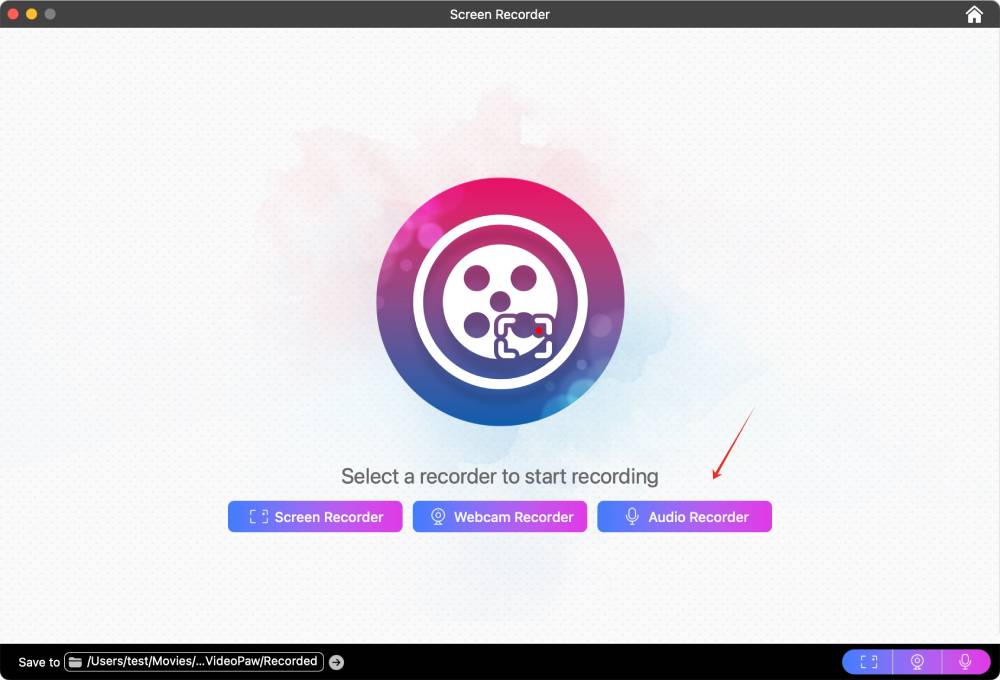
Free Download macOS 10.15 or later - Open the software. On the Home screen, select the Screen Recorder module.
- Click the “Audio Recorder” button.
![choose audio recorder]()
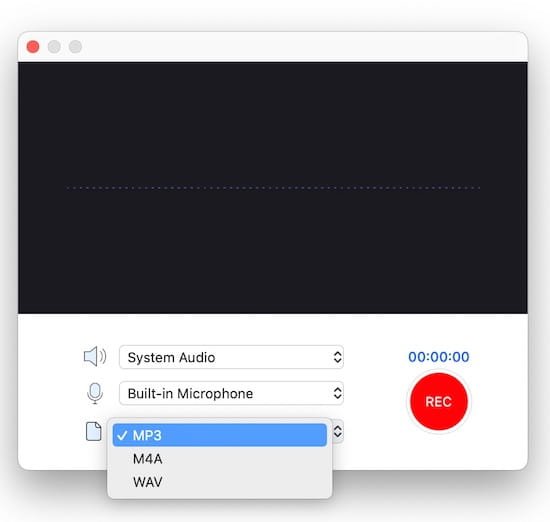
- Select your audio sources. By default, it records both microphone and system audio on Mac. If you only want a basic voice memo from your microphone, click the speaker icon to turn off system audio.
- Click the format dropdown menu and choose an output audio format.
![configure audio recording settings]()
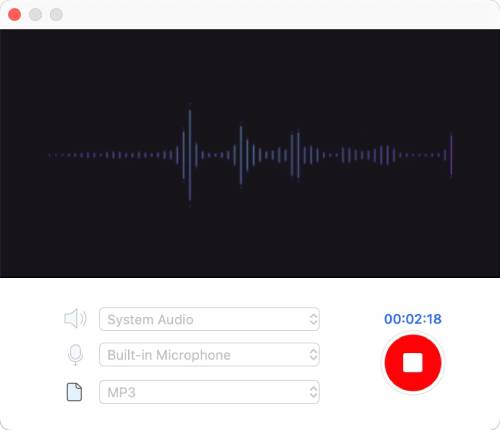
- Click the “REC” button to capture a voice memo.
![start audio recording with videopaw]()
- Speak or play the audio you want to record.
- Click the stop button when you’re finished.
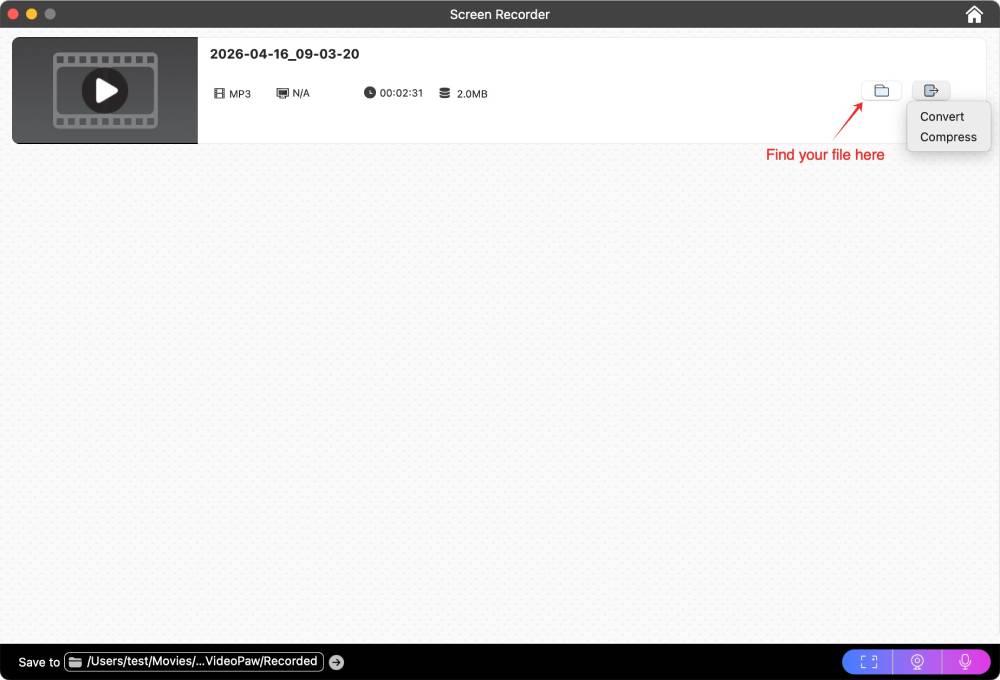
- The recording will appear in the list. Click the folder icon to quickly find the file.
![recording list in videopaw]()
Tip:
VideoPaw is an all-in-one media tool. You can add the recording to the Converter, Compressor, Editor, or Merger to process it further.
Comparison: Voice Memos vs Alternatives
| Voice Memos | QuickTime Player | Cisdem VideoPaw | |
|---|---|---|---|
| Record your voice (microphone) | Yes | Yes | Yes |
| Record internal Mac sound | No | Need install BlackHole and configure | Yes |
| Record screen with audio | No | Yes | Yes |
| Output format | M4A | M4A | MP3, M4A, WAV, FLAC, M4B, and more |
| Save recording directly to any folder | Drag & drop | Yes | Yes |
| Sync recordings to iPhone | Yes | No | No |
| Edit audio and save it | Trim, replace | Trim, split, add clip to end | Trim, compress, merge, add chapters, adjust volume, add fade in/out effect |
| Download audio from YouTube | No | No | Yes |
| Price | Free | Free | $49.99/year (free trial available with limits) |
Can GarageBand capture voice memos?
Yes. GarageBand offers you better sound and more helpful editing options. But for a quick recording, Voice Memos app is more simple and faster to start. For internal audio recording, you can use QuickTime + BlackHole or VideoPaw.

Emily is a girl who loves to review various multimedia software. She enjoys exploring cutting edge technology and writing how-to guides. Hopefully her articles will help you solve your audio, video, DVD and Blu-ray issues.

Ryan Li is a senior developer at Cisdem. Since joining the company in 2017, he has led the development of Cisdem VideoPaw and now serves as the editorial advisor for all articles related to Video Converter.