

How to Screen Record on Mac with Audio (Internal & Microphone)
 173
173
 1
1


Recording your screen on a Mac with microphone is easy by pressing Cmd + Shift + 5, but capturing internal system audio is a different story.
macOS doesn’t allow native screen recording tools to capture internal sound, likely due to privacy and copyright reasons. So how do you screen record on Mac with audio that includes both? This guide will show you three proven ways.
 Cisdem VideoPaw
Recommended Screen and Audio Recorder for Mac
- Record your screen with internal audio, microphone, webcam, or all three
- Record the entire screen, a specific part, or a particular window
- Record screen, audio, or webcam only
- Add real-time annotations like shapes, texts, doodles while recording
- Save or convert to MP4, AVI, FLV, or any format
- Set a fixed recording duration or schedule start and end times
- Create high-quality screen recordings
- Extra: also edit/compress/download videos; digitize DVDs/Blu-rays
- Simple to use
 Free Download macOS 10.15 or later
Quick Comparison
| Method | QuickTime / Cmd+Shift+5 | Cisdem VideoPaw | Screen-Recorder.com |
|---|---|---|---|
| Internal audio | ✅ (with BlackHole) | ✅ (auto) | ✅ (tab only with BlackHole) |
| Microphone audio | ✅ | ✅ | ✅ |
| Output format | MOV | MP4/AVI/FLV (direct) + convert to 300+ formats | MP4 |
| File size | Full resolution, large file | Full resolution with efficient compression | Up to 1080p, small file |
| Frame rate | Variable (not adjustable) | Customizable (15–60 fps) | Constant (not adjustable) |
| On-screen tools | ❌ | 6 tools | 3 tools |
| Editing support | ❌ | ✅ | ✅ (available after login, limited in free) |
| Price | Free | Paid (1-min limit on free) | Free |
| Difficulty | Medium | Easy | Easy |
| Best for | Basic, occasional recording | Professional recording, tutorials, frequent use | Temporary, tab-based recording |
Install BlackHole (Required for Method 1 & 3)
Method 1 and Method 3 both require a virtual audio driver to route system sound to your recording tool on Mac. BlackHole is a free, widely trusted tool that does the job.
If you’re going with Method 2 (Cisdem VideoPaw), BlackHole will be installed automatically, so you can skip this section.
The good news? You only need to install BlackHole once. After it's set up, you can use it for any future internal audio recording needs.
Here are the installation steps:
- Go to the official BlackHole download page at https://existential.audio/blackhole/.
- if you don’t want to donate, click "I can’t afford to donate", then enter your email and name to receive the download link.
- Click the download link in your email. Download “BlackHole 2ch” (the 2-channel version is sufficient for most screen recording needs).
![]()
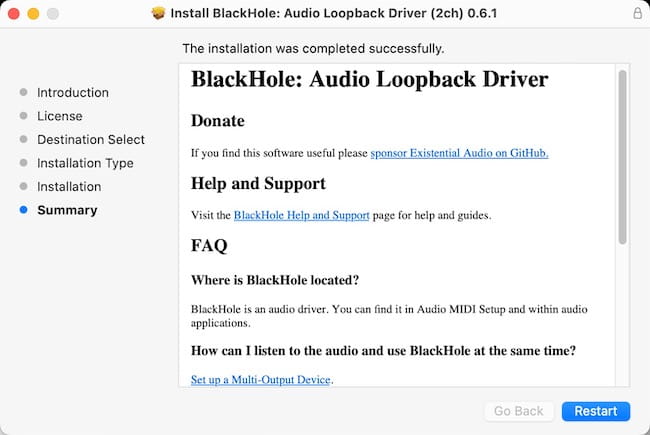
- Open the .pkg file you downloaded and follow the installation wizard.
- Once installation completes, restart your Mac.
![]()
- Go to “System Settings > Sound > Output” to check if BlackHole 2ch has been successfully installed.

Method 1. How to Screen Record on Mac with Audio Using Free Native Solution
Advantages:
- Completely free
- Built into macOS
- Lossless screen resolution
Disadvantages:
- Require configuring BlackHole and Audio MIDI Setup
- The recording has a large file size
- No on-screen and editing tools
Every Mac comes with two built-in screen recording tools - QuickTime Player and the Cmd + Shift + 5 shortcut. Once you have BlackHole installed, you can use them record screen with sound from Mac computer and microphone.
Before you start, you can configure two things in Audio MIDI Setup:
A Multi-Output Device - Let you hear audio while recording.
An Aggregate Device - Combine BlackHole and your microphone so both are captured.
If you don't need these two settings, skip directly to the recording step.
Set the Multi-Output Device as your system output
If you simply select BlackHole as your sound output, two problems arise:
- You won’t hear anything while recording, even though the internal audio is captured successfully.
- You’ll need manually switch back to your speakers/headphones afterward.
The fix? Create Multi-Output Device. It routes audio to both BlackHole and your speakers/headphones simultaneously, so you can hear what’s playing.
Steps:
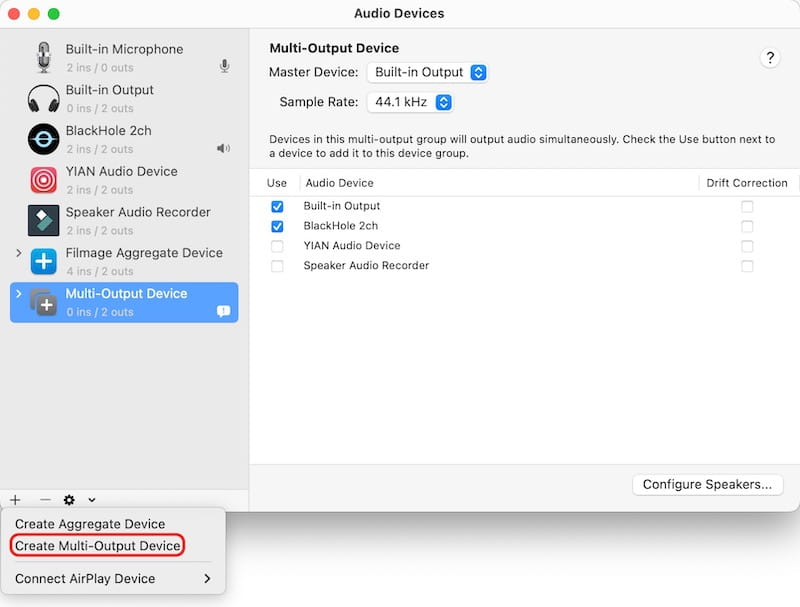
- Open Audio MIDI Setup from "Applications > Utilities" or search for it via Spotlight with "Cmd + Space".
- Click the "+" button in the bottom-left corner and select "Create Multi-Output Device”.
![]()
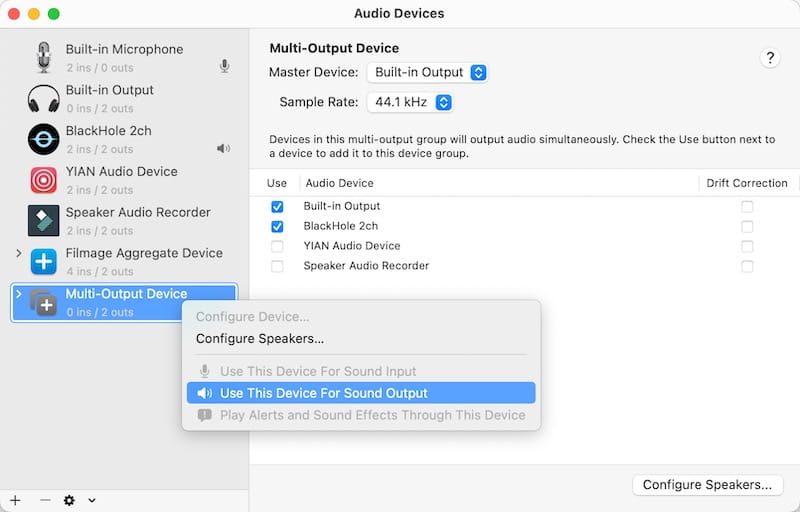
- In the right panel, choose "Built-in Output" as the Master Device.
- Check both "Built-in Output" (sometimes listed as MacBook Pro Speakers or similar) and "BlackHole 2ch".
- Right-click “Multi-Output Device” in the left sidebar and choose the "Use This Device For Sound Output" option.
![]()
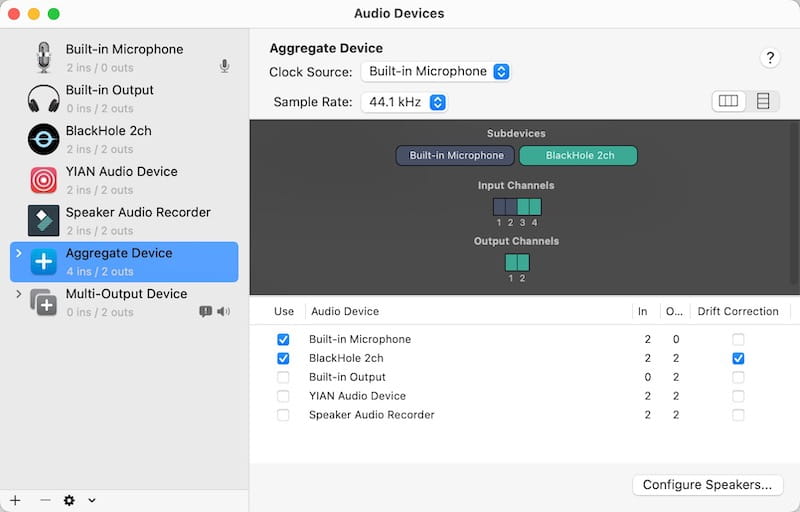
Create an Aggregate Device
To capture both internal sound and your microphone), combine them into a single virtual input.
- In Audio MIDI Setup, click “+” again and select “Create Aggregate Device”.
- In the right panel, choose "Built-in Microphone" as the Clock Source.
- Check "Built-in Microphone" and "BlackHole 2ch".
-
Enable "Drift Correction" only for "BlackHole 2ch" (the non-clock source device).
![]()
The setup is done.
How to record screen and sound on Mac with QuickTime or shortcut:
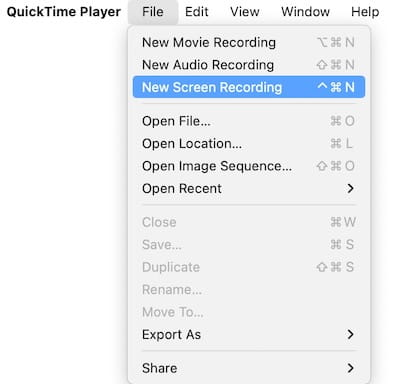
1. Launch QuickTime Player, then click "File > New Screen Recording". Or press "Cmd + Shift + 5" to open the screen recording toolbar directly.
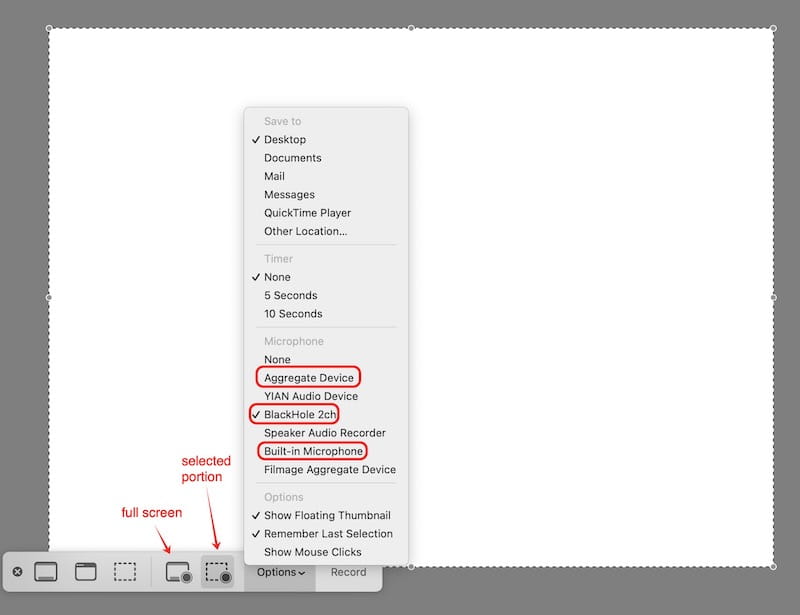
2. Click "Options" next to the record button.
3. Under Microphone, pick “BlackHole 2ch” (only system audio), "Built-in Microphone" (or your voice), or "Aggregate Device" (both).
4. Choose your recording area:
- Click the Record Entire Screen icon to capture everything.
- Click the Record Selected Portion icon to drag a custom area.
5. Choose the output location, timer, or other options.
6. Click the "Record" button.
7. To stop it, click the stop icon in the menu bar (at the top of your screen), or press "Cmd+Ctrl+Esc".
Method 2. How to Record Screen on Mac with Sound Using Professional All-in-One Solution
Advantages:
- Record the screen, audio, webcam, or everything together
- Support real-time annotations
- Trim, crop the recorded video, add chapters, effects, watermarks to it
- High quality and small file size
- Full-featured but easy-to-use
Disadvantages:
- $49.99/year subscription required, or the free version limits recordings to 1 minute
Cisdem VideoPaw is a dedicated screen and sound recorder for Mac. It can easily record screen with internal audio. It automatically installs BlackHole 2ch, no any manual audio setup. You can also choose to record with your voice and face.
Steps to use VideoPaw to record screen video on Mac with sound:
1. Download and install Cisdem VideoPaw.
Free Download macOS 10.15 or later
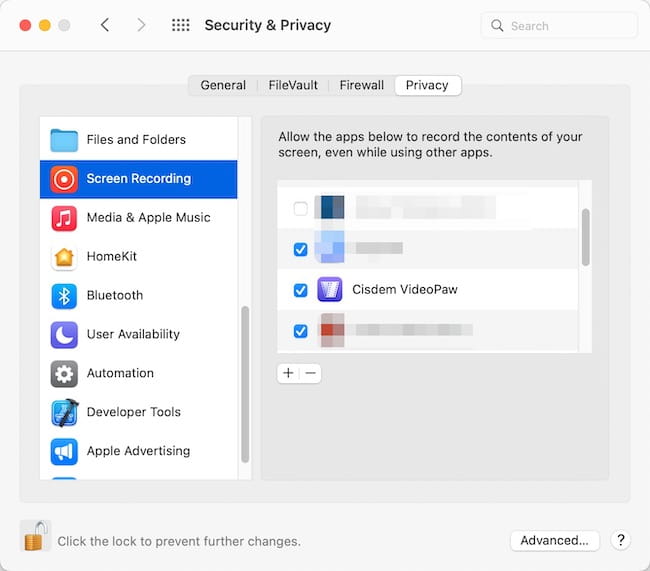
Note: When you first use VideoPaw to record, you'll need to grant screen recording permission. Head to "System Settings > Privacy & Security > Screen Recording". Check the box next to Cisdem VideoPaw to enable it.
2. Open it. Open its home dashboard, choose the Screen Recorder module.
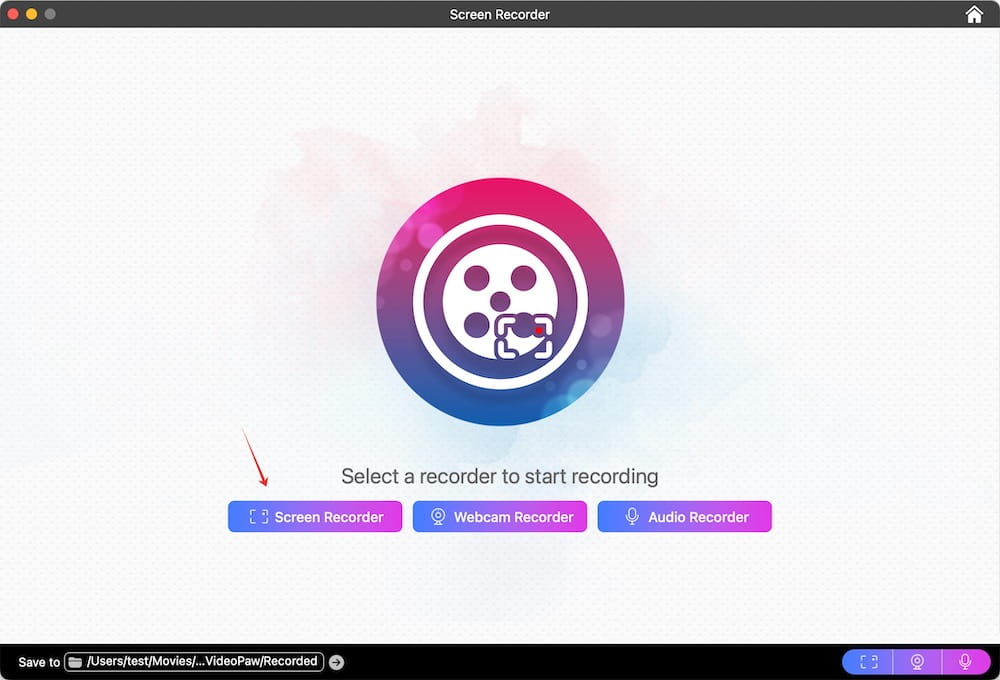
3. Select "Screen Recorder" as your recording mode.
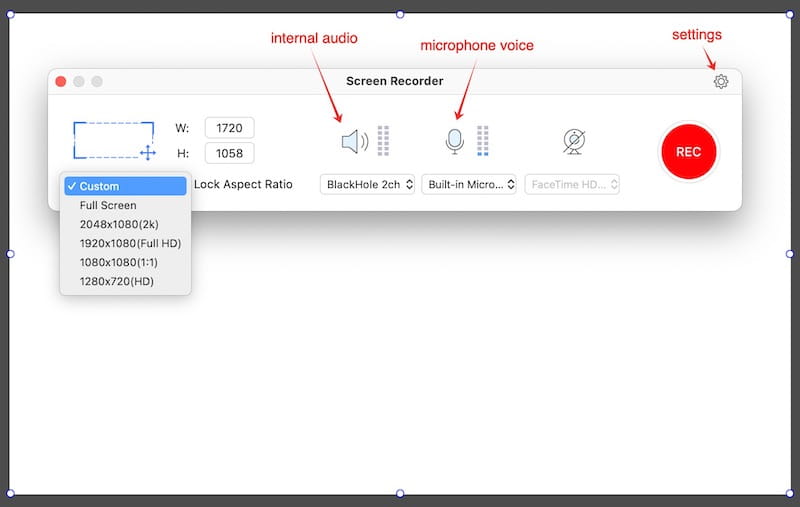
4. Configure audio sources.
In the main recording window, you’ll see three icon buttons.
- Speaker icon: control system audio
- Microphone icon: control your voice input
- Camera icon: control webcam overlay
Click the speaker, microphone, or both icons to enable them.
5. Select "Custom" to drag a specific region, or leave it as full screen. If you want to maintain proportions while resizing, enable "Lock Aspect Ratio".
6. Click the "REC" button to start a screen recording with audio on Mac.
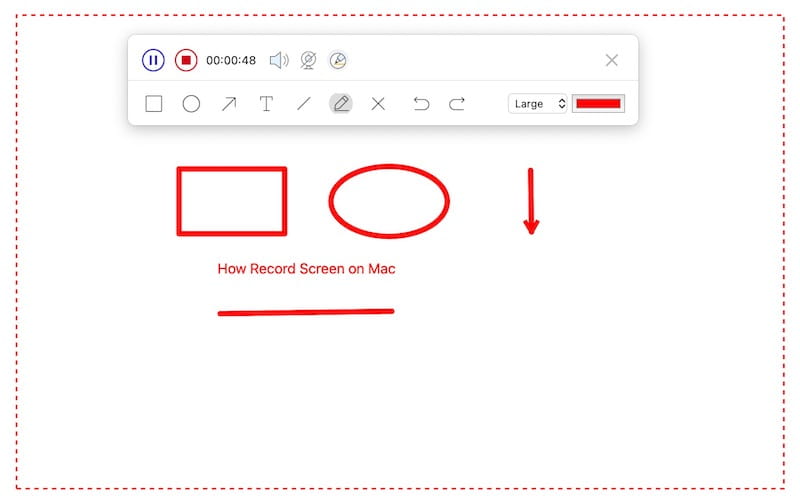
7. During recording, use the on-screen toolbar to draw.
8. When finished, click the stop icon in the menu bar.
Useful tips:
- In the recording window, you can also click the gear icon in the top right corner to open the "Settings" window. Change general settings (the default ones are ideal for most users) and record timer.
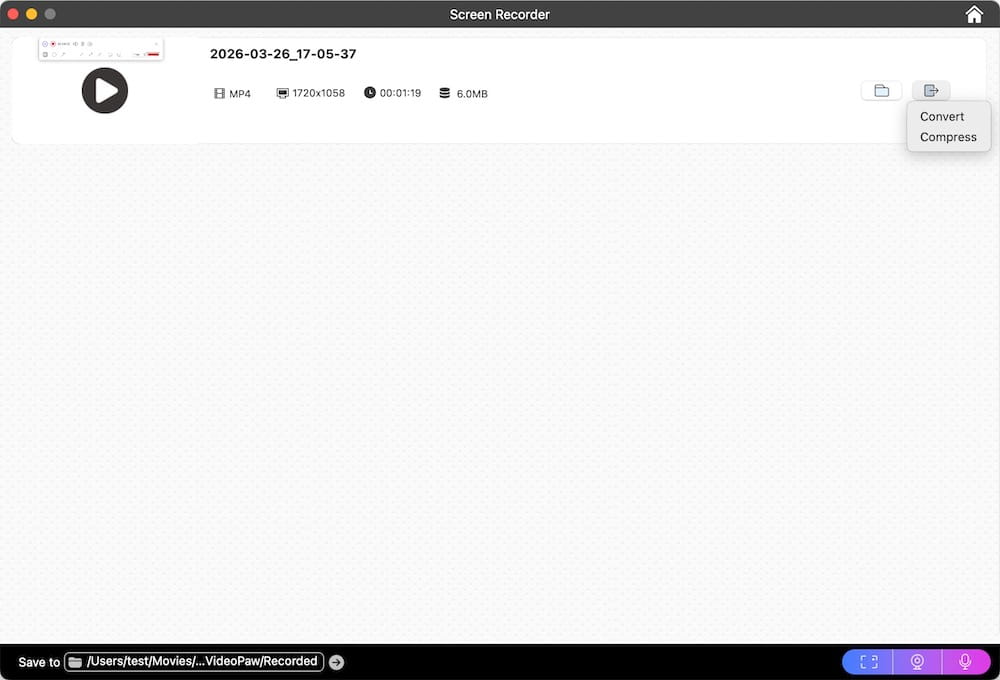
- After recording, the video lists in the interface. Click the folder icon to quickly locate the file, or send it directly to the Video Converter or Video Compressor module for further processing.
![]()
Method 3. How to Screen Record with Audio on Mac Using Online Solution
Advantages:
- Free to use
- Work in your browser; nothing to download or install
- Zoom, doodle and trigger celebration effects during recording
- The output file is small
Disadvantages:
- Virtual audio driver is needed
- Record internal audio only when capturing a browser tab
- No custom region selection
- Maximum 1080p resolution
If you need to record something quickly without recorder software, screen-recorder.com offers a browser-based alternative. It works on Google Chrome, Edge, and Firefox. You can use it to capture your browser tab, a specific window, or your entire screen.
Steps to use online recorder to record screen on Mac with sound:
1. Visit screen-recorder.com website in your browser. Click "Start Recorder".
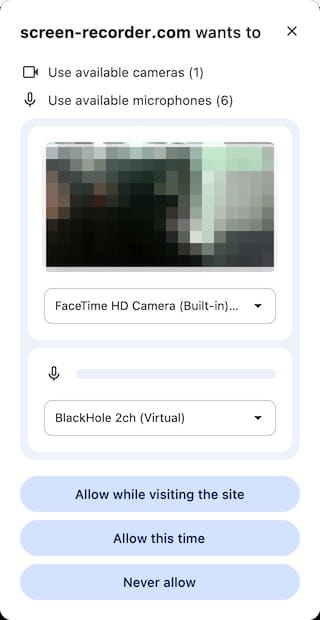
2. When prompted, select "BlackHole 2ch" or "Internal Microphone" from the list.
Tip: If you want to record both, select BlackHole 2ch, then enable your microphone from the recording interface later.
3. Click “Allow while visiting the site” or “Allow this time”.
4. Choose what to share: a tab, a winodw, or entire Screen. Click "Share".
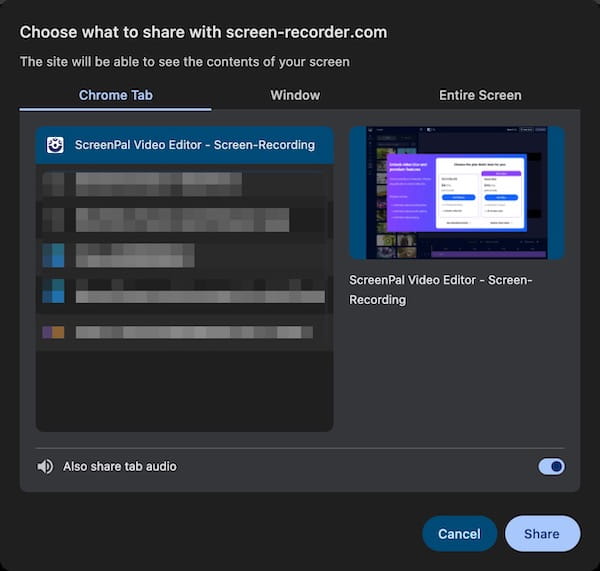
Note: Only selecting a tab lets you record system audio. Choosing a window or your entire screen will only capture your microphone.
5. Click "Mute" or "Camera" to allow them.
6. Click the red record button to start recording.
7. If needed, zoom in on the screen, doodle on it, or trigger celebration effects.
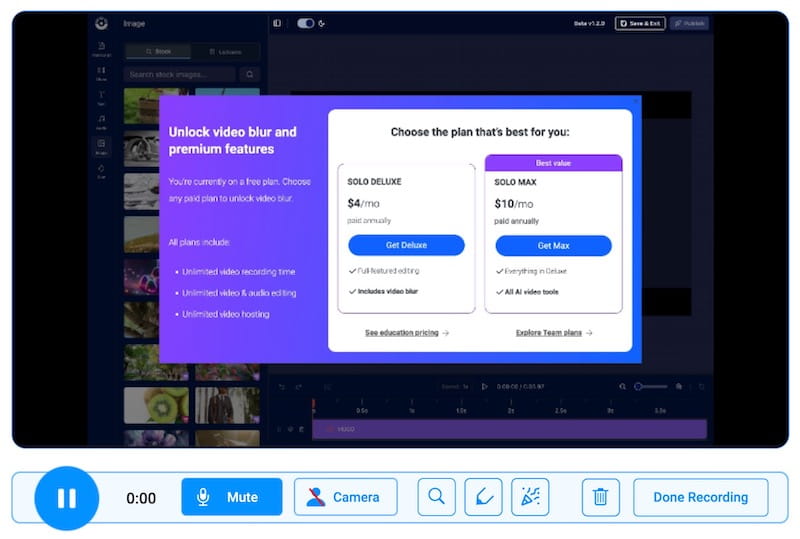
8. Click "Done Recording", then download the file.
Once you're done, click “Edit Online” and sign up for an account to access its limited free editing features - generating captions and adding text overlays.
Conclusion
There you have it - three reliable ways to screen record on Mac with both internal audio and your microphone.
If you don't mind spending time setup, choose method 1.
If you're willing to pay for a tool that just works - no hassle, no manual configuration, Go with method 2.
If all you need is to record a single browser tab, pick method 3.
For method 1 & 3, you can also use Loopback or Soundflower as alternatives to BlackHole.

Emily is a girl who loves to review various multimedia software. She enjoys exploring cutting edge technology and writing how-to guides. Hopefully her articles will help you solve your audio, video, DVD and Blu-ray issues.

Ryan Li is a senior developer at Cisdem. Since joining the company in 2017, he has led the development of Cisdem VideoPaw and now serves as the editorial advisor for all articles related to Video Converter.
Alejandro
Finally, someone who explains QuickTime's audio setup without making my brain hurt. The comparison table is helpful too. Nice work!