

How to Lock the Finder (and Trash) on Mac with a Password
 5
5
 0
0


The Finder is the default file manager app on macOS, with Trash being part of it. To protect your privacy or prevent others from messing around with your files and folders, you may want to restrict Finder access on your Mac.
In this article, I will share simple steps to lock Finder on Mac, along with advanced, easy-to-follow tips to further enhance protection.
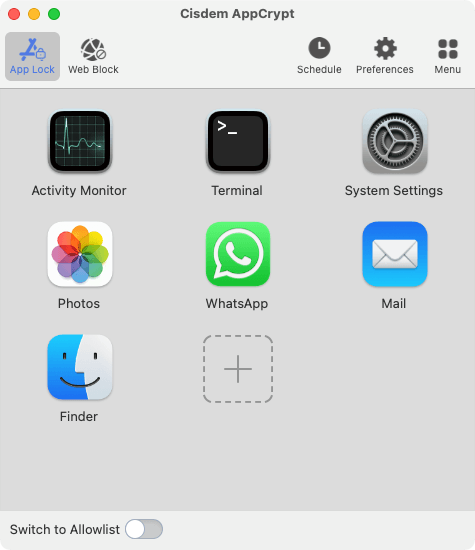
 Cisdem AppCrypt
Protect Finder and Other Apps on Your Mac
- Lock individual apps with a password, such as Finder
- Automatically re-lock apps after a period of inactivity
- Record failed attempts to open locked apps, with time, date, and (optionally) pictures of intruders
- Block access to websites, keywords, and website categories (e.g., Social, News, Adult)
- Allow you to lock apps and block websites permanently or during scheduled hours
- Easy to use and hard to bypass
- Help with privacy protection, productivity, and parental control


Steps: How to lock Finder and Trash on Mac
Here's how to put a lock on your Finder using a tool called Cisdem AppCrypt, or simply AppCrypt.
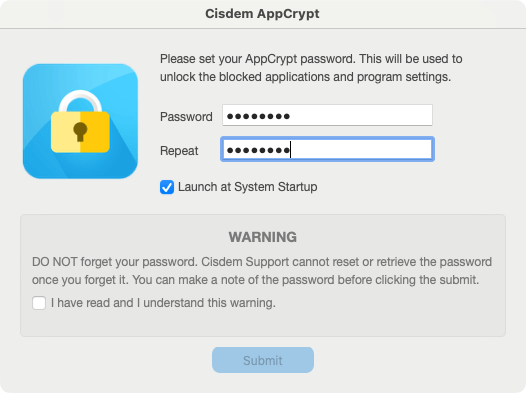
1. Download AppCrypt and install it. It's compatible with macOS 10.12 Sierra or later.
2. When you open this tool for the first time, set a password.
3. Click the tool's icon in the menu bar and choose Open Main Window.
![]()
Then, enter your password to enter the tool's main window.
4. In Finder's Go menu, choose Go to Folder.
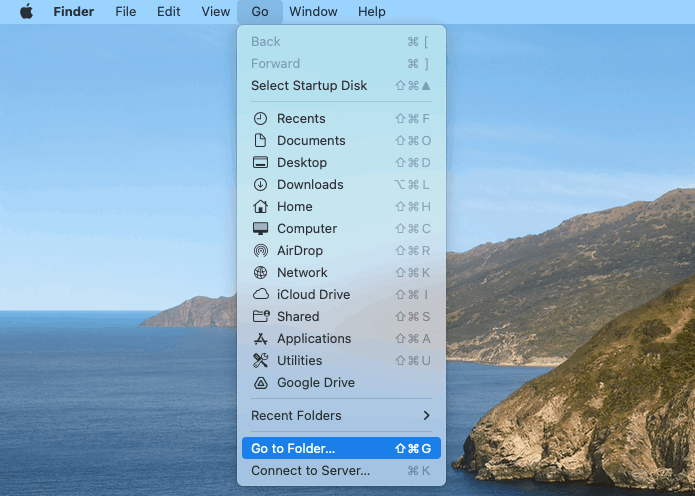
In the dialog that appears, enter /System/Library/CoreServices/Finder, and press the Return key.
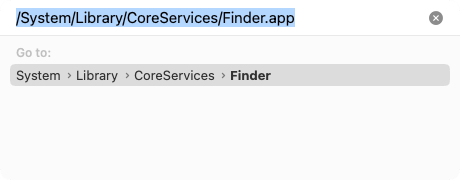
Now, a new window will appear, showing and selecting the Finder app.
5. Drag Finder into the App Lock tab of AppCrypt.
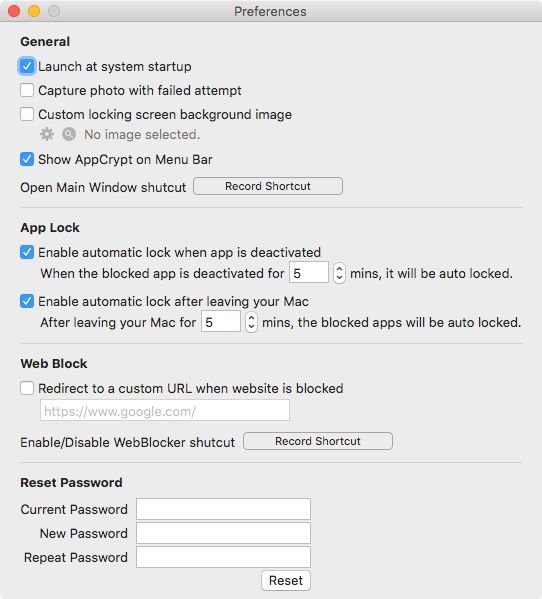
In addition, you can go to AppCrypt's Preferences to configure settings based on your needs, such as setting the lock to automatically start running as your Mac boots up, or enabling the automatic re-lock feature.
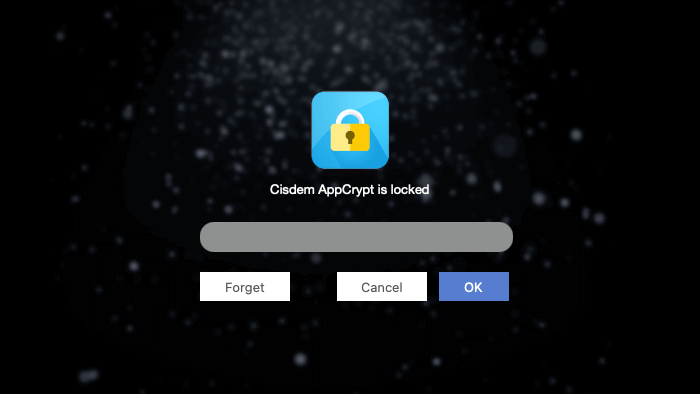
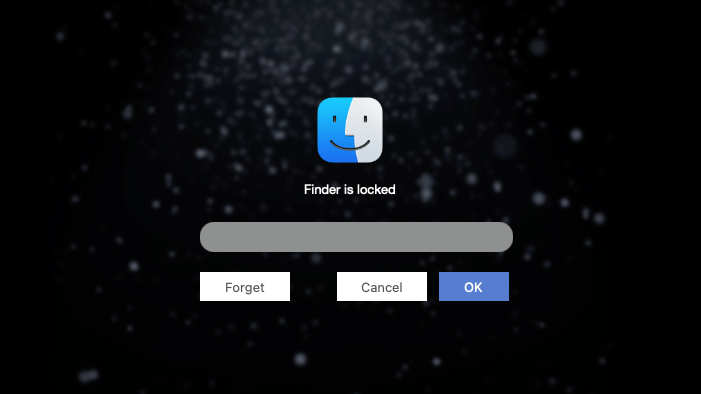
If anyone tries to open Finder, it won't open, and the lock screen will appear, telling you that Finder is locked. Only people who know the password can unlock it.
Now let's dig deeper into what actually happens when this file manager is locked, so you can easily understand whether the current protection is enough.
- Clicking the Finder icon in the Dock will bring up the lock screen, so will performing a right-click and choosing an option (such as New Finder Window or Find).
![clicking the Finder icon in the Dock bringing up the lock screen]()
- The Finder menu becomes inaccessible.
- Clicking the Trash icon will bring up the lock screen, so will choosing Empty Trash. (Emptying your Trash won't happen as long as you haven't disabled the Show warning before emptying the Trash option.)
![clicking the Trash icon in the Dock bringing up the lock screen]()
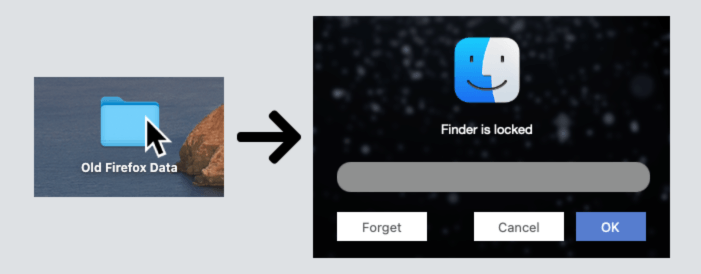
- Clicking the icon of any file or folder on your Desktop will bring up the lock screen. If you right-click an item, options except Duplicate, Make Alias, and Move to Trash will stop working properly. In other words, files or folders can still be deleted (by moving them to Trash).
![clicking the icon of a folder on Desktop bringing up the lock screen]()
- One can still use Spotlight to access files (but not folders) on this Mac.
- One can still use the Open option in apps like Preview, Word, and Excel to navigate Finder.
By following the steps in this part, you can prevent others from accessing the Finder app, including Trash, on your Mac. This helps prevent those who are not very familiar with technology from viewing and messing with your files and folders, such as kids.
However, this is not enough to fully stop people, especially tech-savvy users, from accessing your files and folders. In the following part of this article, I will explain how to add extra layers of protection.
Tips: How to further enhance protection if needed
Here's the scenario. You prefer the convenience of locking the Finder app and dislike the more complex setup of locking files and folders directly, but you still want more security. Here are some tips that may help.
Display a warning message before emptying the Trash
1. Go to Finder's Settings.
2. In the Advanced tab, make sure that the Show warning before emptying the Trash checkbox is selected.
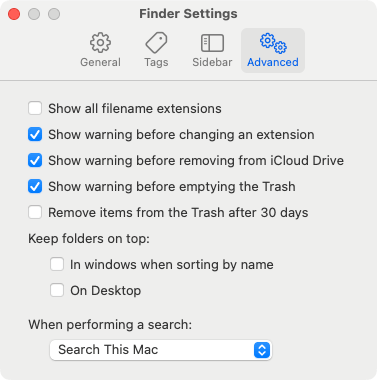
This way, when Finder is locked, clicking that Empty Trash option won't perform a deletion of items in your Trash.
Avoid putting important files and folders on your Desktop
When Finder is locked, the Desktop is still visible. While one can't open items using the simplest way (i.e. clicking their icons), one can still perform some basic actions, such as Move to Trash. (Items in Trash still exist on your Mac though.) Therefore, you may want to avoid storing important items on Desktop.
Disable Spotlight
If you are not a fan of Spotlight, you can just disable it for added privacy and control.
1. Go to Launchpad.
2. Search for Terminal, then open it.
3. Enter sudo mdutil -a -d, then press the Return key.
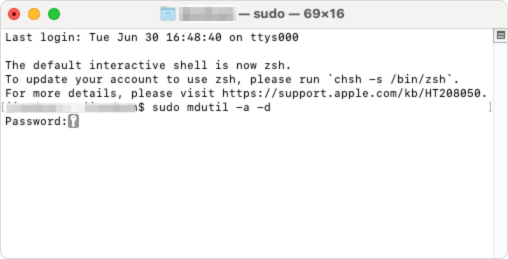
4. Enter your administrator password.
Finder is already inaccessible, and now you've disabled file searches from Spotlight. There's added peace of mind.
You can enable Spotlight at any time by entering sudo mdutil -a -i on in a similar way.
Lock apps like Preview, Word, and Excel
If needed, you can also lock these apps to prevent others from navigate Finder through the mentioned Open option.
1. Enter your password to open AppCrypt's main window.
2. Drag the apps you want to protect from the Applications folder to the App Lock tab in AppCrypt.
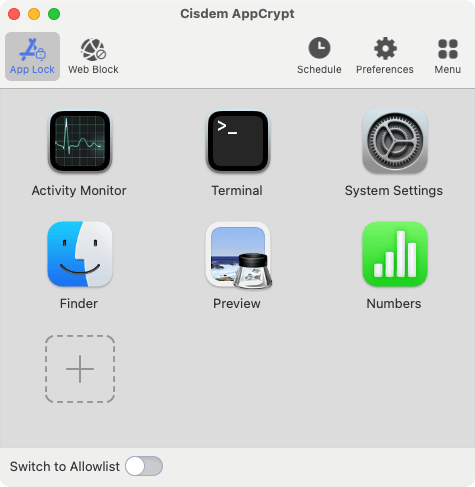
Now, they are protected with a password, preventing unauthorized access.
Wrapping up
Whether you are looking for a way to lock Finder or Trash on Mac, this article is helpful. You can simply follow the steps provided above. However, it's important to understand what you really need, which should become clearer after you read the article. If you need a Finder-level of access restriction, this article is the right solution. If you actually need a file-level access control, then you may need to try methods like using a file vault.

Norah Hayes likes to share her tips on how to improve focus and stay motivated at work. She believes it is essential to eliminate all online distractions during work hours.

Ethan Long joined Cisdem in 2015 as a developer and now serves as the editorial advisor for Cisdem AppCrypt. He actively tests and uses Cisdem AppCrypt and other screen-time management tools to ensure AppCrypt meets its promises in real-world scenarios.