

How to Password Protect Folder on Mac with/without Disk Utility
 76.4K
76.4K
 4
4


Key takeaways
This article covers three effective methods to password protect a folder on Mac.
If you prefer a simple solution without using Disk Utility, the first two methods are the best choices. Method 3 provides step-by-step instructions on using Disk Utility to password protect folder on MacBook, iMac etc.
If a certain folder on your computer or that you are going to send via email contains sensitive or personal information, you may want to protect it with password. This article shows you how to password protect a folder on Mac easily in different ways, without Disk Utility or with it. By locking a folder, you can keep the files in it safe from prying eyes.
Important: Regardless of the method you use, it’s important to remember the password you set.
 Cisdem AppCrypt
The Best Tool to Password Protect Apps on Mac
- Password lock individual apps, such as Photos and WhatsApp
- Offer an option to automatically relock apps after a period of inactivity
- Record failed attempts to open locked apps and take pictures of intruders
- Also block websites and pages with password
- Let you block specific sites, URLs with certain words, or all sites except a few
- Let you lock apps and block websites permanently or at certain times
- Easy to use
- Hard to bypass
- Help with privacy protection, parental controls and productivity
- Compatible with macOS 10.15 or later
- Also available for Windows, iPhone and iPad, and Android
- Watch the video below for details


Method 1. How to password protect folder on Mac with F-Vault
Applies to: macOS 10.13 or later
Mac allows you to easily password protect a PDF or document and also provides FileVault to encrypt your startup disk. But it doesn’t offer a way to put password on a folder. Luckily, you can use third-party folder encryption software such as F-Vault and MacFort (not officially available anymore). F-Vault is a great app to give you the ability to password lock the folders and files on your Mac.
Steps to password protect folder on Mac:
1. Download F-Vault from the App Store on your Mac.
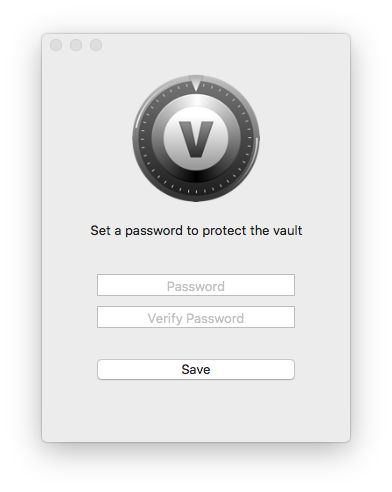
2. When you open it for the first time, set a password. Provide your email for password recovery if needed.
3. You will see the Vault and a vault-folder named Default. You can also create new vault-folders.

4. Drag the Mac folder that you want to protect into the Vault or a vault-folder.
5. When asked if you want to delete the original files, click Delete.
In step 5, when you click Delete, F-Vault will permanently delete the original folder. Or, instead of clicking Delete, you can perform the deletion manually.
Now your folder is protected with password.
The folder and the files in it are in the encrypted vault which no one can access without knowing the correct password. Also, when you try to search for the folder (or a file in it) in Spotlight or Finder, it won’t appear in the search results.
To access the folder and its files, launch F-Vault, enter the password and click OK. It’s that easy. To make them inaccessible again, quit F-Vault.
Tip: How to unprotect a protected folder on Mac
If you don’t want to keep a folder private anymore, you can remove password protection from the folder by dragging it out from F-Vault to a desired location such as the Desktop. Alternatively, select the folder, control-click it, and then choose Export to Finder.
Pros:
- Easy to use, even for beginners with no technical knowledge.
- Allows you to quickly lock or unlock a folder on Mac.
Cons:
- Requires installing third-party software.
- Only provides basic folder-locking features.
Method 2. How to password protect folder on Mac with Terminal
Applies to: All macOS versions
The first method is about putting the folder you’d like to protect in an encrypted vault. This way, people who have access to your Mac can’t open this folder.
If you need to encrypt the folder itself (and don’t want to use Disk Utility), you can use Terminal, the free terminal emulator built in to macOS. With Terminal, you can turn a folder into a password encrypted ZIP archive file.
If you want to password protect a folder to send in an email, just use this method.
1. Launch Terminal on your Mac. You can use Spotlight to search for it or go to Finder > Applications > Utilities.
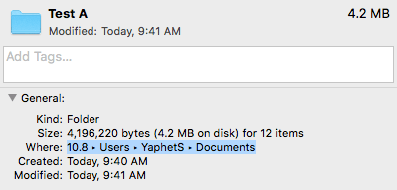
2. Suppose you need to password protect the folder “Test A” in Documents. Control-click “Test A” in Finder and choose Get Info.
3. In the Info window that appears, go to the General section, highlight the location path (after Where) and copy it.
4. Return to Terminal. Type cd and a space and paste the path. Press the Return key.

5. Type ls and press the Return key.
6. Type zip –er TestAProtected.zip “Test A”. Here “TestAProtected” is the name you give to the ZIP file. Hit Return.
7. Now it will ask you to set a password. Enter a password and hit Return. Verity it. Hit Return.

8. Permanently delete the original folder.
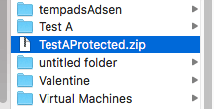
Go to the Documents folder on your Mac, and now you can find a ZIP archive file named TestAProtected.zip.
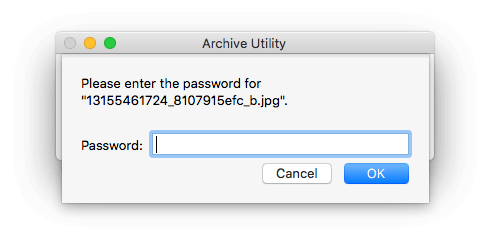
If you double-click the archive, the Archive Utility dialog box will pop up asking you to enter the password.
Pros:
- Uses a built-in macOS tool.
- Offers strong encryption.
Cons:
- Not beginner-friendly.
- Less convenient if you need to access to folders frequently.
Method 3. How to use Disk Utility to password protect folder on MacBook and iMac etc.
Applies to: All macOS versions
I would like to password protect file folders (under Documents) so even if I leave my computer on, someone cannot just open up some sensitive files. How do I do that? If not by folder, do I have to password protect each file? How do I do that? - A question on the Apple Discussions forum
Disk Utility is a system utility available for free on every Mac. It allows you password protect a Mac folder by turning the folder into an encrypted Apple Disk Image (.dmg) file. This method works on macOS Sequoia, macOS Sonoma, Ventura, Monterey, Big Sur, Catalina, Mojave, High Sierra, Sierra and earlier versions. It can also work with external hard drives.
Note: If you encrypt a folder using Disk Utility and then send it to someone, the recipient will need a Mac to do the decryption. If the recipient is a Windows PC user, you can use the second method.
To open Disk Utility, click the Spotlight icon in the menu bar, type in Disk Utility and hit Return/Enter. Or, go to Finder > Applications > Utilities and find the app. The steps below show you how to use it to do the encryption.
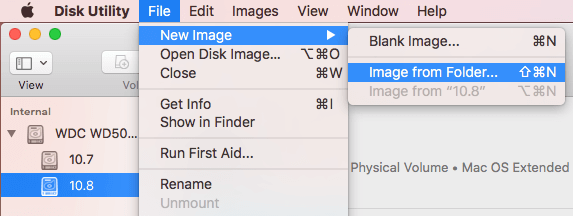
1. In Disk Utility, from the menu bar, select File > New Image > Image from Folder.
2. Select the folder you want to lock with password and click the Choose button.
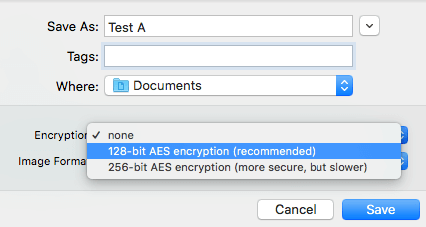
3. In the dialog box that appears, choose a location to save the .dmg file. Edit the name if needed.
4. There are two encryption options: 126-bit AES encryption and 256-bit AES encryption. Select the one you need.
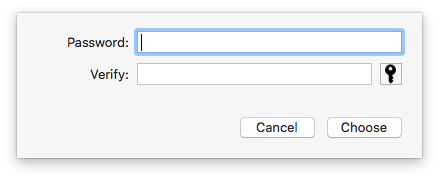
5. When prompted, enter and verify your password. Click Choose.
6. There are a few Image Format options. When you password protect folder on Mac, with the option read-only or compressed, you won’t be able to change the files in the protected folder. With read/write, you are allowed to change the files.
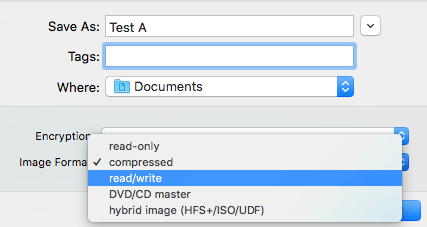
7. Click Save. And it will start creating folder disk image.
The original folder is still there on your hard drive with all the files in it. If your purpose is to prevent other users of your Mac from being able to access these files, you need to delete the original folder and then delete it permanently in Trash.
Now the folder is locked by password. When you or someone else tries to open the .dmg file, a dialog box will pop up asking for password. Those who don’t know the correct password won’t be able to open the disk image and access the files in it.
Once you enter the correct password, the file will appear in the sidebar of Finder. Select it and you will be able to find all the files in your folder. To password protect it again, control-click the file in the sidebar and select Eject. This will unmount the disk image file. If you are on Mojave or later, you can directly click the eject icon.
Tip: How to add files to a password-protected folder on Mac?
To be able to do this, create a password-protected folder first. In Disk Utility, from the menu bar, select File > New Image > Blank Image. Configure Encryption, Image Format and other options. Set the maximum size that you want. When created, it lets you add files when it’s mounted in Finder.
Pros:
- Built-in macOS solution.
- Works on all Mac models.
Cons:
- More time-consuming to setup process compared to other methods.
Bonus tips
How to hide a folder on Mac
If you only want to hide a folder from being seen, this tip is for you.
1. In Terminal, type chflags hidden.
2. Drag the folder that you’d like to hide into the Terminal window.
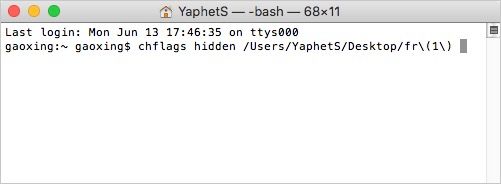
3. Press the return key.
To unhide the folder, just change “hidden” to “nohidden”.
How to protect Dropbox folder with password on Mac
Many Mac users also want to know how to protect a folder in places like Dropbox, OneDrive and Google Drive. A practical way is to encrypt a folder before you upload it to the cloud. Although cloud storage services already require email address and password to access a user’s account and files in it, this can add an extra layer of security.
When it comes to sharing a folder with protection, you can change the share settings so that only specific people can open the folder.
Conclusion
Can you password protect a folder on Mac? The answer is yes, and it’s easy to do. This article talks about different ways to password protect folder on Mac without Disk Utility or with it. Regardless of your intent, be it stopping others from viewing certain folders on your Mac or encrypting a folder for emailing, these methods can be useful.

Norah Hayes likes to share her tips on how to improve focus and stay motivated at work. She believes it is essential to eliminate all online distractions during work hours.

Ethan Long joined Cisdem in 2015 as a developer and now serves as the editorial advisor for Cisdem AppCrypt. He actively tests and uses Cisdem AppCrypt and other screen-time management tools to ensure AppCrypt meets its promises in real-world scenarios.
Alex
Well written, Rosa. I just got the new Mac Book Pro M2 chip, so I am learning the Apple OS, and all the tip and tricks. Of course, articles like yours, help me a lot to understand the Apple OS. The Method 3. How to a folder using Disk Utility definitely was a plus for me. Thank you very much.
Dedan
I'm apt to give AppCrypt a try, but I see it can not lock folders. What a pity! If I want to use it lock Office Document on my Mac computer, will this be came true?
Rosa Reyes
Hi Dendan, Thanks for your attention. It is safe to say, AppCrypt can lock Office Document App, but is unable to lock folders directly.
Patrick Lane
Thanks a lot for your post ... Patrick (MySafe developper)