

How to Find Similar Images in Folder Easily on Windows PC and Mac
 36.1K
36.1K
 8
8


Whether you are a professional photographer or someone who takes a lot of photos with a phone, if you have the habit of storing photos on your computer, then chances are high that there are similar photos on your computer. If so, you may want to find them, pick the best versions, and delete the ones that you don't like that much.
In this article, I will show you how to find similar images in folders on your Windows or Mac computer in two ways, providing step-by-step instructions and sharing my experience.
 Cisdem Duplicate Finder
The Best App to Find Similar Images on Computer
- Identify duplicate photos, videos, documents, audio files, and other file types
- Detect similar images, allowing you to set the similarity level
- Support Windows PC, Mac, external storage devices, and cloud drives
- Work with folders, drives, Mac's Photos, and iTunes
- Offer 3 view modes, with side-by-side image previews
- Automatically select all duplicates for one-click deletion, while keeping original files untouched
- Provide 8 rules to help you bulk select unwanted photo versions, e.g., Select Newest and Select Low-Quality
- Easy to use and customize
- Available for Windows, Mac, Android, and iOS


What are similar photos?
Like duplicate photos (exactly identical, regardless of file names), similar photos are also common. They are photos that share a relatively high degree of visual similarity but are not exactly the same.
There are can be two types of similar images.
- Images that look the same to the naked eye but are different in file sizes,file formats, or resolutions: For example, your camera may save the same photo in both RAW/HEIC and JPEG formats. Also, they may be created by compressing or resizing photos.
- Images that look alike: There are several kinds, such as pictures taken in burst mode, photos of the same subject captured from slightly different angles, distances, or exposures, and slightly edited versions of the same photo (e.g., rotated, cropped, or watermarked).
Generally, you don’t need multiple similar photos of the same scene or both high- and low-quality versions of the same photo. Therefore, it can be a good idea to find and clean them up.
How to automatically find similar photos on your computer
Applies to: Windows, Mac
If you have a large photo collection or your photos are scattered around your hard drive, this method is the best option for you.
This method is easy to use for everyone. It uses a user-friendly tool called Cisdem Duplicate Finder, which has a similar image finder feature. The feature supports common image formats (e.g., JPG, JPEG, PNG, TIFF, BMP, and WebP), camera RAW formats (e.g., Canon's CR2 and CR3, and Nikon's NEF and NEF), and HEIC. Therefore, it's suitable for both average users and professionals.
It compares images in various aspects, such as histogram similarity, feature similarity, and pHash similarity, providing fast speed and high accuracy. Then, it displays similar images in groups for you to handle easily.
(Photos are stored in folders on Windows PC, while Mac users usually store them in the Apple Photos app. Therefore, I provide separate instructions for different operating systems.)
Steps: Find similar images in folders on Windows
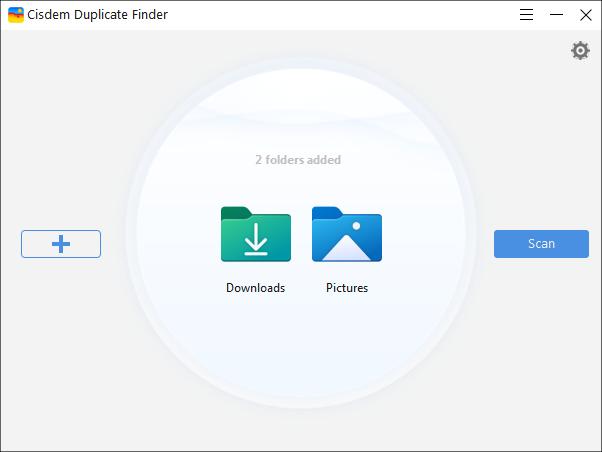
Step 1. On your Windows PC, download and install Cisdem Duplicate Finder, then, open it.
 Free Download Windows 10 or later
Step 2. To find similar images in a folder, add this folder using the Add button ![]() or drag and drop.
or drag and drop.
To find similar photos across multiple folders, add these folders.
Go to Settings ![]() . Under the Similar Images tab, make sure that the Enable similar images function checkbox is selected.
. Under the Similar Images tab, make sure that the Enable similar images function checkbox is selected.
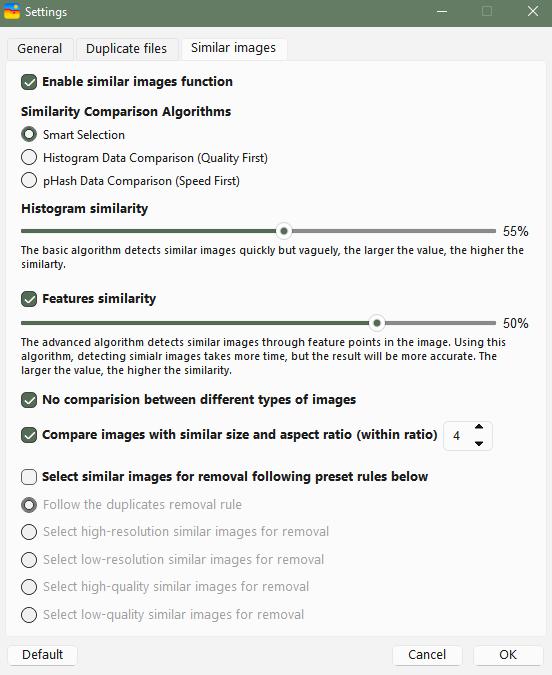
Once the checkbox is selected, you can set the similarity level under it. This allows you to decide how strict Cisdem Duplicate Finder will be when it identifies similar photos. Being strict means that only pictures that are very similar will be detected. Being looser means more results, with a higher degree of difference being allowed in the found photos.
Step 4. Click the Scan button to start the finding process.
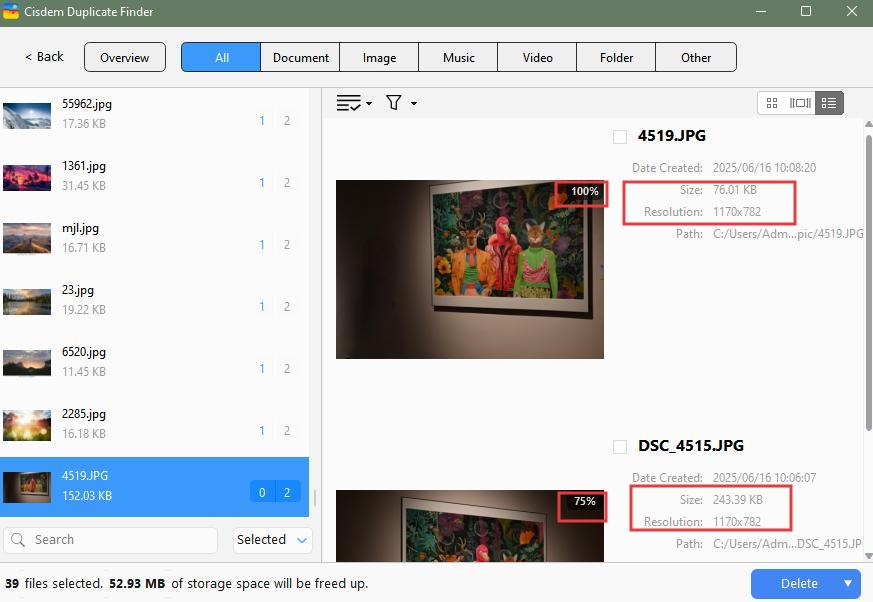
Step 5. When the finding process is finished, the results window will appear. It has several tabs. The Image tab displays all the exact duplicate images and similar images that have been found in the folder(s). You can conveniently preview images side by side.
If you are not satisfied with the results, you can click the Back button  in the top left corner, go to Settings
 ![]() to adjust the strictness, and start a new scan.
to adjust the strictness, and start a new scan.
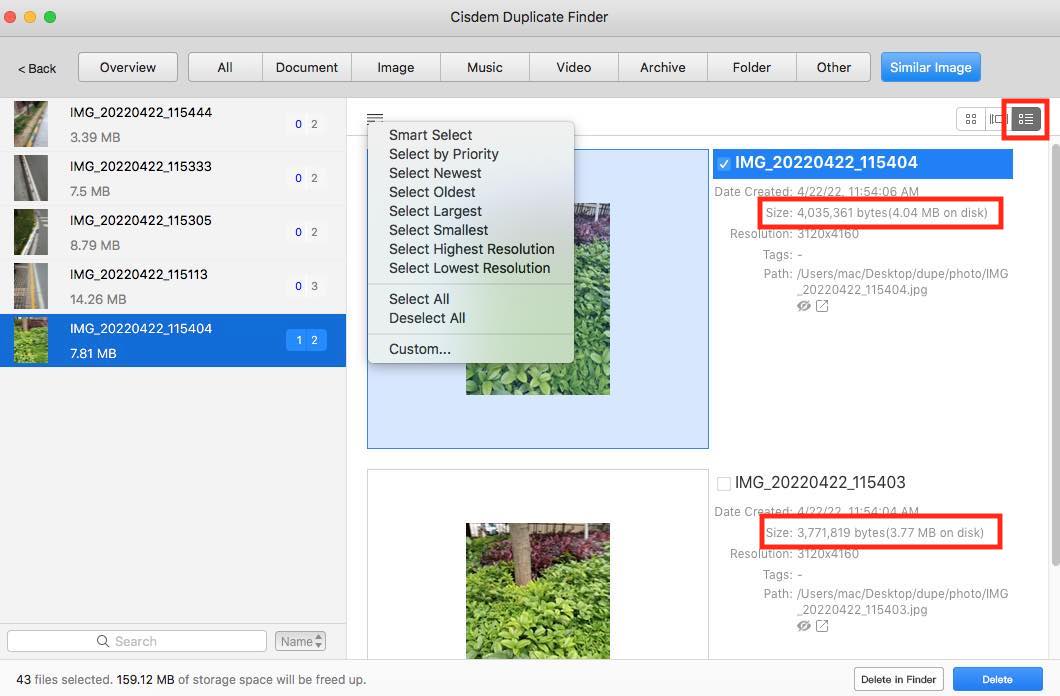
Step 6. In each group of similar photos, manually select the photos that you want to delete. The best ones that you want to keep are left unselected.
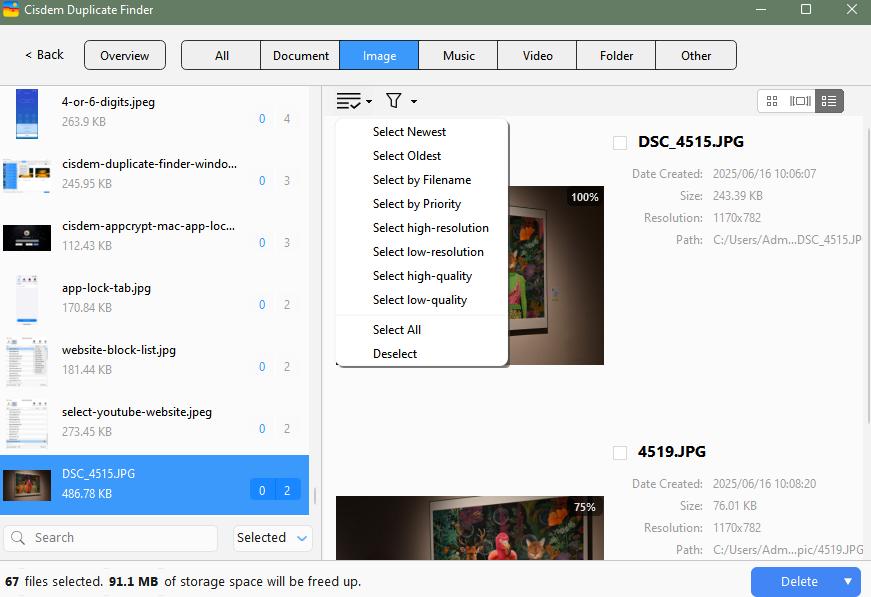
You can also use the selection rules to help you bulk select. On the left, highlight the groups to which you want to apply a rule, click the list icon and then choose a desired rule, such as Select low-resolution.
(When it comes to duplicate photos, in each group, the app will automatically select all but one photo for deletion, saving you from selecting manually.)
Step 7. Click the Delete button in the bottom right corner to delete all the selected images. Then, confirm the deletion.
The deleted files will go to Recycle Bin.
Steps: Find similar images in folders and Apple Photos on Mac
Step 1. Download and install Cisdem Duplicate Finder on your Mac. Open it.
 Free Download macOS 10.11 or later
Step 2. Click the Add button to add one or more folders. You can also add the library of your Apple Photos app.

Step 3. Click Scan to start searching similar images.
Step 4. This similar image finder displays all detected similar images under the Similar image tab. It provide 3 preview modes. You can switch to the Info mode to view the details.
Step 5. Select unwanted images manually or with the help of selection rules.
Step 6. Click Delete to move them to Trash.
A tip for finding similar photos in Apple Photos
Developed by Apple, the Photos app on your Mac is included with macOS. Many Mac users use Photos to manage and view pictures. If you are one of them, the steps above are still useful. Only step 2 is different.
In step 2, add the Photos library instead a folder. The Photos library is where the photos you see in Photos are stored. By default, the library is located in the Pictures folder. When it comes to Photos on Mac, the deleted photos will go to the Recently Deleted album instead of Trash.

How to manually find duplicate photos on your computer
If you don't have many photos on your computer or your photos are stored in a single folder, you can try manually looking for similar photos among them. However, it may still be time-consuming.
The manual method uses the built-in file manager on your computer: File Explorer for Windows, and Finder for Mac.
Steps: Find similar images in a folder using File Explorer (Windows)
File Explorer is a built-in file manager in Windows. With it, you can easily filter files by type. For example, let it display only pictures within a specific folder. Then sort the files by file size or file name. After doing these two steps, you can browse the list and identify similar pictures in the folder.
This method can be especially helpful for users who wish to clean up similar images without relying on third-party tools. However, this can be time-consuming, especially if you’re dealing with a large number of photos.
Step 1. Open your Windows PC. In File Explorer, open the folder in which you want to find similar images.
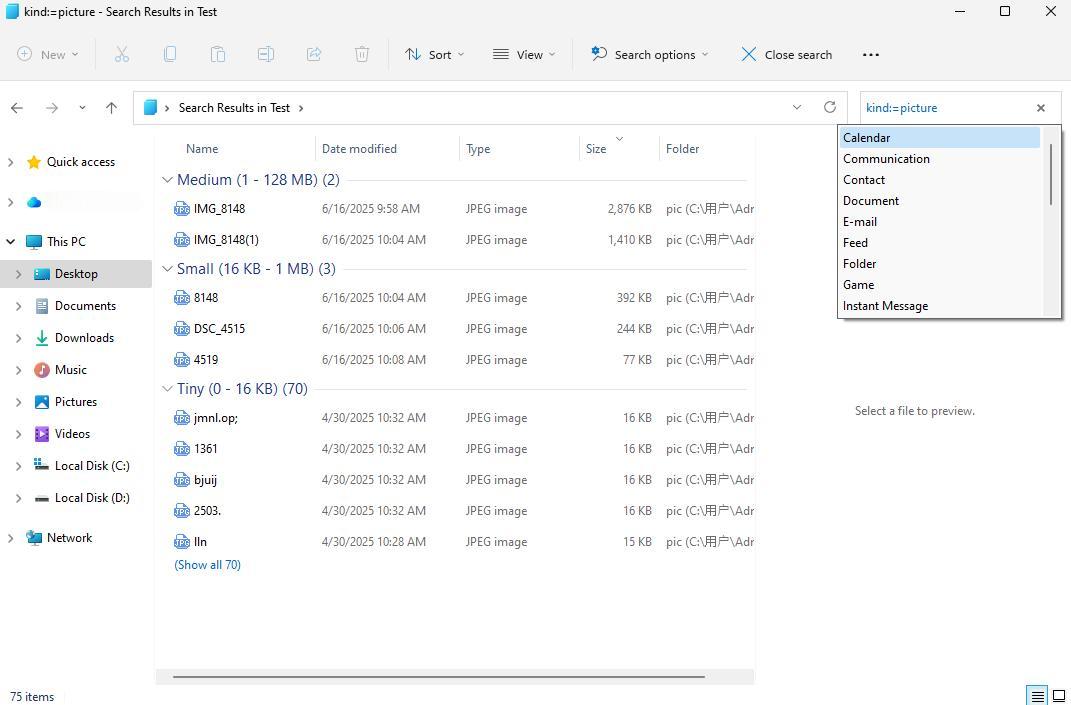
Step 2. In the upper-right corner, type Kind:=picture to filter out all pictures in this folder.
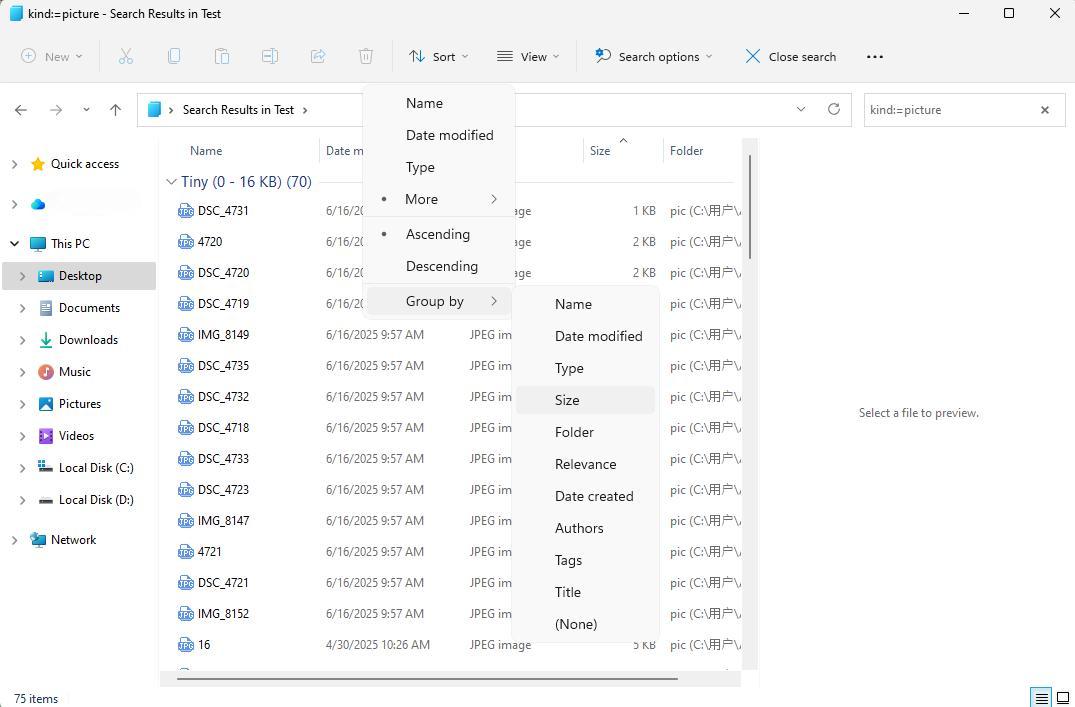
Step 3. Click Sort > Group by. Select Size or Name.
Step 4. Click the View tab. Select Large icons or Extra large icons to view the photos more clearly. But File Explorer does not support previewing RAW images.
![]()
Step 5. Identify similar images in folder by comparing their visual content and details.
Step 6. Right-click on the pictures you wish to remove. Click the Trash icon.
Steps: Find similar images in a folder using Finder (Mac)
Similar to Windows File Explorer, Finder is a built-in file manager for Mac. With it, you can manually find similar images in a folder on Mac. But it does not allow you to compare similar images side by side. You may need to open each picture repeatedly to choose which one to keep. Therefore, it will be time-consuming.
Step 1. On your Mac, open Finder.
Step 2. Open the folder that you want to search for similar images.
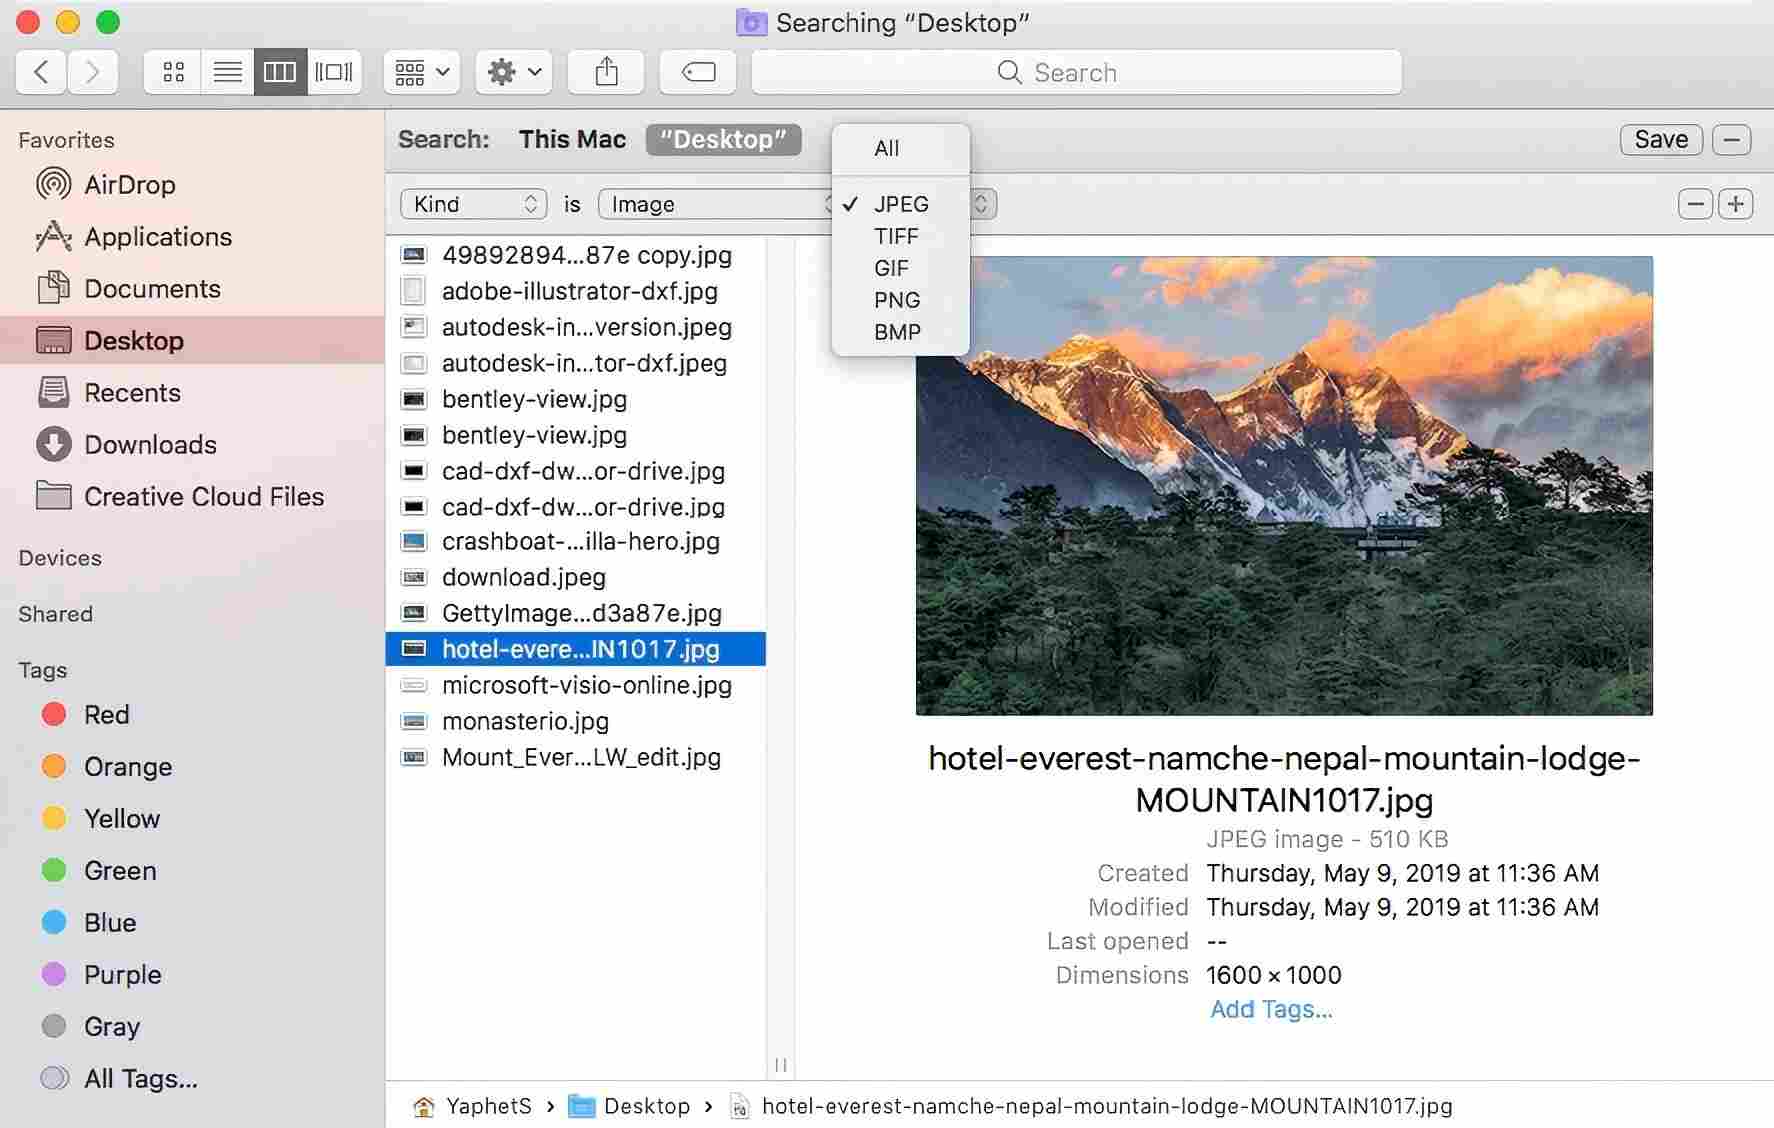
Step 3. From the top tool bar. Select Show items as icons. You can also click View > as icons from the Finder menu bar.
![]()
Step 4. Sort the image files by name, size or when they were taken.
Step 5. Identify similar pictures by comparing the visual content.
Step 6. Drag the unwanted similar photos to the Trash in the Dock or right-click on the photo then select Move to Trash.
FAQs
Do Windows or Mac computers have a built-in similar image finder?
No, Windows PC and Mac computers do not come with a tool specifically designed to find similar images. You can only use the built-in file manager to sort and view image files. Then manually find and delete the similar images. To accurately and quickly find similar images on computer, it’s recommended to use third-party software such as Cisdem Duplicate Finder.
Can I find similar images in a specific folder based on one image?
Yes. If you want to find images similar to a specific one, just add this image into the folder you want to scan. Then, use the similar image finder to scan the entire folder. If there are similar images to it, they will be displayed in the same group in the results window.
How to look for similar images on iPhone or Android?
There are also many similar image finders for mobile phones. Cisdem Duplicate Finder is one of them, which can help you find similar images and exact duplicate images easily. To find similar images on iPhone or Android phone, just choose the one that suits you.
Conclusion
Similar photos and duplicate photos can take up space on computer often without you even noticing it. By using a similar image finder to find similar photos your Mac or Windows computer, you can quickly find and remove these unnecessary photos in a folder or Photos library. The removal helps free up space on your hard drive, making room for new photos.

With a passion for tech and writing, Sarah joined Cisdem, where she focuses on creating articles about using utility tools to enhance file management and simplify contact management.

Adrian Li is Cisdem’s Chief Engineer and serves as the editorial advisor for Duplicate Finder and ContactsMate. His work and insights have been featured in leading tech publications such as Fossbytes, TUAW, Redmond Pie, SafetyDetectives, and BestForAndroid.
Jacob Anderson
I really like Cisdem’s AI feature for finding similar images. It quickly found lots of similar photos and made cleaning up my Mac much easier. Such a useful feature!
Jackson Campbell
I followed the guide when cleaning up my Mac photo library, and it made finding similar images really straightforward. The steps were clear. Taank you!
Evelyn Brown
Thanks for the step-by-step instructions. If just cleaning a single folder, the manual method is reliable, but the professional tool can save a lot of time.
Andreas Schmutterer
I didn’t realize I had so many similar images on my Mac until I tried this. Thanks for this detailed article!
Anik Ganguly
Simple but very effective utility. The last duplicate file finder I used could only find exact duplicate photos. This one helped me find nearly 3GB of similar images on my computer.
Marcel Lustenberger
Very handy, well designed app to find similar images. Saved me a lot of time. Love its nice clear interface!!
Hamilton
Many similar photos scattered on MY Mac, and they took up much hard drive space. When I felt depressed, my friend recommended me Similar Image Detector, and now all similar photos are gone.
Felicia
Finding and deleting similar images manually is really very annoying and tedious, thanks for sharing such powerful similar image finders