

Cisdem Duplicate Finder User Guide
 13.7K
13.7K
 0
0


Cisdem Duplicate Finder is a good helper to release the space on your HD, you can scan photos, videos, archives, entire folders and more. Also according to the advanced preferences, you can scan truely duplicate files as your requirement easily and quickly. To facilitate the process of scanning & removing duplicates with Cisdem Duplicate Finder, there are four main parts available to get started.
Getting Started
Download & Install
1. You can download the installation package of Cisdem Duplicate Finder from the below link.
 Free Download
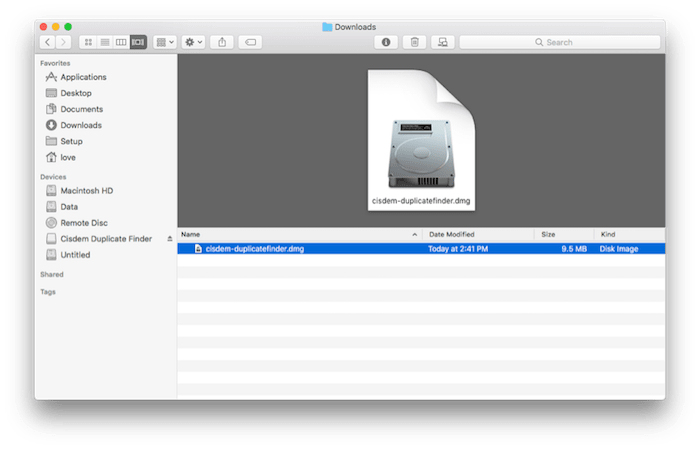
2. Install Cisdem Duplicate Finder with the downloaded package. Double-click the dmg file.
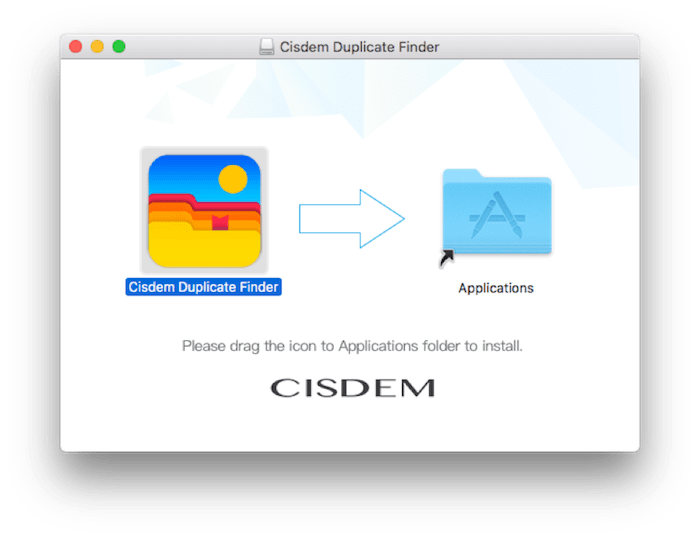
Drag the Cisdem Duplicate Finder icon to Applications folder.
Activation
After installing the program, you need to activate the program if you want to use the full version features.
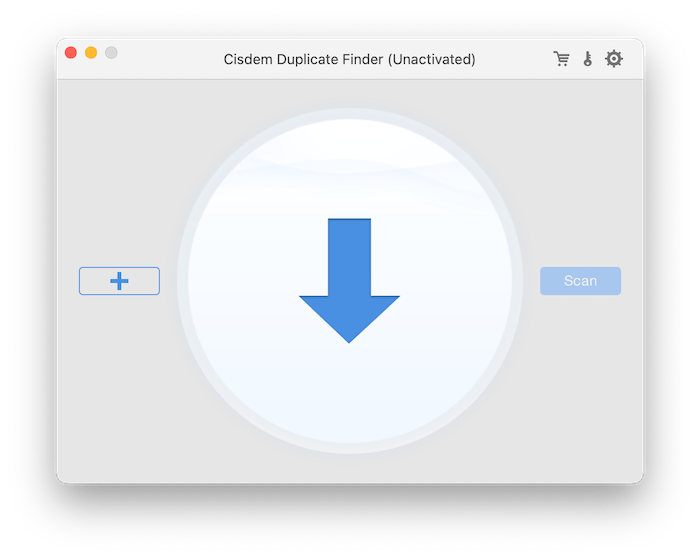
1. Go to Lauchpad or Applications folder, double click Cisdem Duplicate Finder to run the program, and then click the key icon on the top right corner.
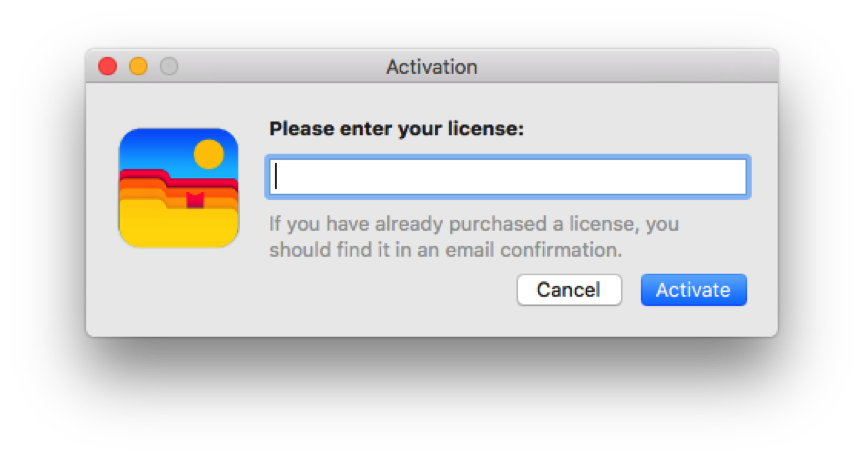
2. Copy-n-paste the license code into the popped-up window, click Activate.
Free Up Space On Your Mac
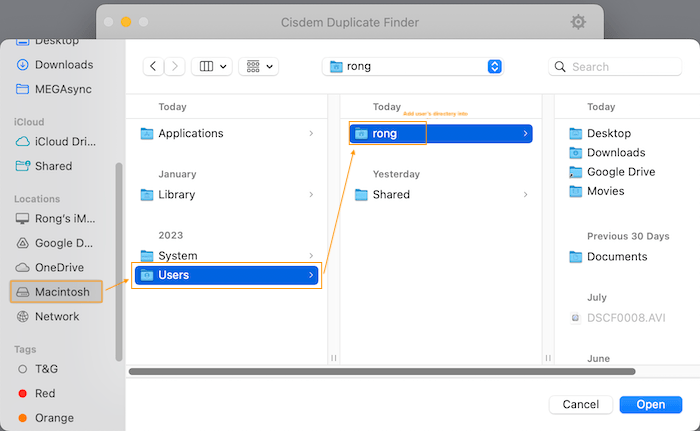
Before we start a scan, we should know what we need to import into Cisdem for scanning. Internal hard drive? Nope. Internal hard drive includes the files stored on your Mac and system files, it is easy damage corrupt the system if you delete the system files. Then what we need to scan? All your files on your Mac are stored in the folders within your user's directory, so you just need to add the user's directory into Cisdem for scanning.
Step 1 Add user's directory into the program
You can either click  or directly drag&drop to add the user's directory into the program.
Step 2 Click  to start scanning.

Step 2 Delete the duplicate files.
Wait until the scan completes, check the duplicate files in the scan result and click  to clear all the duplicate files with a click.

Find Duplicate Files
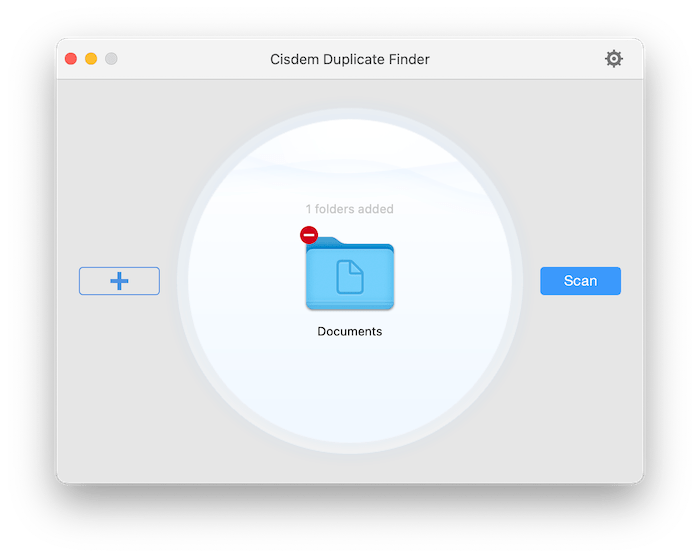
Step 1 Add folders into the program
a. Drag-n-drop folders to the circle area on the start interface.
b. Click the cross button on the left side of the circle and choose folders from the window that appears.
c. Click File > Open… on menu bar, then choose folders in the window that appears.
To remove all folders, you can click the red button at the upper-left corner.
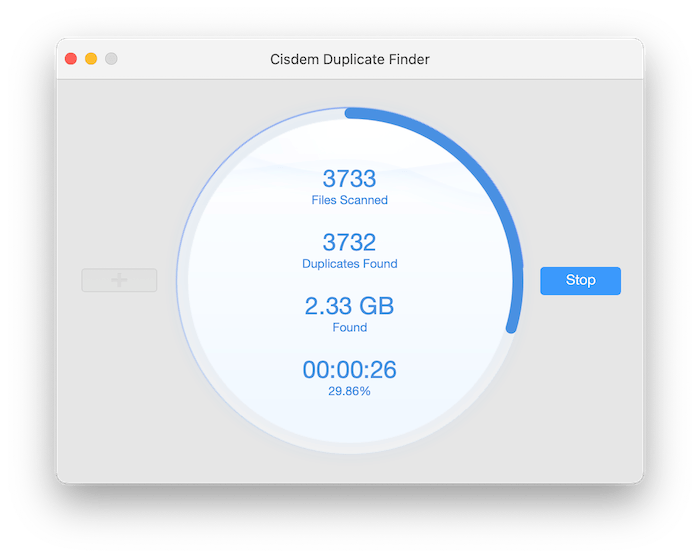
Step 2 Click Scan to start scanning, the scanning interface shows number of files Scanned, number of duplicate files found, size of the duplicate files found and the remaining scanning time.
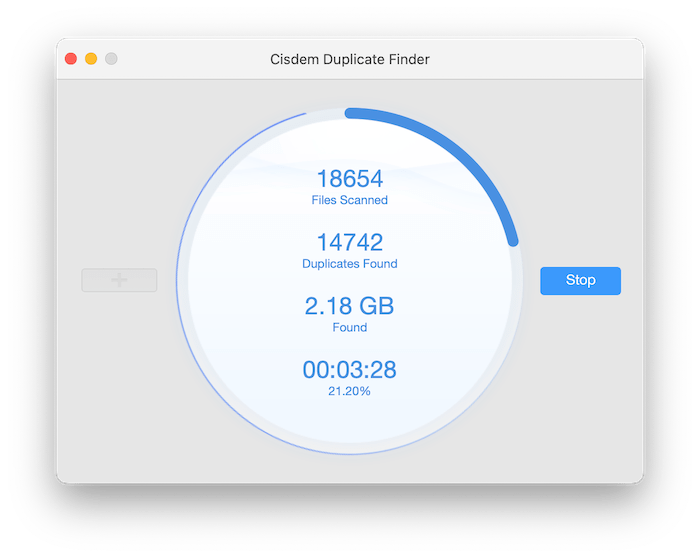
Step 3 Click Stop to finish the scan or wait until the scan is auto stopped. Select the file you want to remove, click Delete
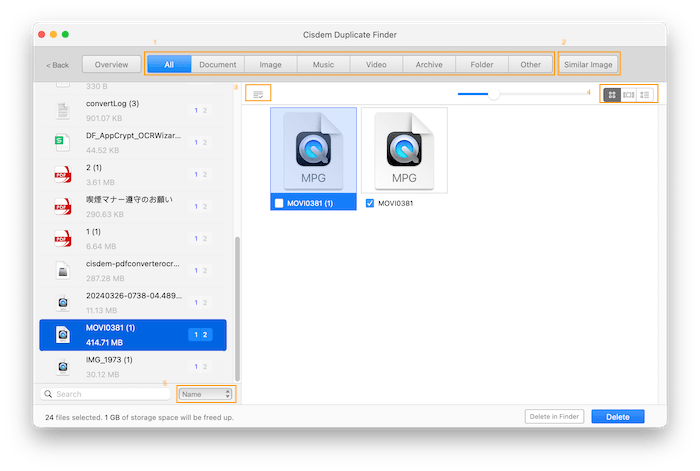
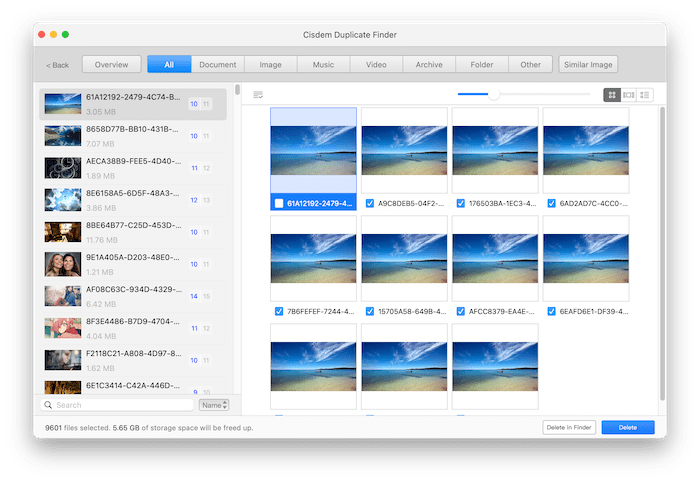
1. It shows all types of duplicate files, and you can select the file type you want to display.
2. For images, Cisdem detects both duplicate and similar images, duplicate images are listing under the Image tab, and similar images are listing under the Similar Image tab.
3. All the deleted files are selected by default, you can also manually change the mark of duplicate files for deletion, or click here to change rules for deletion.
Tips:
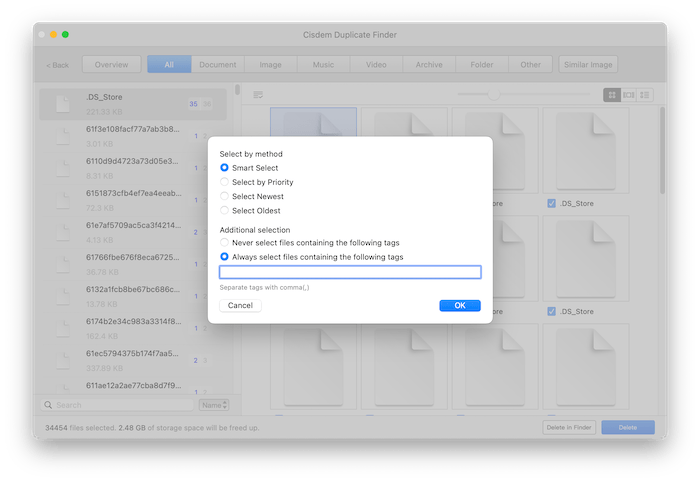
a. Cisdem allows you to auto select the taged/untaged files for deletion by clicking "Custom...", then a window will drop down as below, you can select "Always" or "Never" option for the deletion, then enter the related tags on the blank space and click OK.
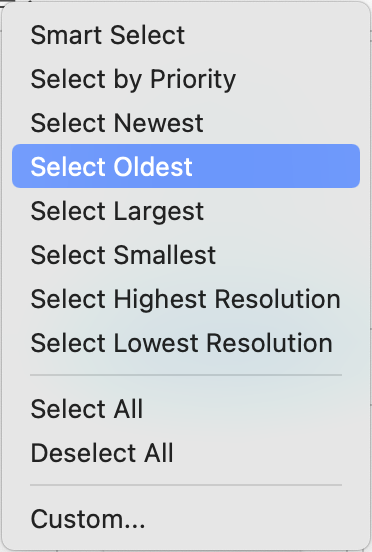
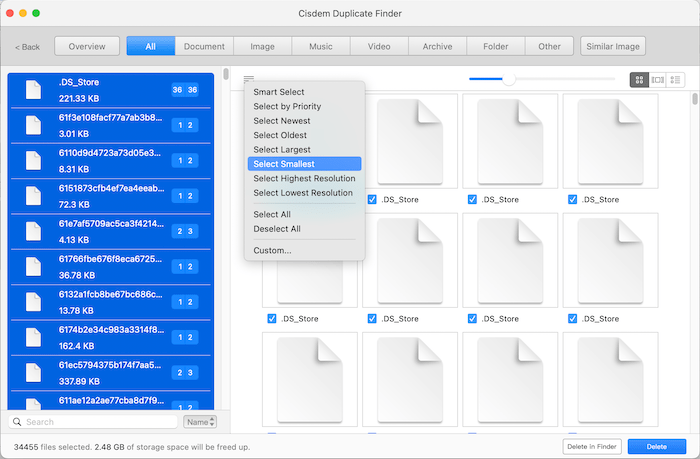
b. If you want to auto select all the duplicate files with another rule, you can press Command+A to select all the duplicate files in the list, and then select a rule you prefer.
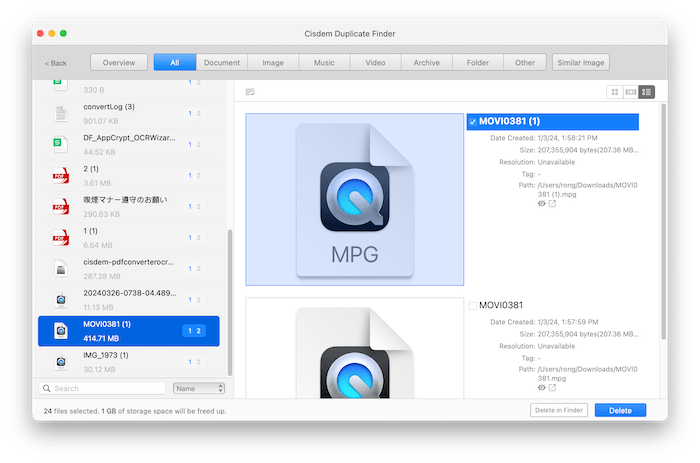
4. Cisdem offers 3 modes (Thumbnail, List and Info) for users to view the duplicate files, you can switch the mode as your needs. If you want to know the path or other detailed information of the duplicate files, you can just click  to navigate to the Info mode.
 Ignore: If you click thic icon after the file, this file will be added into the ignore list in the Preferences settings, and Cisdem will not scan this file for duplicates.
 Show in Finder: You can click this icon after the file to show this file in Finder.
5. You can click here to adjust the sort of the duplicates by Name, Size, Count and Type.

Tips: If you mistakenly deleted the duplicate files and want to put them back, you can click Window> Restore from Trash, hold Command and click to highlight the target files, click 

Find Duplicate Musics in iTunes
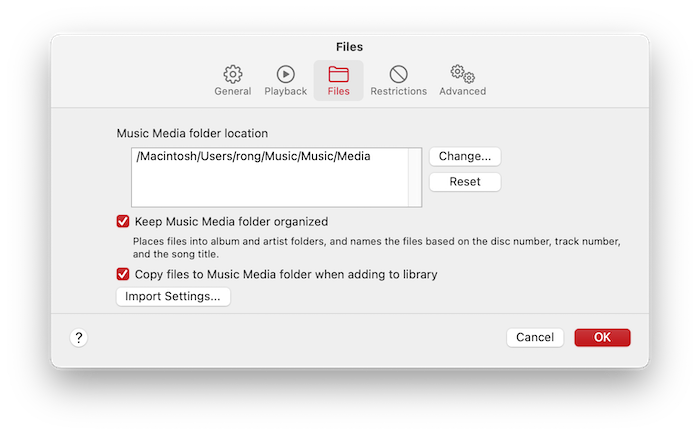
Step 1 Open Music Preferences, choose Files. You'll find the Music Media folder location
Step 2 According to the location mentioned above, add the iTunes Media folder into Cisdem Duplicate Finder
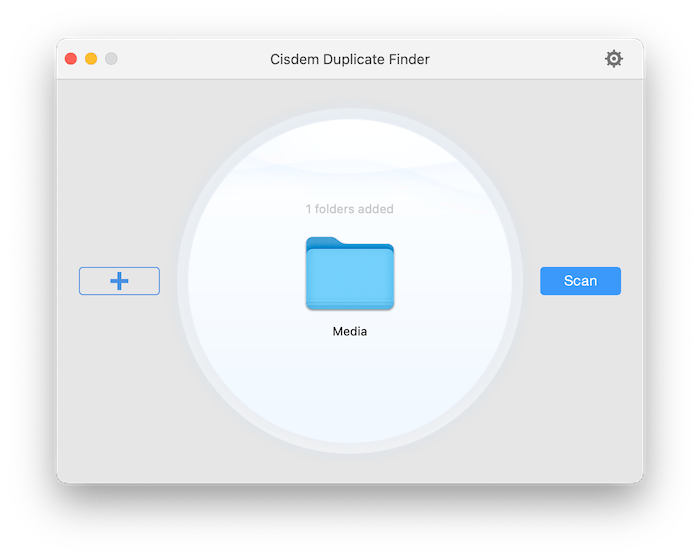
Step 3 Click Scan button to start scanning
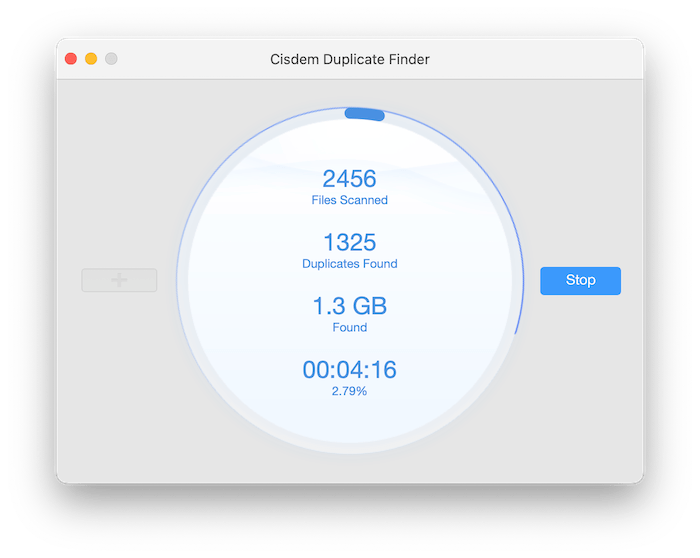
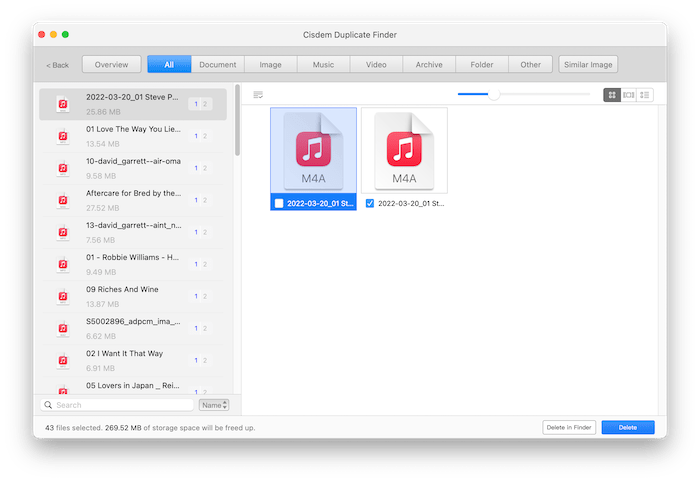
Step 4 You can manually stop scanning or wait until the scanning is finished, it brings you to a scanning result interface, click "Delete" after checking the duplicate list, all the duplicate files will be moved to Trash, permanently or another folder, which depends on the Removal method you select on the preferences settings of Cisdem Duplicate Finder
Tips:
Cisdem will only help you remove duplicate songs from the Media folder, if you want to completely delete those duplicate songs, please reference the sentences below:
1. Why can I still play those deleted music files after deleting them with Cisdem?
The duplicate music files are removed to Trash by default, and iTunes can automantical trace those deleted music files in the Trash when you play them in iTunes, so you need to permanently remove them from Trash if you don't want to play them in iTunes any more.
2. How can I remove the deleted music files from Music Library?
Step 1 Create a new playlist (such as playlist 1) by selecting ‘New Playlist’ in the File menuin iTunes, and then add all your songs to playlist 1;

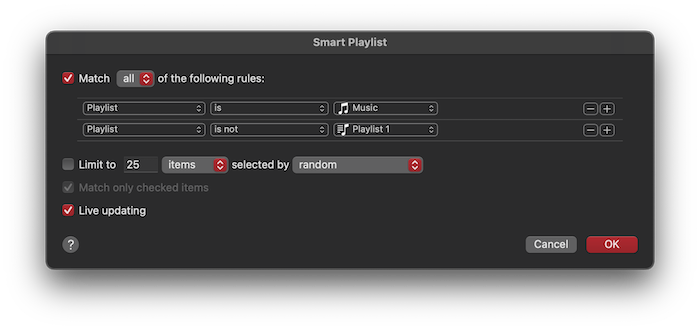
Step 2 Create a smart playlist by selecting New Smart Playlist

Apply the rules listed in the below screenshot. By default, iTunes will list only one row as a rule. Press the plus button at the right in that row to create the second rule. Click OK.
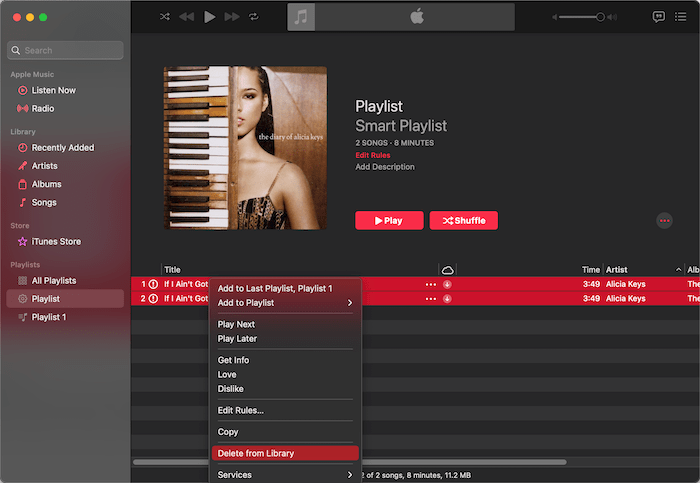
All the deleted songs will be moved to the newly created smart playlist, and then you can press CMD+A to highlight all of them and select "Delete from Library" to delete them from your Music library.
Finde Duplicate Photos
Scan Photo Library for 10.14 or earlier
All the pictures in the Photos app are saved in a photo library, so if you want to clear the duplicates of Photos app, you need to drag and drop the photoslibrary into Cisdem duplicate finder for scanning.
Step 1 Run Cisdem Duplicate Finder, find the location of your photoslibrary, drag and drop it into the program
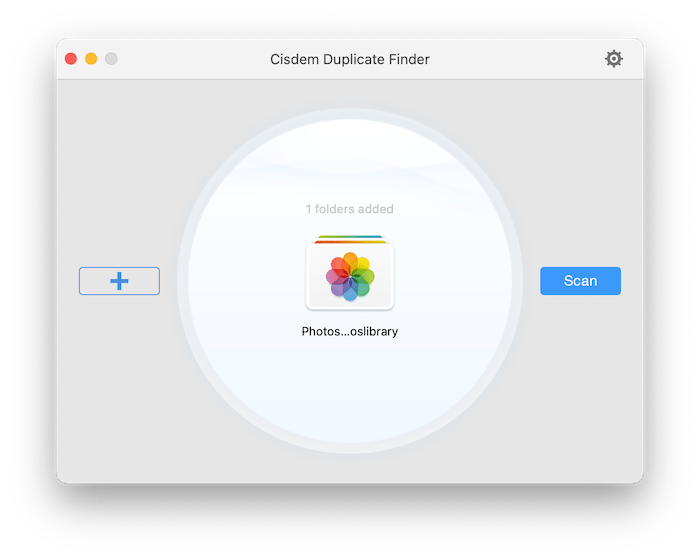
Step 2 Click "Scan" to start scanning
Step 3 When the scanning is finished, the duplicate images and similar photos will separately display under All/Images tab and Similar Image tab, and you can check them one by one before clicking Delete
For duplicate images: Please notice that Cisdem will only auto-mark the exact duplicate photos/videos for deletion, so if you want to delete the exact duplicates, the fastest way is direclty clicking "Delete" button to delete all the marked photos, or you can also select to manually mark the photos you want to delete.
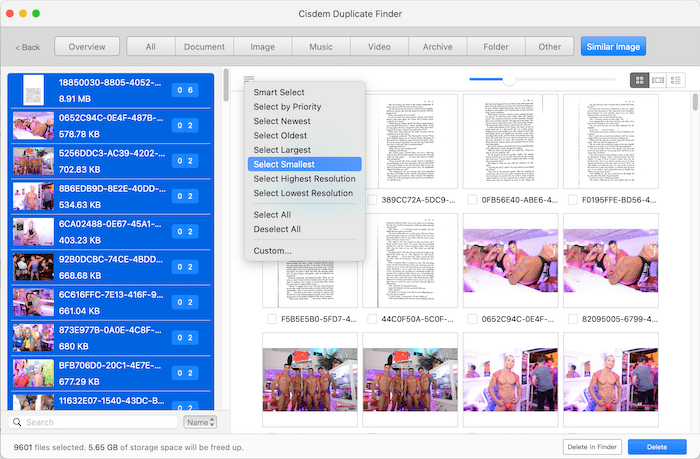
For similar images: To protect the security of your photos, Cisdem will not auto-mark similar photos for deletion, we suggest that you can manually check them before deleting. But if you want to auto select them for deletion, you can navigate to Image tab > Similar, press Command+A to select all the similar photos, click "Smart Select", all the similar photos that are recommended for deletion will be marked in the list, and then you can directly click "Delete" to delete similars in a click.
Note:
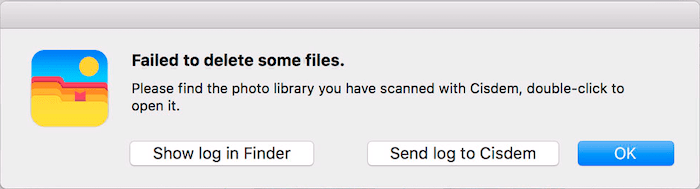
1. After clicking the Delete button, Cisdem Duplicate Finder will auto open the photo library that Cisdem have scanned with, when it fails to open the photo library, the below error message will pop up. Please quit your Photos app, go to find the target photo library, double click to open and try to delete again.
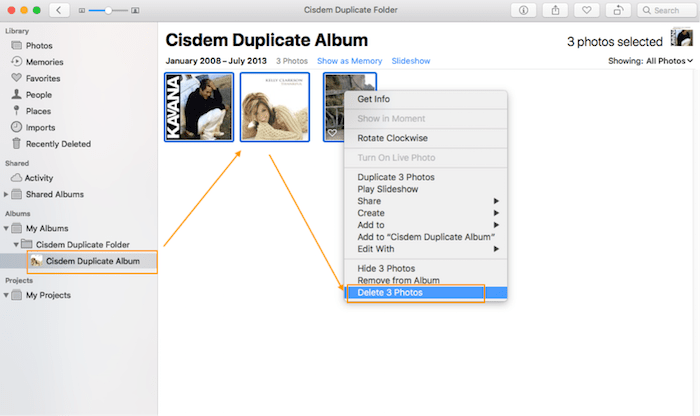
2. Due to the limitations of Photos app, Duplicate Finder cannot delete the photos in Photos Library completely, but those duplicate photos will be moved into Photos > Cisdem Duplicate Album.

Tips: If the problem persists after opening the target photo library, please send the log files to our support team at support@cisdem.com to get further assistant.
Step 4 Delete duplicate photos in Photos app
Find “Cisdem Duplicate Album” under Photos, choose the photos you want to delete, right click on them and choose “Delete Photos”, then all the duplicate photos in Photo Library will be deleted.
Note: If you want to permanently delete those duplicate photos, you can go to clear all the photos in the Recently Deleted folders in Photos app after that.
Scan Photo Library for 10.15 or later
All the pictures in Photos app are saved in a photo library, so if you want to clear the duplicates of Photos app, you need to drag and drop the photoslibrary into Cisdem duplicate finder for scanning.
Step 1 Run Cisdem Duplicate Finder, find the location of your photoslibrary, drag and drop it into the program
Step 2 Click "Scan" to start scanning
Step 3 When the scanning is finished, all the duplicate files and similar photos will be displaying on the following interface, and you can check the duplicate/similar photos one by one before clicking Delete
For exact duplicates: Please notice that Cisdem will only auto-mark the exact duplicate photos/videos for deletion, so if you want to delete the exact duplicates, the fastest way is direclty clicking "Delete" button to delete all the marked photos, or you can also select to manually mark the photos you want to delete.
For similar photos: To protect the security of your photos, Cisdem will not auto-mark similar photos for deletion, we suggest that you can manually check them before deleting. But if you want to auto select them for deletion, you can navigate to Images tab > Similar, press Command+A to select all the similar photos, click "Smart Select", all the similar photos that are recommended for deletion will be marked in the list, and then you can directly click "Delete" to delete similars in a click.
Step 4 Delete the marked duplicates
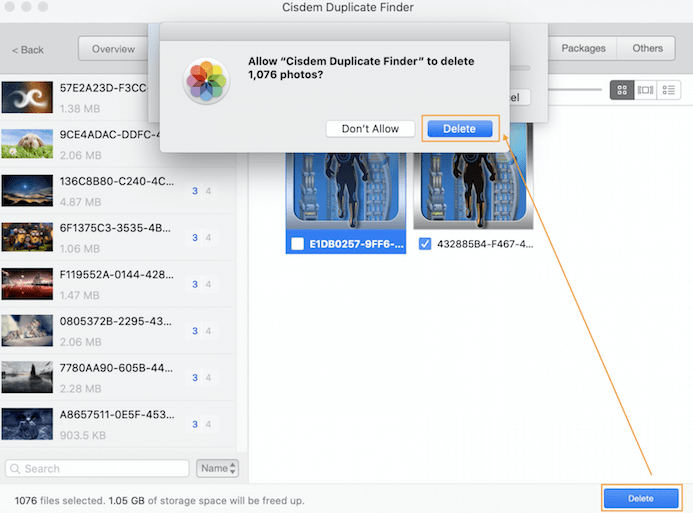
Cisdem can only delete the files from a system photo library, if the photo library you've scanned is a system photo library already, it will pop up a window below to ask you to confirm if you want to delete those files, and will remove them into the Recently Deleted folder in the Photos app after clicking the Delete button.
If the scanning photo library is not set as a system photo library, or the photos you are preparing to delete existed in the Recently Deleted folder already, it will pop up a window below
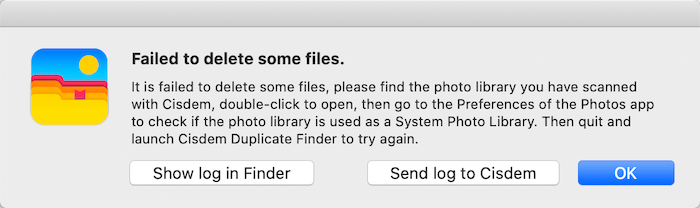
You can do as follows to resolve it:
1. Firstly please quit the program, and don't forget to save the scan result.
2. Find the photo library you have scanned with Cisdem, double click to open, then go to the preferences of Photos app, click "Use as System Photo library" to turn this button gray.
3. Go to the Recently Deleted folder of Photos app, clear all the photos there.
4. Run Cisdem Duplicate Finder again, click File> Open Project file and select the scan result you've saved before to open the scan result, and delete again.
Tips: If the problem persists after opening the target photo library, please send the log files to our support team at support@cisdem.com to get further assistant.
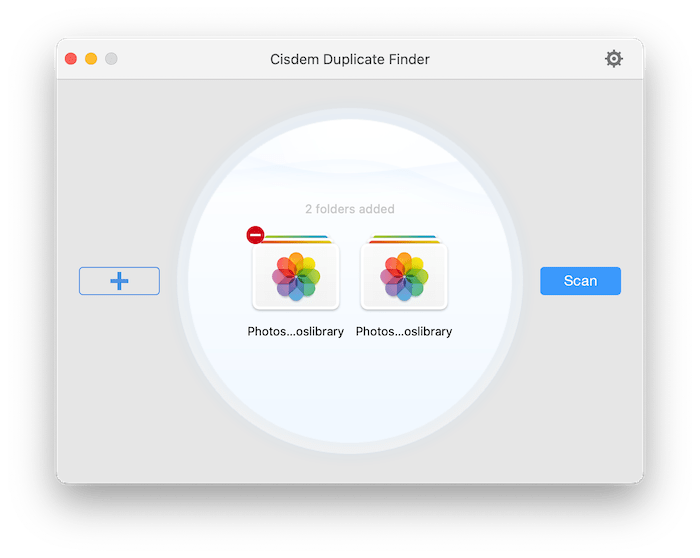
Scan multiple Photo Libraries
You are also allowed to scan multiple photo libraries at a time, Cisdem Duplicate Finder will help you to clear the duplicates between different photo libraries.
Step 1 Go to find the location of your photo libraries, drag and drop them into Cisdem Duplicate Finder
Step 2 According to the macOS version running on your Mac, following the steps “Scan Photos Library for 10.14 or earlier” or "Scan Photos Library for 10.15 or later" to start scanning
Customize Scan Settings
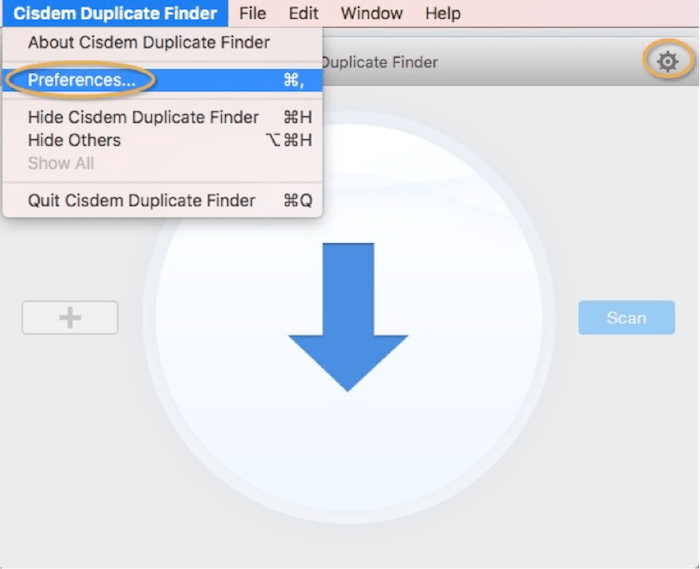
You can get a better using experience by customizing preference settings of Cisdem Duplicate Finder for Mac. Click on the Cisdem Duplicate Finder > Preferences option at the top-left corner of the menu bar or directly click the set button at the top-right corner of the Cisdem Duplicate Finder.
General
You can change the scan settings with General Preferences.
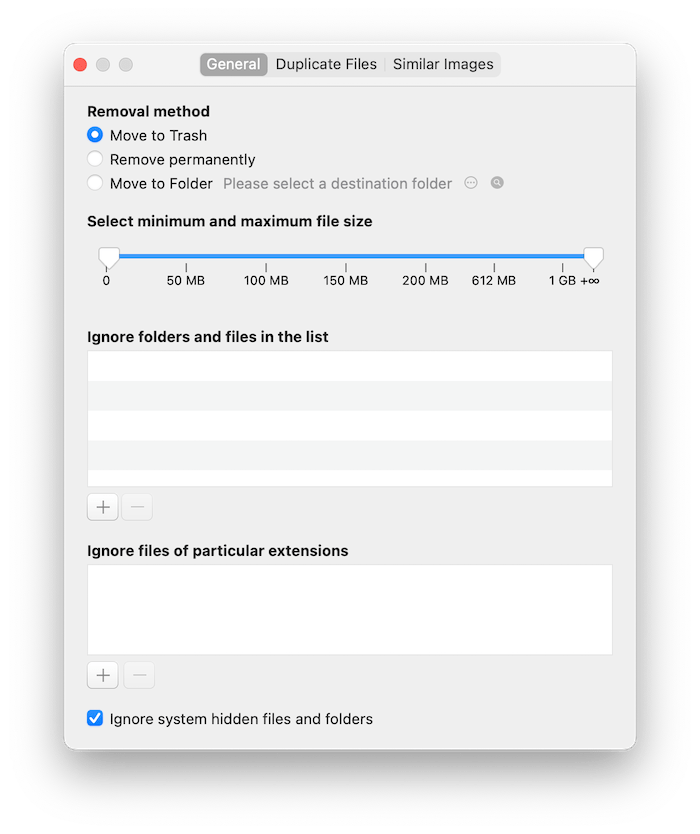
Removal Method
This option can be used if you want to remove the duplicates permanently or move them to a folder after clicking Delete.
 Show in Finder, you can click it to search your Finder.
 You can click it to set the location you want to move the duplicate files to.
Select Minimum and Maximum file size
The default is 0 to Unlimited, but if you don't want to scan the file size more than 200MB, then you could drag and move the mark at 200MB.
Ignore folders and files in the list
If you don't want to scan some folders or files, you can add these folders or files into this list, then Cisdem will skip scanning these folders/files. Also in the scan result page, if you ignore some files, those files will be added into this list automatically.
Ignore files of particular extenssions
You can also add the extenssions of the files that you don't want to scan, then Cisdem will skip scanning files with these extenssions.
Duplicate Files
You can change the settings of scanning and removing duplicate files.
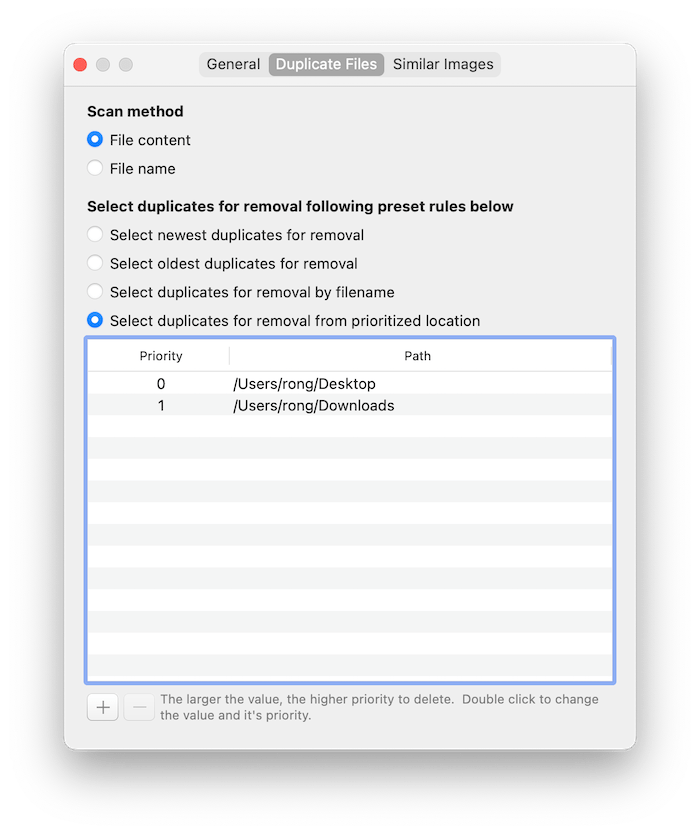
Scan Method
You can select to scan the duplicate files according to the file's name or content.
Tips: For images and documents, Cisdem can only scan duplicates files according to the file's content.
Select duplicates for removal following preset rules below
Select newest duplicates for removal: The latest created duplicates will be priority selected to remove.
Select oldest duplicates for removal: The earliest created duplicates will be priority selected to remove.
Auto-select to remove duplicates by filename: This is a defaulted option. For example, if there are two duplicate files, one of the file is named as Document, and another is named as Document 1, then Document 1 will be priority selected to remove.
Select duplicates for removal from prioritized location: You can set the path here, if the duplicates belongs to one of the setting path, it will be priority selected to remove.
Similar Images
You can change the settings of scanning similar images.
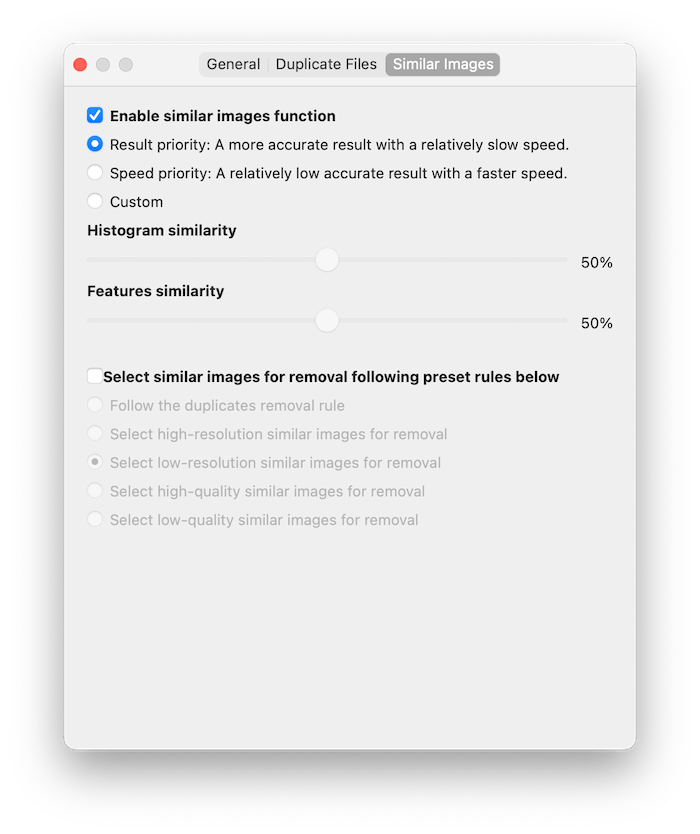
Enable Similar images function
This option is marked by default, if you don’t want to detect the similar images, you can cancel this option before scanning.
Result priority: To compare the similarity of the images, to get a more accurate result, it may take some time for scanning, and this is a defaulted option by Cisdem.
Speed priority: If you need to optimize the scan speed, you can choose to select this option.
Custom: You can also customize the scan accurate by adjusting the values of Image similarity and Features similarity, the higher the value, the more accurate the result.
Select similar Images for removal following preset rules below
This option is unmarked by default, if you want to auto select the similar images for deletion when the scan completes, you can manually mark this option before start scanning.
Follow the duplicates removal rule: Follow the rule that you've selected under the Duplicate files tab.
Select high-resolution similar images for removal/ Select high-quality similar images for removal: If you want to save the space on your hard drive, you can select this option to remove images with higher resolution or higher quality.
Select low-resolution similar images for removal/Select low-quality similar images for removal: If you want to keep sharper photos, you can select this option.
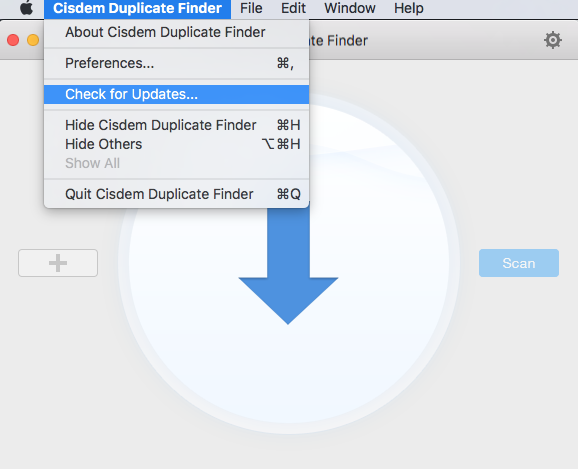
Update Cisdem Duplicate Finder
We always suggest users to use the latest version of the program.
When you launch Cisdem Duplicate Finder, Cisdem will auto check for updates.
Also, you can click Cisdem Duplicate Finder > Check for Updates… on the left top menu bar to manually update it.

Traci Gordon has worked as a tester in a software company for 8 years, she believes that the best software should be a tool that can help users accomplish what they need with the simplest steps.

Adrian Li is Cisdem’s Chief Engineer and serves as the editorial advisor for Duplicate Finder and ContactsMate. His work and insights have been featured in leading tech publications such as Fossbytes, TUAW, Redmond Pie, SafetyDetectives, and BestForAndroid.