

How to Delete Duplicate Photos on Mac in All macOS Versions
 21.2K
21.2K
 4
4


Key Takeaways
Duplicate photos on Mac can exist in the Photos app and folders.
The Photos app in macOS 13 or later has built-in duplicate detection but lacks bulk deletion.
With Cisdem Duplicate Finder, you can find and bulk delete duplicate photos in the Photos app as well as folders.
There are four ways available for deleting duplicate photos on Mac. This article will provide a comparison of these four methods and provide step-by-step instructions for the two most effective methods.
 Cisdem Duplicate Finder
Delete All Duplicate Photos on Mac at Once
- Identify duplicate photos as well as other duplicate files (videos, audio, documents, etc.)
- Detect similar photos too
- Find duplicate files on Mac, external storage devices, cloud drives, and more
- Work with folders, Mac's Photos, and Music/iTunes
- Display duplicates for you to preview side by side
- Automatically select all but one item for deletion in each set of duplicates, enabling you to remove all duplicates at once
- Let you adjust selections manually or choose from 8 preset rules (e.g., Select Newest, Select Smallest)
- Send deleted duplicates to the Recently Deleted album or Trash


Compare methods available for removing duplicate photos on Mac
It's common for Mac users to store photos in the Photos app or in folders, and duplicate photos can exist in both locations. There are four methods available for handling them.
| Method 1. Use software | Method 2. Use Duplicates album | Method 3. Use Smart Album | Method 4. Use Smart Folder | |
|---|---|---|---|---|
| Available for | macOS 10.11 or later | macOS 13 or later | macOS 10.10.3 or later | All macOS versions |
| Work with | Photos app, folders | Photos app | Photos app | Folders |
| Find duplicates | Automatically | Automatically | Manually | Manually |
| Remove duplicates | Manually, all at once | Manually, one by one | Manually, one by one | Manually, one by one |
Quick notes
- Methods 1 and 2 are efficient, so this article will show you how to use them step by step respectively.
- Methods 3 and 4 are not efficient, so I don't recommend them.
- For macOS 13 (Ventura) or later, you can see this part of the article to learn about the advantages and possible disadvantages of method 2.
- If you want to perform bulk deletion, or if your Mac is using macOS 12 or earlier, method 1 can be your best choice. See this part of the article for more information on method 1.
- Method 3 uses the Smart Album feature in the Photos app to automatically group together photos that meet specified criteria, which likely groups together potential duplicates. This may help if you manually look for duplicates. Interested in the Smart Album feature? See this article on Apple’s website.
- Method 4 uses Finder's Smart Folder feature, which works similarly to the said Smart Album feature. Interested in the Smart Folder feature? See this article on Apple’s website.
Method 1. How to find and delete duplicate photos on Mac with duplicate photo finder software
Applies to: macOS 10.11 El Capitan or later
This method uses duplicate photo finder software Cisdem Duplicate Finder. The software works with both the Photos app and folders on your Mac. The removal of all duplicates only takes a couple of clicks. There is also a high degree of customizability, and everything is in your control.
Here’re the main benefits of this method.
- Find duplicate files the Photos app and folders
- Detect similar images too, including those that appear the same but have different formats or sizes, and those that look alike
- Support all image formats (e.g., JPG, JPEG, PNG, GIF, HEIC, WebP, etc.), including all camera RAW formats (e.g., CR2, CR3, ARW, etc.)
- Provide automatic selections and selection rules to make it easy to bulk delete duplicate photos
Note
Cisdem Duplicate Finder is designed to safely work with Mac’s Photos. For example, after you confirm the deletion, the app will delete duplicates, and the deleted photos will go to the Recently Deleted album. It’s just like what would happen when you delete items in Photos.
Below are the steps.
Step 1. Install duplicate photo finder software.
Download and install Cisdem Duplicate Finder. Open it.
 Free Download macOS 10.11 or later
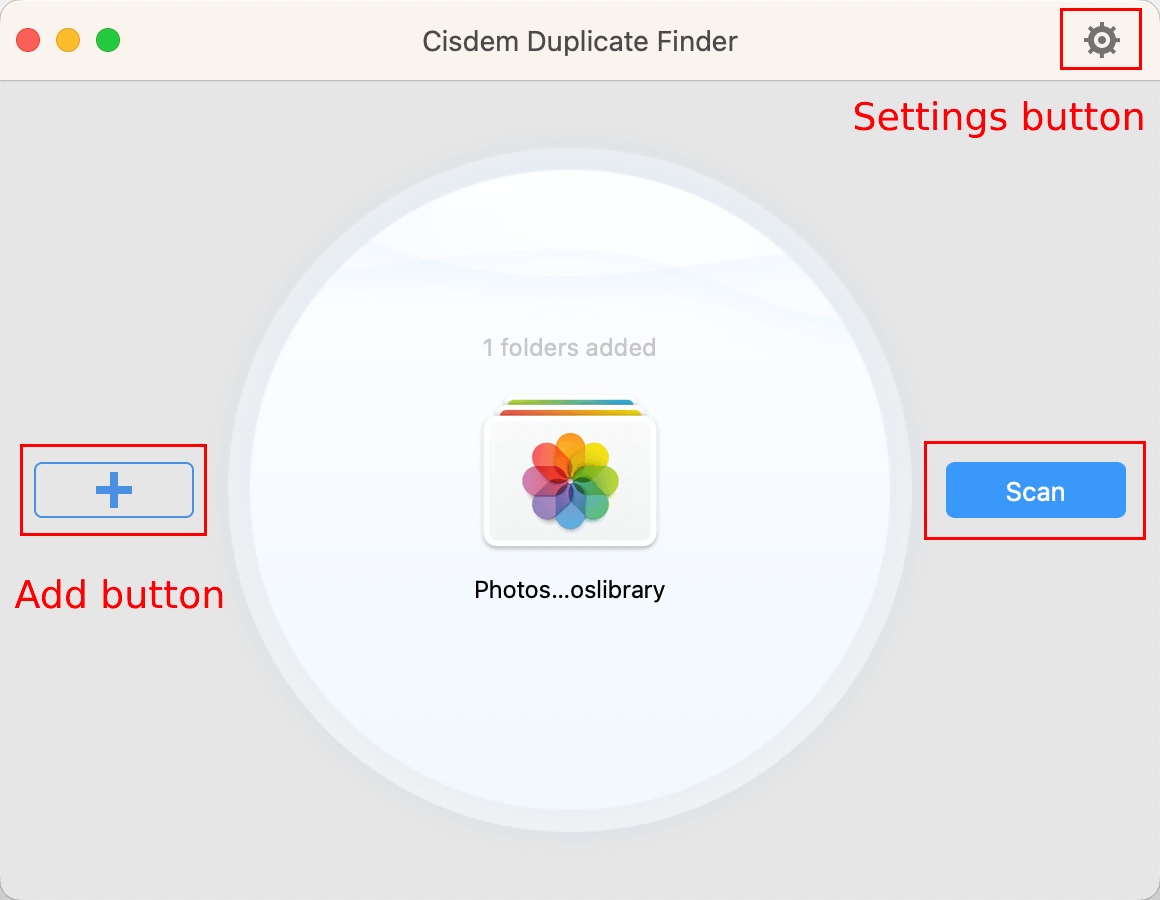
Step 2. Add locations to scan.
To look for duplicate photos in one or multiple folders, click the Add button, select the folder(s), and click Open. Alternatively, you can use drag and drop.
To find duplicates in Photos app on Mac, just add the Photos library. The library is by default located in the Pictures folder.
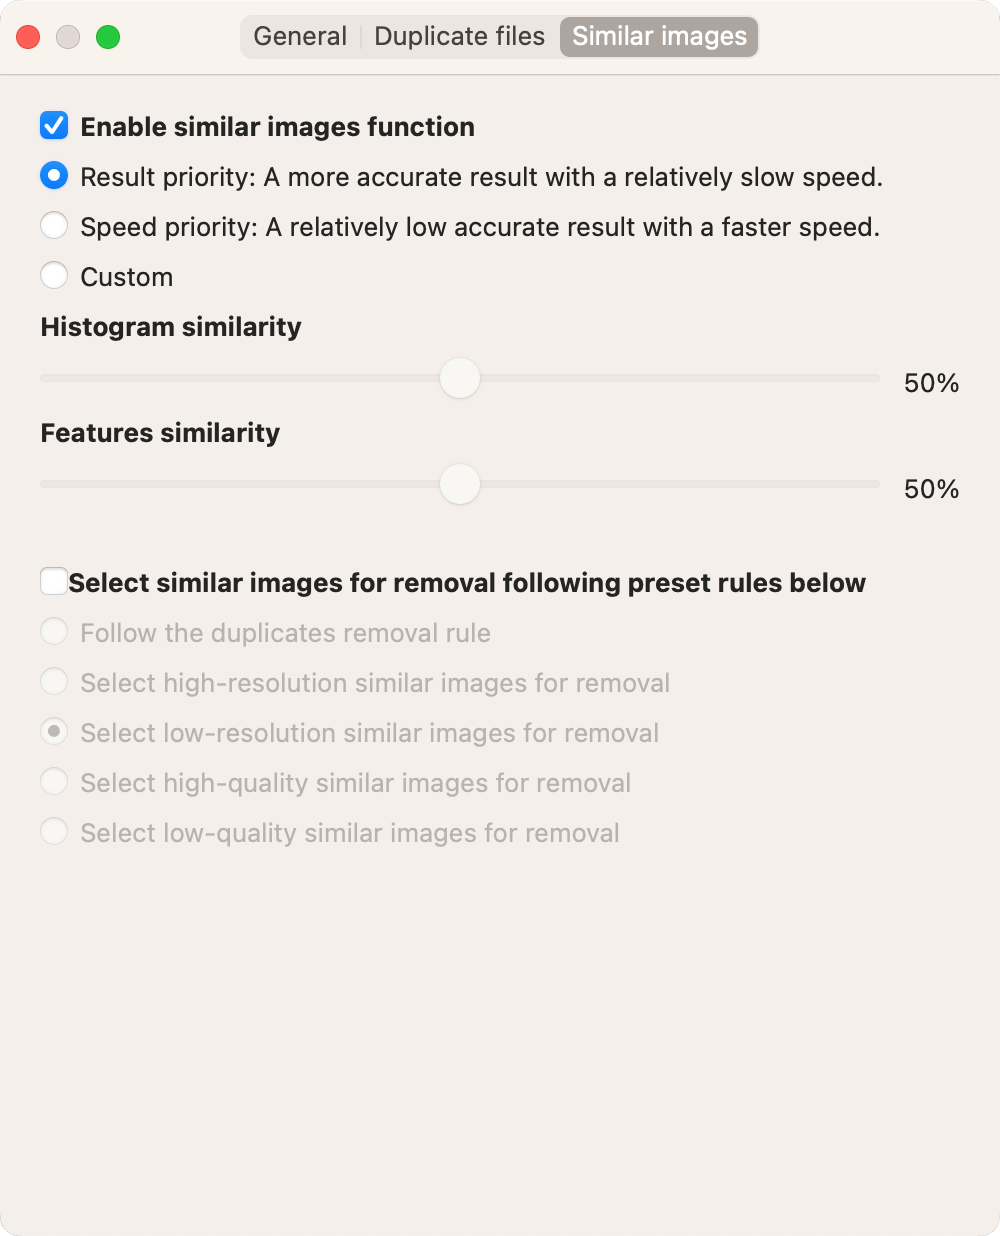
Step 3. Customize the settings (optional).
Go to Settings to customize the settings if needed. For example, you can exclude certain files and folders from the scan.
To find similar ones, make sure that the Enable similar images function checkbox (under the Similar images tab) is selected.
Step 4. Click Scan.
Click Scan to start scanning for duplicate photos. The time the scan takes depends on the number of files.
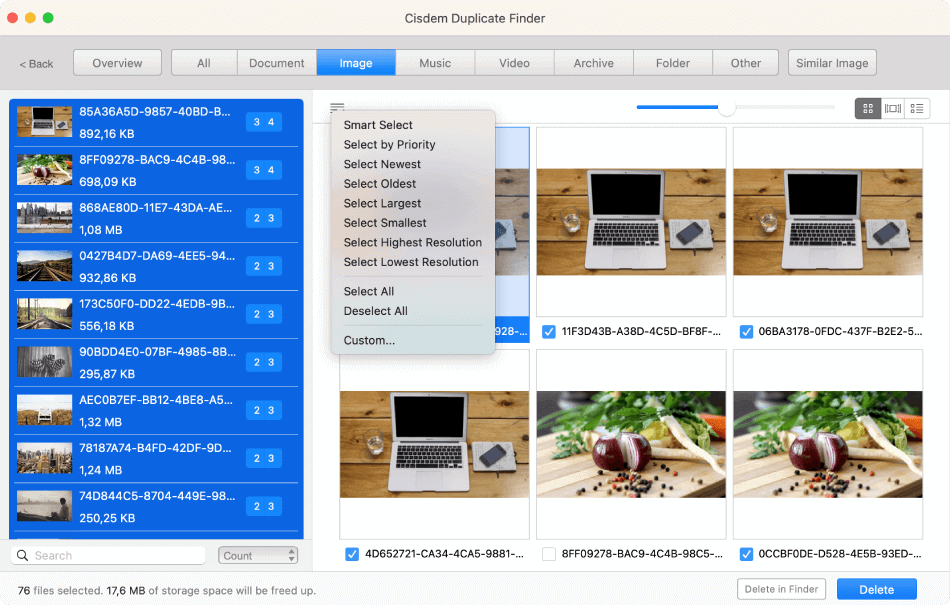
Step 5. View the found duplicate photos.
When the scan is complete, the results window will appear. Its Image tab displays exact duplicate photos. The Similar Image tab displays similar photos.
There are three view modes. The first one allows you to conveniently preview photos side by side. The other modes allow you to preview photos and view photo information like a photo’s location, size and resolution.

Step 6. Select duplicates for removal.
In each set of exact duplicate photos, the software has already automatically selected all but one for deletion. You can also select or deselect by hand. In addition, you can use a selection rule. On the left of the results window, highlight the sets you want to apply a rule to, click the List button and choose the desired rule.
As for detected similar images, in each set, you can manually select the unwanted ones for deletion. The selection rules can also help you select.
Step 7. Delete all duplicates with a click.
Click Delete in the bottom right corner to delete all selected photos at once. And confirm the deletion.
The duplicate pictures removed from folders will go to Trash. The duplicates deleted in the Photos app will go to the Recently Deleted album.
Method 2. How to find and delete duplicate photos in Mac’s Photos app with the Duplicates album
Applies to: macOS 13 Ventura or later
If your Mac is running macOS Ventura or later, then this method is built-in to your Mac, which is an advantage because you don’t need to install any software. This also means that this method is totally free.
The method uses the Duplicates album in the Photos app, which automatically detects exactly identical photos and very similar photos in the library. When the detection is complete, the Duplicates album displays the detected duplicates for you to view and manage.
The detection process is fully automatic, which can be both a pro and a con.
- You don’t need to start the detection, which can be great.
- You can’t tell if the detection pauses or not, and there is no way to resume or start the detection. You have no control over the process. This can be a disadvantage.
The detection can take a few hours or days. If your have a large library, it can take even longer. Although you can easily merge each set of duplicate photos in the Duplicates album, there’s no way to do it in bulk. These are two potential disadvantages.
Below are the steps.
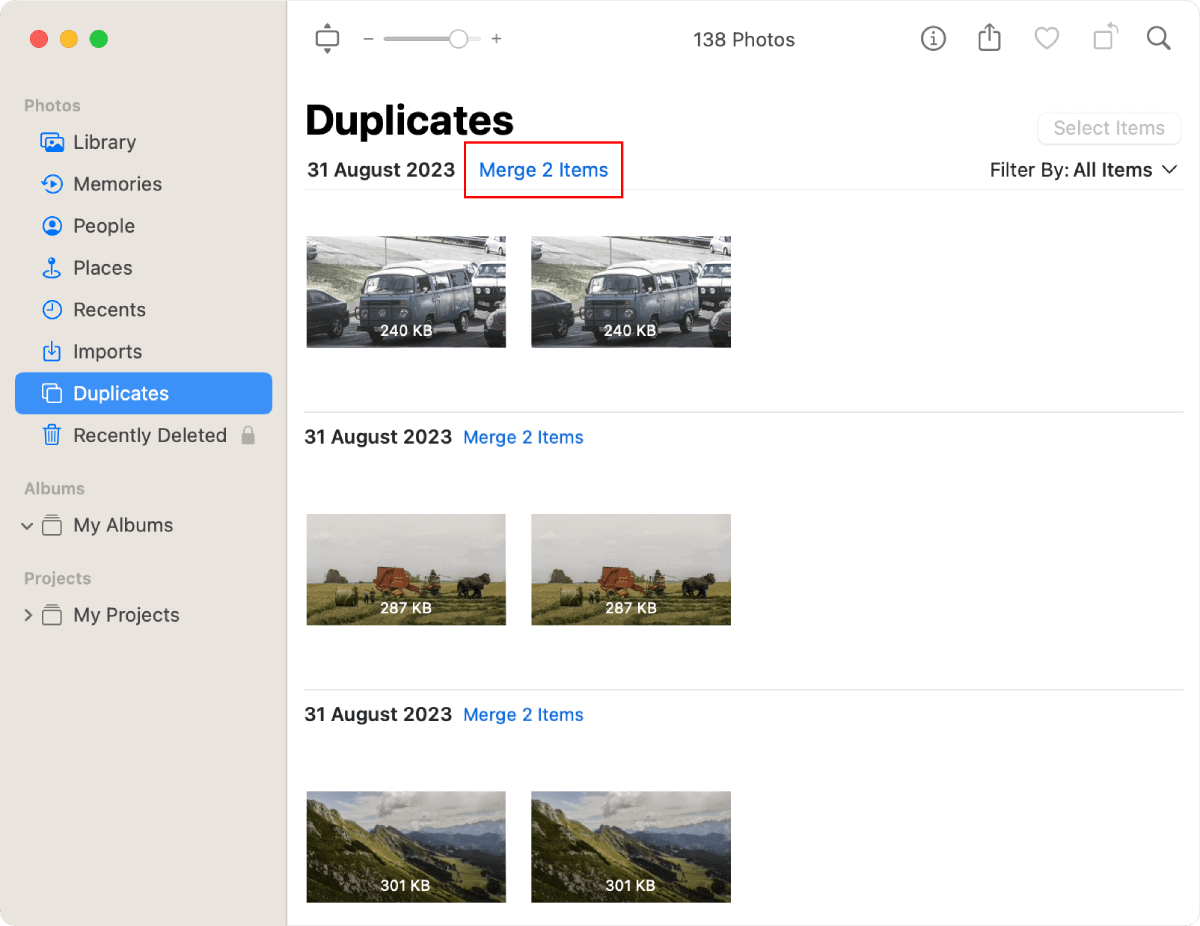
Step 1. Open the Duplicates album.
In Photos, go to the sidebar on the left and click Duplicates. If Duplicates doesn’t show in the sidebar, try these tips.
Step 2. View duplicate photos.
The Duplicates album neatly displays the sets of duplicates found in your library. In each set, you can view photos side by side and see their sizes.
If you can’t see any duplicate in the album and are presented with a Finding Duplicates message, just wait.
Step 3. Remove duplicate photos.
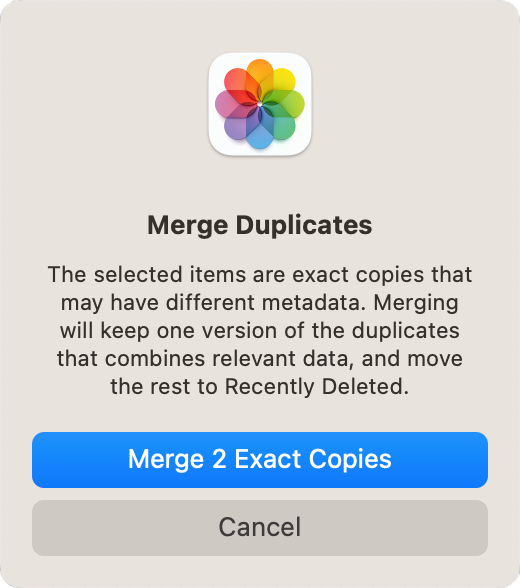
There are two removal options: merge and delete.
Each set comes with a Merge Items button. For a set of exact duplicates, clicking the button will automatically keep the photo that Apple considers to be the highest quality version and remove the rest. For a set of similar photos, clicking the button will automatically keep the photo with highest quality (like the highest resolution) and remove the rest.
Also, you can manually decide which to keep and which to eliminate. In a set, select the unwanted version(s), control-click, and choose Delete [number] Photo(s).
There isn’t a way to merge or delete all duplicate photos, so you need to deal with them individually.
FAQs
Why are there duplicate photos on my Mac?
There can be various causes. For example, copying photos to different folders creates exact duplicate photos, possibly with “2” in their file names. If you set your camera to save both the JPEG version and the RAW version of a photo, importing photos from your camera will lead to similar photos (more precisely non-exact duplicates) on your Mac. Burst mode shooting, taking photos from slightly different angles, and slightly editing photos can lead to similar photos.
How do I delete duplicate photos in iPhoto on Mac?
iPhoto is the predecessor of the Photos app. If you have an iPhoto library cluttered with duplicates, you can import the library to the Photos app and then use method 1 or method 2 to remove the duplicates.
Conclusion
Keeping your photo collections free from duplicates brings a more seamless and enjoyable viewing experience and makes it easier to organize photos. In addition, eliminating the unnecessary copies or lower quality versions of the same photos frees up storage space and makes room for new photos. I hope the two methods on how to delete duplicate photos on Mac can help you effortlessly and reliably remove duplicates from your Photos app or photo folders or both.

With a passion for tech and writing, Sarah joined Cisdem, where she focuses on creating articles about using utility tools to enhance file management and simplify contact management.

Adrian Li is Cisdem’s Chief Engineer and serves as the editorial advisor for Duplicate Finder and ContactsMate. His work and insights have been featured in leading tech publications such as Fossbytes, TUAW, Redmond Pie, SafetyDetectives, and BestForAndroid.
Henry Lopez
Thanks! This guide really helped me clean up my duplicate photos on my Mac. My Photos library feels way more organized now.
Lilli Schrauzer
Apple Photos has Duplicates album that automatically detect duplicates, but I still prefer third-party tools for their flexibility. Good article. Thank you!
Dirk Maxeiner
I tried. The application is wonderful. Find duplicate files, pictures, archives and more. THANK YOU!
Adrian
Thank you for the instructions! They are easy to understand. I followed the steps and it worked. The duplicates are gone.