

How to Convert vCard to CSV on Mac and Windows
 32.7K
32.7K
 2
2


“I manage customer data at work, and many colleagues send me VCF files. The problem is, our CRM system only accepts CSV. To avoid manually entering everything, I have to convert those vCard files into CSV before importing. I’m looking for a efficient way to do this without losing data.”
vCard, also known as VCF, is a popular file format for storing contact information. But sometimes there are situations where you need to convert vCard to an even more popular format - CSV.
In this article, I will show you four proven ways to convert vCard to CSV, providing step-by-step instructions. There's also an FAQs section to help you better understand or troubleshoot the conversion.
 Cisdem ContactsMate
The Best VCF to CSV Converter
- Import contacts from vCard and CSV files
- Export or convert contacts to CSV, Excel, vCard, and more
- Help you convert one or multiple vCards to CSV efficiently
- Allow you to specify which fields to export to CSV
- Support various contacts sources: Google, Outlook, Mac, iCloud (Mac only), and more
- Let you view, search, add, edit, delete, group, tag, email, share, print, and sync contacts
- Let you find and delete or merge duplicate contacts with a click, as well as detect formatting issues like incomplete names and invalid phone numbers or email addresses
- Easy to use and customize
 Free Download macOS 10.11 or later
  Free Download Windows 10 or later
4 best methods to convert VCF to CSV
I tested the following methods, and you can choose the one that best suits your needs.
Method 1. Using Cisdem ContactsMate (Mac & Windows)
You can easily convert VCF to CSV and other common formats using Cisdem ContactsMate, the best contact manager app for Mac and Windows. With this app, you can convert one or multiple vCards to CSV at a time. The conversion is easy and customizable.
Below are the steps for Mac and Windows separately.
For Mac
1. Download and install ContactsMate.
Free Download macOS 10.11 or later
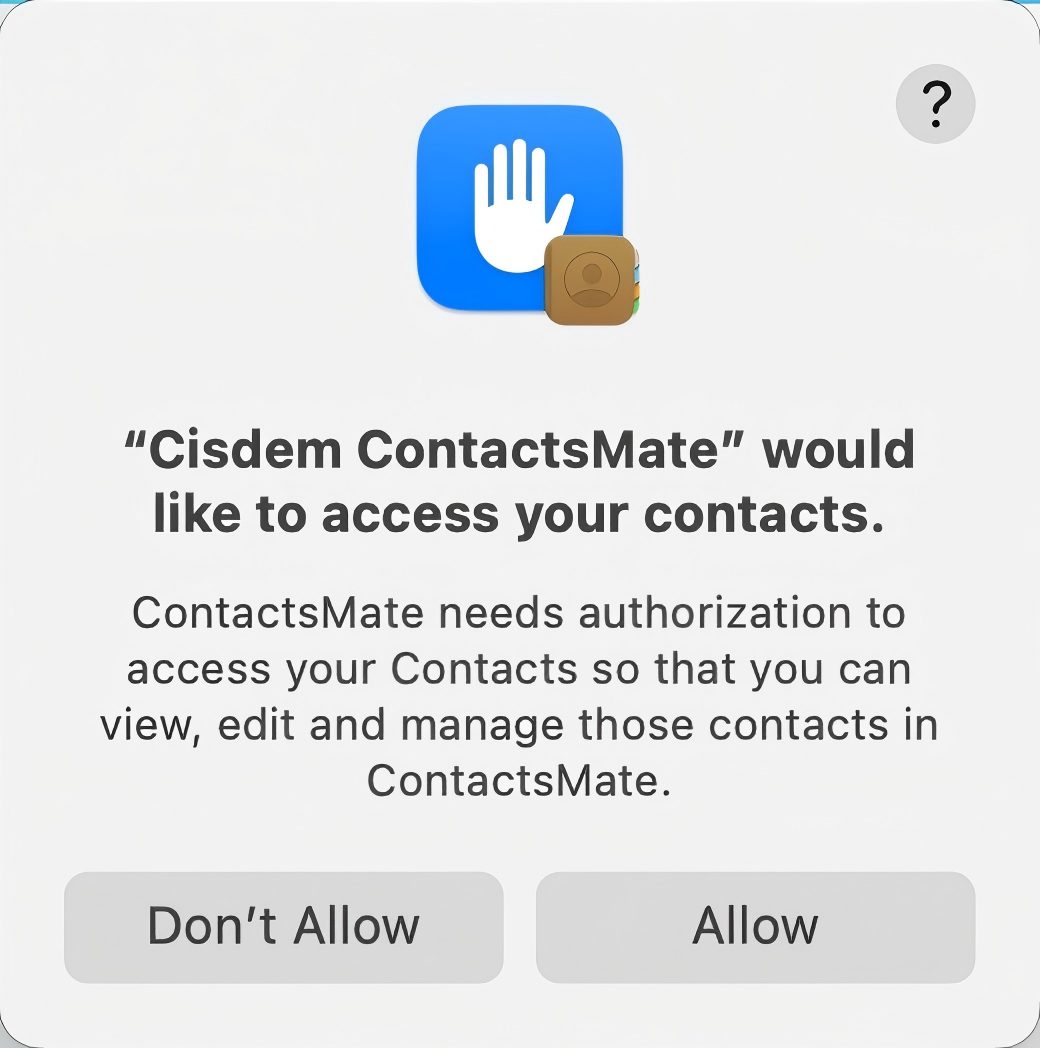
2. The first time you open it, allow it to access your contacts.
3. In the left sidebar, right-click On My Mac. Choose New Group.
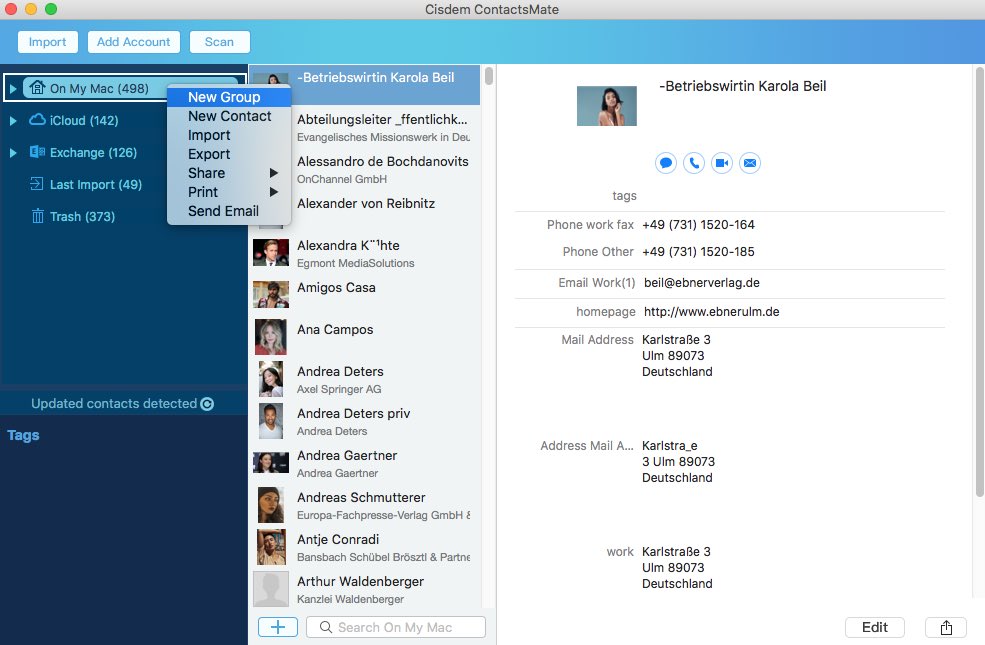
4. Control-click the created new group and choose Import. Select one or multiple VCF files to import.
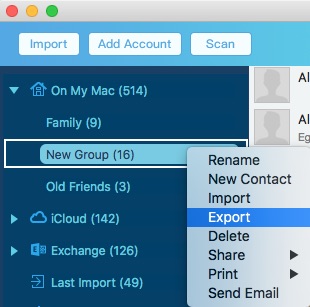
5. Control-click the new group and choose Export.
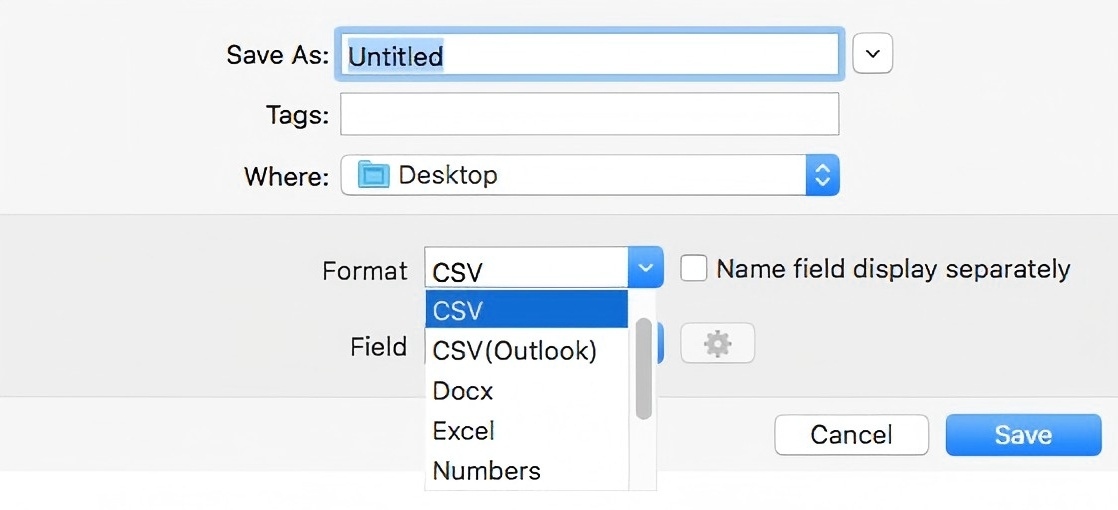
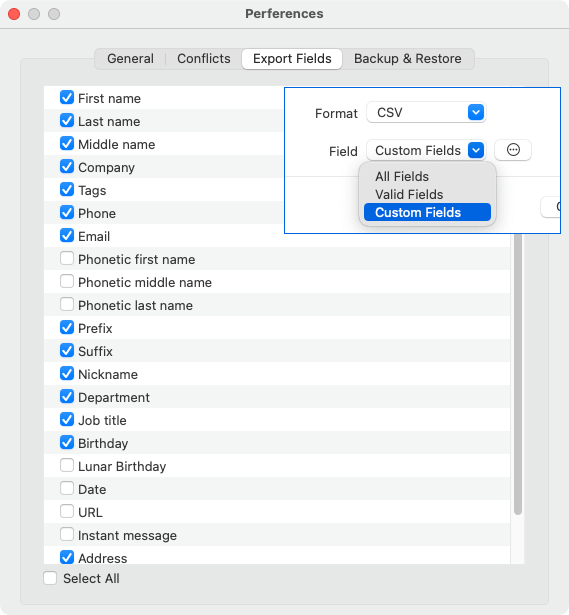
6. To convert VCF to CSV on Mac, select CSV or CSV (Outlook) as the output format based on your needs. Click Save.
(There are still other output formats available. For example, to convert VCF to Excel, just select Excel instead.)
Now your VCF file is converted to CSV successfully. You can view and check the exported CSV file using a spreadsheet app.
Tip
In step 6, you can customize how names are displayed in the exported CSV file, as well as which fields to export.
By default, contact names are displayed in a single column. If needed, you can set names to be displayed in two columns: First name and Last name.
The Field dropdown menu provides three options: All Fields, Valid Fields, and Custom Fields. Choosing Custom Fields allows you to export only fields of your choice.
(Once the conversion is done, if you want to delete the new group created in step 3 and the contacts within it, do this. Click the new group in the sidebar, select all contacts there, press the Delete key, and click Delete. Then, click the new group in sidebar again, press the Delete key, and click Delete.)
For Windows
1. Download and install ContactsMate.
Free Download Windows 10 or later
2. Open it. Add your Google or Outlook account.
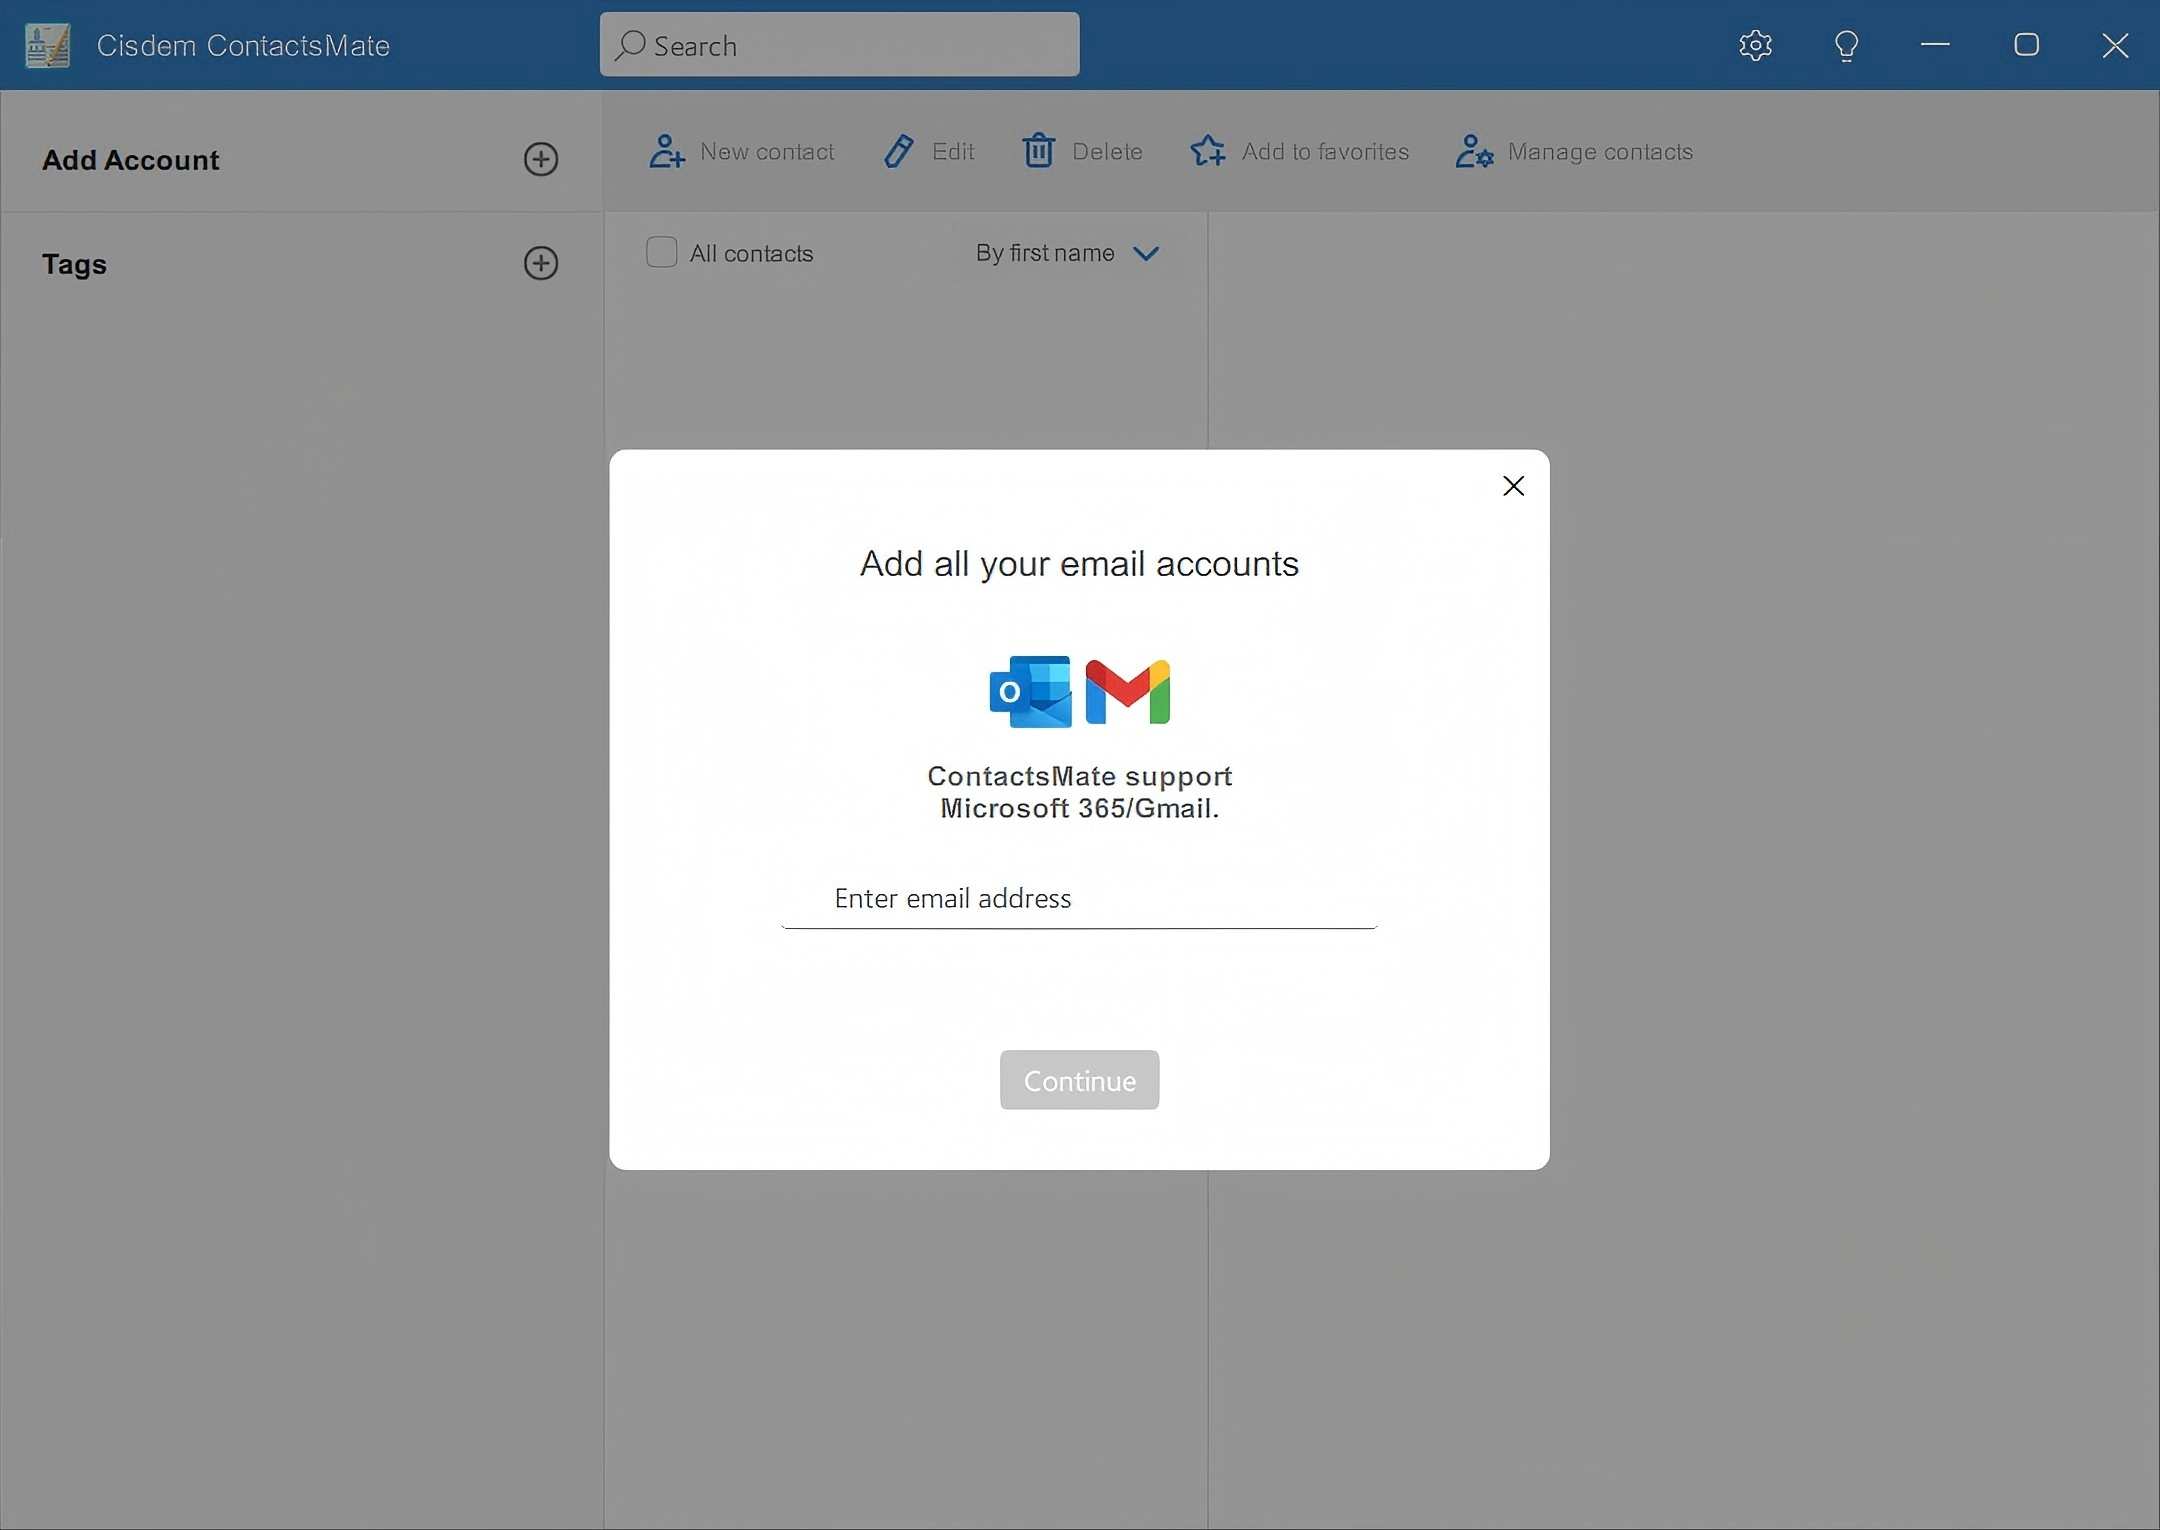
3. In the top right corner, click Manage contacts > Import contacts.
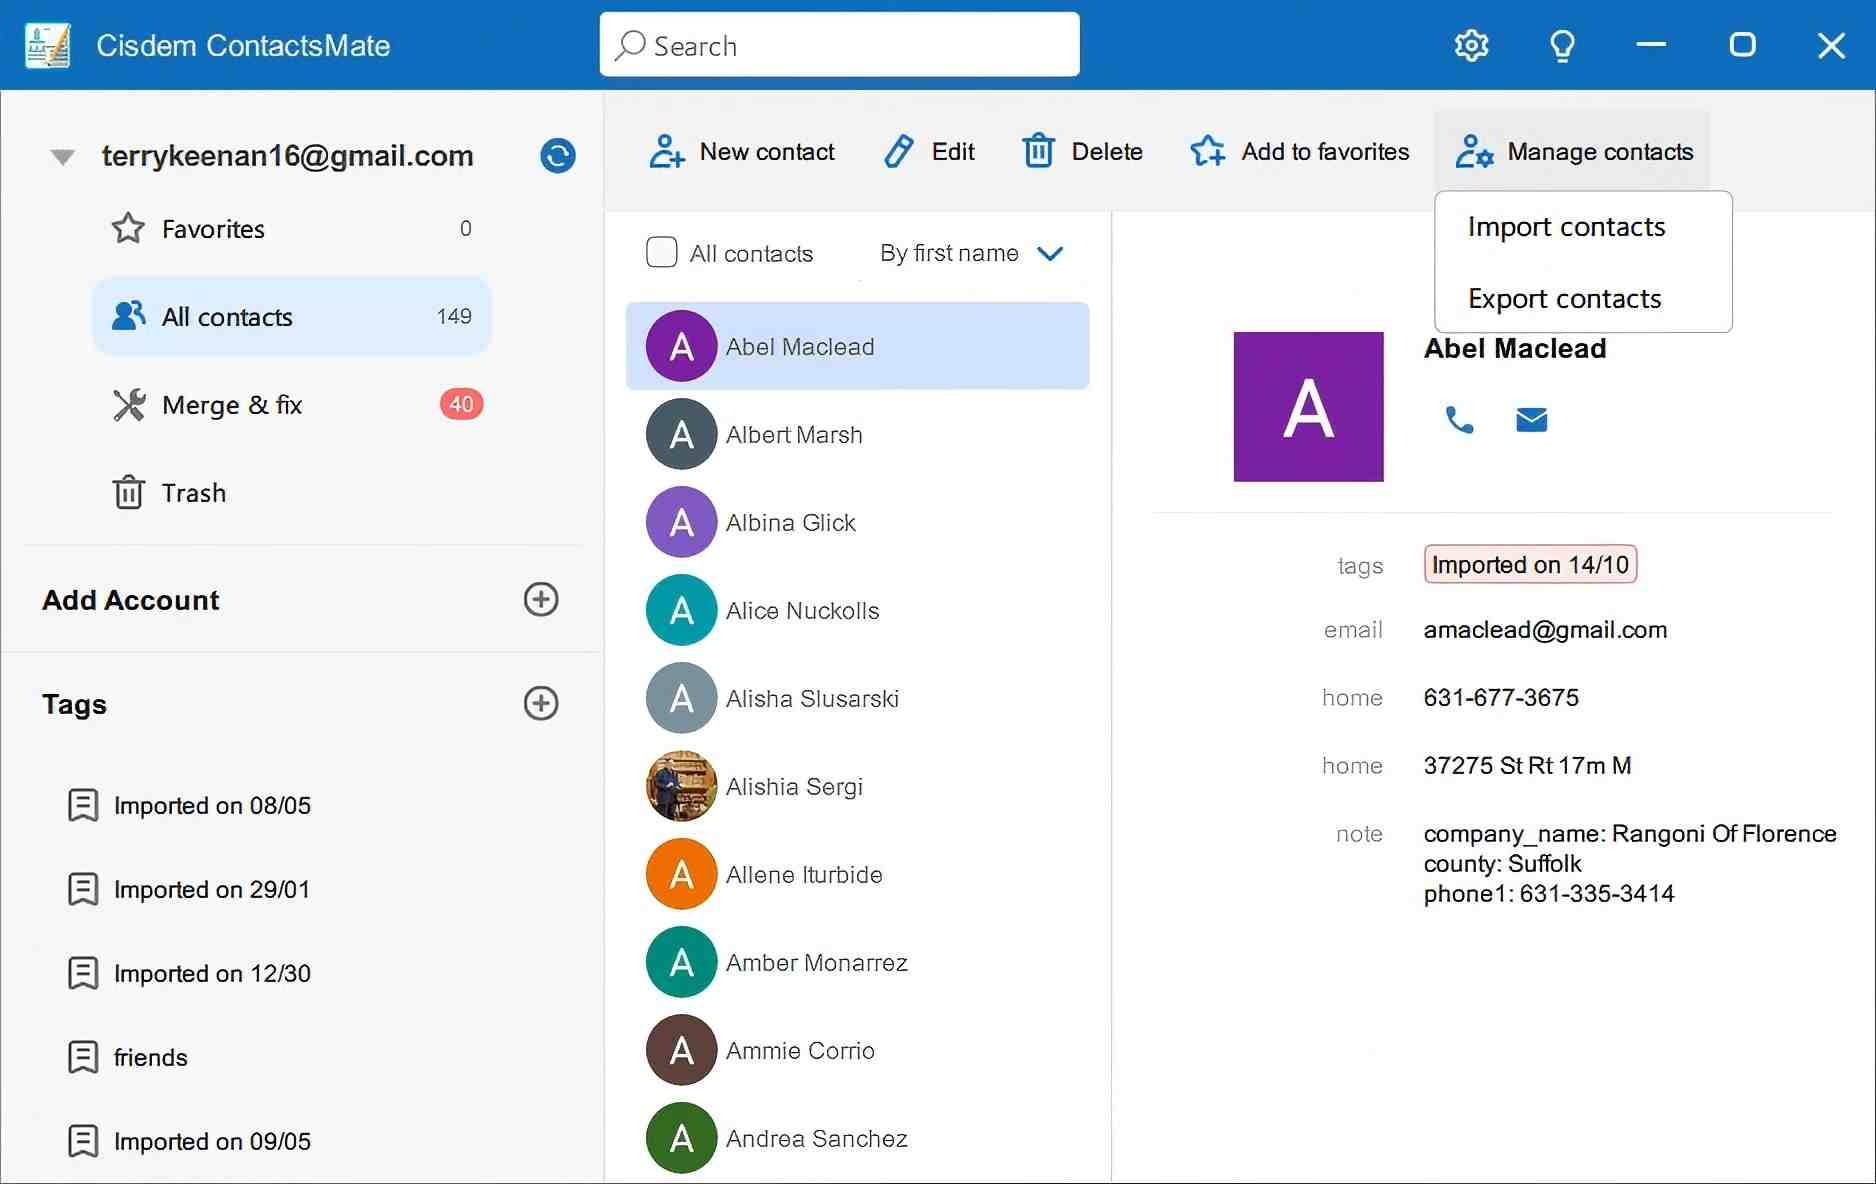
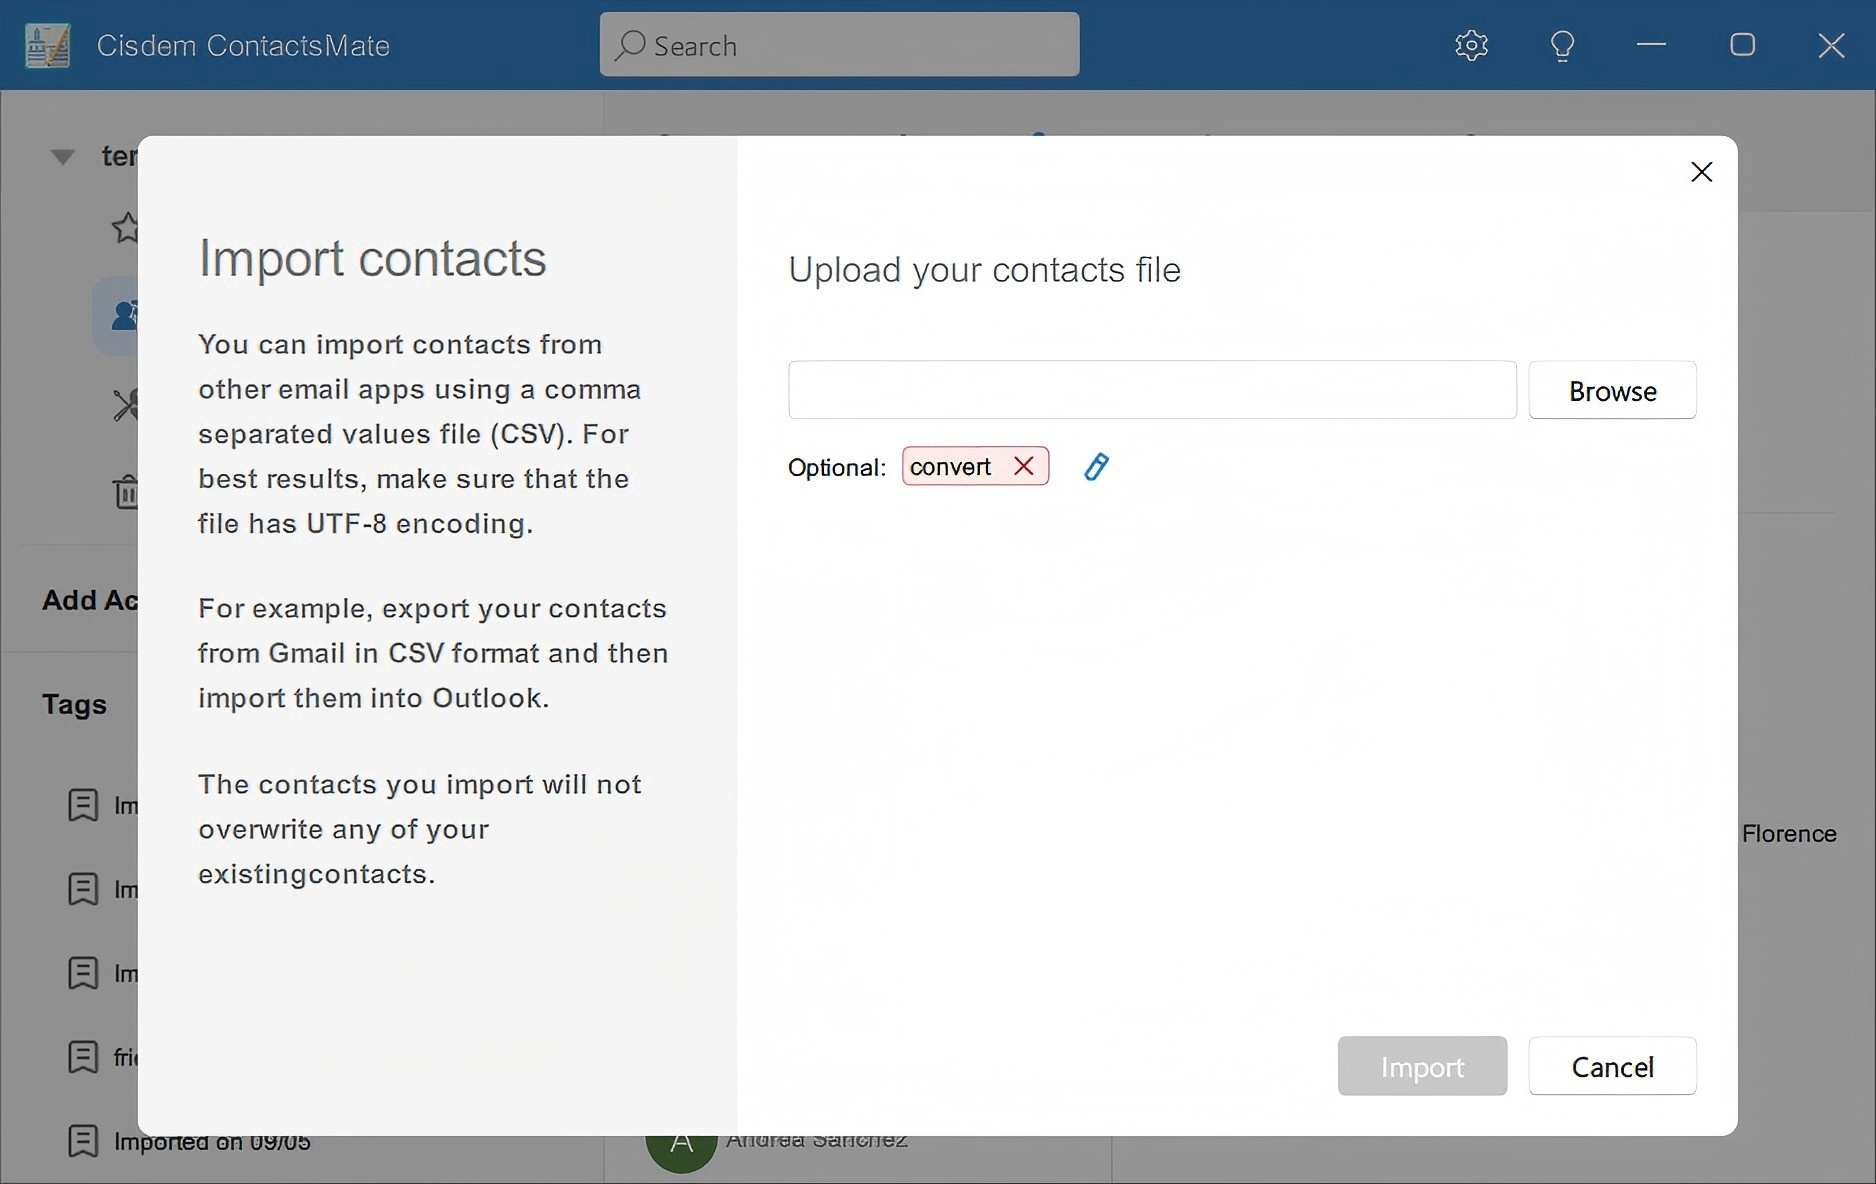
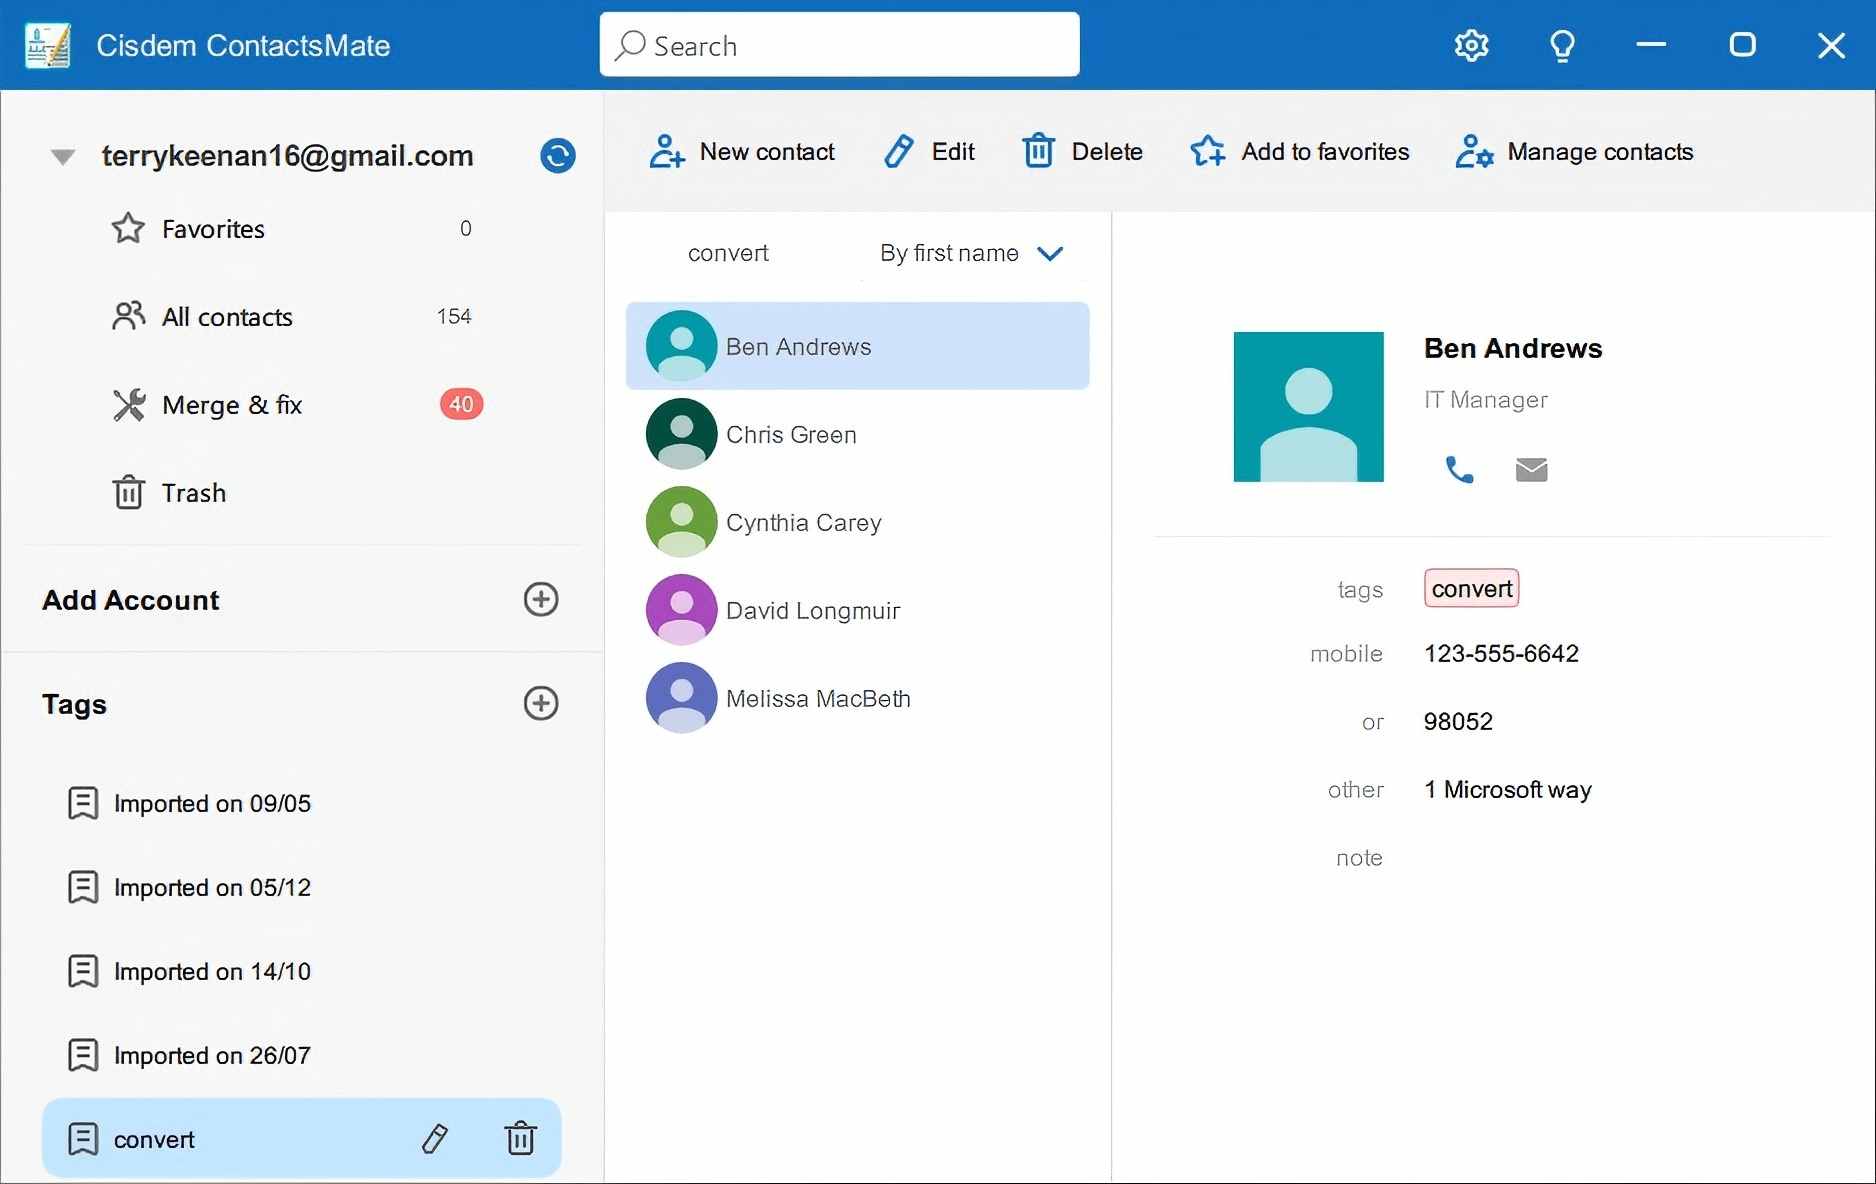
4. In the Import contacts dialog, click Label > New Tags and create a new tag called Convert. Now click Browse to import your vCard file.
5. One the left, click Convert in the Tags section. Select all contacts under this tag.
6. Click Manage contacts > Export contacts.
7. In the Export contacts dialog, choose Selected contacts in the Contacts from this folder menu. Choose CSV as the export format. Select the Export CSV platform. Click Export.

Method 2. Use Outlook for Windows
If you are a Windows user, you can also consider a built-in conversion solution - using the Outlook for Windows app (simply called Outlook on your device). You should be able to find the app on your computer. But if not, you can install it from the Microsoft Store.
This method is easy to use. However, there's a possible downside. In the test, all contact information except names went to the Notes column (field) after the conversion.
1. Open Outlook for Windows.
2. On the left, choose People.
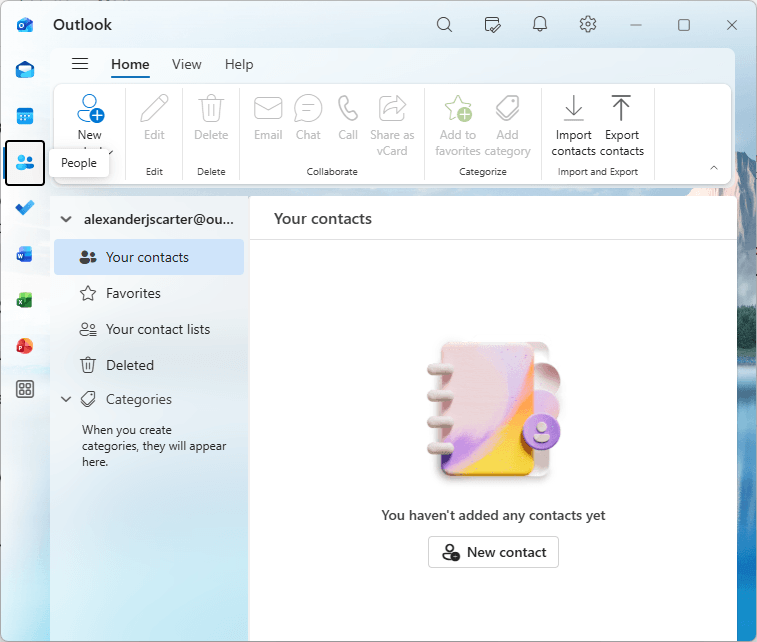
3. Click Import contacts in the toolbar.
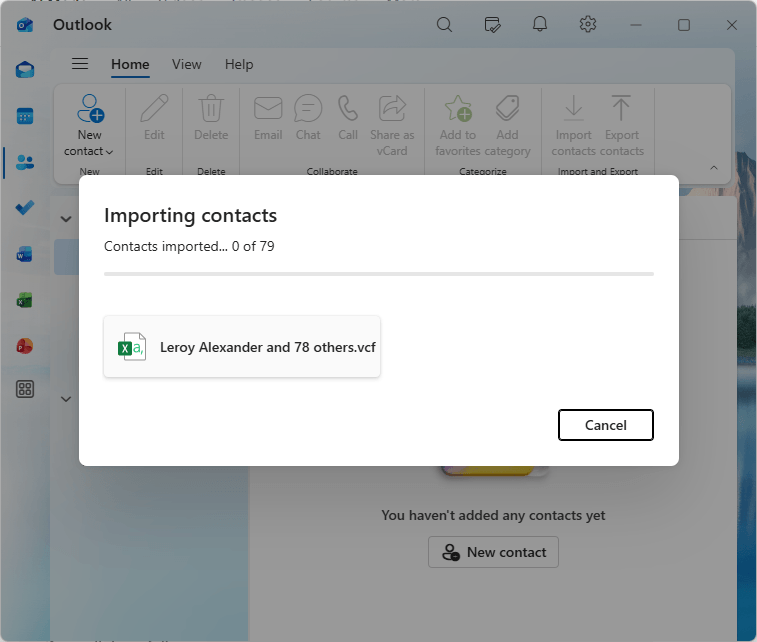
4. Drag one or more vCards into the Import contacts dialog and click Import. When import is complete, a message will inform you.
Note
However, the actual import process can be much slower. Don't start the conversion until you are sure it's truly finished.
5. In the navigation pane on the left, check the number next to Your contacts to make sure all contacts have been imported. Then, click Export contacts in the toolbar.
6. Click Export in the Export contacts dialog.
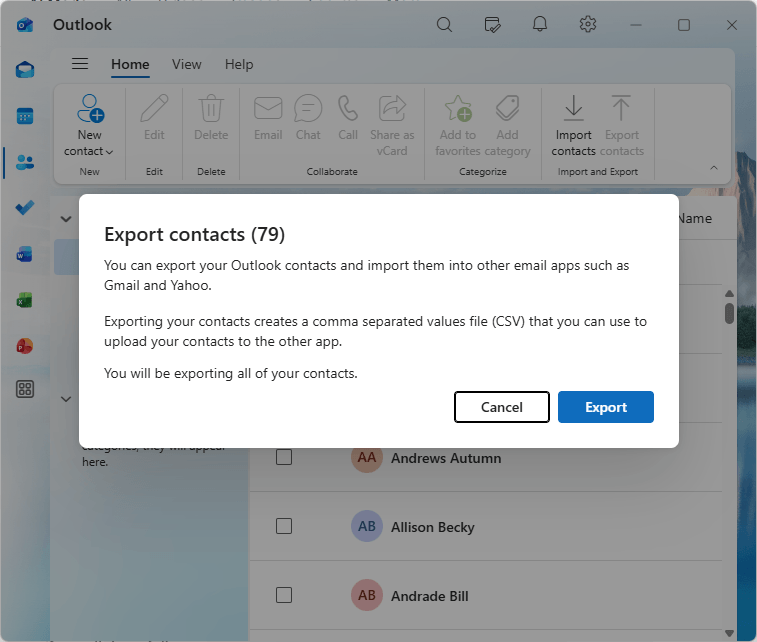
A CSV file named "contacts" will soon be automatically saved to your computer.
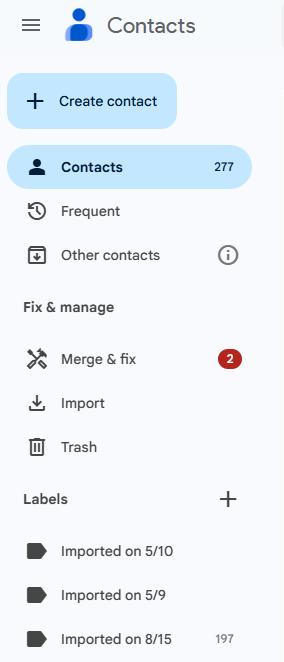
Method 3. Using Google Contacts
Google Contacts is a web-based contact management tool from Google. It’s Import and Export features supports CSV and vCard formats, which can help you convert contacts between these 2 formats on Mac and Windows computer easily.
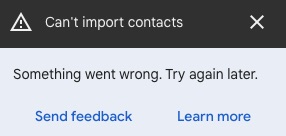
This method can only convert one vCard at a time. If there are many vCards, this method is not efficient. Another downside is that you can’t convert a lot of contacts at a time. In my testing, I tried converting a vCard file containing 500 contacts. It failed.
1. Open a browser. Go to https://contacts.google.com/.
2. Sign in with your Google account.
3. In the left sidebar, click Import.
4. Click Select file, select the VCF file you want to convert. You can click the Label button and create a label for these imported VCF. This separates the contacts you originally had and allows you to remove all contacts in this label label directly after the conversion.
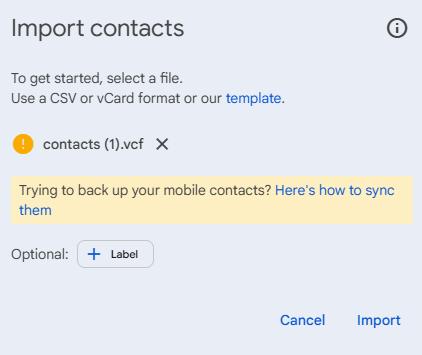
5. Click Open. Click Import.
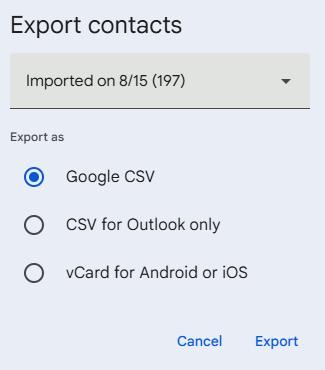
6. In the Labels section, you’ll see the label you just created. Click it and click the Export icon in the upper-right corner of the page.
7. Click the down arrow icon. In the Labels section, choose the contacts you just imported.
8. Select Google CSV or Outlook CSV as the export format.
9. Click Export.
By default, the exported CSV file will be saved in the Downloads folder on your device.
Method 4. Using an online converter
There are also free online tools dedicated to converting VCF file to CSV or Excel. The web page https://tribulant.com/vcard-csv/ is one of them. This VCF to CSV converter is free to use and easily accessible. However, it doesn’t support VCF files that are larger than 8 MB.
1. Open a browser. Go to https://tribulant.com/vcard-csv/.
2. Click Choose File.
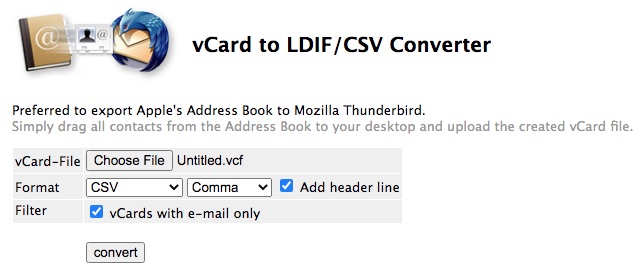
3. Select the vCard file that you’re going to convert. Click Open.
4. Choose CSV or Gmail (CSV) as the output format.
5. Click Tab. choose Comma, Tab, or Semicolon as the separate values from the drop-down menu.
6. Select the Add header line checkbox.
7. In the Filter section, it allows you to filter vCards with e-mail only.
8. Click convert.
As mentioned, there’s customizability. This converter provides three options to separate values: Tab, Semicolon, and Comma. But if you choose the option Tab or Semicolon, all contact information (such first name, last name, email address and mobile phone) will appear in the first column in the exported CSV file, which is likely to make this CSV file invalid when you import it to an app or service. The option Comma is recommended.
Another converter available is https://www.aconvert.com/document/vcf-to-csv/. In addition to CSV, it enables you to convert VCF to Excel.
A comparison of these 4 methods
Each method of this article to convert VCF to CSV has its own strengths and limitations. Below I’ll give you a brief comparison.
|
Method |
Ease of use |
Compatibility |
Cost |
Type |
Time needed |
Best for |
|---|---|---|---|---|---|---|
|
Cisdem ContactsMate |
★★★★★ |
Mac, Windows |
Paid (with trial) |
Offline |
Fast (support bulk conversion) |
Users who need to process a large number of contacts in batches. |
|
Outlook for Windows |
★★★☆☆ |
Windows |
Free |
Offline |
Fast |
Users who'd be patient with adjusting contact info in CSV after conversion. |
|
Google Contacts |
★★★★☆ |
Any OS |
Free |
Online |
Medium (only one VCF can be converted at a time) |
Users who are looking for a free solution and don't have too many vCard files to convert. |
|
Online Converter |
★★★★★ |
Any OS |
Free |
Online |
Fast (as long as the internet speed is fast) |
Users who do not have important or private data in the vCard files. |
FAQs
What is a vCard?
vCard (with the extension .vcf) is also known as VCF (Virtual Contact File). It’s a standard file format for storing contact information. A single vCard can contain one or multiple contacts.
There are 3 popular versions of the vCard file format:
- vCard 2.1: It is the earliest version that released in 1990s. It is also known as the original vCard. However, it has limited support for encoding. With this version of vCard, users can store basic contacts information. It also supports images and logos. vCard 2.1 is still widely used today.
- vCard 3.0: vCard 3.0 is a more standardized version. It is supported by most email and contact applications. In this version, more features such as Property Grouping are added. What’s more, it allows users to store contact’s geographical details and time zones. It also supports high-quality images and audio clips.
- vCard 4.0: This is the latest and most secure version currently. Compared to the earlier 2 vCard versions, it is also more flexible, allowing users to store more than one email address, phone number, etc. However, not all email and contact applications can recognize it.
What is a CSV file?
CSV (comma-separated values) is a text data format used to store tabular data. We can use it to store different kinds of information, such as contacts. In a CSV file containing contact information, each row represents a contact, and each column represents a specific field.
Some services or apps, such as Outlook, Google, or Shutterfly, may only accept (or better support) CSV files in a specific layout. Below are some details about Google CSV and Outlook CSV.
- Google CSV uses Unicode to preserve international characters while Outlook CSV doesn’t support these characters.
- Google CSV and Outlook CSV use different header names and orders. For example, Google CSV typically uses Name, Given Name, Family Name. Outlook CSV uses First Name, Middle Name, Last Name.
- Google CSV is better suited for Google Contacts. Outlook CSV is for Microsoft Outlook, Exchange, and Office 365.
What are some reasons to convert vCard to CSV?
There are a few reasons you might need to convert vCard to CSV.
- Many software doesn’t supports the VCF format. However, CSV can be opened in most spreadsheet software.
- CSV makes it easier to sort, filter, or edit contacts. It is especially useful for managing large contact lists.
- CSV is also compatible with more email and contact applications, making it easier for you to import contacts.
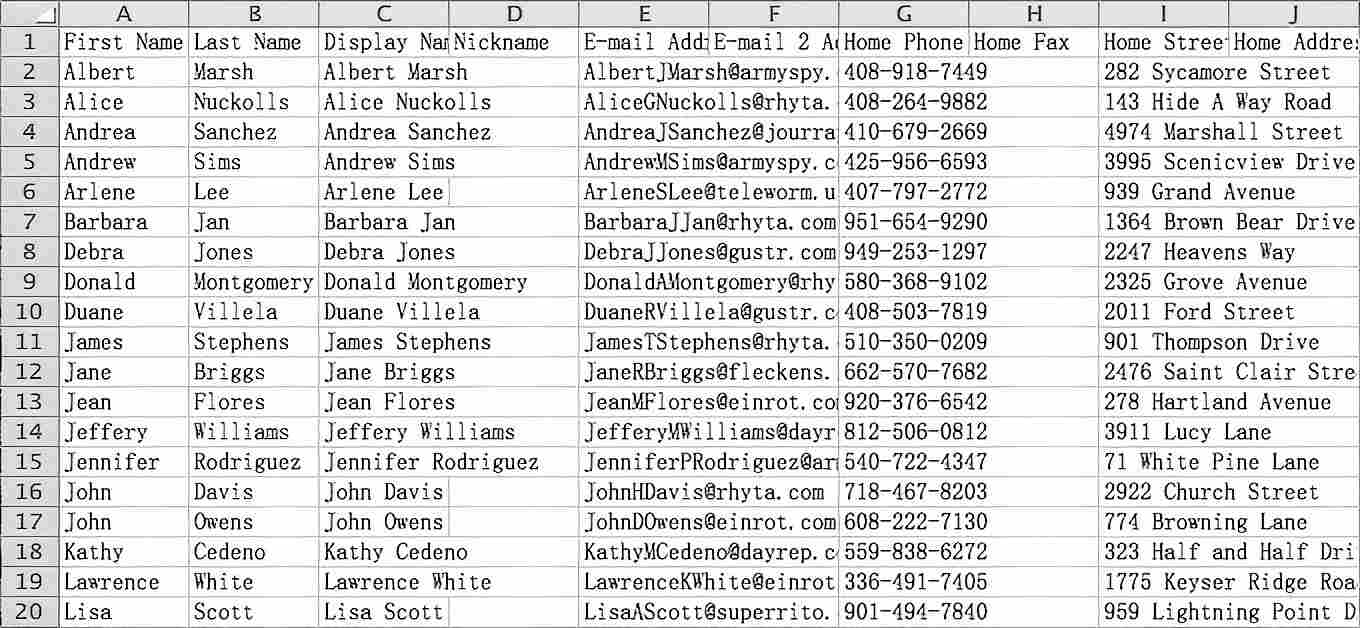
How to view and check the exported CSV file?
You can use a spreadsheet app (like Microsoft Excel, Apple Numbers, or Google Sheets) to view the exported CSV file.
If you are importing the CSV file into an application, carefully check the file and make sure it can be correctly imported.
- Make sure that every contact information like name, email address is shown in the right place.
- If headings are missing or incorrect, the exported CSV file may not be accepted by a service or app at all, or it may result in information loss or disorganization. In such a case, you can try adding or editing the headings.
The good news is that the methods talked about in this article provide good conversion results.
Can I convert multiple vCard files to CSV at once?
Yes. To convert multiple vCard files to CSV at once, you can merge them into a single VCF file first. Then convert it to CSV. If you don't know how to merge or want to save time, you can use Cisdem ContactsMate for batch conversion.
Would I lose contacts data during the conversion?
No, you won't lose contacts information unless you intentionally exclude certain fields during conversion or use an incompatible CSV layout (such as importing Google CSV to Outlook). Don't worry if you find any information loss after conversion. Just try a different conversion method or use edit the exported CSV file. For a smooth, quality conversion, I recommend using a professional contact manager to convert your contacts file to avoid losing data.
Conclusion
Compared with VCF, CSV files are easier to be edit, especially when batch editing or searching contacts. Also, CSV files are supported by more apps and services. This article talks about how to convert VCF to CSV on Mac and Windows in different ways. Thanks to the conversion, the contact data in a VCF file can be opened in a spreadsheet app or text editor and be used in many apps or services.

With a passion for tech and writing, Sarah joined Cisdem, where she focuses on creating articles about using utility tools to enhance file management and simplify contact management.

Adrian Li is Cisdem’s Chief Engineer and serves as the editorial advisor for Duplicate Finder and ContactsMate. His work and insights have been featured in leading tech publications such as Fossbytes, TUAW, Redmond Pie, SafetyDetectives, and BestForAndroid.
Isabella Williams
The Google Contacts option was convenient since I already use it. The online converter is also easy to use.
C.M.
Hey there! Just finished reading your awesome article on converting vCards to CSV. Loved the variety of methods you covered! Quick question: have you come across any challenges or limitations with any of these methods, especially when dealing with large vCard files? Thanks for the helpful tips!