

7 Ways to Export Outlook Contacts to iCloud on Mac and PC
 6.5K
6.5K
 0
0


Outlook is an email client app by Microsoft and is available for Windows, Mac, Android, and iOS. Email service Outlook.com is often referred to as Outlook as well. Sometimes, we need to transfer our Outlook contacts to iCloud for access, backup, or other purposes.
In this article, I will share methods to export contacts from Outlook to iCloud, covering both Outlook the email client app and Outlook the email service.
 Cisdem ContactsMate
Move Outlook Contacts to iCloud Easily with Drag and Drop
- Support various contacts sources: Outlook, iCloud, Google, Mac, etc.
- Allow you to transfer contacts between supported sources with drag and drop
- Export or convert contacts to 8 formats: CSV, Excel, vCards, etc.
- Import contacts from vCard and CSV files
- Allow you to view, search, edit, add, delete, group, tag, email, print, share, sync, and back up contacts
- Find and delete or merge duplicate contacts with a click
- Detect incomplete names, blank names, invalid phone numbers or email addresses, and more
- Easy to use for everyone
 Free Download macOS 10.11 or later
Part 1. How to export Outlook contacts to iCloud on Mac
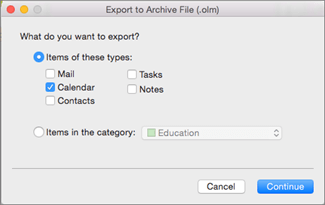
Outlook for Mac's Export feature allows you to export contacts to an archive file (with the extension .olm). Outlook.com's Export contacts feature only supports the CSV format. Both OLM and CSV are not supported by iCloud. Don’t worry. This part will show you 3 methods to do the export.
Method 1. Export contacts from Outlook to iCloud directly
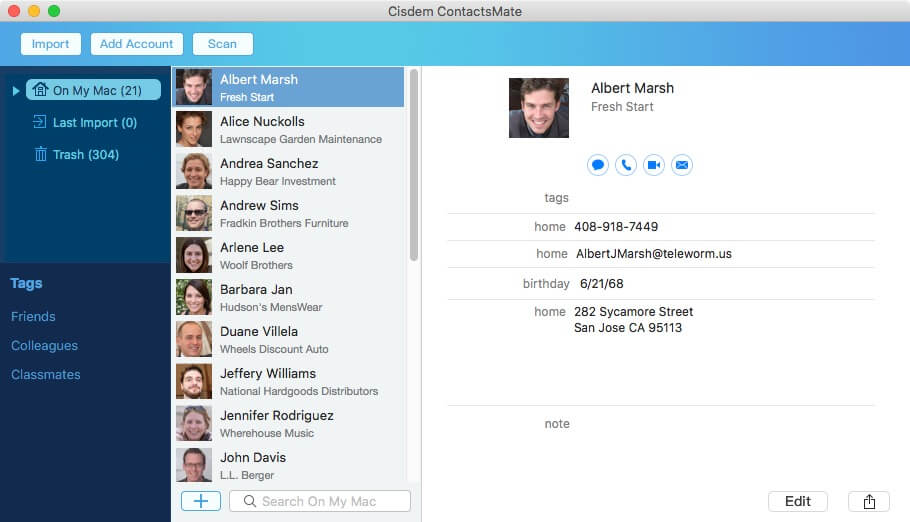
For Mac users, the easiest way to export Outlook.com contacts to iCloud is to use Cisdem ContactsMate (an easy-to-use and versatile contact management app for Mac). It supports various contacts sources and allows you to effortlessly move contacts from one supported source to another.
This method is direct and doesn’t require any conversion.
Steps
1. Download and install Cisdem ContactsMate.
Free Download macOS 10.11 or later
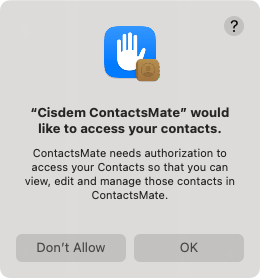
2. When you open it for the first time, click OK in the message that appears.
3. Click Add Account in the toolbar at the top of the ContactsMate window.
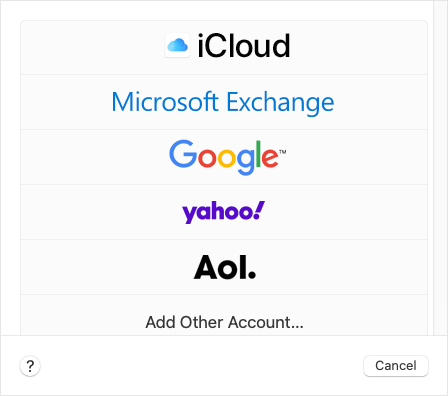
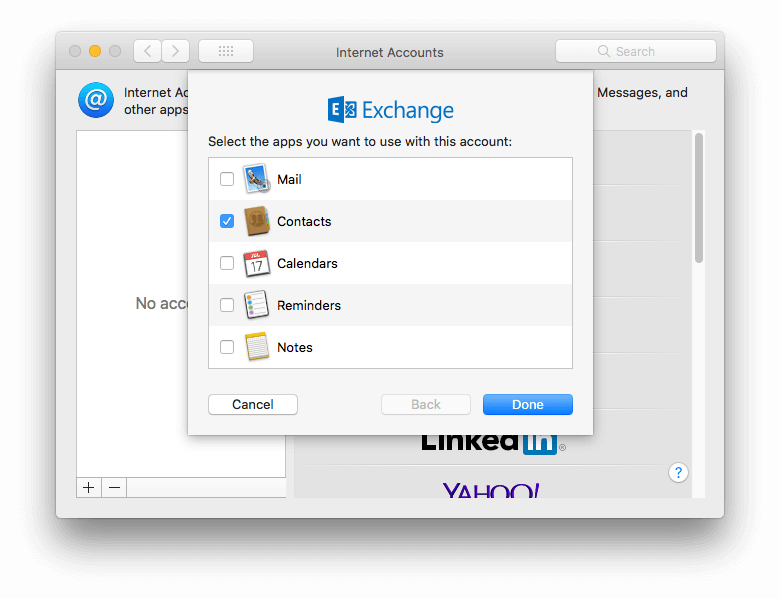
4. In the window that appears, click Add Account. Then choose iCloud and sign in to it.
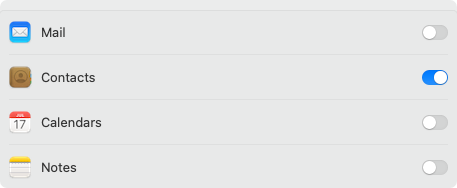
5. Turn the switch next to Contacts to the on position.
6. In a similar way, choose Exchange, sign in with your Outlook.com account, and then make sure the Contacts checkbox is selected.
7. In the sidebar on the left side of the ContactsMate window, click the Refresh button  next to the Updated contacts deleted message. And iCloud and Exchange will appear in the sidebar.
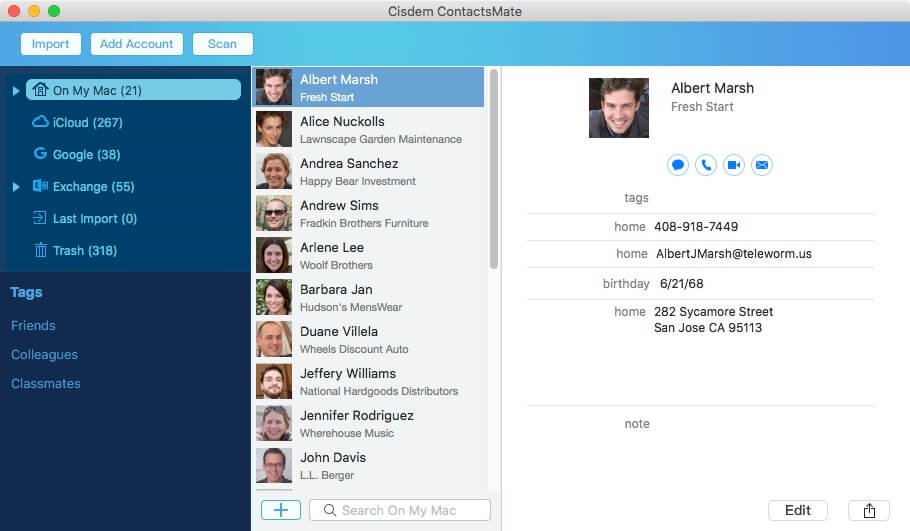
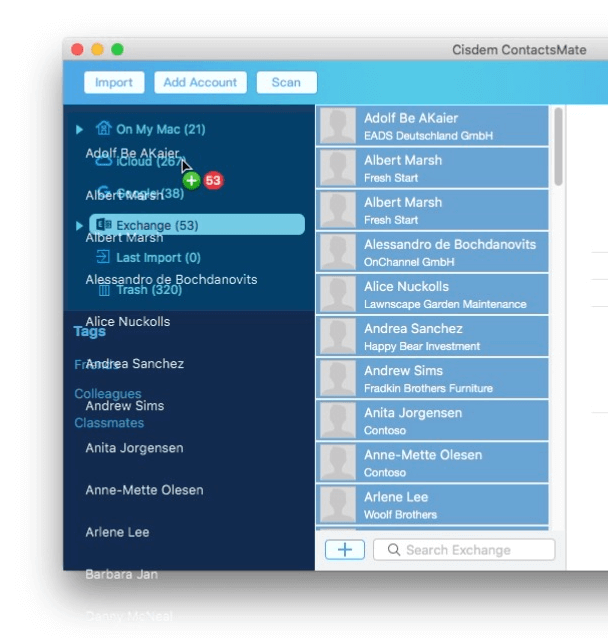
8. To transfer Outlook contacts to iCloud on Mac, choose Exchange in the sidebar, select all the Outlook contacts with Command-A, then drag them into iCloud in the sidebar.
Tips
- With this method, in addition to all Outlook contacts, you can export selected contacts only. To do so, in step 8, select the specific contacts that you want to export.
- If you also want to transfer Outlook contacts to iPhone, only one extra step is needed. Just turn on iCloud for Contacts on iPhone.
- This method also allows you to easily export Outlook contacts on Mac to other services or apps (such as Google) or to the file formats that you may need (such as CSV).
![]()

Method 2. Move Outlook contacts to iCloud manually
The old version of Outlook for Mac app supports exporting contacts to an OLM file (as shown in the screenshot below), and the new Outlook for Mac app doesn't have an export feature.
Luckily, both versions actually provide a hidden method to export contacts to individual vCards, which is exactly the file format that iCloud accepts. However, with this method, you need to manually import these vCards one by one to iCloud, which may be time-consuming.
This method works with Outlook for Mac 16 (new version), Office 365 for Mac Subscription, Office for Mac 2019, Outlook 2016 for Mac, and Outlook for Mac 2011.
(The steps below uses Outlook for Mac 16. The interface can be different, depending on the version you use, but the process is basically the same.)
Steps
1. Open the Outlook app on your Mac.
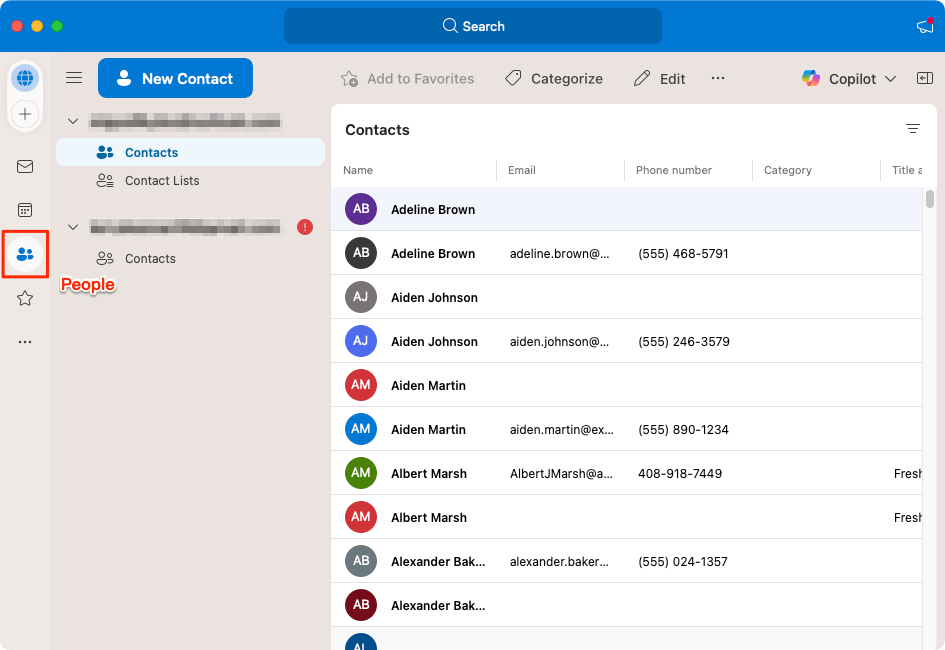
2. Click the People icon on the left.
3. Create a new folder on your desktop.
4. On the People interface, select all the contacts that you are going to export.
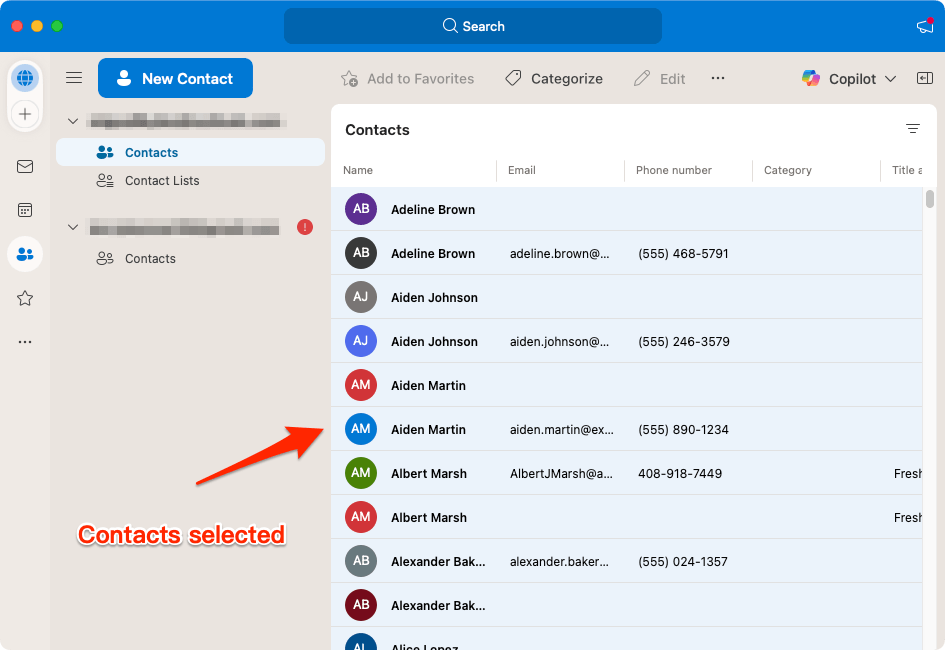
5. Drag the selected Outlook contacts into the newly created folder. Now the contacts are saved on your Mac as individual vCards.
6. In your browser, go to iCloud.com. Sign in and choose Contacts.
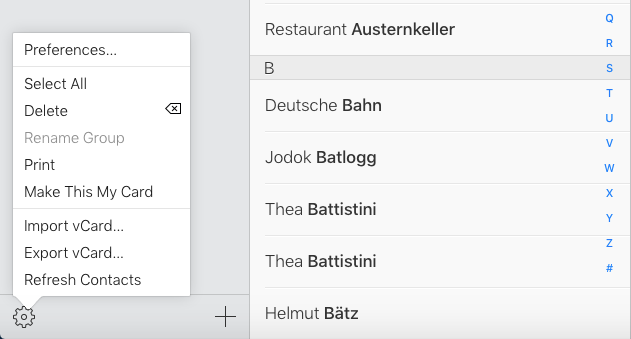
7. Click the gear icon in the bottom left corner and choose Import vCard.
8. Select a vCard exported in step 5 and click Open. Repeat this step to move other Outlook contacts to iCloud.
Tip
If there are too many vCards, or if you don't like the idea of importing vCards to iCloud one by one, here's a tip that helps. Visit vcf-file-merger.com in your browser, click the box on the right, locate the newly created folder, select all vCards, and click Open. Now, you have a single vCard containing your Outlook contacts.
Method 3. Export Outlook contacts to iCloud via CSV to vCard conversion
This method is not direct. You need to first export Outlook.com contacts to a CSV file and then convert this file to the format the iCloud supports. In addition to Mac, this method applies to Windows PC.
1. In your browser, go to Outlook.com and sign in.
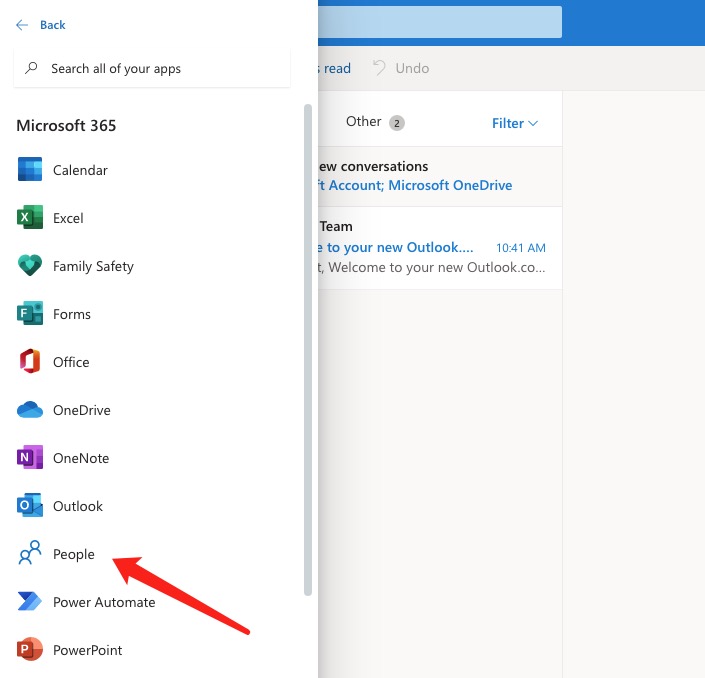
2. Click the App launcher button in the top left corner and choose People. (If you can’t see People, click All apps.)
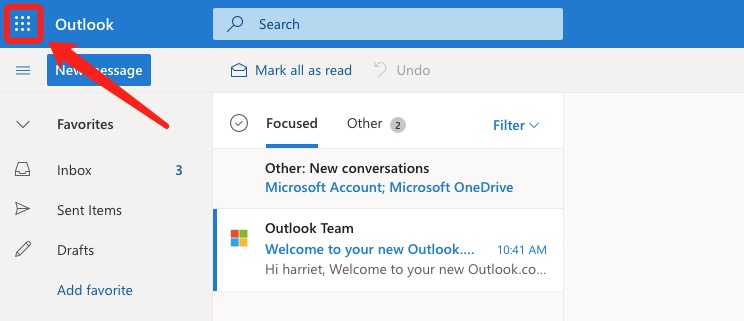
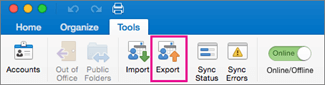
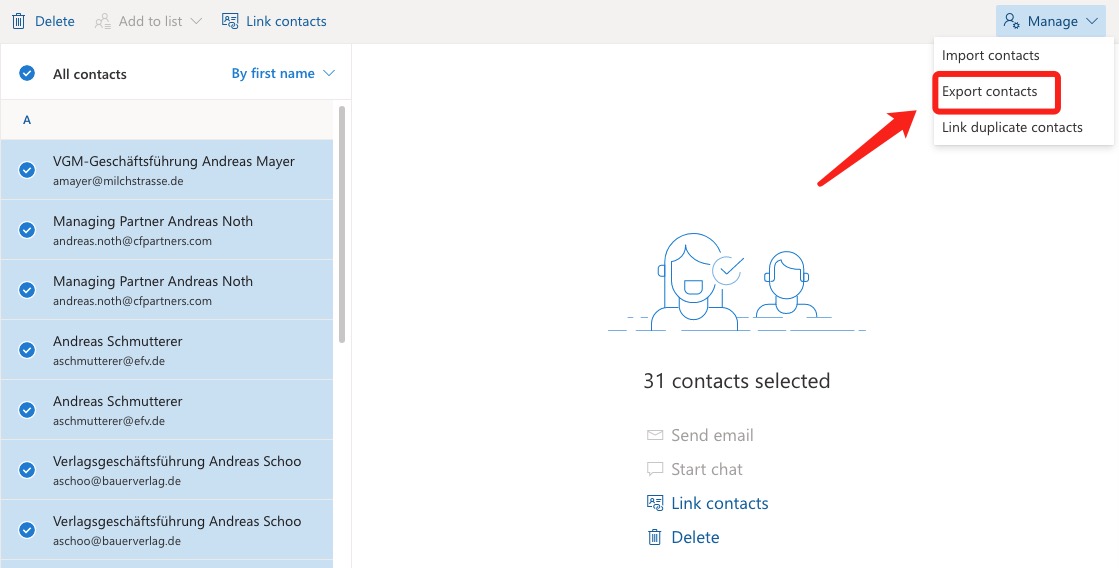
3. Click Manage contacts in the upper right corner and choose Export contacts.
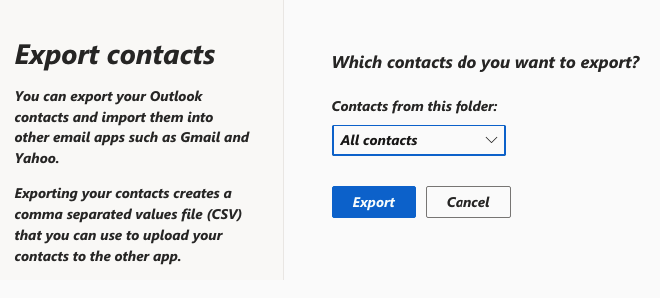
4. In the dialog that appears, click Export. And now all your Outlook contacts are exported as a CSV file.
5. Convert this file with an online or desktop CSV to vCard converter.
6. Go to iCloud.com, sign in and choose Contacts.
7. Import the vCard containing all your Outlook contacts to iCloud.
Part 2. How to export Outlook contacts to iCloud on Windows PC
If you are a Windows PC user, you can check out the following 3 methods to transfer Outlook contacts to iCloud.
Method 1. Transfer Outlook contacts to iCloud with iCloud for Windows
Before you start, you need to download iCloud for Windows.
1. Sign in with your iCloud account. Check the Contacts and Calendars With Outlook checkbox.
2. Click Apply to sync all contacts to iCloud.

Method 2. Export Outlook contacts to iCloud using Outlook Share Function
Outlook for Microsoft 365, Outlook 2019, Outlook 2016 and Outlook 2013 allow users to share and send contacts as vCard files, which provides a workaround to do the export.
1. On your PC, open the folder in which you want to keep your exported Outlook contacts.
2. In Outlook, click People and select all the contacts that you are going to move to iCloud.
3. Select Share > Forward Contact > As a Business Card.
A new mail message window will open, and you will find that the contacts show up in the Attached field as individual vCards.
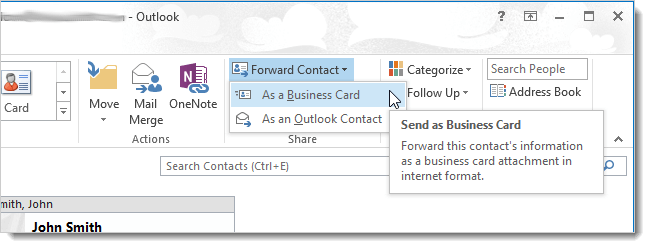
4. Right-click the Attached field and choose Select All to select all the vCard contacts.
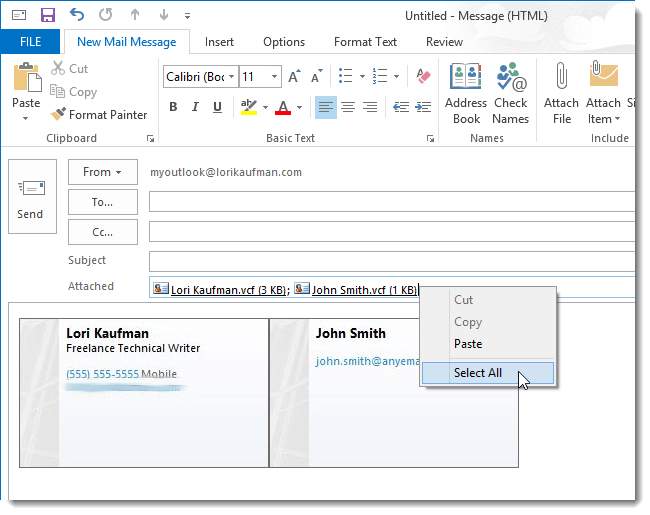
5. Drag the selected contacts to the folder mentioned in step 1. Now you can close the mail message window.
6. Go to iCloud.com and import the vCard files.

Method 3. Export Outlook contacts to iCloud on PC via Converting CSV to vCard
This method can help if you use:
- Outlook for Microsoft 365.
- Outlook 2019.
- Outlook 2016.
- Outlook 2013.
- Outlook 2010.
- Outlook 2007.
When it comes to different versions especially an older one, the first six steps can be a little bit different.
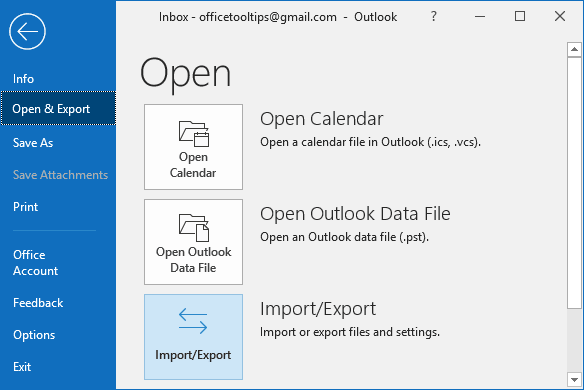
1. In a newer version of Outlook, go to File > Open & Export > Import/Export.
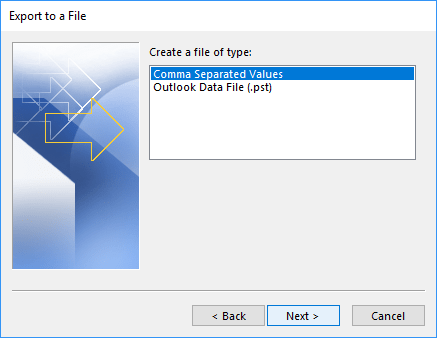
2. In the Import and Export Wizard window, select Export to a file. Click Next to continue.
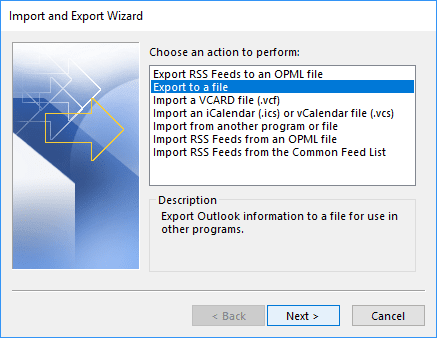
3. Select Comma Separated Values (CSV).
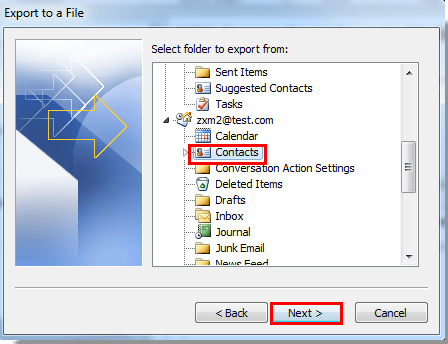
4. Select a Contacts folder in the Export to a File window if needed. Click Next.
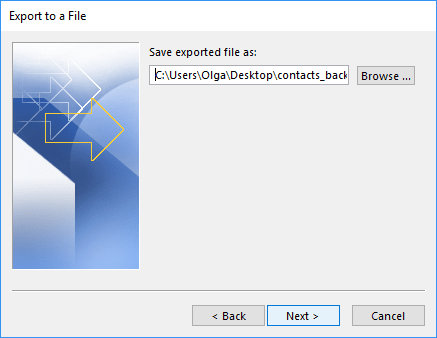
5. Click Browse and choose a folder on your computer to save the exported CSV file. Click Next.
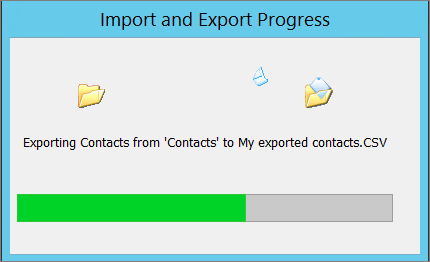
6. Click Finish, and it will start exporting your Outlook contacts. Once the process is finished, you can find the file in your destination folder.
7. Convert the CSV file to a vCard file.
8. Go to iCloud.com and import the converted vCard file to iCloud Contacts.
Method 4. Export New Outlook contacts to iCloud via Share as vCard
Microsoft released the New Outlook desktop app in 2023. This method is dedicated to New Outlook. Note that this method is only suitable for a small number of contacts.
1. Open New Outlook (simply called Outlook on your machine).
2. Click the People icon in the sidebar on the left.
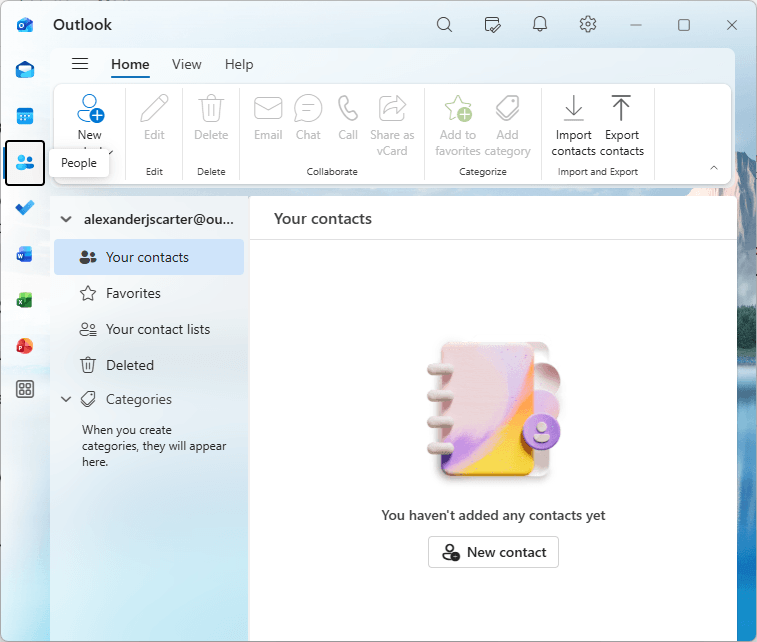
3. In your contacts list, click the three-dot icon next to the first contact you need to export.
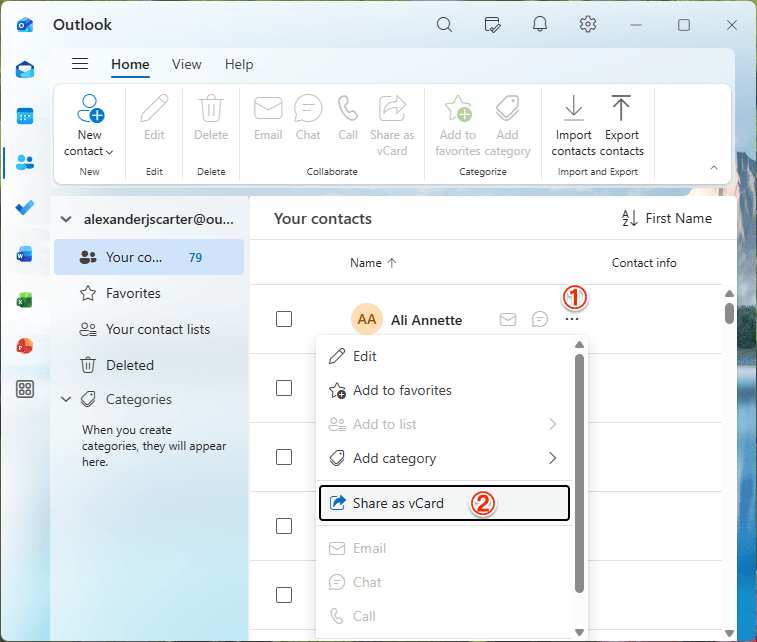
4. Select Share as vCard.
5. Click Share in the dialog that appears.
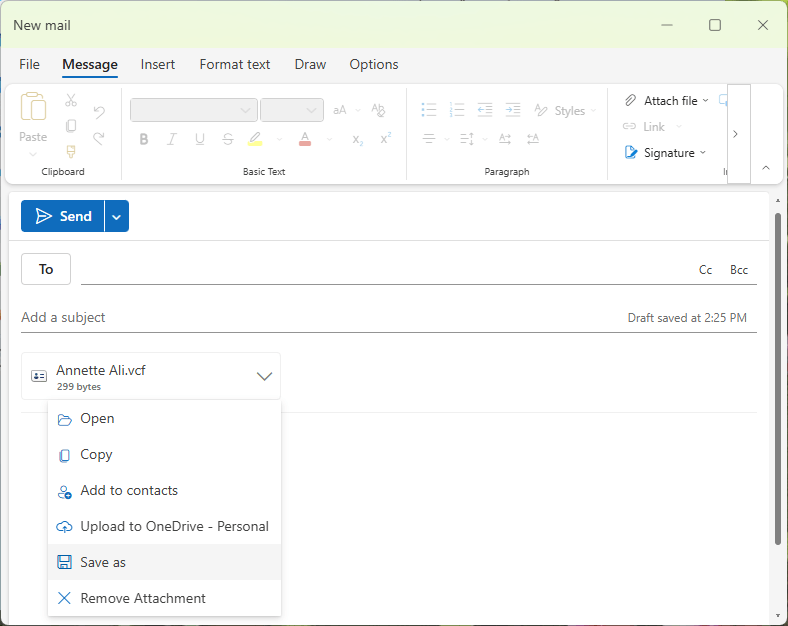
6. In the New mail dialog, you will see this contact. Click the arrow icon next to it and choose Save as. Now, this contact is saved as a vCard on your PC.
Repeat steps 3 to 6 to save other contacts as individual vCards. (There isn't a bulk method available.)
7. Go to iCloud.com to import these vCards.
FAQs
Is there a direct way to transfer Outlook contacts to iCloud?
While neither Outlook nor iCloud provides a direct way to do this, ContactsMate allows you to do the transfer directly.
How do I move all my Outlook contacts to iCloud?
It depends on the method you use. If you use a method involving directly dragging and dropping, make sure that you select all your Outlook contacts first. If the method requires you to export your Outlook contacts to a file first, make sure that you export all contacts.
How do I merge duplicates after importing?
It's common to have duplicates after importing, and there are a few ways to deal with them. For example, you can use your iPhone's Contacts app to find and merge them.
Conclusion
You, by using one of the methods, can export Outlook contacts to iCloud. You can do it one by one or in mass. And for Mac users, the way that use ContactsMate is the best I believe, because it is easy and quick and direct. For Windows users, the method that uses iCloud for Windows can be the best, as it’s very efficient.

With a passion for tech and writing, Sarah joined Cisdem, where she focuses on creating articles about using utility tools to enhance file management and simplify contact management.

Adrian Li is Cisdem’s Chief Engineer and serves as the editorial advisor for Duplicate Finder and ContactsMate. His work and insights have been featured in leading tech publications such as Fossbytes, TUAW, Redmond Pie, SafetyDetectives, and BestForAndroid.