

How to Find and Bulk Remove Dropbox Duplicate Files Easily
 8.7K
8.7K
 1
1


Duplicate files can accumulate in your Dropbox account over time, wasting space and resulting in disorganization. In this article, I will show you how to find and delete duplicate files in Dropbox in two ways on Windows PC and Mac.
 Cisdem Duplicate Finder
The Best Dropbox Duplicate Finder
- Find duplicate photos, videos, audio files, documents, and others
- Find duplicate files in Dropbox, other cloud drives, computers, and external storage devices
- Let you view found duplicates in 3 modes, with side-by-side photo previews
- Automatically select all but one file for deletion in each group of duplicates, allowing you to remove all duplicates from Dropbox with a single click
- Let you manually select or deselect files
- Also offer rules (such as Select Newest) for bulk selection
- Easy to use for everyone


Method 1. How to find and delete duplicates in Dropbox using a duplicate file finder
If your Dropbox account has many files, this method is the best choice. The method uses a software called Cisdem Duplicate Finder, and here’s why it’s the best.
- Automatically scan for duplicate photos, videos, documents, and other types of files
- Can handle any number of files, from MBs and GBs to TBs
- Provide high speed (scanned my Dropbox account with 1.96 GB of files in just 2 seconds)
- Accurately identify duplicate files by comparing file contents, regardless of file names
- Allow you to preview duplicates before deletion
- Automatically select all duplicates for one-click deletion and let you easily adjust selections based on your needs
Below is how to use this method.
Steps for Windows PC
1. Install: Download and install Cisdem Duplicate Finder. Open the app.
 Free Download Windows 10 or later
2. Authorize: Authorize Cisdem Duplicate Finder to work with your Dropbox.
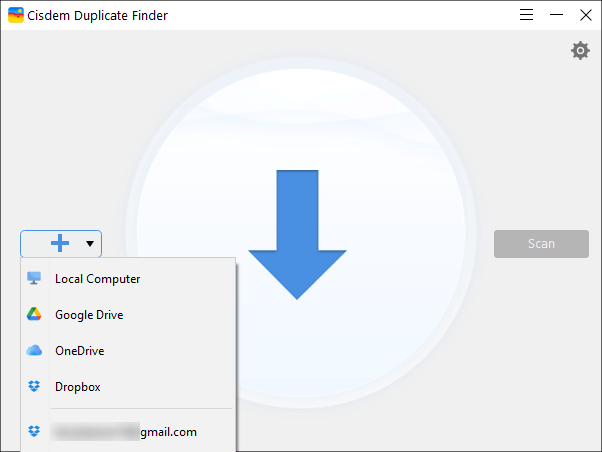
- Click the arrow in the Add button to open a dropdown menu, then select Dropbox from the menu. This will prompt you to sign in to your Dropbox account in your browser.
![Cisdem Duplicate Finder screen showing an Add button with a dropdown arrow, along with a menu containing Dropbox and a few other options]()
- After signing in, click Continue to see the Dropbox consent screen, then click Allow to continue.
- On the Authorized successfully screen that appears, click Back to Application.
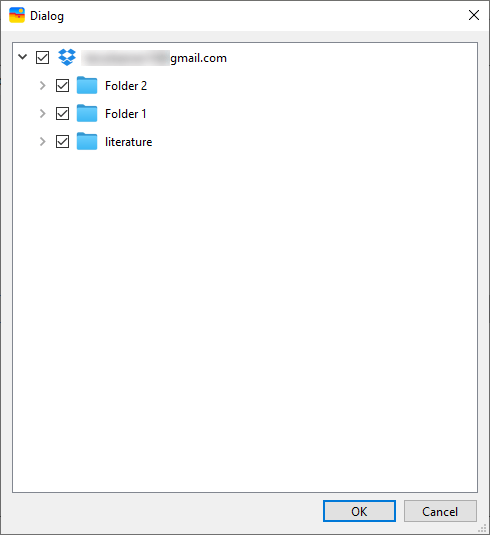
3. Add: In the dialog that appears, add your entire Dropbox or specific folders to scan for duplicate files by selecting the checkbox, then click OK.
Note
Cisdem Duplicate Finder supports working with one or multiple locations, allowing you to thoroughly find duplicate files within a folder, drive, or across multiple locations.
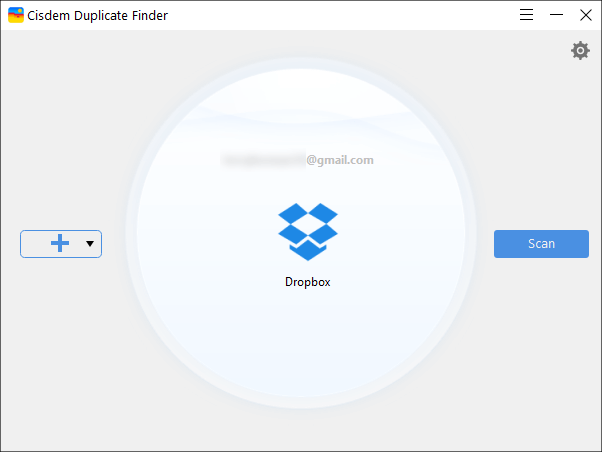
4. Scan: Click Scan to start looking for duplicate files in your Dropbox online.
5. View: When the scan is complete, Cisdem Duplicate Finder's results window will list all the duplicate files that have been found, and you can easily view, sort, and search them as needed.
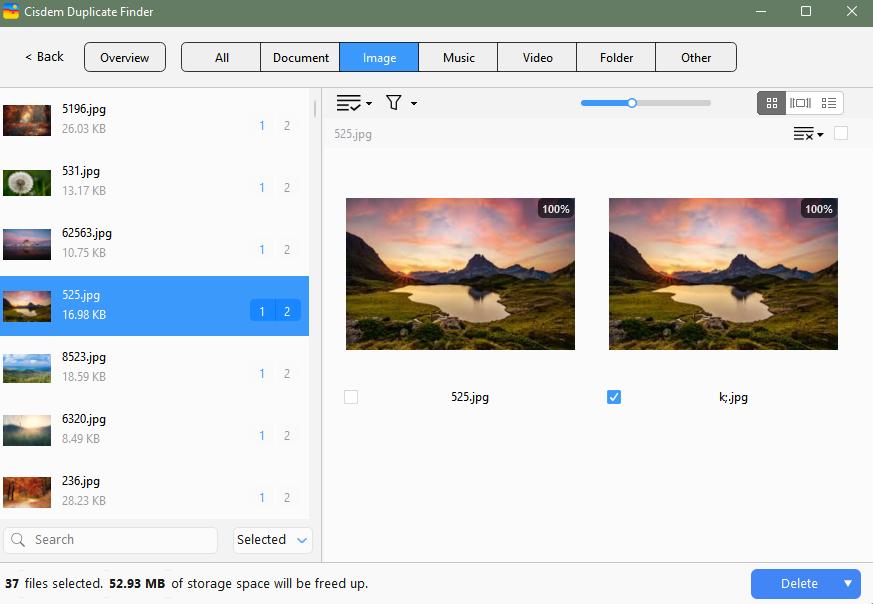
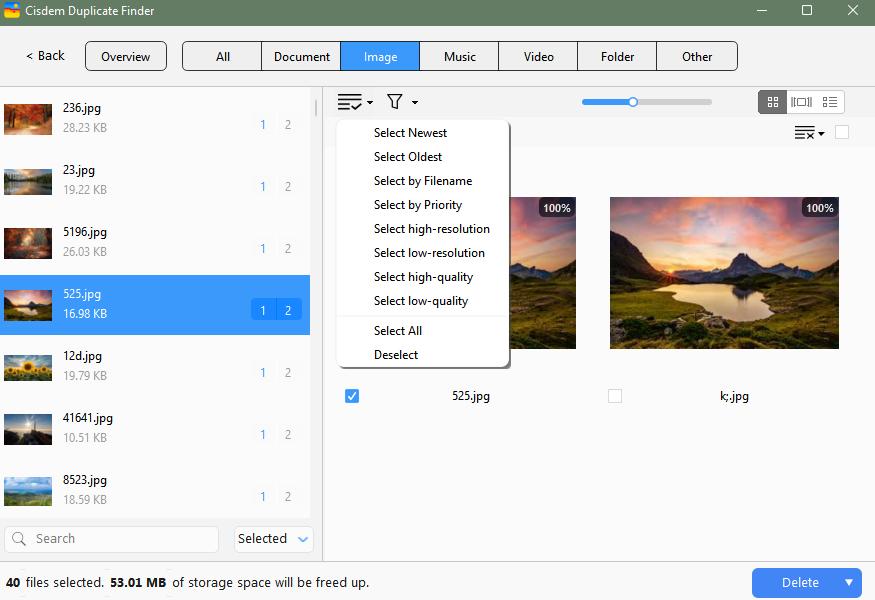
6. Select: In each group of duplicate files, Cisdem Duplicate Finder has already automatically selected the duplicate(s) for deletion, while keeping the original unselected.
If needed, you can adjust the selections manually or apply a desired selection rule, such as Select Newest.
7. Delete: Remove all selected files at once by clicking Delete in the bottom right corner and confirming the deletion.
Now all duplicate files will be moved to the Deleted files section in Dropbox, and Dropbox will automatically sync the removal to any devices where the Dropbox app is installed and linked to your account.
Note
Files in Dropbox's Deleted files section will stay there for 30 days. If you have deleted some duplicates that you actually want to keep, you can easily restore them from Deleted files during that period of time.
Steps for Mac
1. Sync: Sync your Dropbox items to your Mac. (Skip this step if you have already done this.)
- Download and install the Dropbox desktop app on your Mac.
- Open the Dropbox app and click Sign in with Dropbox.
- Once setup is finished, the app will automatically sync your Dropbox files and folders to your Mac. You can click the Dropbox icon in the menu bar to check the sync status. When it finishes, you will see the Your files are up to date message.
![Window showing a list of files and a message saying that Your files are up to date]()
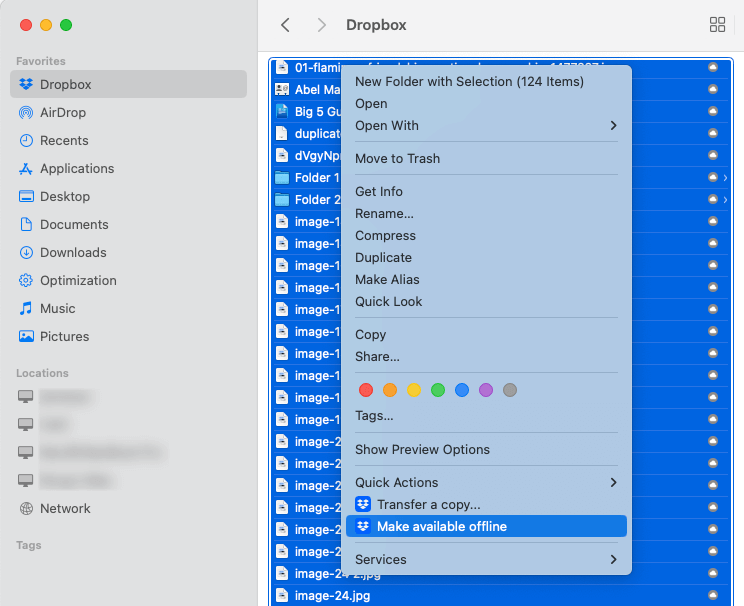
- Click Dropbox in the left sidebar of Finder, select all items in it, control-click, and then choose Make available offline. (To find duplicate files only in specific folders, selecting those folders is enough.)
![Finder screen showing that Dropbox in the left sidebar is selected and also showing a menu with the Make available offline option being selected]()
- Wait until each item in Dropbox displays a green circle icon, which means all your Dropbox files and folders are available on your Mac. (The time taken depends on the number of your files.)
![Finder screen showing that Dropbox in the left sidebar is selected and also showing a list of files on the right, with each file displaying a green circle icon on the right side of itself]()

2. Install: Download and install Cisdem Duplicate Finder. Open it.
 Free Download macOS 10.11 or later
3. Add: Click the Add button, select Dropbox or just specific folders in it, click Open.
4. Scan: Click Scan to start finding duplicates.

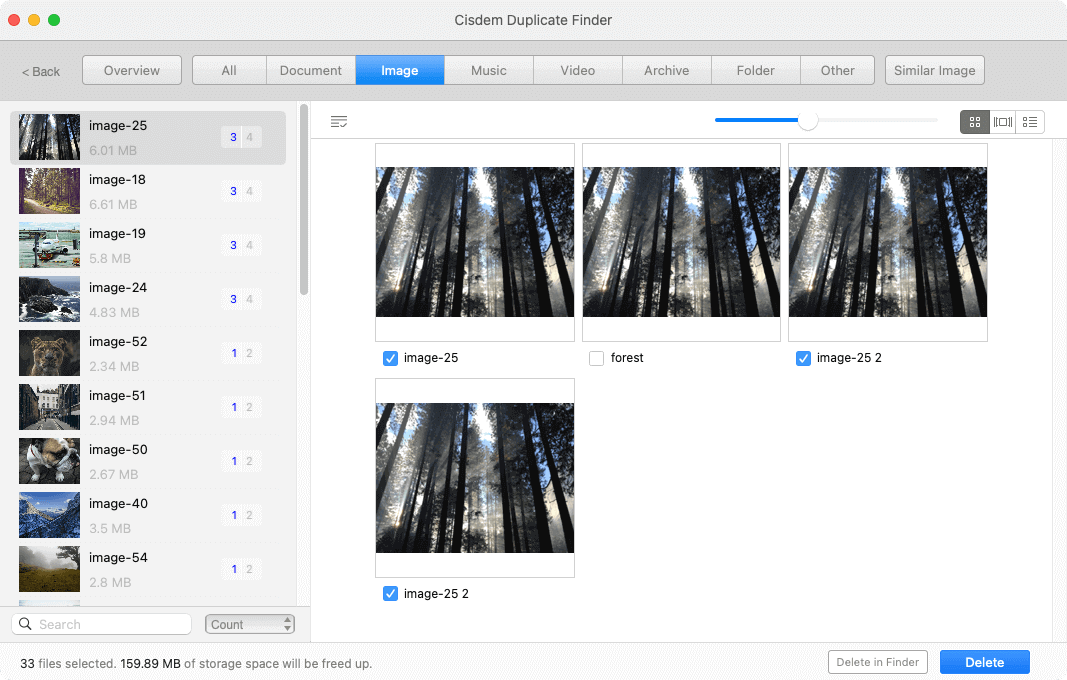
5. View: Once the scan is done, you will see all the found duplicate files in Cisdem Duplicate Finder's results window. You can easily view them as needed.
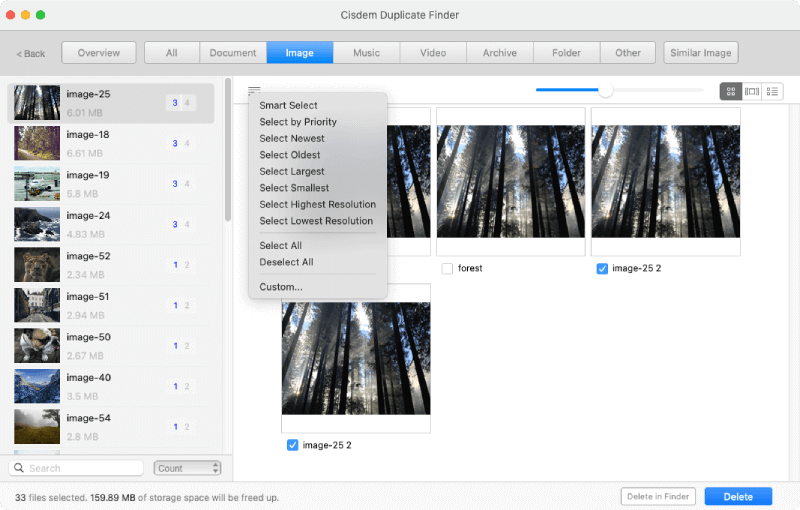
6. Select: Cisdem Duplicate Finder has automatically selected all duplicates for removal, while keeping all original files unselected. If you want, you can manually select/deselect files or use a selection rule, such as Select Oldest.
7. Delete: Click Delete and then Yes to move all selected files to Dropbox's Deleted files.
Now all unwanted duplicates are removed from your Dropbox and will stay in Deleted files for 30 days. If you open Dropbox on your phone, you will find that the deletion also occurs there.
Important
During the syncing, scanning, and removal process, make sure that your computer is running, the Dropbox desktop is running, and you have a good internet connection.
A tip for removing duplicate photos from Dropbox
In your Dropbox, you may have the following:
- duplicate photos, which you already know how to deal with
- photos that appear the same but are different in formats or sizes
- photos that look similar
Many people consider the last two types of photos as duplicates as well. Cisdem Duplicate Finder calls these two types similar photos and finds them by default on Mac along with duplicate files.
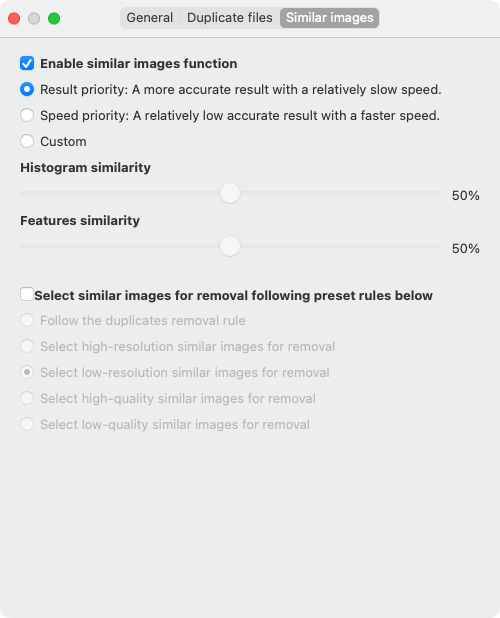
The found similar images will also be displayed in the results window, but the automatic selection feature doesn’t apply to them. Because handling them can be subjective. That being said, several selection rules (such as Select Smallest) are available to help you mass select potential redundant photo versions.
Method 2. How to manually find duplicate files in Dropbox
If there aren't many files in your account, you can consider manually looking for duplicate files.
While you can do it manually in any way you prefer, I recommend checking out the method I’m sharing below. It not only takes advantage of Dropbox's search feature but also helps you find duplicates that are in different folders.
Note
The following steps only deal with one type of duplicates at a time and use duplicate photos as an example.
1. Open: Open dropbox.com in your browser on a computer.
2. List: In the search box at the top of the page, enter type:image to list all the image files in your account on the same page.
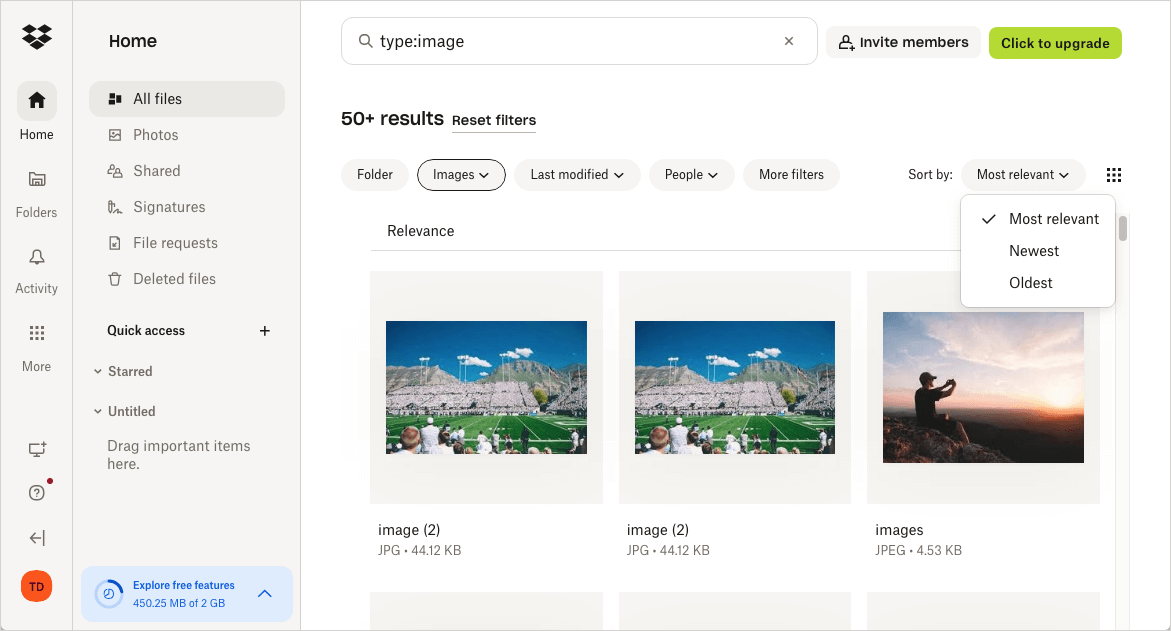
3. Filter and sort: You can experiment the available filter and sort options for displaying photos until it becomes easier for you to spot duplicates.
4. Identify: When you find photos that appear to be the same, compare their contents and information to confirm if they are truly duplicates.
5. Delete: Select the unwanted duplicates in your photos one by one, then click Delete to move them to the Deleted files section.
Continue handling other types of duplicates as needed.
FAQ
Why are there duplicate files in my Dropbox?
A group of duplicate files is two or more files that are exactly identical, regardless of their file names.
You may have created duplicates yourself, such as transferring files to a folder with the Copy feature instead of the Move feature.
There’s also a scenario where Dropbox creates a conflicted copy of a file. A conflicted copy seems to be a duplicate, but it's actually an edited version of the file, created when two or more people edit the same file simultaneously.
Will Dropbox upload duplicate files?
Dropbox does detect certain duplicate files during uploads. For example, there is file “IMG_2622”, which is already in a folder in your Dropbox. If you try to re-upload it to the same folder, Dropbox will recognize it and ignore the re-upload to avoid duplicates.
However, detection will fail in some situations. Here are two examples.
- If “IMG_2622” already exists in Folder 1, and if you re-upload it to Folder 2. Dropbox will think it as a new file and upload it.
- If you upload both “IMG_2623” and “IMG_2623 copy” (which are exactly the same except their file names) to the same folder or different folders. Dropbox will consider them two unique files and upload both.
Can Dropbox find existing duplicate files?
No, Dropbox doesn’t provide a feature that identify any duplicates that already exist in your account.
Wrapping up
So far, Dropbox’s duplicate detection isn’t intelligent enough to prevent duplicate files from being uploaded all the time. Some user habits also lead to duplicates. Therefore, it’s common to have duplicates in Dropbox. You can get rid of them using dedicated software or the manual method, based on the number of files in your account.

With a passion for tech and writing, Sarah joined Cisdem, where she focuses on creating articles about using utility tools to enhance file management and simplify contact management.

Adrian Li is Cisdem’s Chief Engineer and serves as the editorial advisor for Duplicate Finder and ContactsMate. His work and insights have been featured in leading tech publications such as Fossbytes, TUAW, Redmond Pie, SafetyDetectives, and BestForAndroid.
Brahmani Cotton
Tried method 1 and it worked great! Found hundreds of Dropbox duplicates in minutes.