How to Restore from Time Machine Backup on Mac (Single File, macOS, New Mac)
 8.1K
8.1K
 1
1
It’s a good habit to set up Time Machine and backup your Mac to it. Time Machine allows you to restore files if you enable it and do have backups. But sometimes you can’t backup Mac to it successfully, then how to perform data recovery on Mac when you find data lost? This guide will show you how to restore from Time Machine and recover lost data on Mac if Time Machine not working.
 Cisdem Data Recovery for Mac
Time Machine Restore Failure? Fix!
- Recover files even without Time Machine backup
- Restore videos, audios, images, documents, 200+ file formats
- Repair damaged videos
- Both quick scanning and deep scanning to find back files lost due to different situations
- Recover files from internal or external hard drive on mac
- Preview files before recovery
- High recovery rate
- Traceable scan results to avoid repeat scanning
- Save recoverable data to local drive or cloud
 Free Download
What is Time Machine and How It Works?
Time Machine is a Mac built-in backup utility developed by Apple. It creates incremental backups of files that can be restored at a later date. It allows users to restore the whole Mac system, multiple files, or a single file and works with any external or internal volume that connected to your Mac via USB, FireWire, or Thunderbolt.
When Time Machine is enabled, it takes periodic snapshots of all your files and catalogs them on the hard drive you choose as backup disk. It backs up the entire contents of your Mac files hourly, daily and weekly, as the drive gets full, Time Machine will delete the oldest backups and replace them with newer versions.
How to Set Up Time Machine on Mac
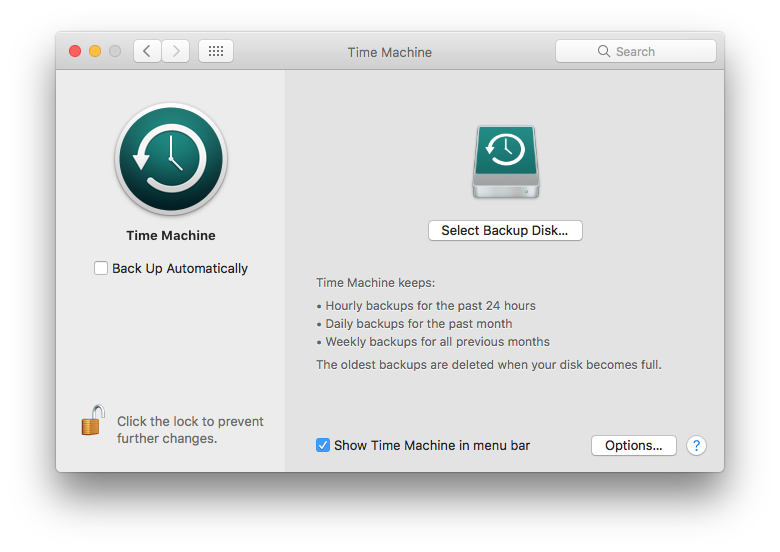
- Select System Preferences from the Apple menu.
- Click the Time Machine icon and click “Select Backup Disk” to choose which disk you'd like to use as a Time Machine backup and click “Use Disk”.
- Check the “Back Up Automatically” box in order to automatically back up your Mac to your chosen disk. Check the “Show Time Machine in menu bar” box as you wish.
![]()
And you can also backup your Mac files by choosing “Back Up Now” after clicking the Time Machine icon in the Menu bar.
How to Restore A Single File from Time Machine?
In case of data deletion or lost, retrieving specific files or restoring them to an earlier version seems to be the most common use of Time Machine. Here is the guide on how to restore a single file from a Time Machine backup:
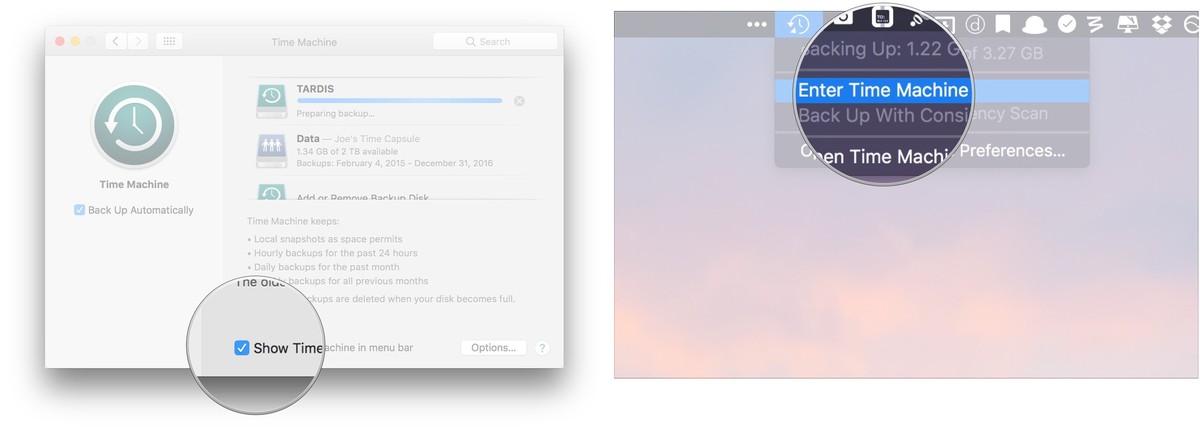
- Select System Preferences from the Apple menu.
- Choose the Time Machine icon.
- Check the box next to Show Time Machine in menu bar if you haven’t.
- Click Enter Time Machine after clicking the Time Machine icon in the Menu bar.
![]()
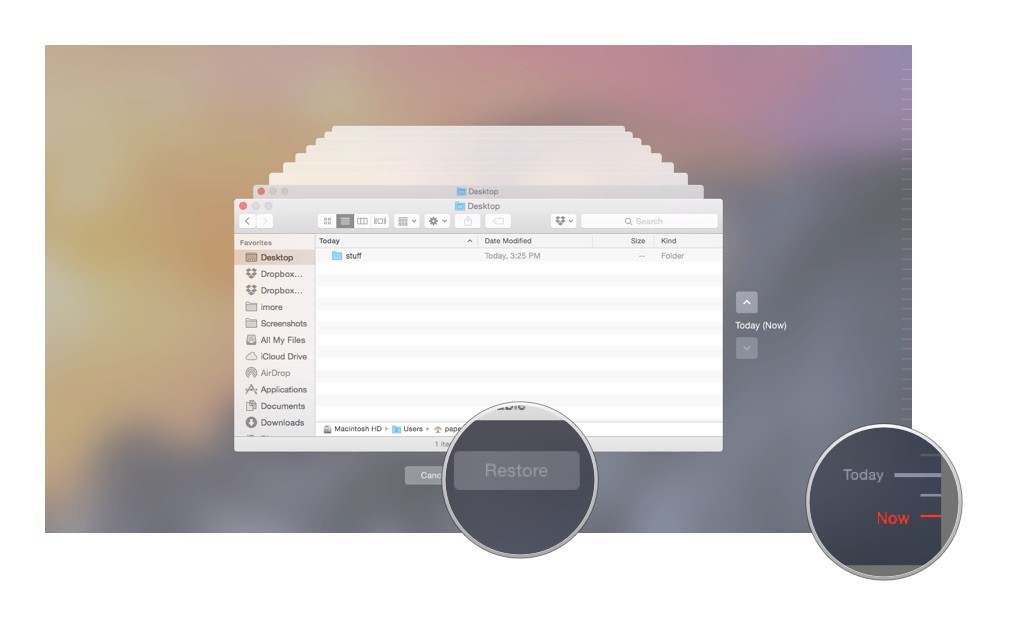
- You'll see a list of backups arranged by date, and then select one backup to find the files you want to restore. Find the file or folder in question and click Restore. Time Machine will then copy that file back to its original location on your hard drive.
![]()
How to Restore macOS from Time Machine Backup?
Another condition is using Time Machine to completely restore the Mac’s accounts and data. Read on to learn the approach of restoring macOS from Time Machine backup.
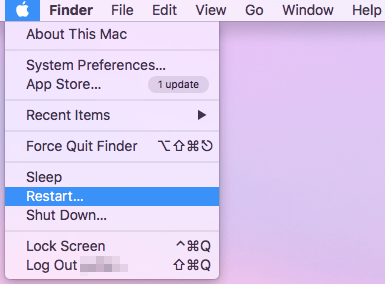
- Connect the Time Machine external drive to your Mac.
- Click Restart from the Apple menu bar.
![without migration assistant 01]()
- Go to boot selection screen. This will vary depending on different Mac models.
- For Apple Silicon-based Mac: Hold down the power button until startup screen shows. Then click Options > Continue.
- For Intel Mac: Keep pressing Command + R until the Apple logo appears.
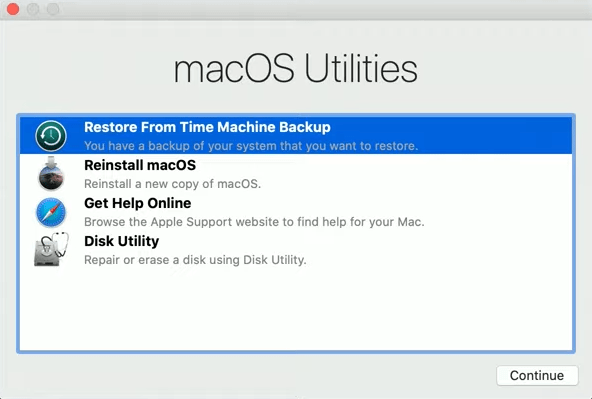
- You will reach Mac’s recovery mode window. Choose “Restore From Time Machine Backup” > click Continue.
![without migration assistant 02]()
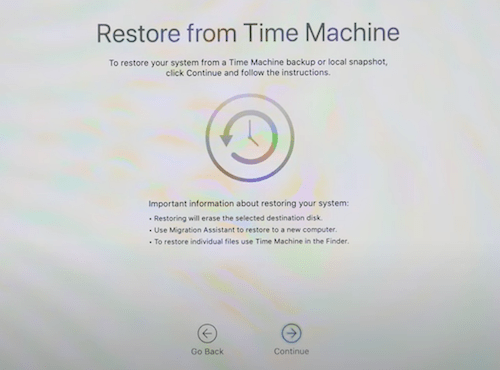
- Click Continue again to confirm to restore from Time Machine.
![without migration assistant 03]()
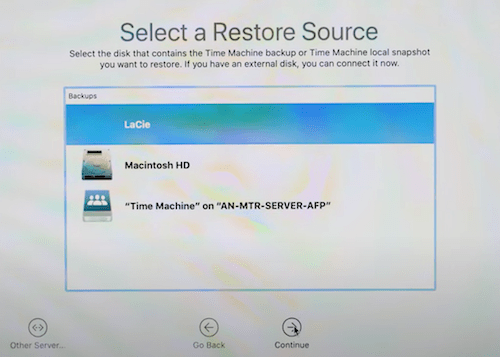
- Select the disk that contains the Time Machine backup > click Continue.
![without migration assistant 04]()
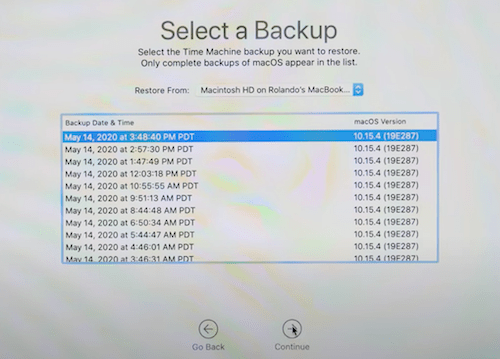
- Find the exact backup you want to restore and click Continue.
![without migration assistant 05]()
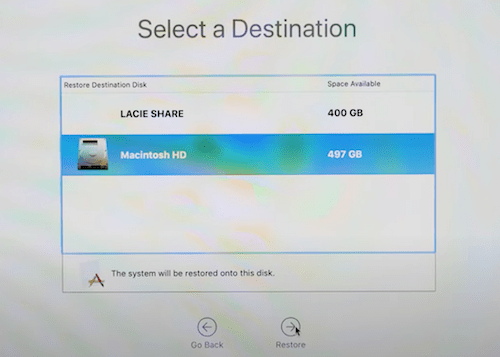
- Select a destination drive to restore the Mac system > click Restore icon.
![without migration assistant 06]()
- From the pop-up window, click “Erase Disk” to confirm the recovery.
![without migration assistant 07]()
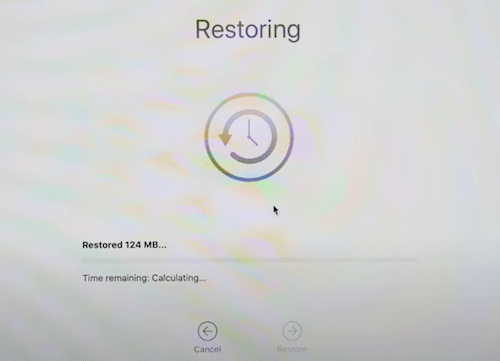
- At last wait patiently until a complete restoration from Time Machine backup is done.
![without migration assistant 08]()
How to Restore from Time Machine Backup to New Mac?
Migration Assistant is to a useful tool self-contained in macOS system. This utility offers a pretty straightforward path to extract the macOS setup from either a backup or another Mac, which helps to restore your Mac from Time Machine, even restore from Time Machine to a new Mac.
- Connect the disk containing the Time Machine backups with your New Mac.
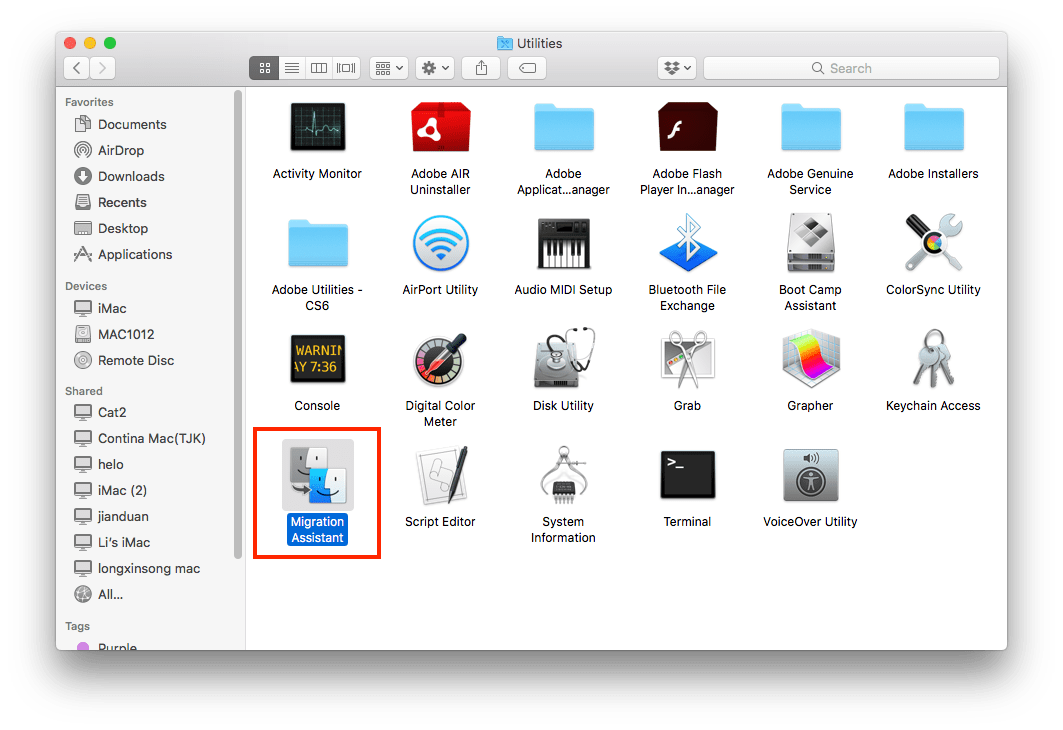
- Head for Finder > Applications > Utilities folder > open Migration Assistant.
![with migration assistant 01]()
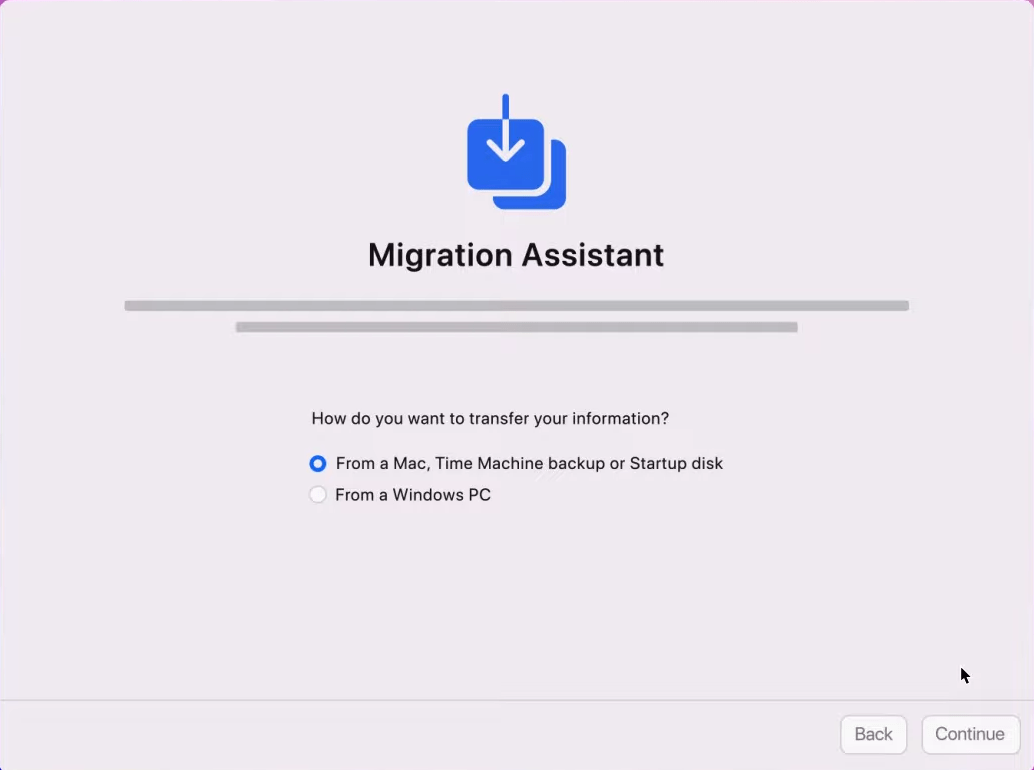
- Choose to transfer your information From a Mac, Time Machine backup or Startup disk. Then hit the Continue button.
![with migration assistant 02]()
- Select the right Time Machine backup for macOS recovery and click Continue.
- Select all of the backup data by checking every information type. Finally click Continue to start to recover the data from backup to your Mac.
Fail to Restore from Time Machine? Here is The Best Fix!
Sad to say, there is not always successful backup from the Time Machine. Sometimes you may find the Time Machine restore greyed out or stuck, or you get a pop-up message displaying as: Time Machine Error.
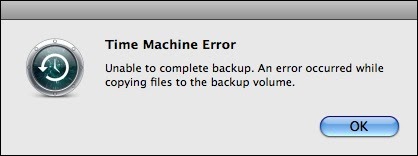
Thus it means Time Machine fails to be workable and you can’t restore data from its backup at this moment. But why? And how to regain your data after Time Machine not working? Keep reading.
Why can't I restore my Mac from Time Machine?
All sorts of situations are potential to cause Time Machine backup failure. Several major ones will be listed below.
- The hard drive used for backup has no enough storage space.
- The backup disk is read only or has been corrupted.
- Your Time Machine backup disk is not mounting.
- Your Mac system preference is not compatible with the Time Machine.
- The network connection is closed or poor.
- Hardware error occurs on your Mac.
- Viruses or malwares attack the macOS system.
How to restore data if Time Machine not working?
Once Time Machine not working, a data recovery software is urgently needed to recover your lost files. Here take Cisdem Data Recovery for Mac as an example.
With advanced recovery technology and optimal computer algorithm, Cisdem Data Recovery offers both quick scanning and deep scanning to detect your storage device. This almighty tool can help you recover 200+ types of file like photos, documents, videos, music, archives, etc., from Mac internal hard drive & external drive, memory card, MP3 player, etc., even it can repair the damaged videos if you cannot open them.
Here’s how to restore Mac data to previous date without Time Machine:
- Launch Cisdem Data Recovery and go to Disk Data Recovery.
 Free Download
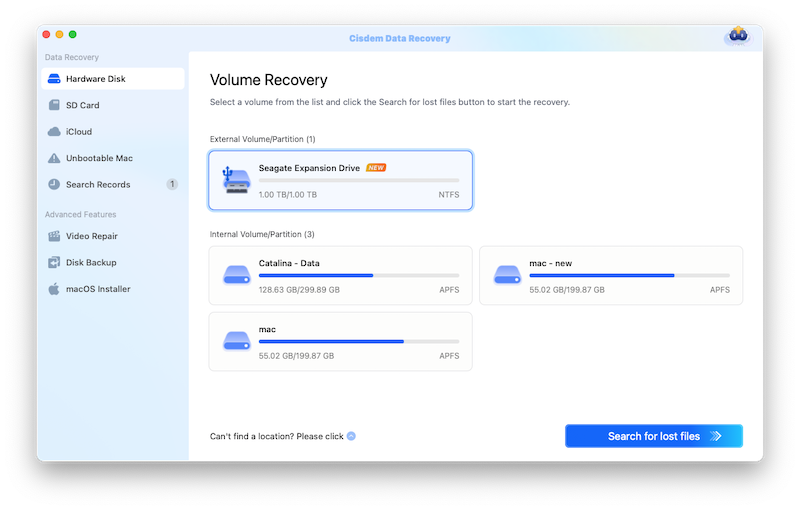
 - Scan the partition that your files were lost from.
The program will show all Mac partitions or volumes that connected to your Mac. Select the Mac local drive and click "Search for lost files" to search it. Also, if your external backup disk is still accessible, you can choose to scan it after connected to your Mac.![cisdem data recovery homepage]()
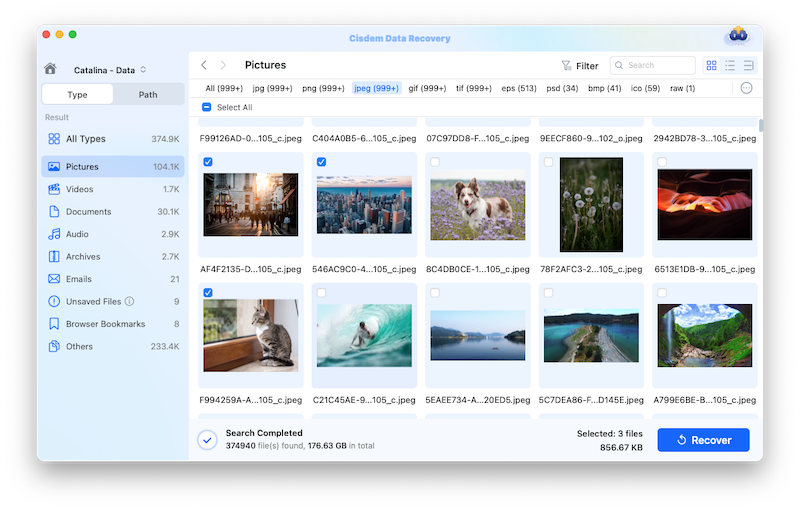
- Recover lost data after Time Machine not working.
When the scanning finishes, all found files would be shown in the window. You can preview files to check how many of your lost files can be recovered. Then select them and click "Recover" to save them on your Mac.![scan and recover lost data]()
To avoid data overwritten, please select a new partition/volume to save the recovered data.
In conclusion
If you set up Time Machine beforehand, you can restore from Time Machine backup. But if Time Machine restore doesn’t work, don’t worry, Cisdem Data Recovery can help you get all deleted and lost files back.

Connie Yu has been a columnist in the field of data recovery since 2011. She studied a lot of data loss situations and tested repeatedly to find a feasible solution tailored for each case. And her solutions are always updated to fix problems from the newest systems, devices and apps.

JK Tam is the lead developer at Cisdem, bringing over two decades of hands-on experience in cross-platform software development to the editorial team. He is now the lead technical approver for all articles related to Data Recovery and DVD Burner.



Harry
No backup, no recovery. Time Machine is really a nice utility for we Mac users to protect data. I highly recommend all of you to prepare a backup disk and back up your data regularly.