

8 Fixes for macOS Can't Repair The Disk (External Hard Drive Incl.)
 22.6K
22.6K
 0
0


When running Disk Utility on macOS to check a disk’s performance or repair it, you may encounter errors and get the message as following:
macOS can’t repair the disk “easystore”. You can still open or copy files on the disk, but you can’t save changes to files on the disk. Back up the disk and reformat it as soon as you can.
Disk Utility stopped repairing Macintosh HD. Disk Utility can’t repair this disk. Back up as many of your files as possible, reformat the disk, and restore your backed-up files.
This article will show you an easy step-to-step guide of 8 fixes for "macOS can't repair the disk".
 Cisdem Data Recovery
Cannot Access to Disk? Recover the Data First!
- Recover data from both internal and external hard disk on Mac
- Restore files lost due to deletion, formatting, system crash, virus attack, human errors, etc.
- Support recovering 200+ formats: documents, photos, videos, audios, emails, etc.
- Restore files from HD, SD card, USB, flash drive, etc.
- Repair corrupted videos
- Recover unsaved office documents
- Preview files before recovery
- Recover files to local drive or to cloud
- Highly compatible on macOS Sonoma, Ventura, Monterey, and earlier
 Free Download macOS 10.9 or later
Basics You Should Know about macOS Can't Repair The Disk
What is the macOS can't repair this disk error?
macOS has a built-in tool to view, check, partition, mount, even format hard drives, that is Disk Utility. Its First Aid is reliably used to scan and repair disk whenever your drive doesn’t work properly.
When you try to repair your disk on Mac using Disk Utility, if the First Aid fails, you may receive an error message telling you that macOS can't repair the disk, or Disk Utility stopped repairing the disk. This error can occur with internal hard drive, external hard drive, SD card, USB flash drive, etc. If it's the internal hard drive, you may also see information saying “The volume Macintosh HD could not be repaired.”
What are the possible causes of the macOS can't repair this disk error?
The error appears when the disk issue or damage is beyond the repair ability of Disk Utility First Aid, and following ones are at the top of the list:
- The drive has bad sectors
- Damaged file system on the drive
- Quick/improper drive ejection
- Sudden power off
- Virus attack
- Incompatibility issues when connecting to your Mac
First Things to Do if Mac Disk Utility Can’t Repair This Disk
What to do first when macOS Disk Utility can't repair this disk? Don't be panic, because this message doesn't mean the drive cannot be repaired anymore and you lost its data forever. Before using all the technical stuff with fixes in the following part, there are quick and easy tips to get it solved without writing new data to your drive in any possible scanning or analyzing.
1. Unplug and reconnect if it is an external hard drive
There may be connecting or booting issues when plugging an external hard drive to your Mac, which finally lead to "macOS can't repair this disk". Then you will be recommended to eject the hard drive safely in Disk Utility, and re-plug in later.
2. Remove other peripheral devices
Your hard drive may go conflicts with other devices that connected to your Mac, remove those unnecessary devices, especially other external storage devices, and check if the program get solved with only one drive connected.
3. Restart Mac
Restarting is always the easiest but the most magical solution when our Mac runs into problems, you can eject the hard drive first if it is an external one, then click the Apple icon and Restart to reboot your Mac.
8 Fixes for "macOS Can't Repair The Disk"
If this issue should happen, and you cannot fix with above 3 small tricks, it is time to dive in deeper, with some technical skills. The correct course of action can be very decisive in enhancing the chances of whether you can fix this issue or not, you can try each fix in a sequential order, to minimize the risk of data loss due to overwriting files on the disk.
1. Fix macOS can't repair the disk with First Aid again
If you see the Disk Utility can't repair this disk error message, Apple suggests that you can try to repair the disk again using Disk Utility. So, before trying any other fixes provided in this article, you can try out this easy fix. If this fix doesn’t work, just read on.
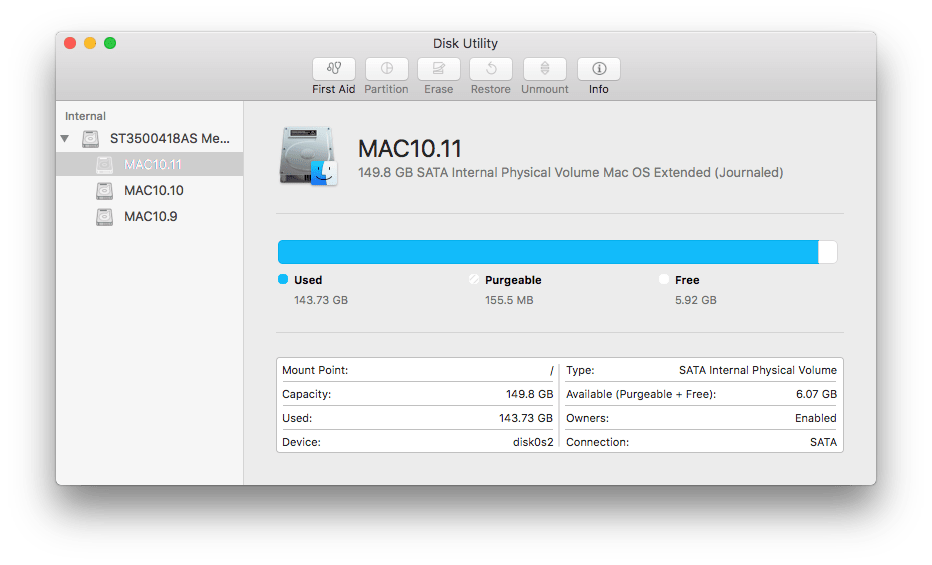
- Go to Applications > Disk Utility.
- Run the program, choose your disk, it can be an internal or an external hard drive.
![disk utility repair 01]()
- Then click on First Aid > Run, to start repairing your disk again.
![disk utility repair 02]()
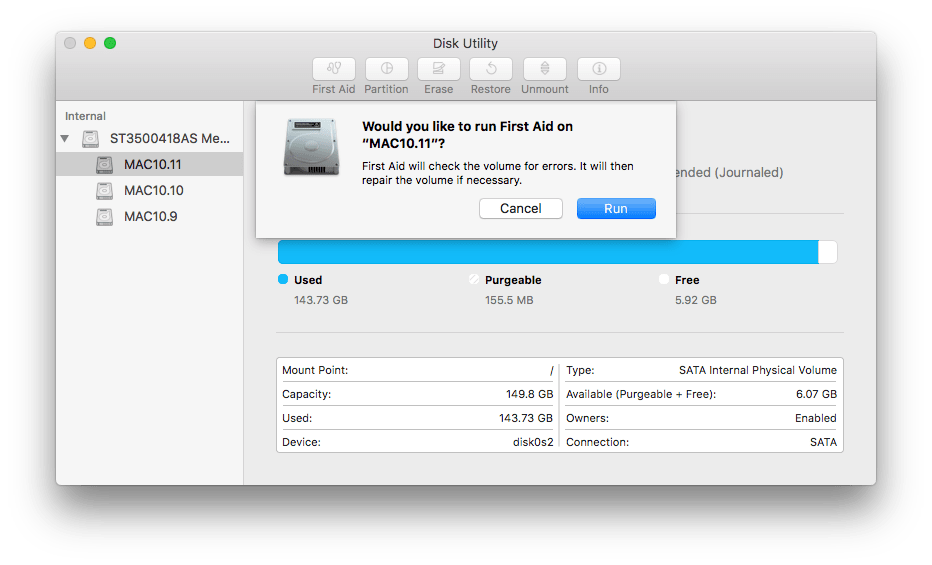
While, how long does Disk Utility first aid take depends on the capacity and condition of your hard drive.
2. Unmount and remount disk
According to Apple support, Mac users can unmount a disk if they need to repair the disk or perform other maintenance. Disk mounting is the process to allow macOS reads information about the disk, assigning a mount point, so it can be read and written by the system. While unmouting and remounting will redo the process and make the disk available to operating system without errors if the disk itself is problem-free.
- Launch Disk Utility from Applications or use spotlight to search the tool on your Mac.
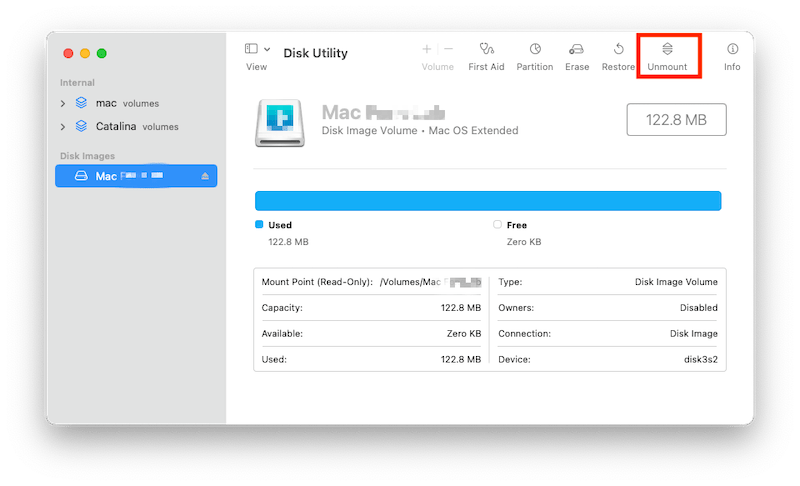
- Select the disk, then click on Unmount.
![unmount disk]()
- When Mount button appears, click Mount to remount the disk, now you can start repairing the disk again.
3. Using FSCK command under single-user mode
FSCK, refers to file system consistency check, it is used to check disk errors and repair it. You can use it to repair startup disk or other specified disks.
This solution is available on every Mac computer. You can only access the FSCK tool through the FSCK command line that appears complex. But this tool is actually pretty simple to use. If you are not familiar or confident with command line usage, don’t worry. The instructions below will walk you through the process.
Steps to repair internal disk using FSCK under single-user mode
- Step 1. Restart your Mac and boot into Single User mode.
For older Mac, as soon as you hear the startup sound, press and hold both the command key and S key, which will boot your system into single-user mode. For M1 Mac, press and hold Command+R during mac restart, then choose Utilities > Terminal. - Step 2. Wait until your system finishes running through its own checks.
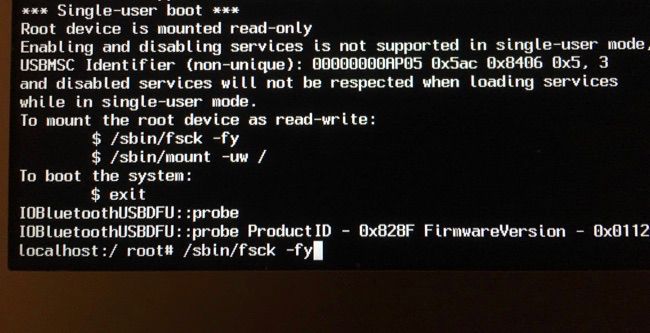
Input the command line: /sbin/fsck -fy. Press the Return key. Wait patiently.
If the system doesn’t find any errors on the disk that can’t be repaired by Disk Utility, it will say "The volume (the name of your drive) appears to be OK."
If it finds any errors, it will say "File system was modified.". In this case, run the /sbin/fsck –fy command once again until it says "The volume (the name of your drive) appears to be OK."![fsck command line]()
- Step 3. Type reboot and press Return to exit single-user mode.
Steps to repair external disk using FSCK under single-user mode
- Step 1. Restart your Mac and boot into Single User mode.
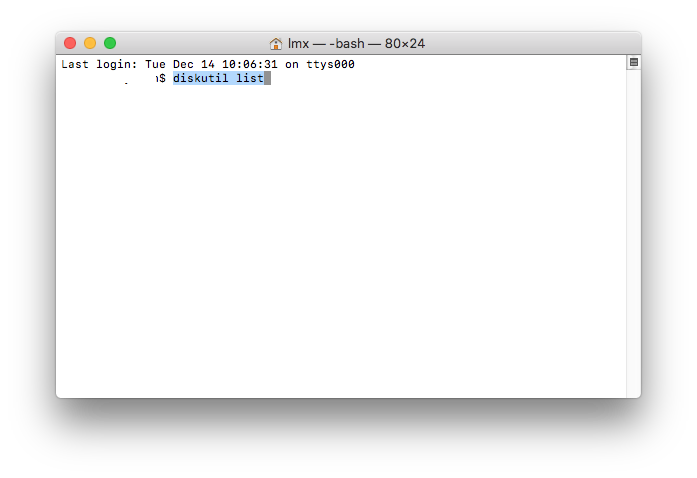
For older Mac, as soon as you hear the startup sound, press and hold both the command key and S key, which will boot your system into single-user mode. For M1 Mac, press and hold Command+R during mac restart, then choose Utilities > Terminal. - Step 2. Input the command line: diskutil list and press Enter to find all external hard drives connected on your Mac.
![fsck command 01]()
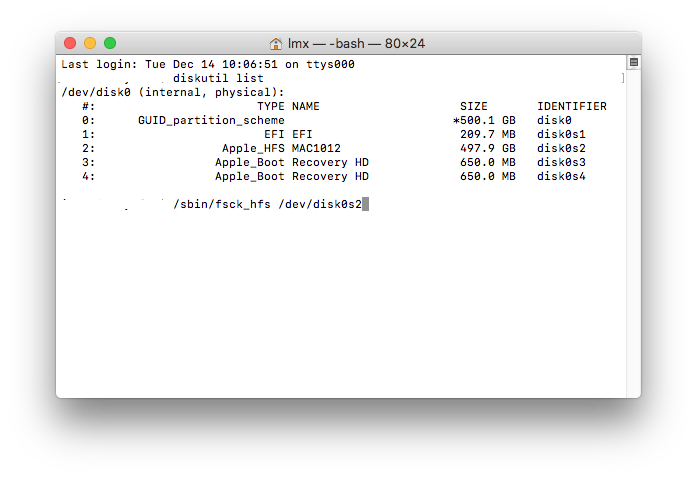
- Step 3. Find the identifier of the external hard drive you want to repair, and remember (copy) the information for next step.
![fsck command 02]()
- Step 4. Input command line : /sbin/fsck_file system –fy /dev/drive identifier, for example: /sbin/fsck_hfs /dev/disk0s2, press Enter to start the checking and repairing.
![fsck command 03]()
- Step 5. Input Reboot and press Enter to restart your Mac.

If you see a line saying "The volume (the name of your drive) could not be verified completely", it means FSCK tool can't repair the disk. If this solution can't fix the Disk Utility stopped repairing (the name of your drive) issue, then use the next solution.
4. Repair startup disk using macOS recovery mode
The issue may be caused by startup disk errors, you can repair the startup disk in recovery mode. All Macs come with a recovery mode to help users recover their Macs and get their Macs back into good condition again.
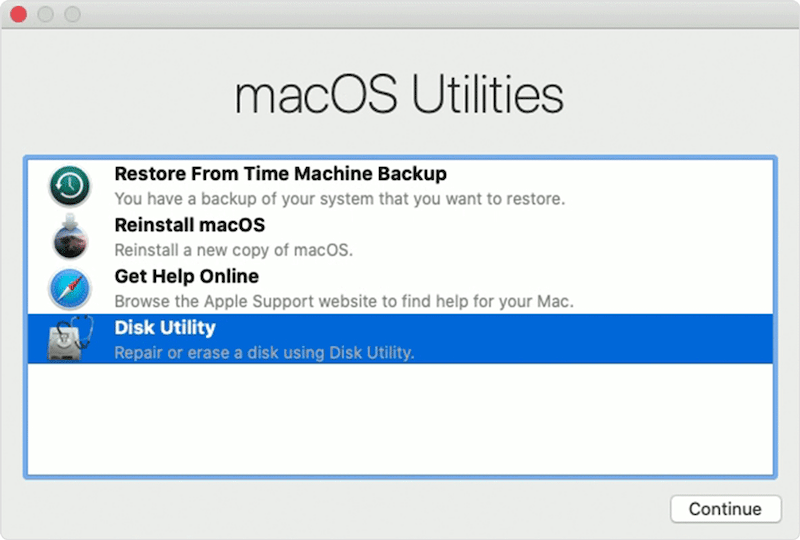
- Restart your Mac and boot into Recovery mode.
For Intel Macs, press and hold Command+R when restarting the Mac, then enter Mac password to enter the recovery mode. For M1 Macs, press and hold Power button until you see "Loading startup options", then select Options and press Return. - Choose Disk Utility and run First Aid to fix your disk under the recovery mode.
![repair startup disk]()
5. Upgrade to latest system
Look back your system information and check if you have updated to the latest system, you will get a chance to get this issue solved as well, because latest system comes with fixes for minor bugs and glitches, also with better performance.
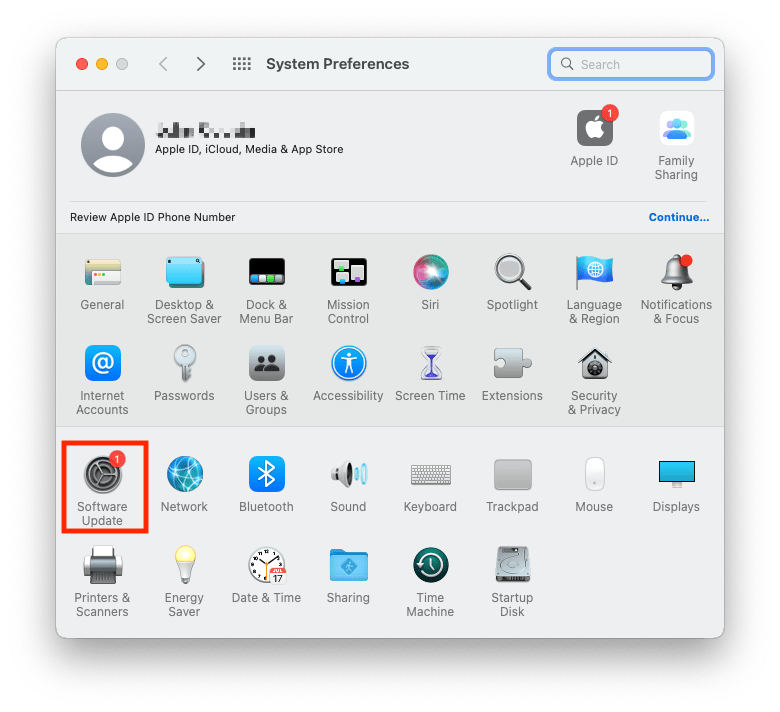
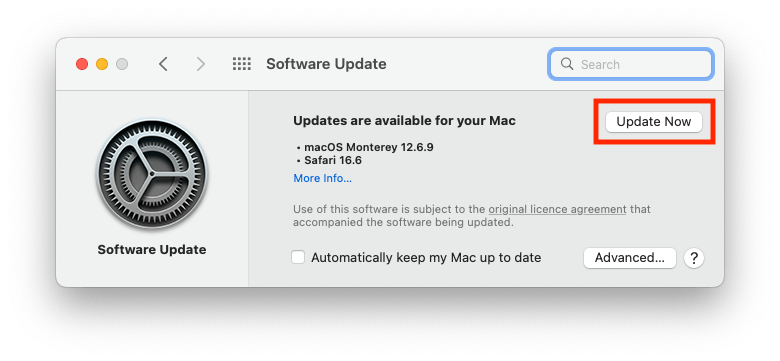
- Launch Settings app, choose Software Update.
![upgrade system01]()
- Click Update Now to upgrade to the latest version.
![upgrade system02]()
6. Format and restore disk data
If the above solutions can’t fix your problem, here is another choice: format the disk and restore files from backup, this is also suggested by Apple. This solution applies to fix macOS can’t repair disk of internal and external hard drive, also applies to portable storage devices such as USB as well. Here you can find the step-by-step instructions to fix macOS can't repair your disk by formatting.
Step 1. Back up as many of our files as possible
It’s very important to back up your files because formatting and reformatting your hard disk or other storage device will delete all the data stored on it. The backup tool you can use is Time Machine. It is built to Mac operating systems since Leopard and makes it easy to back up and restoring files on Mac. If you haven’t used Time Machine before, before backing up, you need to set it up first.
- Get an external hard drive. Its storage size should be bigger than the size of your internal storage.
- Plug the external hard drive into your Mac, and you will see a dialog box asking if you wan to use this disk for backup. Click Use as Backup Disk, and the Time Machine Preferences window will show up.
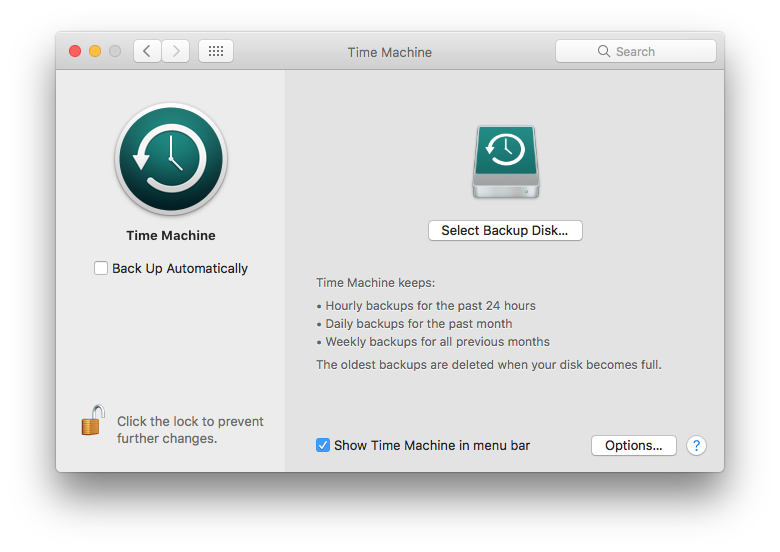
- Click Select Backup Disk and select the disk you want to back up to. Click Use Disk.
![time machine]()
- On the left side column, you can find the Back Up Automatically option. Select it, and Time Machine will automatically back up your entire Macintosh HD.
- Once the backup finishes with a Backup Complete message, you can eject the external hard drive now.
Step 2. Reformat/erase the disk
After completing the backup, you can start formatting your hard drive.
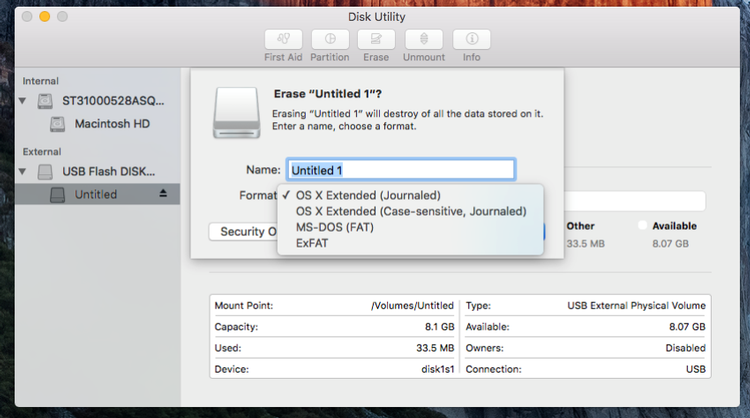
- Go to Disk Utility. Click the Erase tab, and a dialog box will show up.
![disk utility erase tool]()
- In the Name field, you can name your drive. In the Format field, Disk Utility will automatically choose a compatible format/file system for you.
- Click Erase
Step 3. Restore files
For files that you have backed up via Time Machine, you can recover easily. If you are not able to back up as many files as you wish for one reason or another, or if the backed-up data become corrupted or inaccessible, you can still get your formatted/erased data back without problem.
This tip will show you how to easily recover your data from formatted disk during fixing the Disk Utility can’t repair this disk error.
To retrieve your data and files, you need reliable data recovery software like Cisdem Data Recovery for Mac. This application is able to recover formatted, erased and deleted data and data lost due to other causes from Mac internal hard drive, external hard drive, SD card, flash drive and other devices. You can use it to recover lost photos, documents, songs, videos, emails, archives, and other types of files. Also, it can repair damaged videos in different formats.
- Step 1. Download and install Cisdem Data Recovery to your Mac.
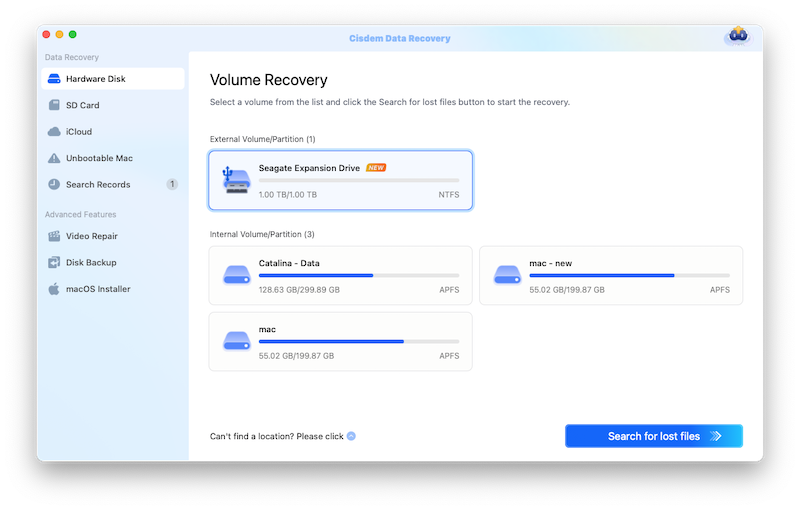
Free Download macOS 10.9 or later - Step 2. Go to Disk Data Recovery, select the disk that you have lost the files.
![select data recovery solution]()
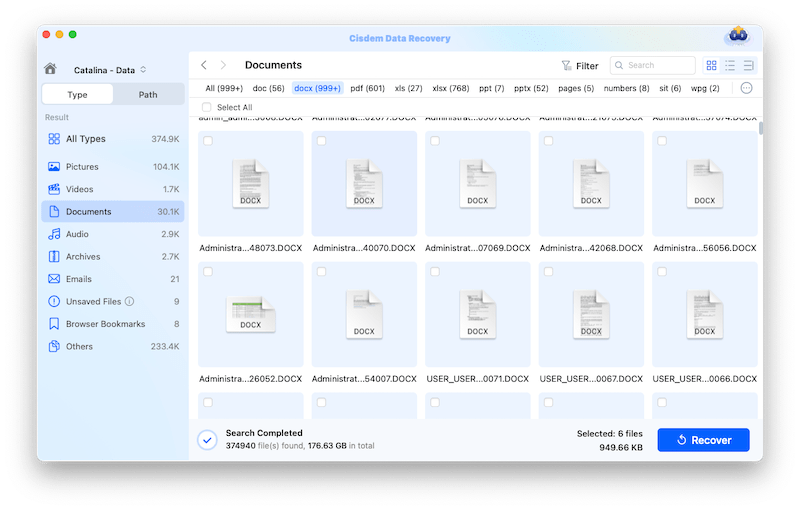
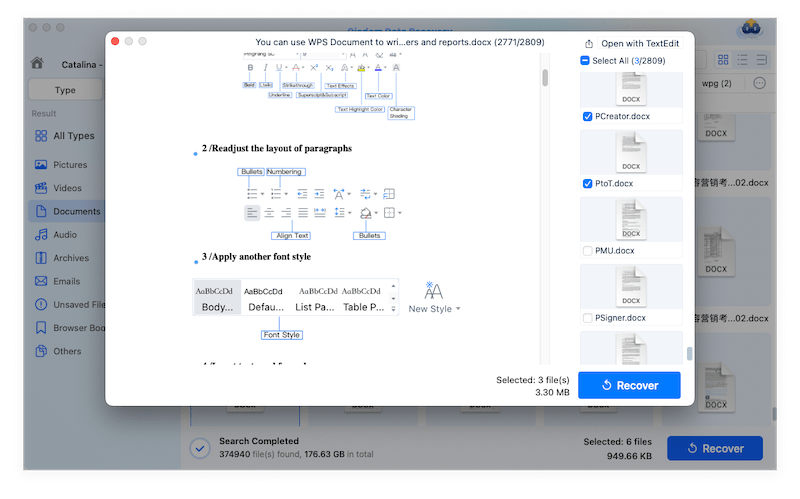
- Step 3. Click Search for lost files. You are able to preview the files before they are recovered. Also, you can use the filter tool to quickly search specific files.
![select a disk to scan]()
- Step 4. Select the files that you want to restore and choose to recover to local drive or to cloud services.
![preview and recover files on mac]()
7. Use a professional disk repair tool
If you are in the hope of fix this issue by using a disk repair software, well, you can try, but it is quite difficult and there are risk of losing more files, as you have to write to the disk when scanning and repairing it.
To increase the chances of solving this issue sucessfully, we sifted through a dozens of disk repair software on the market and would recommend Techtool Pro 18 to you.
Created by Micromat, Techtool Pro 18 is a famous program to test and repair Mac or hard drives connected to it, it supports the latest macOS.
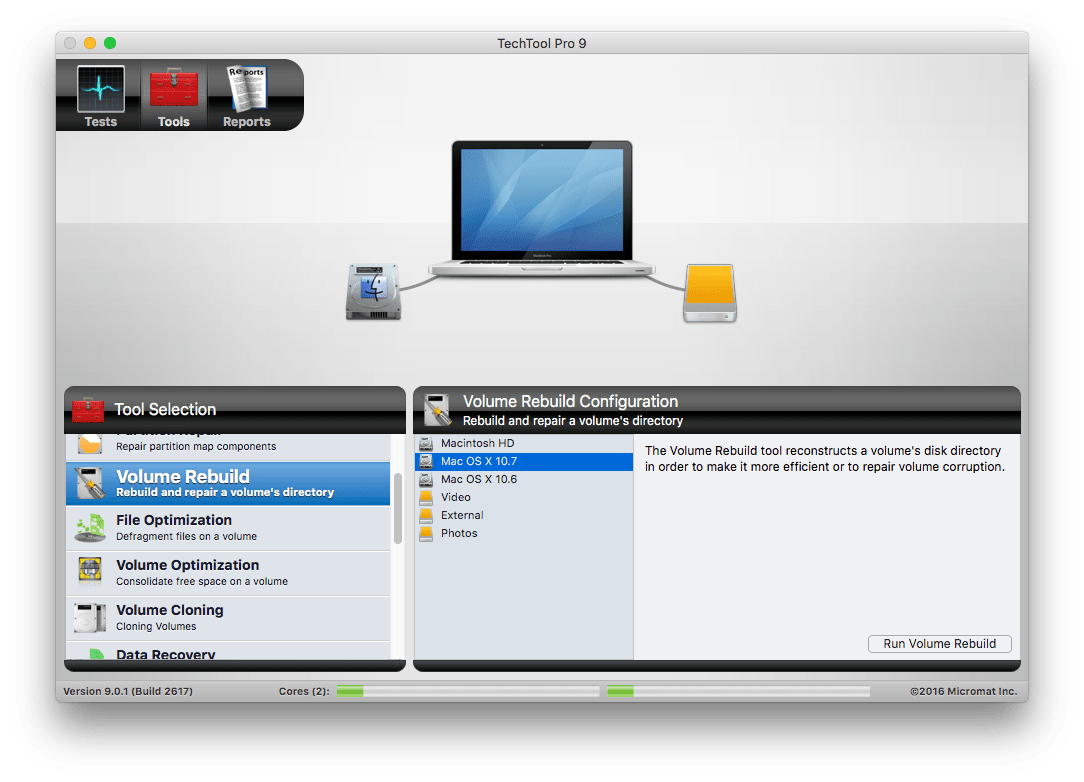
- Download and install Techtool Pro 18 on your Mac.
- Choose Volume Rebuild and select your disk, then click "Run Volume Rebuild" to start repairing.
![techtool repair 01]()
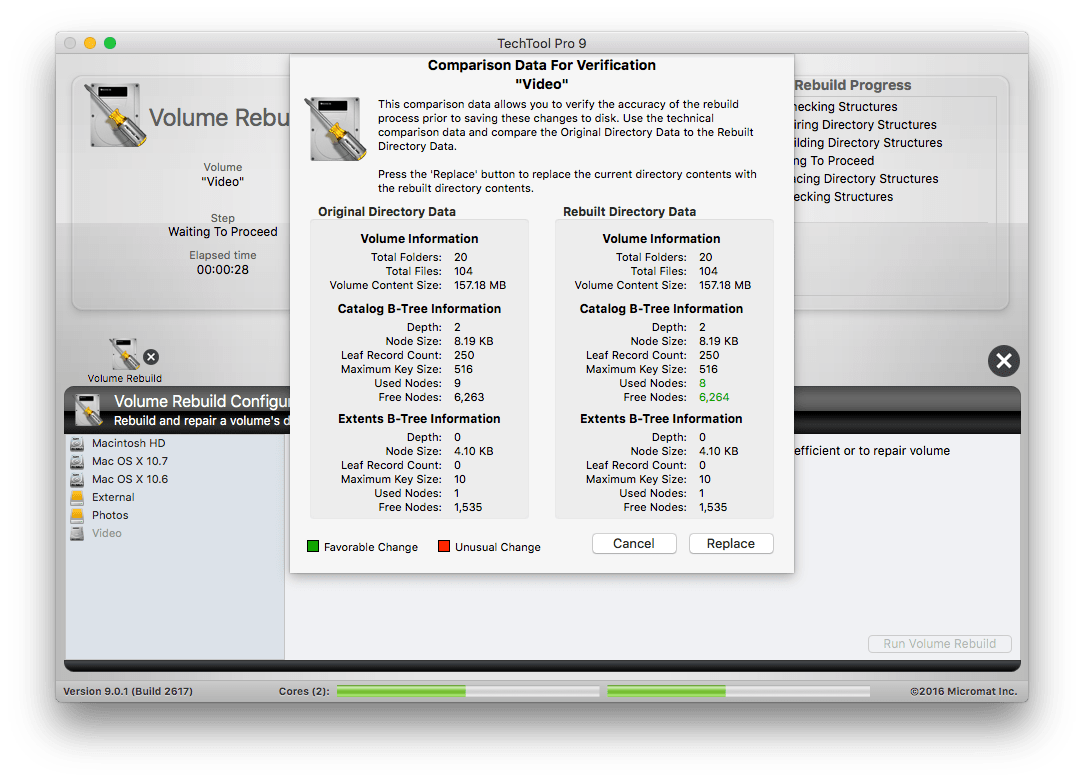
- Then click "Replace" to get a repaired disk.
![techtool repair 02]()
8. Fix the disk on Windows
If macOS can’t repair an external hard drive with the Disk Utility tool, maybe you can connect the disk to a Windows PC and utilize a Windows built-in repair tool to fix it. This repair tool will auto detect disk problems and open a wizard to navigate through a fix process.
- Connect the external hard drive to Windows PC.
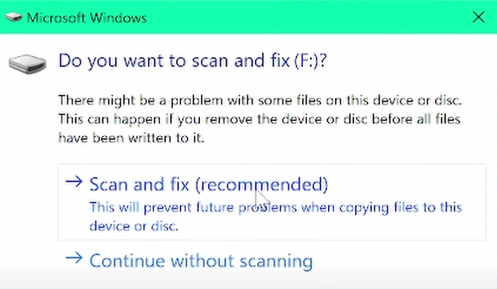
- Click on the message bar to open the repair tool.
- Click on "Scan and fix".
![scan and fix]()
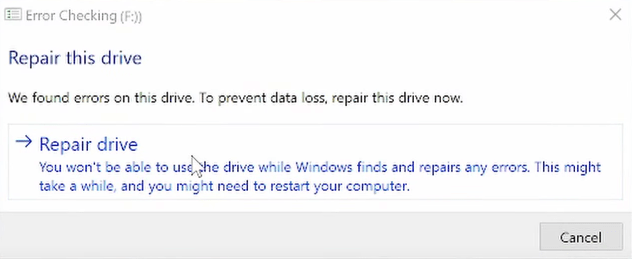
- Then click on "Repair drive", once the repairing finishes, eject the hard drive safely from the Windows PC.
![repair drive on pc]()
- Connect the repaired hard drive to your Mac to check if the issue has been fixed or not.
Conclusion
macOS "Disk Utility can't repair this disk" is a common and fixable error. In a situation like this, don't panic. Just try out the solutions and instructions mentioned in this guide. Disk formatting is a common and very useful way to fix disk errors. Although you can easily get formatted data back using recovery software like Cisdem, it’s always a good idea to back up your files on a regular basis, especially the crucial ones.

Connie Yu has been a columnist in the field of data recovery since 2011. She studied a lot of data loss situations and tested repeatedly to find a feasible solution tailored for each case. And her solutions are always updated to fix problems from the newest systems, devices and apps.

JK Tam is the lead developer at Cisdem, bringing over two decades of hands-on experience in cross-platform software development to the editorial team. He is now the lead technical approver for all articles related to Data Recovery and DVD Burner.