

Cisdem ContactsMate User Guide
 8.1K
8.1K
 0
0


ContactsMate is software that keep all your contacts organized, synced, and up-to-date. It is so easy for you to view, add, edit, group and tag the contacts, also you can scan all your contacts to find out the problematic contacts and fix it, such as the duplicate contacts and formatting errors. What's more, you can share, export and back up contacts to quickly exchange information. To facilitate your use of Cisdem ContactsMate, there are four parts below to get you started.
Getting Started
Download & Install
1. You can download the installation package of Cisdem ContactsMate from the below link.
 Free Download
2. Install Cisdem ContactsMate with the downloaded package.
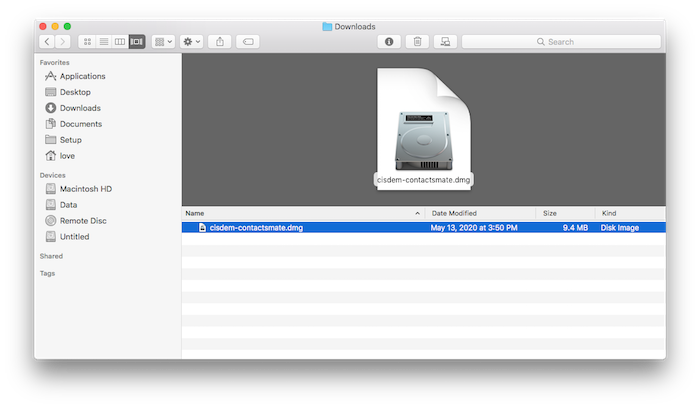
Double-click the dmg file.
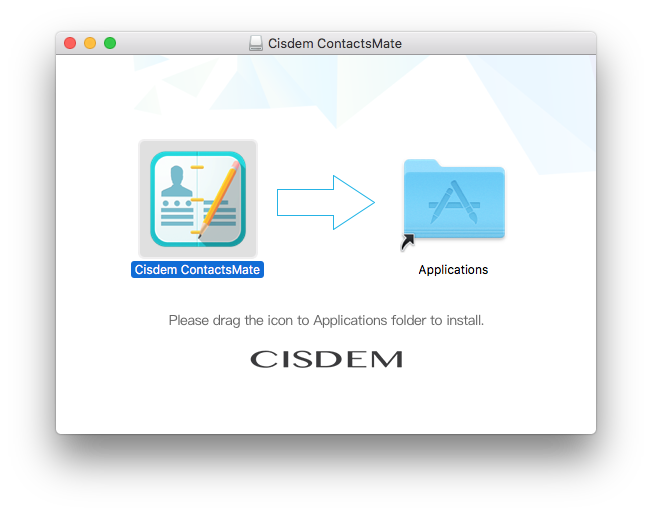
Drag the Cisdem ContactsMate icon to Applications folder.
Activation
After installing the program, you need to activate the program if you want to use the full version features.
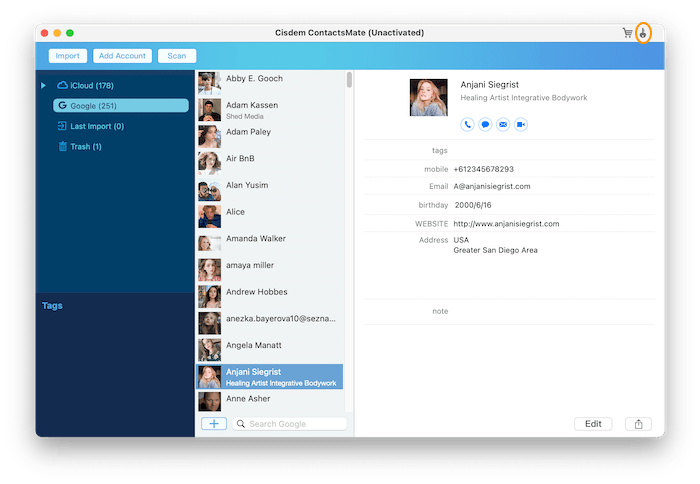
1. Go to Lauchpad or Applications folder, double click Cisdem Contactsmat to run the program, and then click the key icon on the top right corner.
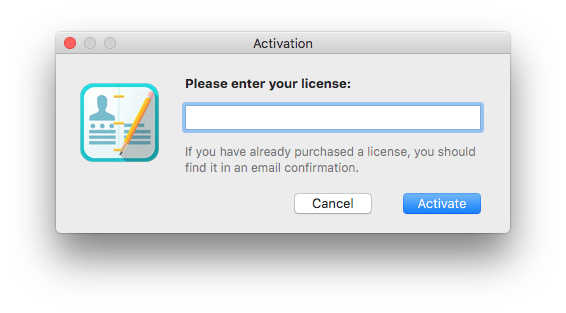
2. Copy-n-paste the license code into the popped-up window, click Activate.
Import Contacts from Multiple Sources
For the first time you run the app, a window will pop up to ask you to authorize the permission to access your contacts. After click “OK”, all the entries in your Contacts will be loaded to Cisdem ContactsMate and displayed accordingly, besides, no further permission will be asked next time you run it.
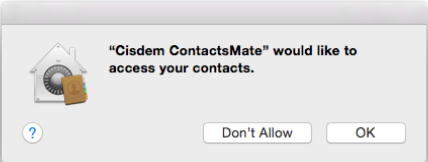
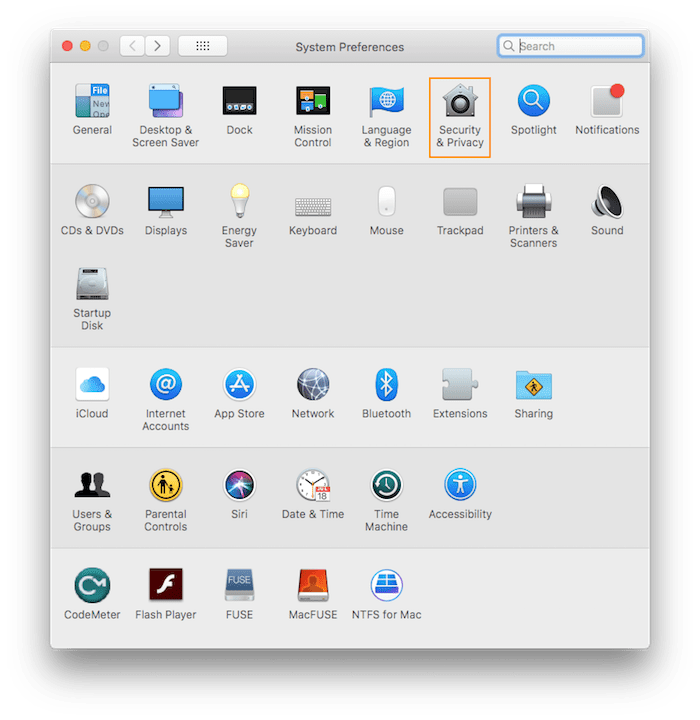
In case that you mistakenly click “Don't Allow”, but you want to allow the ContactsMate access your Contacts, go to System Preferences and select the Security & Privacy.
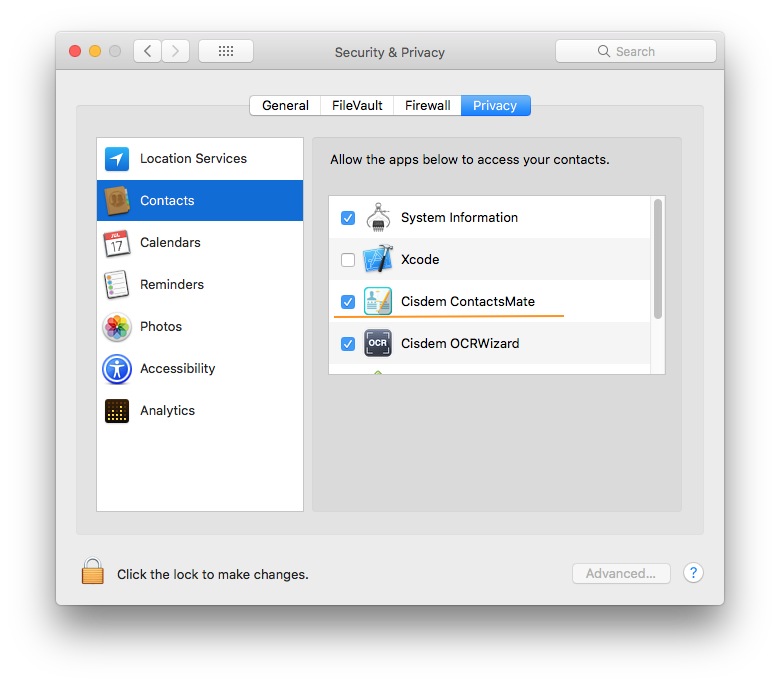
Click “Privacy” and then mark “Cisdem ContactsMate” on the right column.
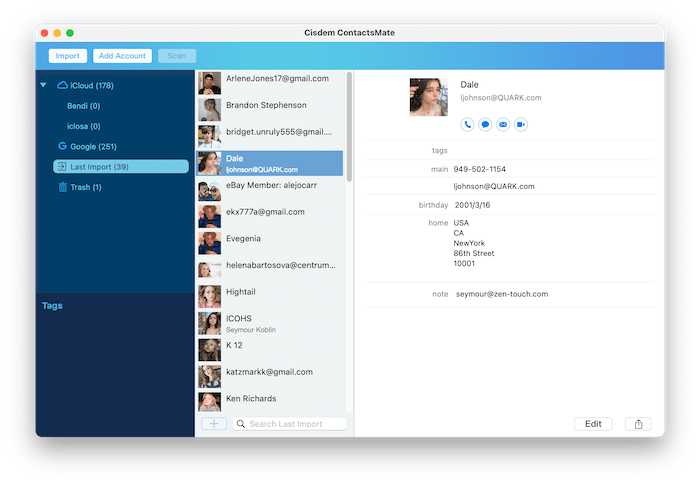
When you launch ContactsMate, the contacts information of the Apple Contacts app will automatically sync into ContactsMate. You can also import the contacts through CSV/vCard file, and import the contacts by adding account of Google, Exchange, iCloud etc.
There are 3 methods to import the contacts into ContactsMate:
1. Click  button to import CSV or vCard file.( The imported contacts will list under "Last Import")
2. Select the group you want to import the contacts to, right click it and choose import to import CSV/vCard files.(The contacts will list under the group you've selected.)
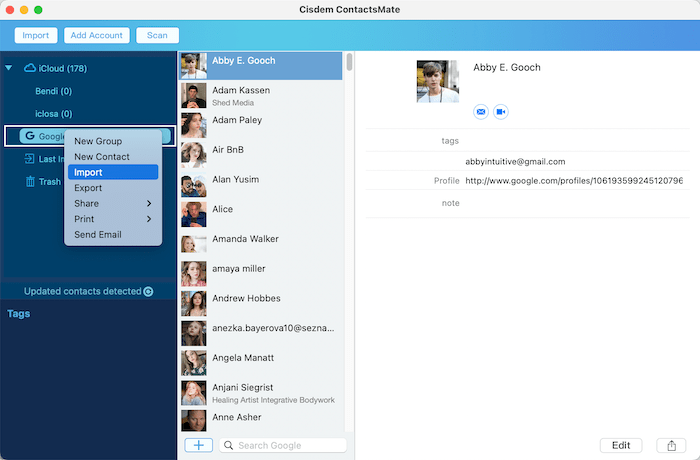
3. Click button  to import the contacts of Internet Account.
Tips:
a. Apple Company removes integration with third-party Internet accounts like Twitter and Facebook on macOS 10.14, so if you are running macOS 10.14 or later on your Mac, you cannot add account of Twitter and Facebook in Cisdem ContactsMate.
b. You need to click the button  to refresh the contacts, then the contacts of the new added Internet accounts will be displayed.
c. If you see the refresh button displays, it means that Cisdem detects the changes of the contacts, you can then click the button to refresh it.
Organize Contacts with Groups
If your contacts were grouped in Contacts app on Mac, not only contacts, but also the groups will sync to ContactsMate. You can also add, edit or delete groups in ContactsMate, and all the changes will sync to the related app.
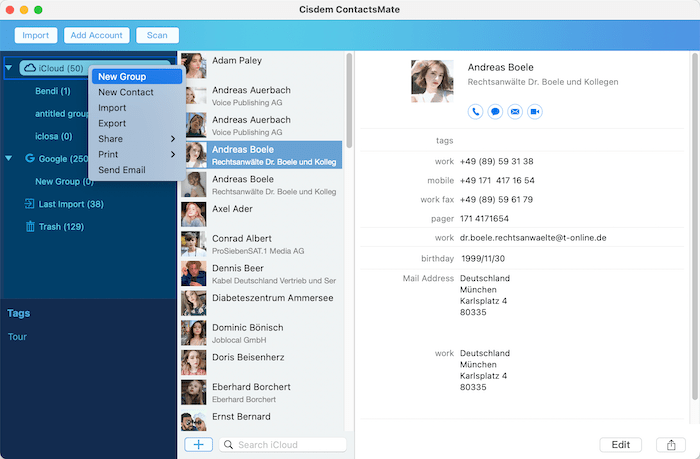
New group: If you want to create a group under iCloud, you can right click iCloud, then click New Group to enter the name of the new created group.
Delete group: If you want to delete this group, then right click the target group and choose Delete. Also you can directly press "Delete/Backspace" key to delete it.
Rename group: Right click the group name, click “Rename” or double click the group name, whichever method you selected can rename the group.
Move contacts: If you want to move contacts to another group, just click to select the target contacts, drag-n-drop to another group name. Or right click the target contacts, click Move to and then choose a group you want to move the contacts to.
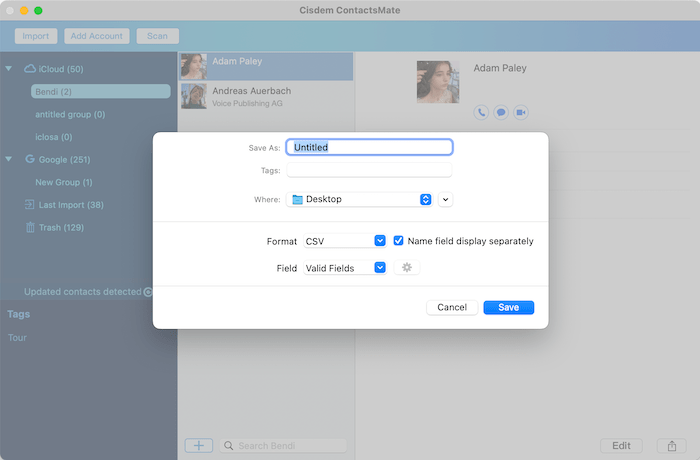
Export group: Right click the Group, click Export option on the right-click menu, choose a format and location, then click Save. There are eight output format options provided in ContactsMate: CSV, CSV(Outlook), vCard, TXT, Docx, HTML, Excel, Numbers and Pages.
Note:
1. The CSV file you exported will combine First name and Last name in the same column by default, if you need to seperate them, please tick "Name field display seperately" on the pop-up window before clicking Save.
2. When exporting to CSV file, you are allowed to choose the fields that you want to export, you can choose "Valid Fields", "All Fields" or "Custom Fields". If you choose "Custom Fields", you can then click  to select the fields that you need.
Share group: If you want to share the contacts of one group to others, right click the group, select Share, and then select the app you want to share with.
Print group: When you want to send gift cards to your friends, it is convenient to directly print contacts from ContactsMate. Right click the target group, select Print, you can select to print the Default Fields or All Fields.
Tips:
a. Default Fields includes Name (Company name or Personal name), Phone, Email, and Address. If it is company contacts, only company name will be printed; if it is personal contacts, then only personal name will be printed.
b. If there are more than one phone numbers, only the first phone numbers will be printed. So does email and address.
Send Email: If you want to send emails to the contacts under this group, right click the group name, click "Send Email", then you can directly send an email to all the contacts under this group.
Add, Edit and Organize Contacts
You can edit all the contacts in Cisdem ContactsMate, and all the updates will sync to the related accounts.
Add a new contact
Right click the group you want to create a contact in, and then choose New Contact.
You can also click ![]() button to add a new contact.
button to add a new contact.
Click the Photo icon to load photo from local resource.
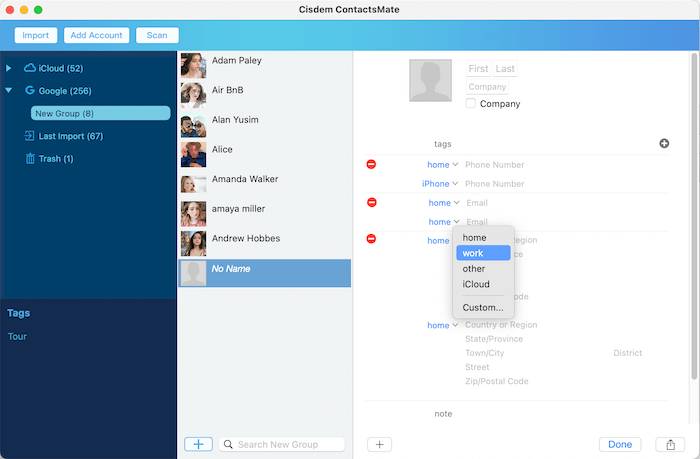
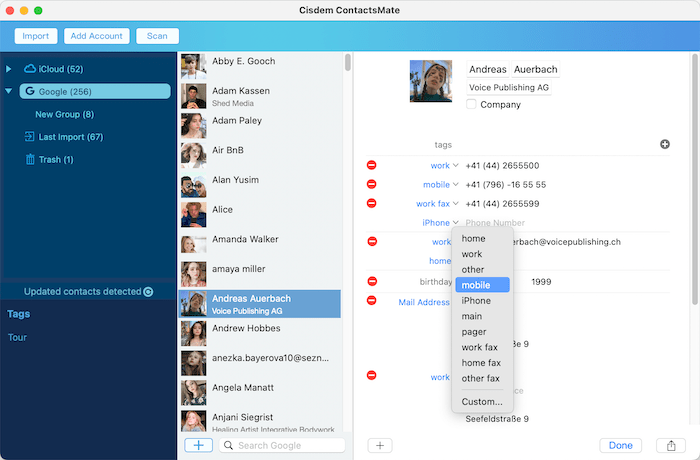
In this contact edit window, 3 fields(phone, email and address) are displayed by default, you can click the field to select another name or select Custom... to customize the field. To add another field, just click  button and choose a field from the pop-up list.
To enter the contact information, you can directly click on the blank space and type in as needed.
Delete Contact
a. Click Delete option to delete the selected contact.
b. Command click to select multiple contacts, right click them, then click Delete on pop-up menu.
c. Press shortcut keys "Command+Delete" to delete the selected contacts.
Remove Contact
a. Click Remove option to remove the selected contact out of this group.
b. Command click to select multiple contacts, right click them, then click Remove on pop-up menu.
Edit Contact
a. To add a field, just click button and choose a field from the pop-up list.
b. To remove a field, click button.
c. Click a field to change another name or click Custom... to add any name you want.
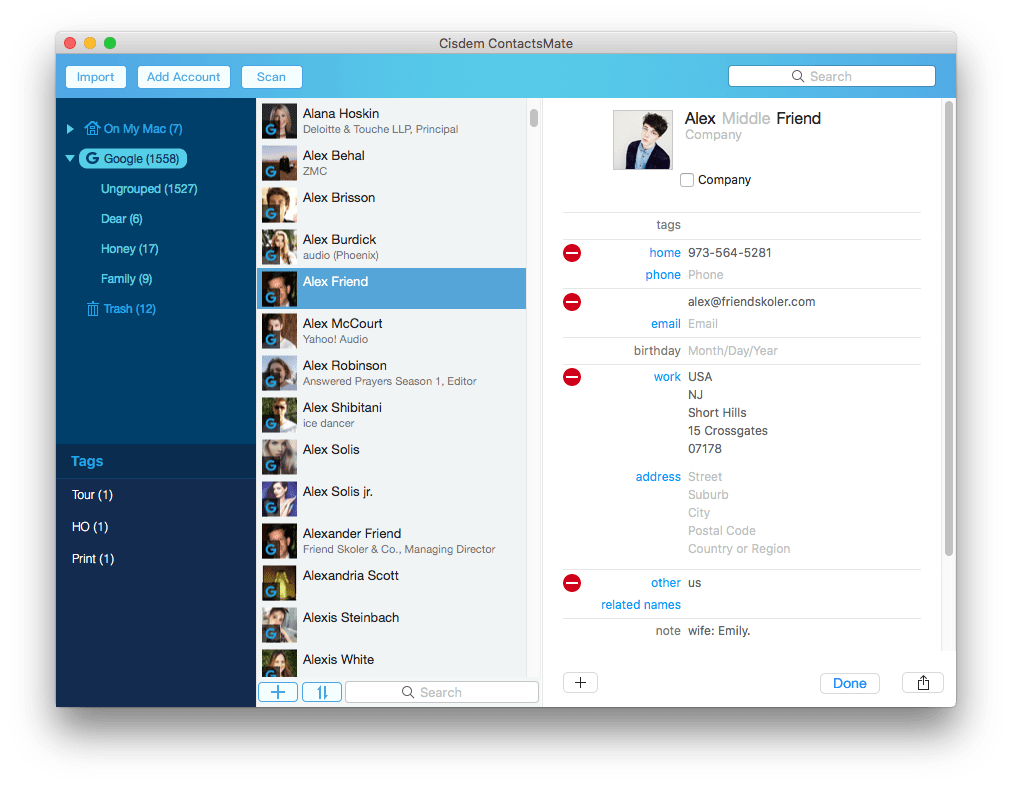
d. Company contact: When the contact is considered as a company contacts, you could check the box of Company in the contact information. The first line of this contact in the list is showing Company Name, the second line of this contact is showing Personal name and Job title.
Tips: If you ticked Company and the company name is blank, the first line will be showing “No Name”.
e. tags: You can click  to add a tag for the current contact, so that you can click the tags on the left side to easily locate the corresponding contacts with the same tag.
Search Contacts Quickly
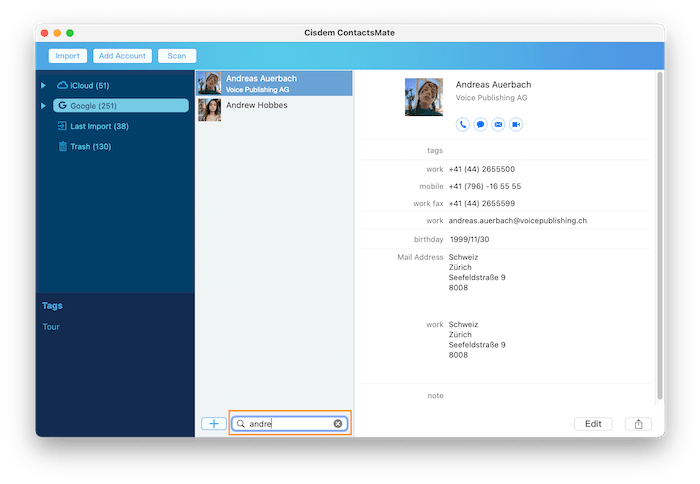
Select the target group you want to search the contacts, and then type words related to contacts in the search box.
Tips:
a. Fields of Personal name (include prefix and suffix), Company name, phone, email, and note are available to be searched both with Universal Search and Group Search.
b. If you want to search for a phone number such as 041+1234567, you can directly enter "041123" to get the result, symbol is not required to be entered.
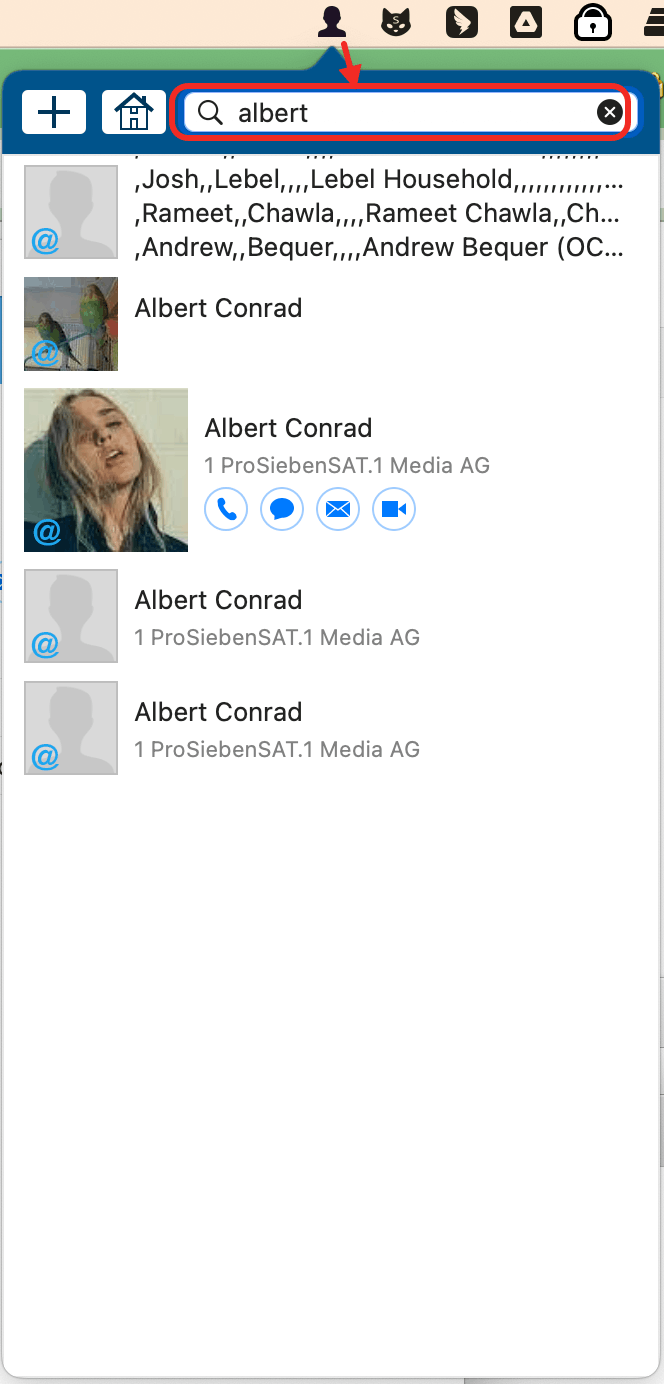
If you want to search contacts globally, click a contact icon on the top menu bar and search contacts there.
Export Contact
Right click a contact, click Export option to export the contact.
Share Contact
Right click a contact, click Share option to select the way to share your contact, you could select mail, messages and so on.
Print Contact
Right click a contact, click Print option to select Print Default Fields or Print All Fields.
Print Default Fields includes Name (Company name or Personal name), Phone, Email, Address.
Tips:
a. For the default fields, if it is company contacts, only company name will be printed; if it is personal contacts, then only personal name will be printed.
b. If there are more than one phone numbers, only the first phone numbers will be printed. So does email and address.
Send Email
If you want to massive e-mail to the target contacts, just Command click the target contacts, right click one of the contact, click "Send Email".
Merge Duplicate Contacts
System will bring you to Conflict Resolution after clicking the Scan button, you will see all the questionable contacts showing on the left column under each conflict, meanwhile, you are allowed to “hide” or “show” the content for a more convenient operation. Click any of contacts the detailed information will be displayed on the right part of the interface including Name of the contact, Problem, Solution and Details. And then you can select the proper solution, click Fix or Fix All with the problematic contacts. Be aware of that all the changes made here will automatically update to your Address Book.
If you want to fix only one contact, you can do as below:
Step 1 Select the target account, click button  to scan all the problematic contacts
Note: It only enables you to scan the problematic contacts in the same account, for example, you can scan the duplicate contacts in your gmail, but you cannot scan the duplicate contacts between gmail and iCould.
Step 2 Select one of the duplicated name, choose a solution (Edit or Ignore), click  .
.
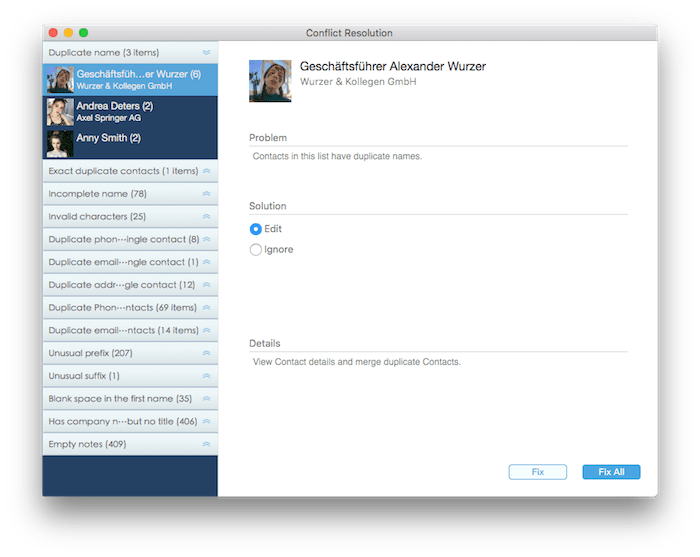
Ignore: When you select Ignore, then this duplicate name contact will be removed from the list.
Edit: When you select Edit, then a pop-up window will be showing for you to edit this contact information.
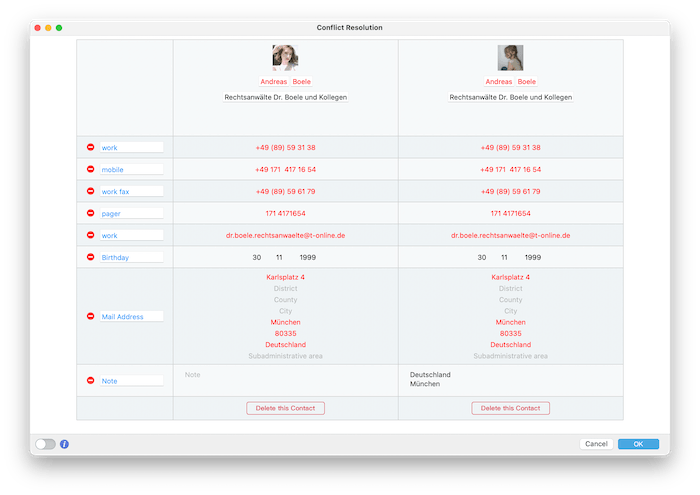
a. You can click  to delete the contact you don't want to keep.
b. You can click to delete the field you don't want to keep.
c. You can click on the contact information to edit it as your need.
d. Slide on  if you want to merge the duplicated name contacts information into one contact.
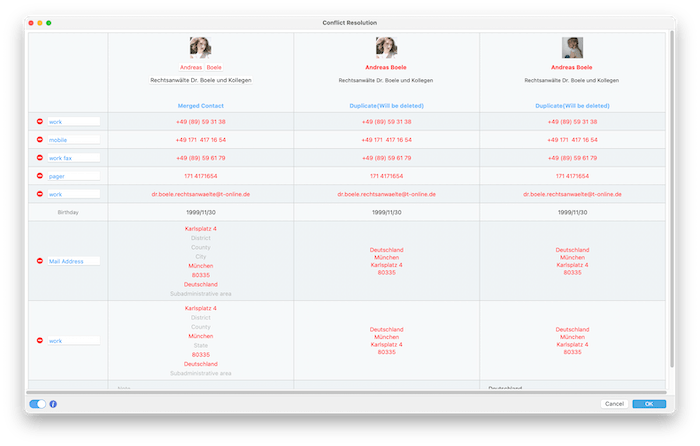
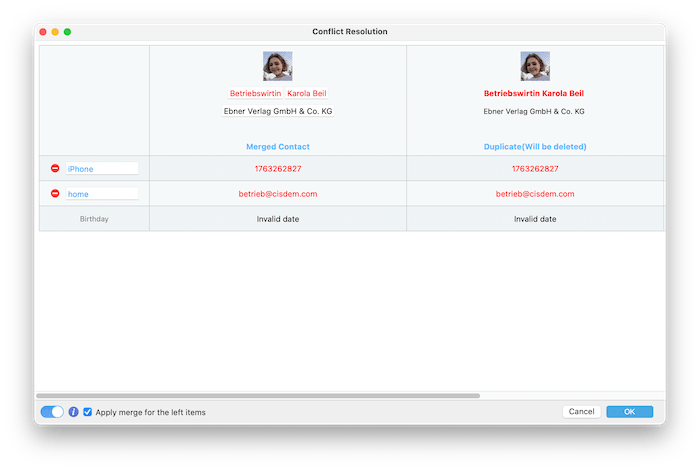
All the problematic information will be marked as red, so that you can easily check the duplicate information. Also you can click to delete the filed or click on the Merged contact info to edit it here.
If the portraits of those two duplicate contacts are different, we will automatically pick one of them and if you want to change to the other one, you can double click the target portrait to switch the portrait of the Merged contact.
If you want to fix all the contacts with one solution, you can do as below:
Step 1 Select the target group, click button to scan all the problematic contacts
Step 2 Select one of the duplicated name, choose a solution (Edit or Ignore), click 

Ignore: When you select Ignore, then all the duplicate name contacts will be removed from the list.
Edit: When you select Edit, then a pop-up window will be showing for you to edit the first contact in the list.
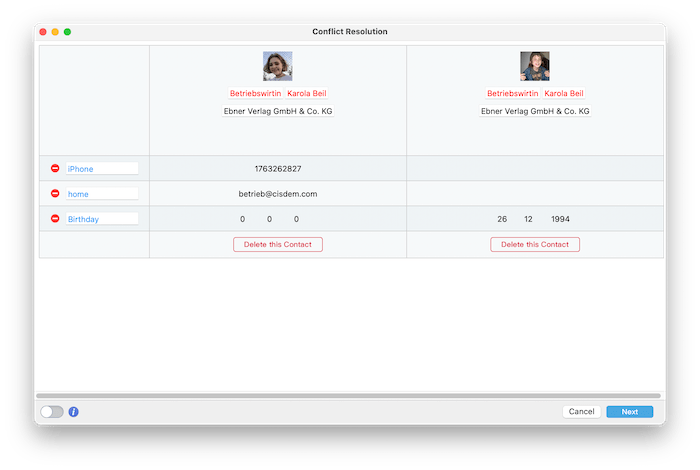
a. You can click to delete the contact you don't want to keep.
b. You can click to delete the field you don't want to keep.
c. After finish editing this contact, you can click  to edit the next contact on the list.
d. Slide on  if you want to merge the duplicated name contacts information into one contact.
All the problematic information will be marked as red, so that you can easily check the duplicate information. Also you can click to delete the filed or click on the Merged contact info to edit it here.
If the portraits of those two duplicate contacts are different, we will automatically pick one of them and if you want to change to the other one, you can double click the target portrait to switch the portrait of the Merged contact.
Tips:
If you want to edit the contacts one by one before being merged, do not tick the option "Refer to this operation to fix all", just click after editing finished.
If you want to directly merge all the duplicated name contacts, tick the option "Apply merge for the left items", and then click  .
.
Customize ContactsMate
If you want to change the defaulted settings, please click “Cisdem ContactsMate” on menu bar and then select “Preferences”. You can set the showing rules: General, Conflicts, Export Fields and Back up & Restore.
General
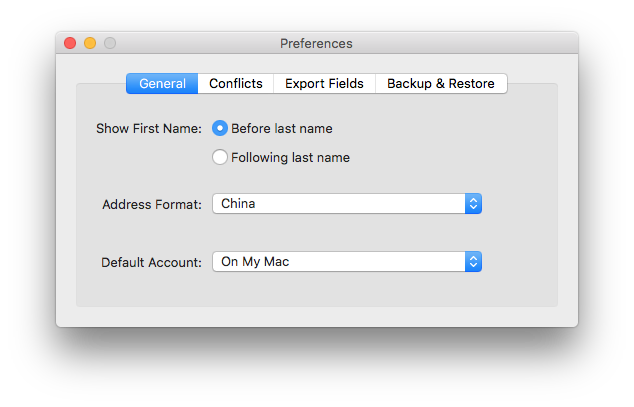
Show First Name: You can set the showing place of First Name, Before or after the last name.
Address Format: The address format may be different for different countries, you can select the proper format as your requirement here.
Default Account: The default account you selected will be showing at the front.
Conflicts
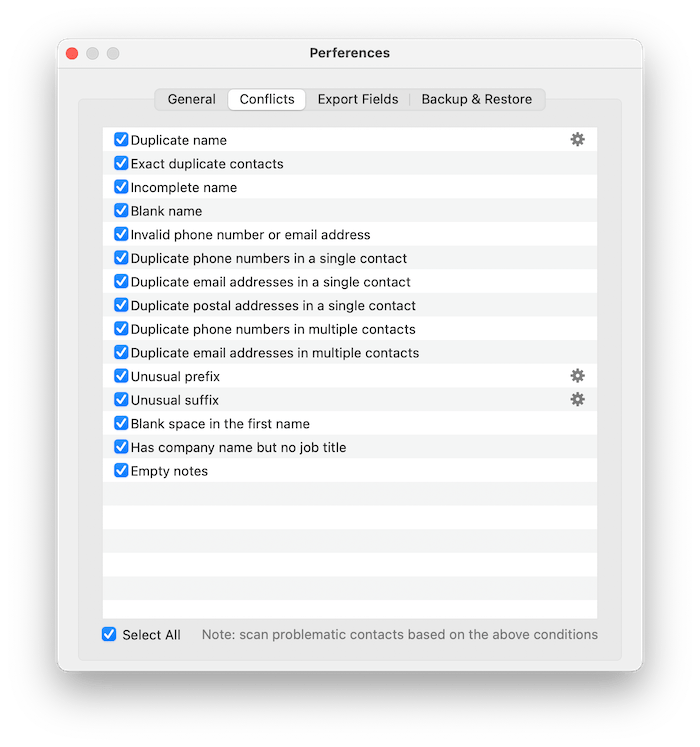
Duplicate Name: That name of contacts appears more than once in contact list.
ContactsMate will separately detected the duplicate name from Company Contact and Personal Contact.
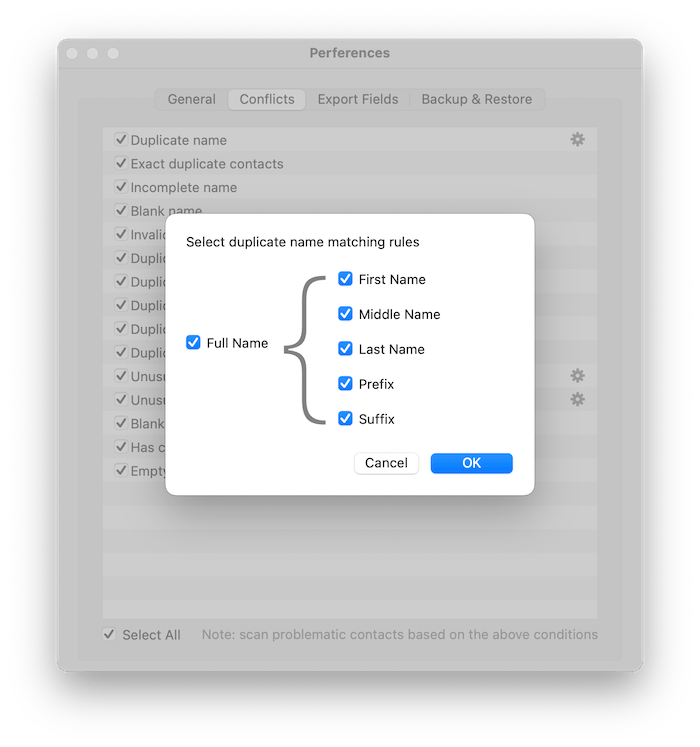
Click button  , you can set what defines a duplicate name as your requirement. For example, if only First Name and Last Name were selected, then Contacts with the same first name and last name but different middle names will also be treated as a duplicate name. By default, the duplicate name means the name with the same First name, Middle name, Last name, prefix and suffix.
Exact duplicate name: Exact duplicate means contacts information of all fields are same.
ContactsMate will separately detected the exact duplicates from Company Contact and Personal Contact.
Incomplete name: Name of Personal Contact is incomplete which means the first or last name is missing or blank.
Blank name: Name of this contact is missing or blank.
For Company Contact: company name of this contact is missing or blank.
For Personal Contact: Both Last name and First name are missing or blank.
Invalid characters: This is only for fields of Email and Phone, which detected no “@“ with email field, and other characters appears except numbers, “+”, ”-“, ”(“, “)”, “space” with phone field.
Duplicate phone numbers in a single contact: This contact has duplicated phone number in different fields, for example iPhone and mobile phone, but only these numbers with exactly the same information will be classified to duplicate phone number.
Duplicate email addresses in a single contact: This contact has duplicated email address in different fields, for example home email and work email, but only these email addresses with exactly the same information will be classified to duplicate phone number.
Duplicate addresses in a single contact: This contacts has duplicated address in different fields, for example home address and work address, but only these addresses with exactly the same information including street, district, city, post-code and country will be classified to duplicate address.
Duplicated phone numbers in multiple contacts: The same phone number appears in more than one contact, for example Mike and Jack has the same phone number, in this case, ContactsMate will detect these two contacts in this conflict.
Duplicated email addresses in multiple contacts: The same Email address appears in more than one contact, for example Mike and Jack has the same home email, in this case, these two contacts will be detected by ContactsMate in this conflict.
Unusual prefix: The allowed prefix and suffix of Personal contact name are showed in “Prefix & Suffix” and those excluded will be listed as unusual ones.
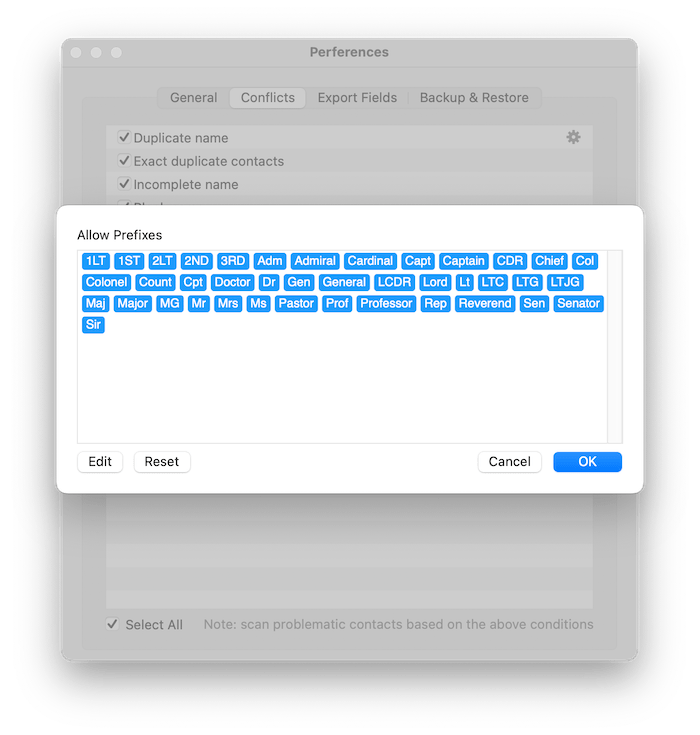
To edit the prefix or suffix, you can click the .png) button behind the Unusual prefix or Unusual suffix, click edit , then you can enter/modify customized prefix or suffix.
button behind the Unusual prefix or Unusual suffix, click edit , then you can enter/modify customized prefix or suffix.
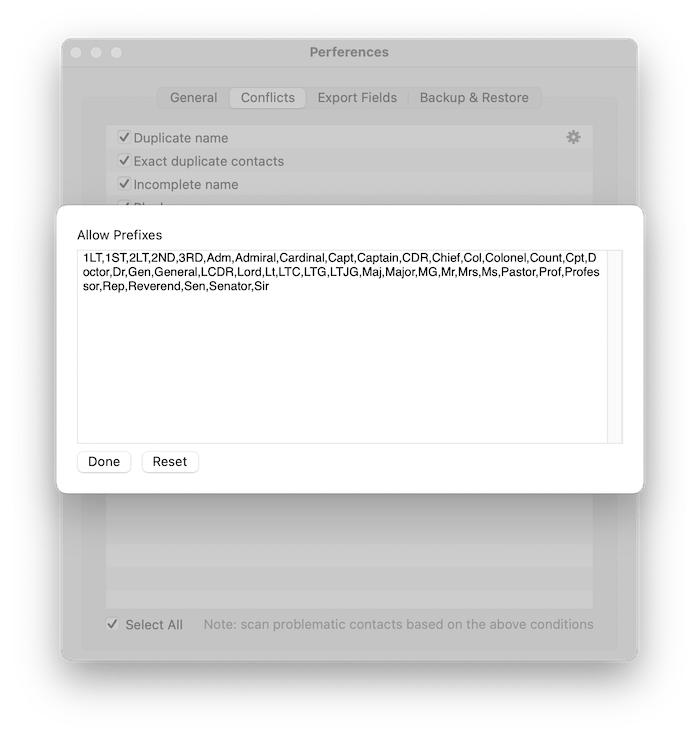
Separate the prefix/suffix with comma “,”. Click the OK button to save edit.
Unusual suffix: As per prefix, you may refer to the figure above.
Blank space in the first name: Among characters of the first name, there exists some blank space. In this case, those Personal Contacts will be listed under this conflict.
Has company name but no title: For Personal Contacts that has company name but job title has not been added.
Empty notes: While the note of this contact is empty, it will be detected as Empty notes. Please notice that when the note was entered with space, it will not be detected as Empty notes.
Export Fields
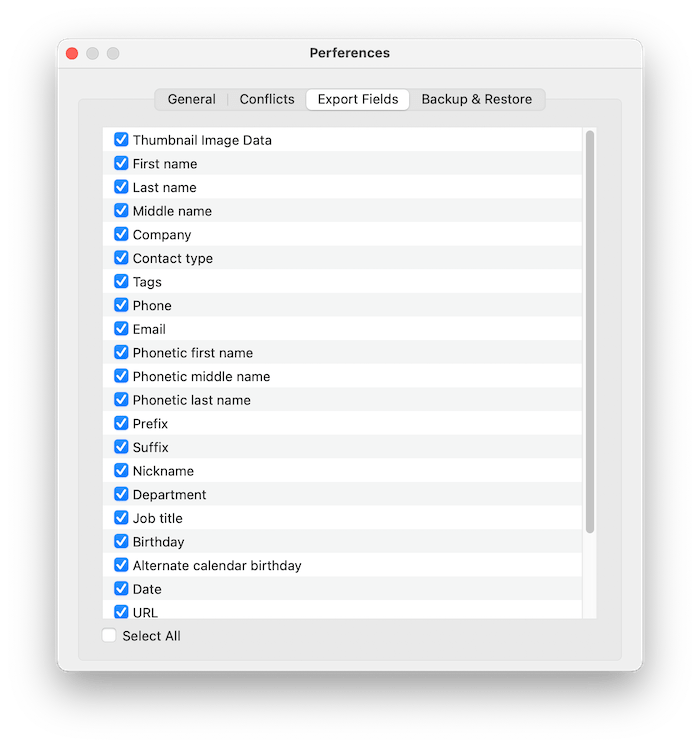
The export fields are all checked by default, you are also allowed to uncheck or check the fields as you like.
Backup & Restore Contacts
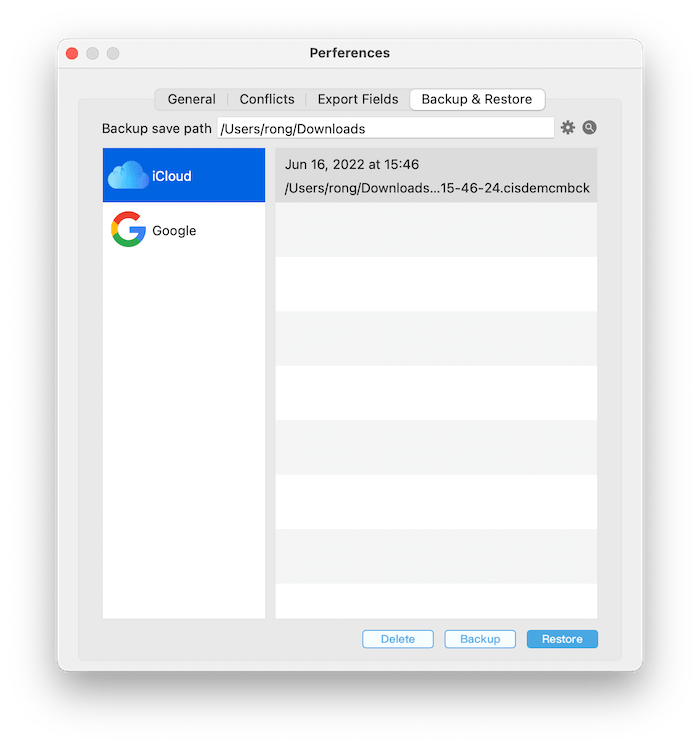
Backup: We suggest you can backup all your contacts before fixing the problematic contacts, in case of missing the contacts information by mistake operation.
Restore: You can restore the backup contacts if you need.
Delete: You can delete your backup contacts if you do not need it any more.
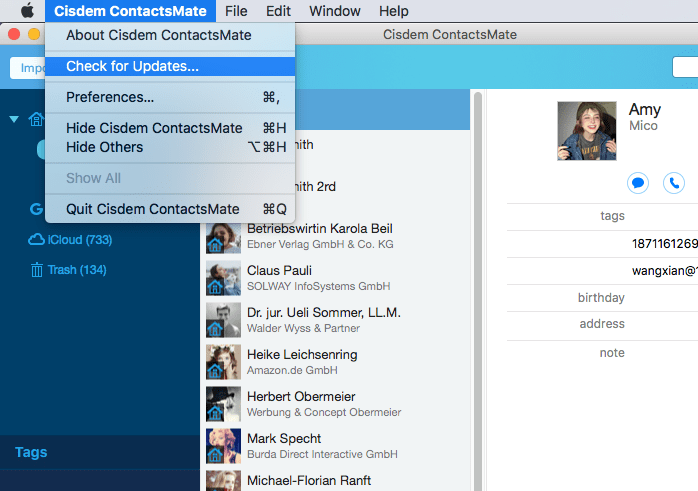
Update Cisdem ContactsMate
We always suggest users can keep using the latest version of the program.
When you launch Cisdem ContactsMate, Cisdem will auto check for updates.
Also, you can click Cisdem ContactsMate > Check for Updates… on the left top menu bar to manually update it.

Traci Gordon has worked as a tester in a software company for 8 years, she believes that the best software should be a tool that can help users accomplish what they need with the simplest steps.

Adrian Li is Cisdem’s Chief Engineer and serves as the editorial advisor for Duplicate Finder and ContactsMate. His work and insights have been featured in leading tech publications such as Fossbytes, TUAW, Redmond Pie, SafetyDetectives, and BestForAndroid.