

How to Merge Photo Libraries on Mac without Duplicates: 3 Ways
 12.9K
12.9K
 0
0


The Photos app (aka Apple Photos) on Mac allows you to create multiple libraries to organize your photos. Sometimes you may need to combine your photo libraries. In many cases, the merging can result in duplicate photos. This article will show you how to easily merge photo libraries on Mac without duplicates.
Note
Regardless of the method you use, it’s a good idea to back up your libraries before the merging.
 Cisdem Duplicate Finder
The Best Duplicate Photo Finder for Mac
- Identify duplicate images along with all other duplicate files (videos, audio, etc.)
- Detect similar images, allowing you to adjust the threshold for comparing images
- Support Mac, Windows PC, external storage devices, cloud drives, and more
- Scan for duplicate files in Apple Photos, Apple Music, iTunes, and folders
- Display duplicate files for you to preview side by side
- Automatically select all but one file for deletion in each set of duplicates, enabling you to remove all duplicates at once
- Allow you to adjust selections manually or choose from 8 rules (e.g., Select Oldest)
- Help you easily keep your photo library duplicate-free
- Easy to use for everyone


Method 1. How to merge photo libraries on Mac by moving photos
Here is the scenario. There are two libraries on your Mac: library 1 and library 2. To merge library 2 with library 1, you can follow the steps below.
Steps: How to merge two photo libraries on Mac
1. On your Mac desktop, create a new folder and give it a descriptive name such as “Exported photos”.
2. Double-click photo library 2 to open it in Photos.
3. In Photos, select Library in the left sidebar and then click All Photos.
4. In the menu bar at the top of the screen, choose Edit > Select All.
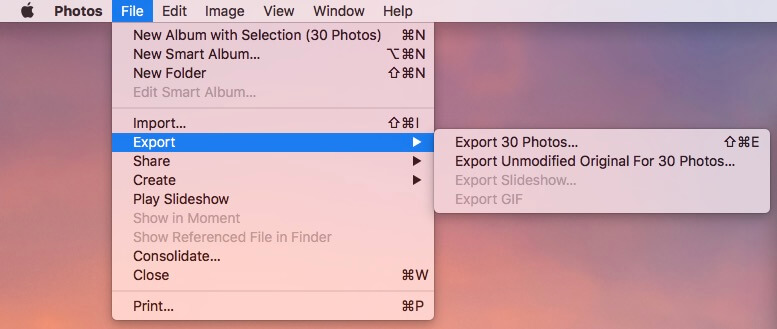
5. Choose File > Export > Export Photos.
Note
If you want the best possible quality and don’t care much about the editing you have done to your photos, you can choose the Export Unmodified Original option instead.
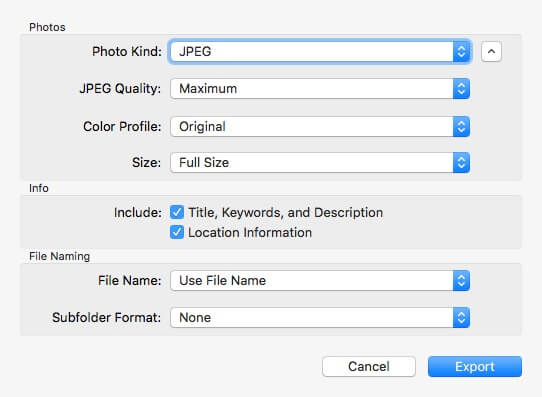
6. In the dialog that appears, customize the export settings based on your needs. Click Export.
Note
You can choose the file type, size, and other options for the exported photos. You may want to export photos in the highest possible quality.
7. Select the newly created folder and click Export.
8. When all the pictures in photo library 2 have been exported, an Export Complete message will appear.
9. Double-click photo library 1 to open it in Photos. Click Switch when asked.
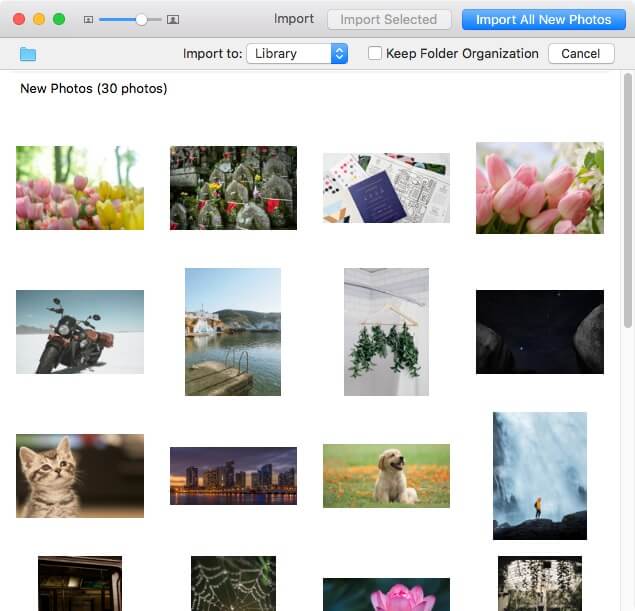
10. In the top menu bar, choose File > Import.
11. Select the folder containing the exported photos and click Review for Import.
12. Click Import All New Photos.
When the import is complete, the two Photos libraries will be merged. All photos in library 2 will be in library 1. However, note that all the albums in photo library 2 will disappear after the merging. (You can delete library 2 to free up space if needed.)
Tip: How to merge photo libraries without duplicates
If duplicates appear after you merge libraries, you may want to get rid of them, since unnecessary duplicates take up space and can make photo viewing less enjoyable. There are two ways to remove them.
For macOS El Capitan 10.11 or later
1. Download and install Cisdem Duplicate Finder. Open the app.
 Free Download macOS 10.11 or later
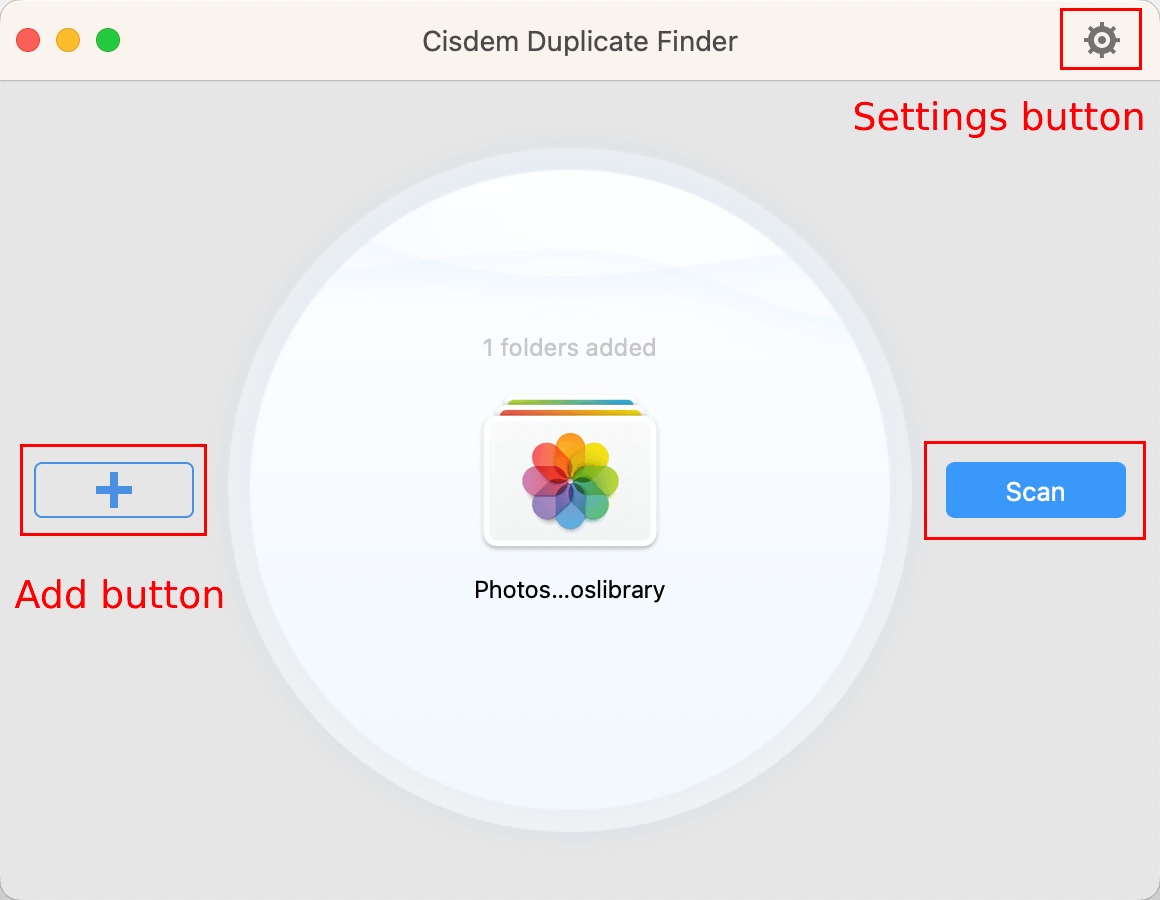
2. Drag the merged library into it. (Alternatively, use the Add button.) Click Scan.
Note
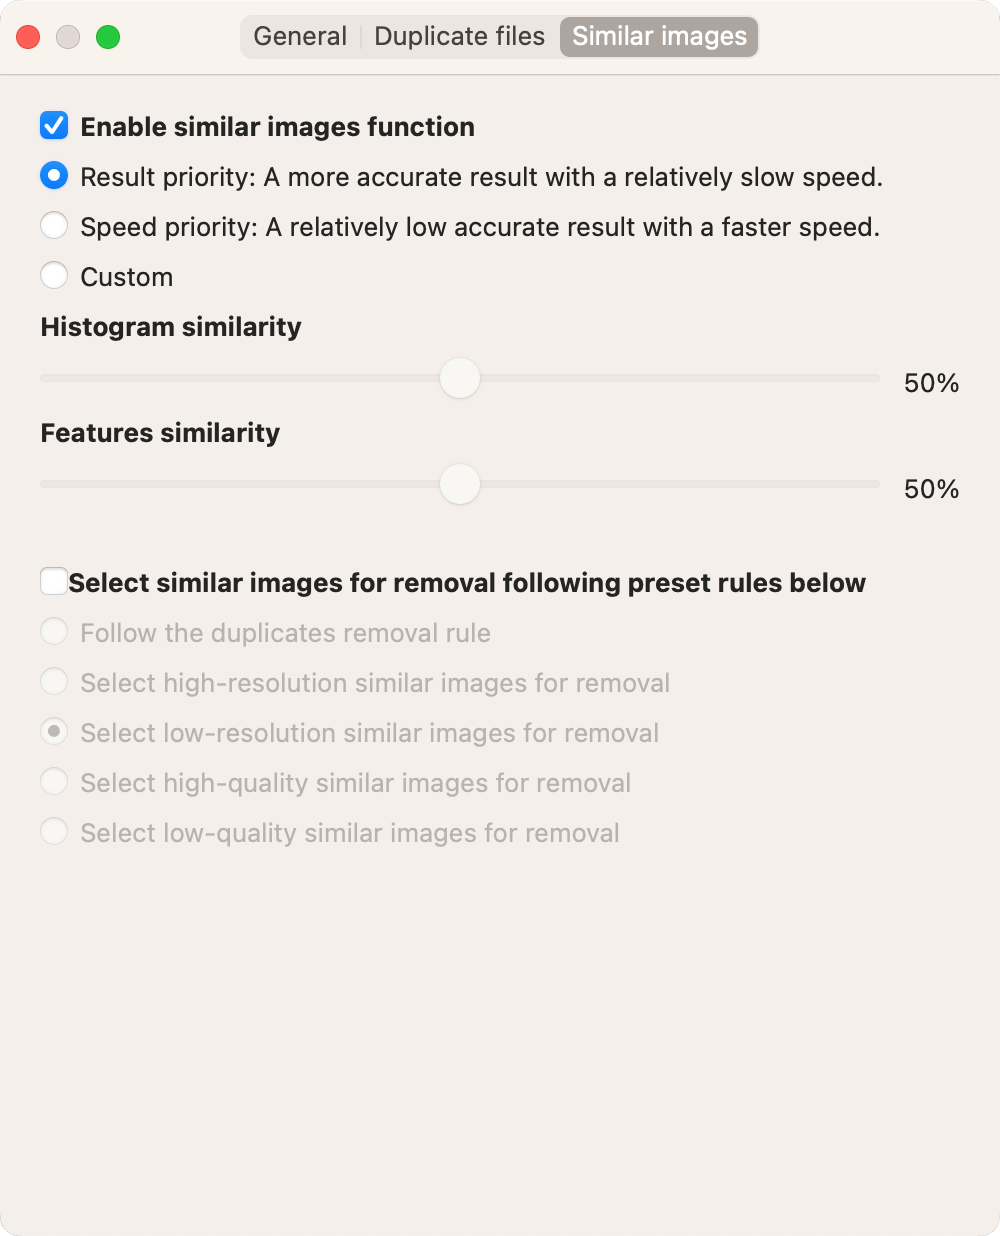
Before clicking Scan, if needed, you can go to Settings > Similar images and enable the function for finding similar images. This way, the app will find similar photos (photos that appear the same but have different formats or sizes, and similar-looking pictures) along with duplicate photos (exactly identical regardless of file names).
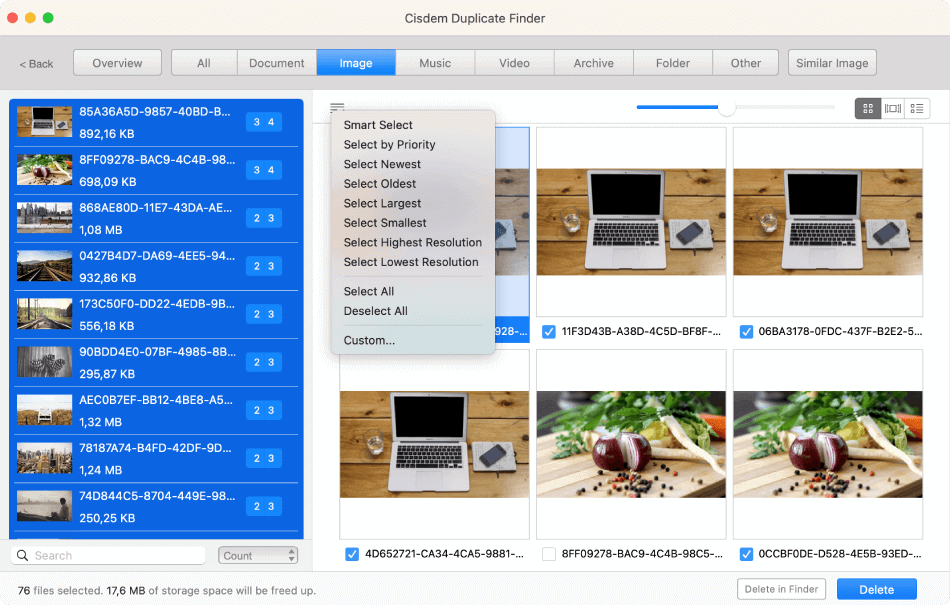
3. Once the scan is done, you will be presented with the results window. There, the Image tab displays all duplicate photos, and the Similar Image tab lists all similar photos.

4. Cisdem Duplicate Finder has automatically selected all duplicates for deletion. You can also select or deselect files by hand, or choose a desired selection rule.
(For example, the Select Smallest or Select Lowest Resolution rule can help you mass select all lower quality versions for removal, when it comes to handling similar photos.)
5. Click Delete and then Delete to delete all the selected photos.
Deleted photos will go to the Recently Deleted album in the Photos app.
For macOS Ventura 13.0 or later
1. Open the Photos app.
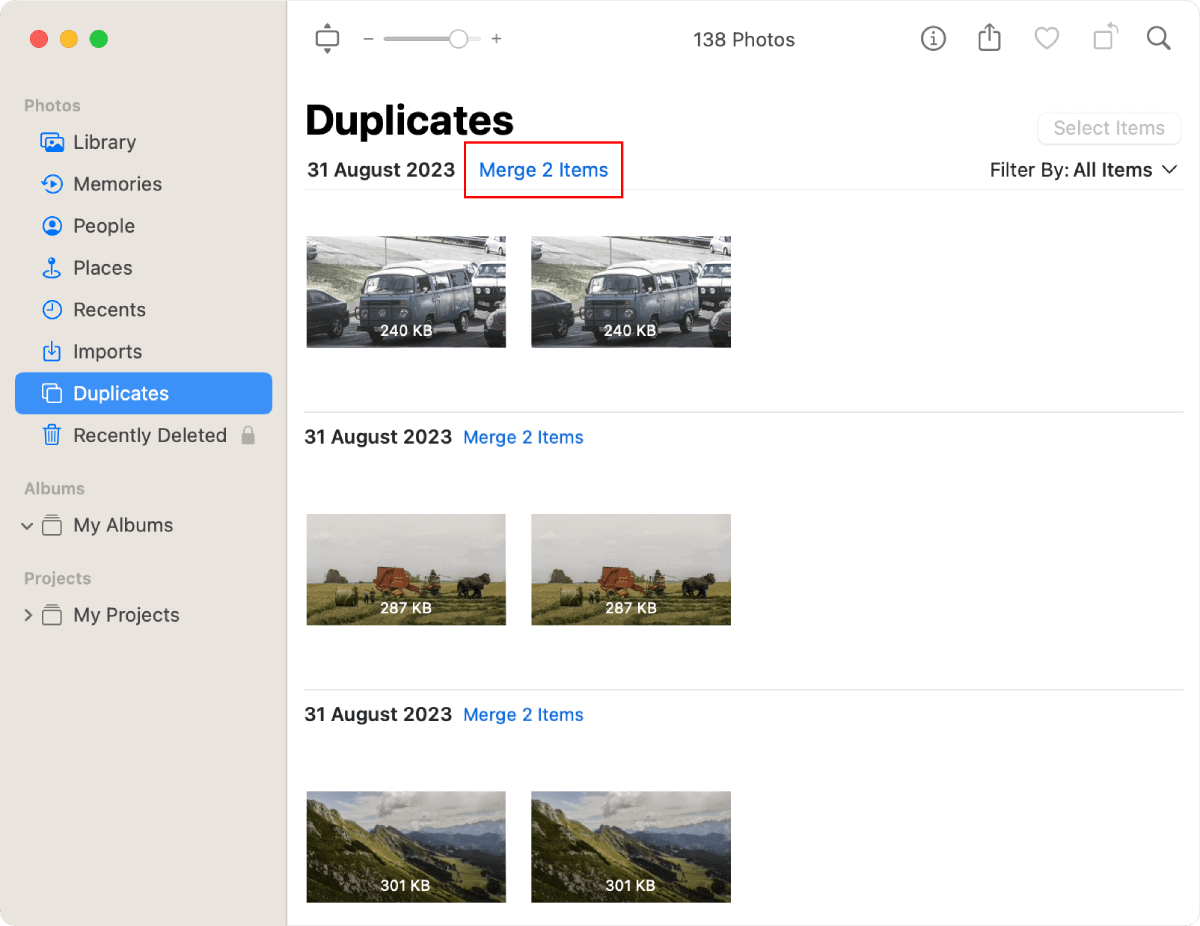
2. Choose the Duplicates album in the sidebar.
3. Check if there are duplicate photos in this album.
- If yes, head to the next step.
- If no, just wait until you see duplicates. (You may need to wait for days, weeks, or even longer, depending on the size of the merged library.)
4. Go through each set and remove duplicates using the Merge button or the Delete feature.
Method 2. How to merge multiple photo libraries on Mac using iCloud
If you are sure that you have enough iCloud storage, then you can iCloud Photos to combine your photo libraries. For example, if the merged library will be 100 GB, you need to have more than 100 GB available space in your iCloud. Also, make sure you have good internet connection.
I easily merged the two Photos libraries on my iMac using a brand new iCloud account. The process didn’t take long because both libraries were very small. If you have gigabytes of photos, it can take hours or even longer. Below are the steps.
1. On your browser, sign in to iCloud and then click Photos to go to iCloud Photos.
2. Double-click photo library 2 to open it in Photos.
3. In the menu bar, choose Photos > Preferences.
4. Under the General tab, click Use as System Photo Library.
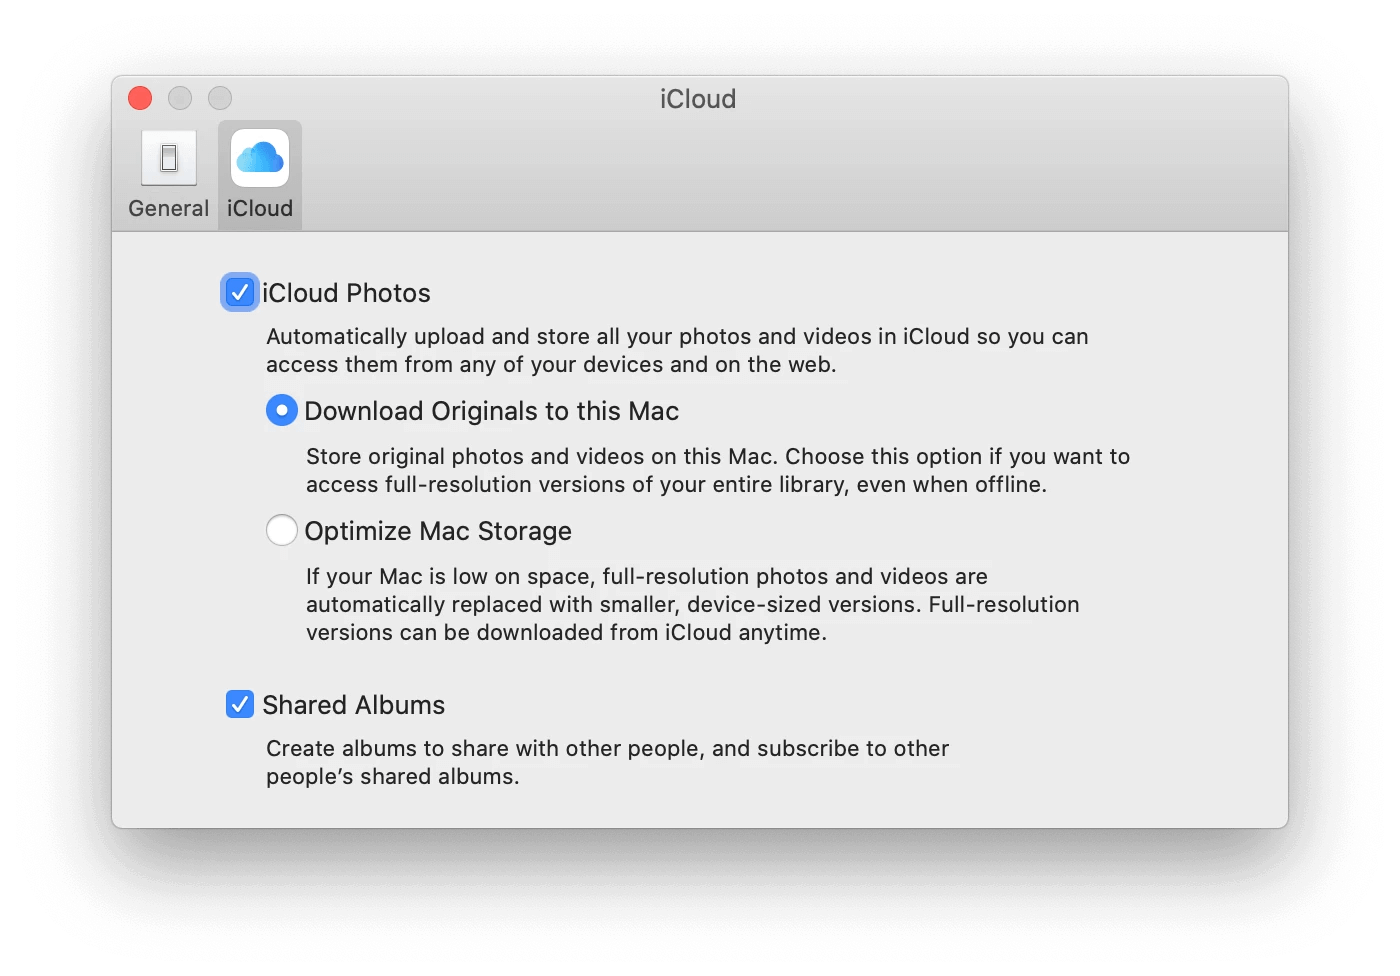
5. Go to the iCloud tab and select the iCloud Photos checkbox. Enable the Download Originals to this Mac option.
Note
If your Mac is running an earlier macOS version, you won’t find the iCloud Photos checkbox. Instead, select the iCloud Photo Library checkbox.
6. All the photos in photo library 2 will be uploaded to iCloud Photos. Wait for the upload to complete.
7. Double-click photo library 1 to open it in Photos. Click Switch when asked.
8. Repeat steps 3, 4 and 5. And then wait for the upload to complete.
9. Photos will start downloading photos. Wait for it to finish.
Now the photo libraries have been merged.
This method has two advantages. During the merging process, duplicate photos will be automatically detected and removed. As a result, the merged library will be duplicate-free. Also, the merged library will preserve everything such as albums and keywords.
Method 3. How to combine Photos libraries on Mac via Show Package Contents
1. In Finder on your Mac, go to the Pictures folder. This is where your Photos libraries typically are.
2. Control-click library 2 and then choose Show Package Contents.
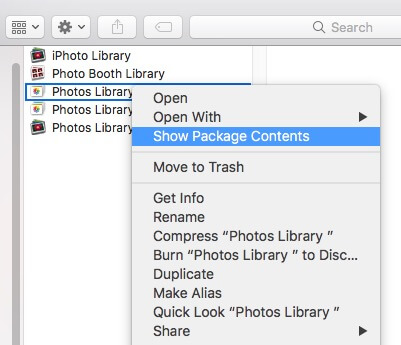
3. Now you are presented with several folders. One of them is called originals.
4. Double-click library 1 to open it in Photos.
5. Drag the folder called originals into Photos.
6. Wait until you see a Successfully imported files message.
Note
On macOS Catalina or later, the folder is called originals. On earlier versions, such as macOS High Sierra, the folder is named Masters.
With this method, something from library 2 will be missing, such as albums, edits, keywords and descriptions.
Here is a scenario. You have an old iPhoto library and you want to merge it with your Photos library. But Photos can’t open the iPhoto library. In such a case, this method can help.
Conclusion
It’s possible to have one, two, three or even more libraries for Photos on Mac, for example, one for personal photos and one for work-related photos. Sometimes, you need to merge them for one reason or another. This article covers three easy ways to merge photo libraries on Mac and a tip to quickly remove duplicates from the merged library. I hope it can be helpful.

With a passion for tech and writing, Sarah joined Cisdem, where she focuses on creating articles about using utility tools to enhance file management and simplify contact management.

Adrian Li is Cisdem’s Chief Engineer and serves as the editorial advisor for Duplicate Finder and ContactsMate. His work and insights have been featured in leading tech publications such as Fossbytes, TUAW, Redmond Pie, SafetyDetectives, and BestForAndroid.