JPEG, short for Joint Photographic Experts Group, is one of the most recognizable raster image format. It has become popular for offering an amazingly effective compression method for color images. However, after upgrading to the new OS X El Capitan, many users are complaining about JEPG related problems such as JEPG preview error, JPEG recovery after sudden loss, etc.
In El Capitan, the Photos gets its first notable update and users are then able to add or edit location information, along with other meta data editing features. Users can also find that there are also support for third-party photo editing extensions in El Capitan. In spite of these improvements, the JEPG files seem easily go wrong with different problems in this new OS X. Here below are the most common JPEG files related problems quoted from Apple Support Communities and relevant solutions for El Capitan users.
Q 2: Can’t Export Multiple Page PDF as JPEG
Q 3: Can’t Group Raw and JPEG Files
Q 4: Lost the Whole iPhoto Library in JPEG
Q 5: Keynote JPEG Export Incorrect
“Hello everyone, that my first message here, i'm using a Mac almost 8 years and never has a problems that i can't solve by myself, but this time i tried everything and don't know what else to do. I have a Mac Mini late 2014 (8Gb RAM, Intel HD 5100) with OS X 10.11, the problem is when i open JPEG photos (not every JPEG, more detailed I'll explain below) in a Preview.app the screen of Preview.app turns green like you can see in a screenshot below, some it times also crashes, i'll leave the crash report at end of a message. Does anyone have same Mac Mini with the OS X 10.11? I want to know if that is software bug or it's a hardware problem? any ideas what that can be? Mac mini, OS X El Capitan (10.11), null”
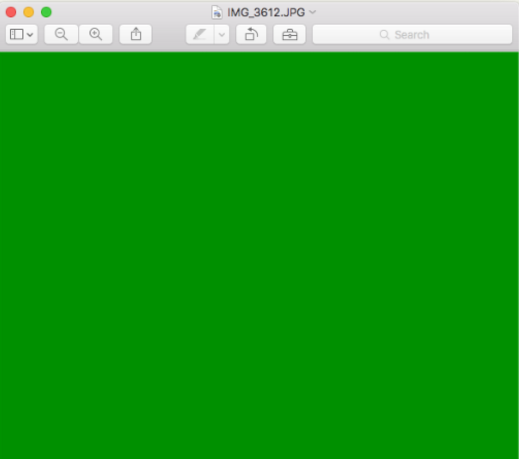
As is mentioned in this quote, users who intend to open JPEG files only to find that a green screen appears. It's surely not a hardware issue and seems to be El Capitan related, since it happens on different devices in El Capitan. Now, Apple tech support has acknowledged it as a problem. In this case, you can have a try by making such settings: Go to “Preview” - “Preferences” - “Images” and select "Size on screen equals size on printout". It is workable to most users.
“Using Preview, I export multiple page PDF as JPEG and results are the first page only as JPEG. Can I use preview to export multiple page PDF as JPEG for every page?”
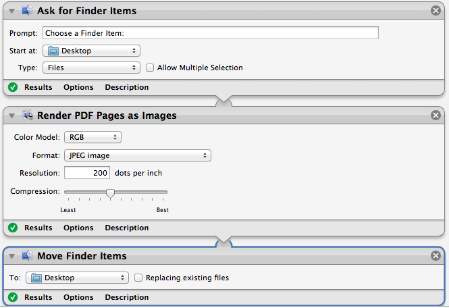
Automator is an application included with OS X which allowing users to build custom workflows to perform both simple and complex tasks by by dragging and dropping, thus saving time and effort over human intervention to manually change each file separately. In order to convert PDF to JPEG for every page, you can open your Automator and then do the settings as the following screenshot.
Actually, no matter what OS X your Mac is in, it is a wise thing to equip your machine with comprehensive and easy-to-use pdf tools to greatly improve working efficiency such as PDFConverterUltimate for Mac, which can be used to edit PDF files, convert normal or scanned PDF file, sign, split, merge, compress, comment, collaborate and organize your PDFs with unprecedented ease and speed.
.png)
“I often shoot RAW+JPEG. Photos seems to be handling them correctly, grouping the two images together when I import. Unfortunately everything that migrated from iPhoto shows the RAW and JPEG images as two separate images.Is there any way to fix this and group them? I can't find any option to do so in Photos. Any third party scripts?”
Here is the solution for your reference: Try to open the photo in "EDIT" mode, then you will be able to switch to the "RAW" version as the original file under the "Image" menu. The options "Use RAW as original" or "Use JPEG as original" are only available in Edit mode, also "Reprocess RAW".
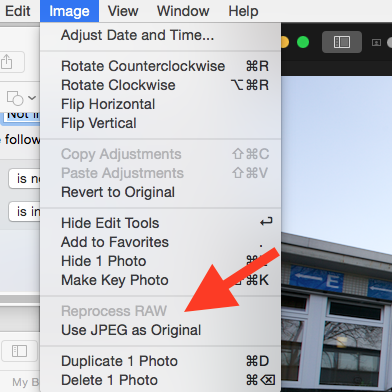
Note: The Photos in El Capitan will import both RAW and JPEG files, but it only uses one of them as the original file. Actually, you will see badge overlays "J" or "R", indicating that if RAW file or the JPEG is currently uses as the original file to render edits.
“I had a huge bank of JEPG photos and videos in my iPhoto library going back years and years. For some reason, when I updated from Yosemite to El Capitan then my whole iPhoto library was wiped. The day before I updated then I uploaded photos to iPhoto and it all worked fine. Everything was there from all those years ago, all happy. Then, soon as I updated the OS, poof! all the photos are gone. The iPhoto app is still there alongside the Photos app, but when I click on it it asks me to select a library from an empty list (I can no longer find any iPhoto libraries on my computer) or create a new library. Where have all my photos gone?? Please help. MacBook Pro with Retina display, OS X El Capitan (10.11)”
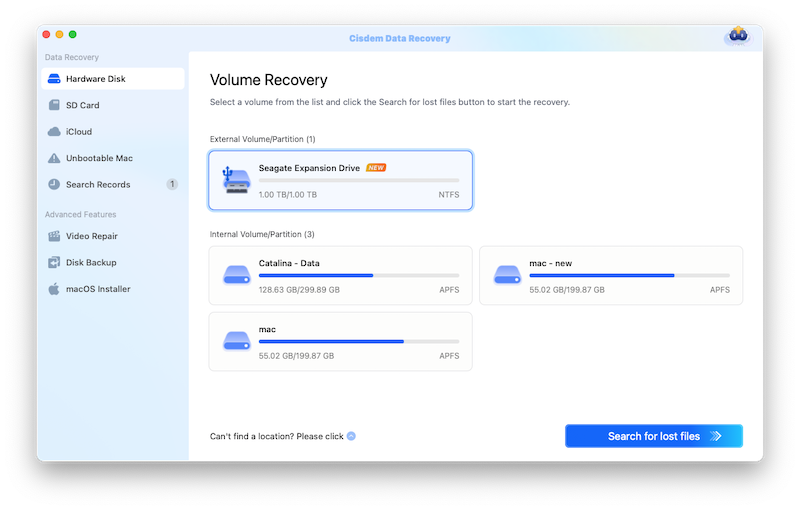
Take it easy! Firstly of all, we should have the awareness that the JEPG must still be in your Mac and, therefore, we do have the way for JPEG recovery on Mac. And, the quickest way is of course to restore the images from your backup from your Time Machine. However, if you doan’t have the backup, a sensible way to recover the photos is to find a reliable tool such as Cisdem DataRecovery for Mac. You may be recommended to recover the photos by searching the location of your original iPhoto library through Finder. I want to say, it is really time-consuming and sometimes not workable.
“When exporting a Keynote file as images (whether exporting to Jpeg, PNG, or TIFF) the images are exporting at 1024 x 768 instead of the correct widescreen resolution 16 x 9 (Keynote is essentially letter boxing the image so it is not stretched). This has just started since the latest update-- it's worked correctly for years, this is the first issue I've had. I've changed the document properties and other settings to see if there is some setting that changed somehow. I've looked and not see if Apple has a fix coming for this and have not come up with any matches. MacBook Pro with Retina display, OS X El Capitan (10.11.1)”
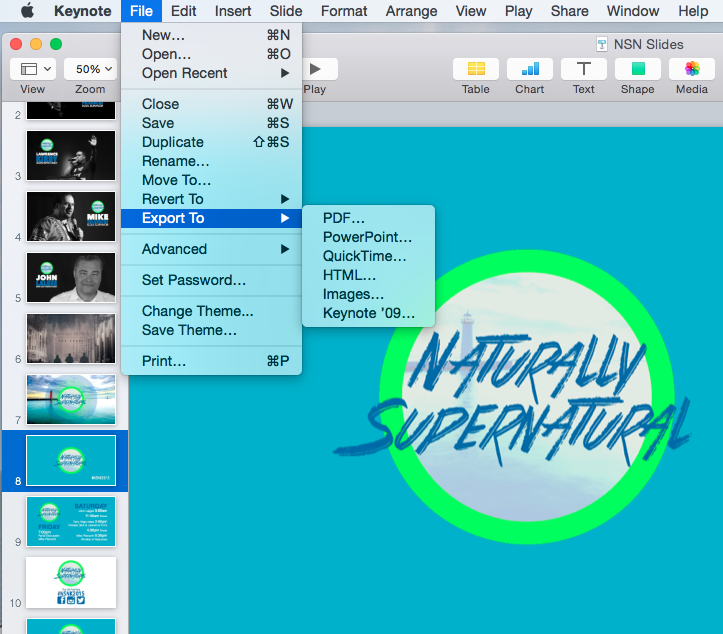
Well, we should admit that Keynote is a powerful program. However, since keynote's latest update, many El Capitan users have meet the same problem that exported images are coming out smaller file sizes. You’re suggested to solve this problem in this way (though a little annoying): Instead of exporting the slides as images, export them as PDF. Then open the PDF in preview and from there export as an image file. So basically its two-steps instead of one.

Connie Yu has been a columnist in the field of data recovery since 2011. She studied a lot of data loss situations and tested repeatedly to find a feasible solution tailored for each case. And her solutions are always updated to fix problems from the newest systems, devices and apps.


Rita
Very detailed article, this really helped me a lot, thanks.