

How to Import CSV to Google Contacts on Mac & Windows PC
 9.1K
9.1K
 1
1


Suppose you have a CSV file with the contacts that you want to import to Google Contacts. The good news is that Google Contacts supports importing contacts from the CSV format. The possible bad news is that the import may fail or partially fail. Don’t worry. This article shows you how to import contacts from CSV to Google Contacts successfully on computer.
This article talks about 2 methods. With Method 1, you may need to edit your CSV file before you can successfully import contacts from it to Google Contacts. Method 2 is more efficient because no editing is needed.
 Cisdem ContactsMate
Easily Import CSV File to Google Contacts
- Compatible with Mac and Windows
- Support various contacts sources: Google, Outlook, Mac's Contacts, iCloud (Mac only), etc.
- Import contacts from CSV and vCard files
- Export/convert contacts to various formats: CSV, vCard, Excel, etc.
- Help you effortlessly transfer contacts between sources
- Help you effortlessly convert contacts between formats
- Let you view, search, edit, add, group, tag, share, print and sync contacts
- Find and delete/merge duplicate contacts
- Let Mac users backup/restore contacts with a click
- Easy to use
- Help you import CSV contacts to Google without limits or problems
 Free Download macOS 10.11 or later
  Free Download Windows 10 or later
Method 1. How to import contacts from a CSV file in Google Contacts
Applies to: Mac, Windows
This method has two parts.
Steps to import contacts from CSV to Google Contacts
1. In your browser, go to https://contacts.google.com/.
2. Sign in with your Google account.
3. On the left, click Import.

4. In the dialog that appears, click Select file. Select the CSV that contains the contacts you want to import. Click Open.
5. Click Import.
How to edit CSV files to import to Google Contacts
Although Google Contacts supports importing contacts from CSV files, such imports don’t always succeed. There can be a few reasons why problems happen. And you can edit the CSV file to fix the problems.
Possible problems:
- Google Contacts says that the file is in the wrong format.
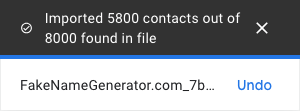
- Google Contacts doesn’t import all the contacts in the CSV file.
![a message saying that Google Contacts didn't import all the contacts in the file]()
- The contacts are not imported the way you expect.
Possible fixes:
- If Google Contacts says that the format is wrong, try opening the CSV file in Excel and exporting it to CSV again.
- Google Contacts recommends not importing more than 3,000 contacts at a time.
- If Google Contacts can import all the contacts but the information is not imported the way you want, you can edit the CSV file.
Below is how to edit the CSV file. The editing is about adding column headings if they are missing or editing the column headings.
1. Open the CSV file in Excel.
2. Check if there are column headings and if the headings are in the first row.
3. This step is about what column headings to use.
You can first try the official template provided by Google Contacts. Download the template and open it in Excel. Compare the headings in the template and in your CSV file. Edit the headings in your file accordingly if needed. Now try uploading the edited file to Google Contacts.
If the official template doesn’t work, you can create a template yourself.
Method 2. How to efficiently import contacts from CSV format Google Contacts
Applies to: Mac, Windows
This method is available for Mac and Windows. Windows users can scroll down for steps on PC.
On Mac
This method doesn’t work with macOS 10.13 High Sierra or earlier. If your Mac is running newer macOS versions like macOS Ventura, this method definitely works.
This method uses Cisdem ContactsMate, the best contact management app for Mac. ContactsMate supports various contacts sources (such as Mac, Google Contacts, iCloud, Exchange and Outlook.com) and various contacts formats (such as vCard, CSV and Excel). With ContactsMate, you can easily and effectively import, export, convert, transfer, access, organize and clean up your contacts.
Below is how to do the import without possibly having to splitting or editing CSV files.
1. Download and install ContactsMate.
Free Download macOS 10.11 or later
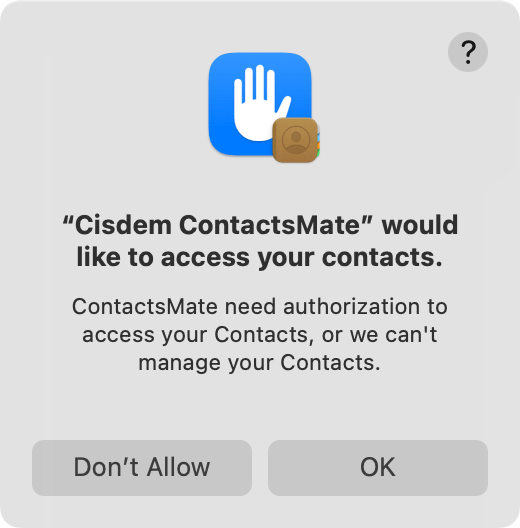
2. When you open it for the first time, click OK to allow access.
3. Click Add Account in the toolbar.
4. Add your Google account.
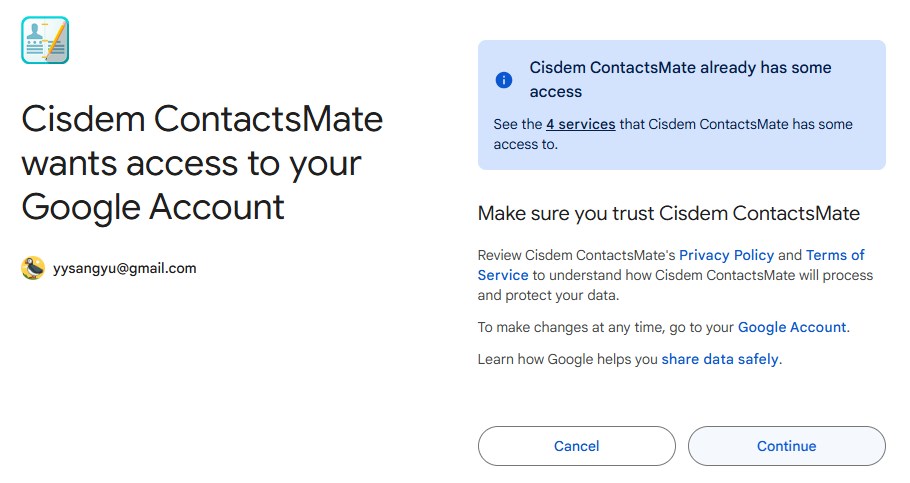
In the Internet Accounts window that appears, click Add Account.
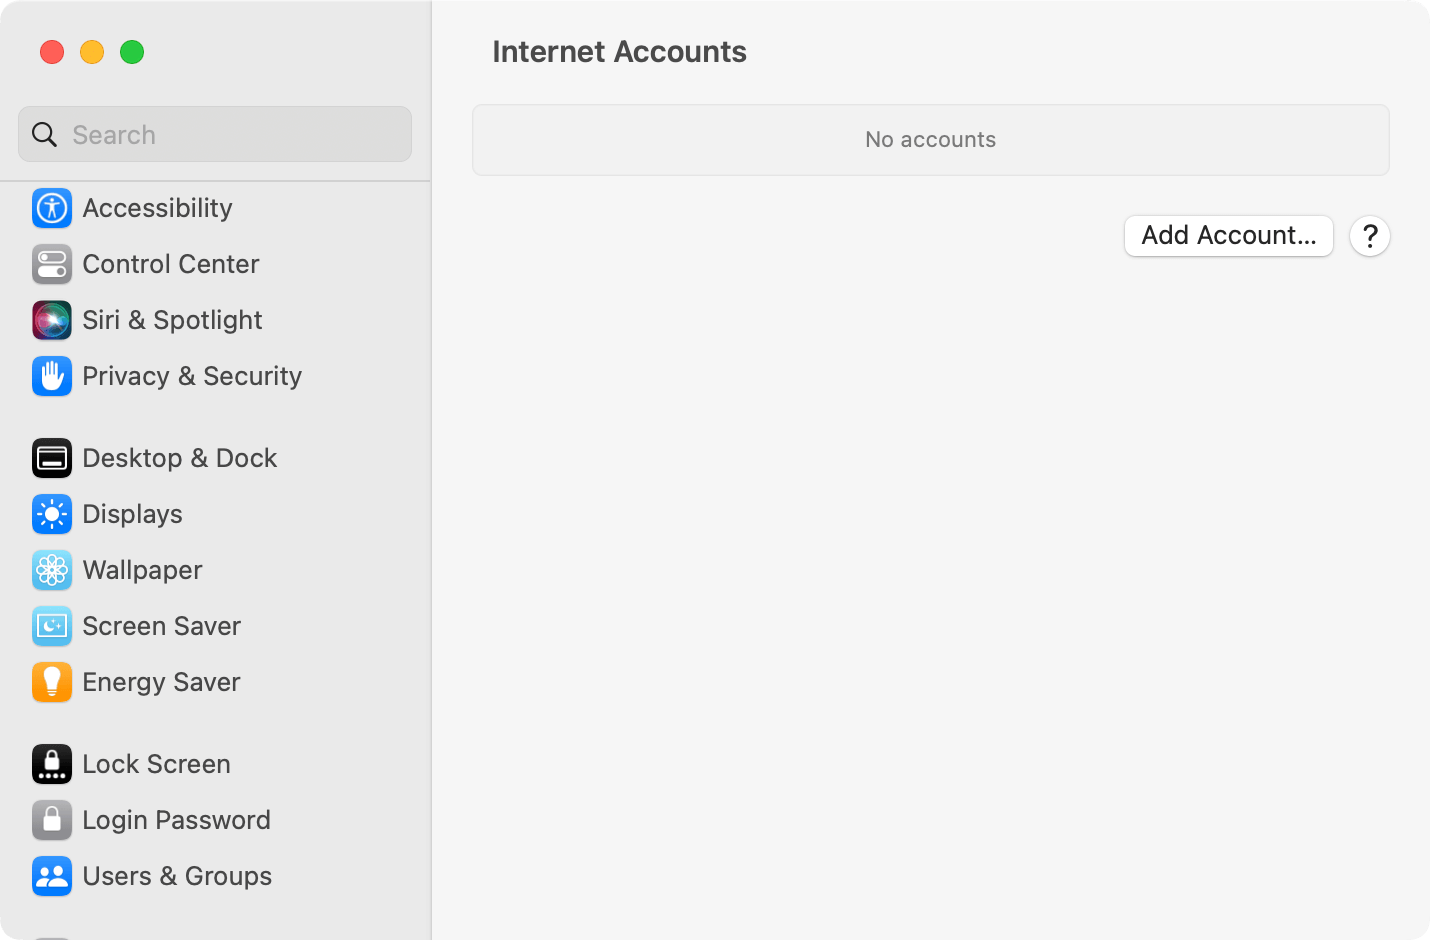
In the dialog that appears, click Google.
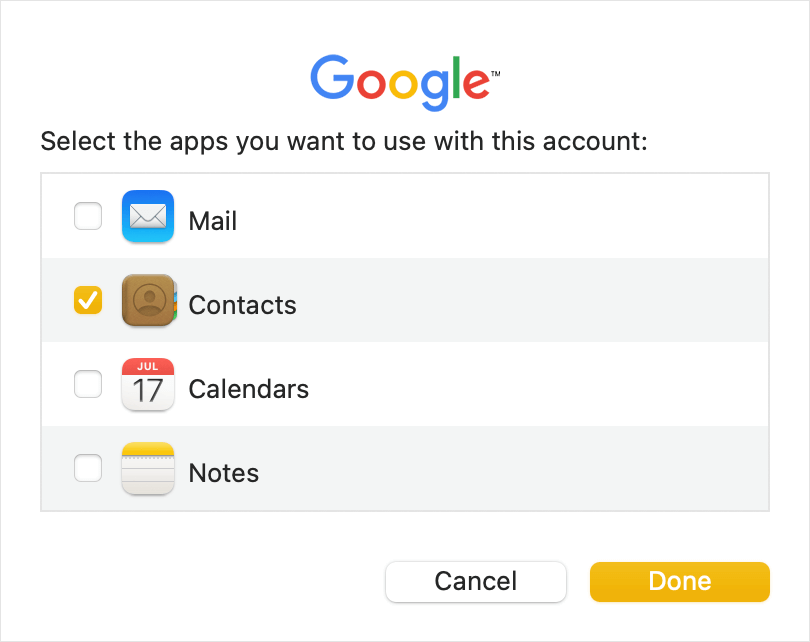
Sign in to your Google account and allow macOS to access.
5. In the Select the apps dialog, select Contacts and click Done.
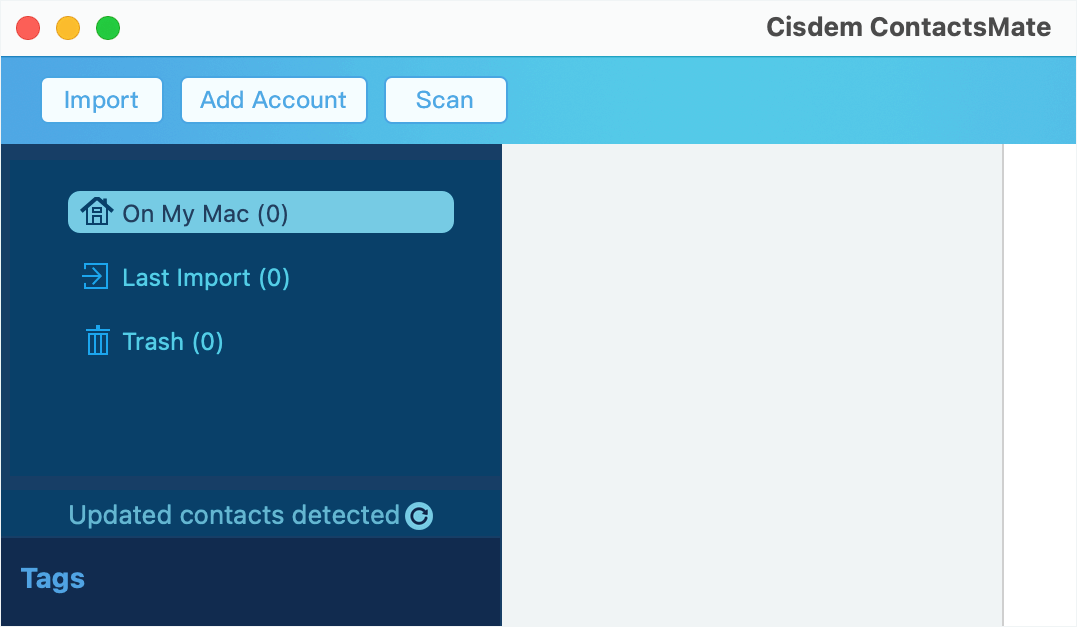
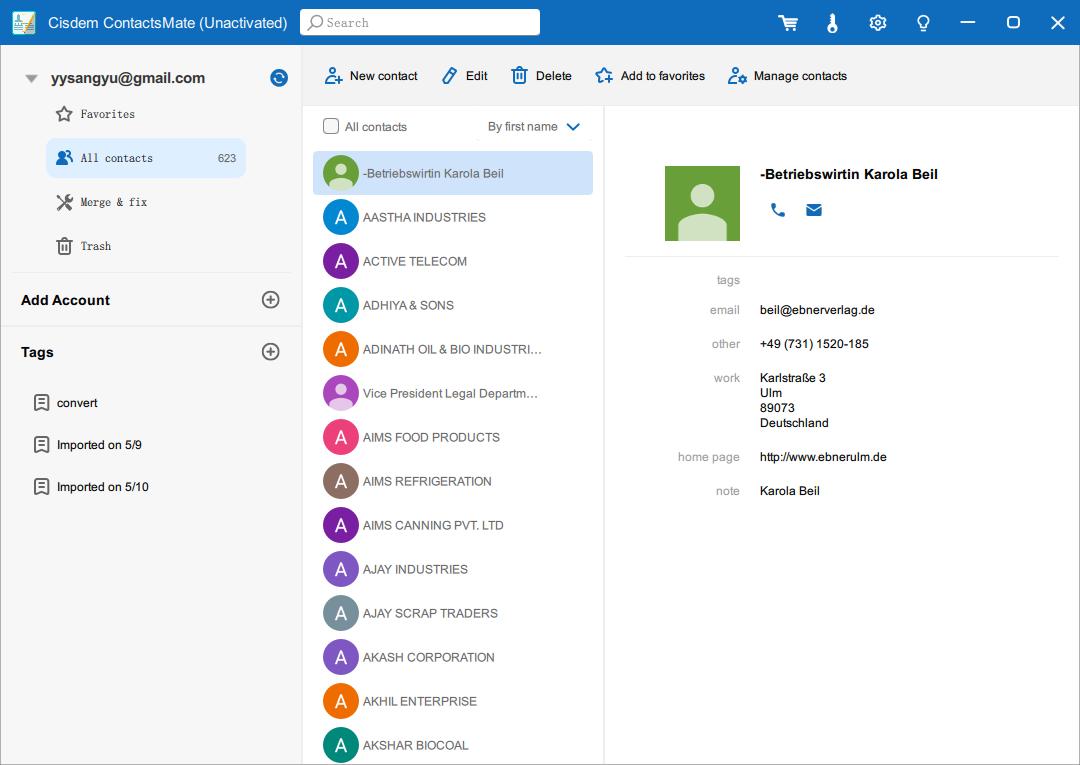
6. In ContactsMate, on the left, click the Refresh button next to the Updated contacts detected message.
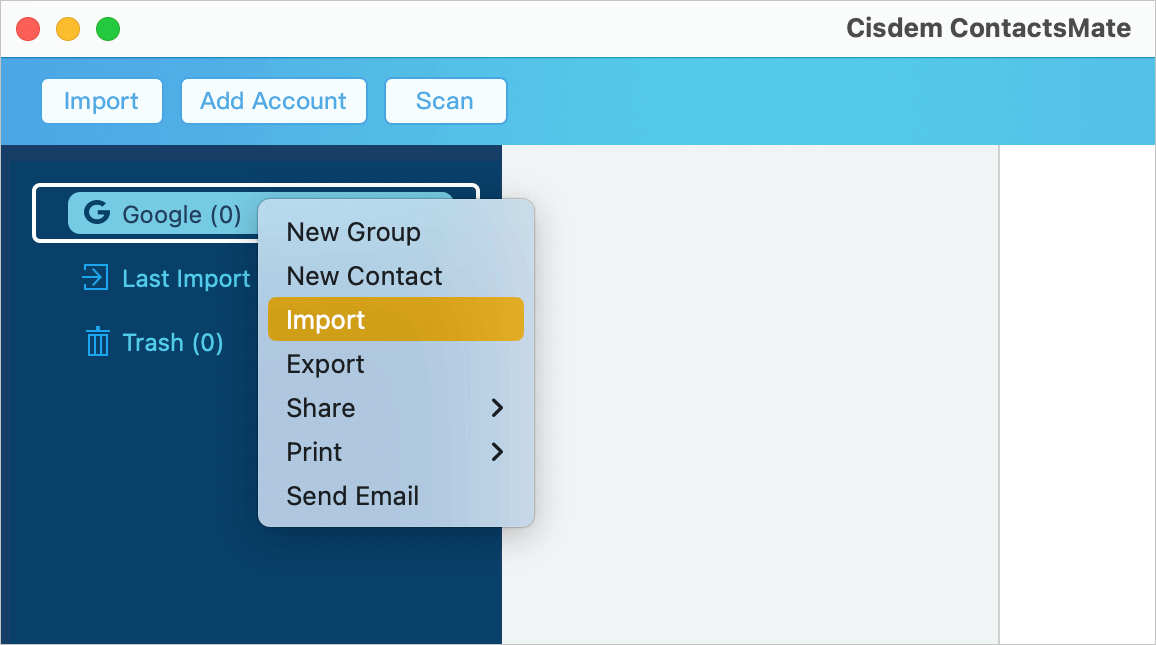
7. On the left, Google will appear. Control-click (or right-click) Google and choose Import. Select the CSV file.
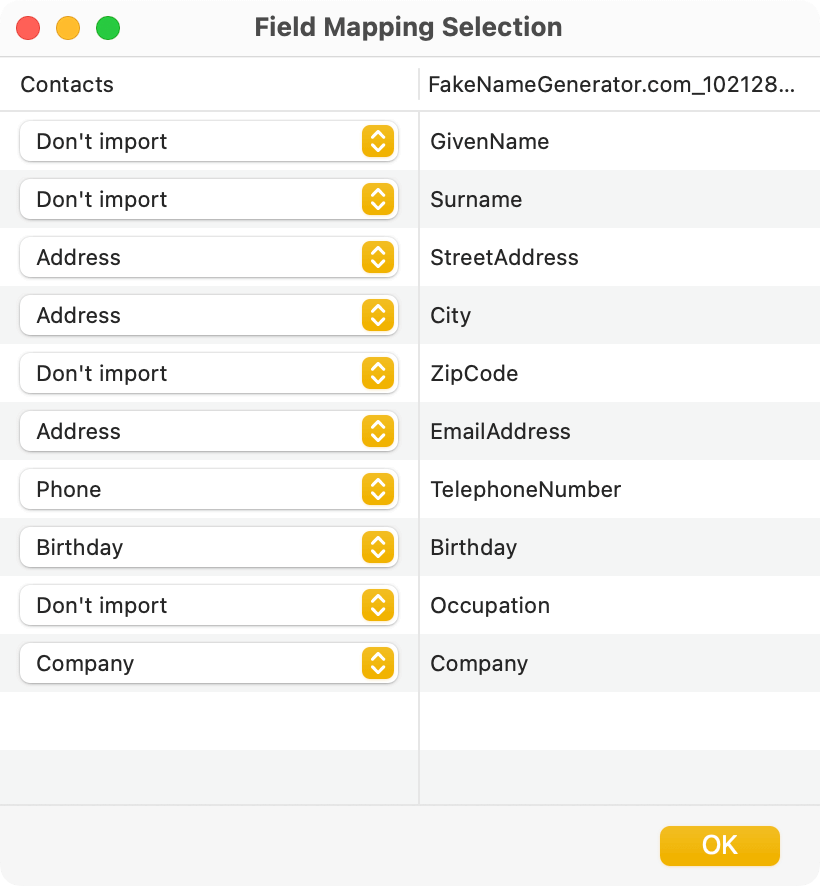
8. In the Field Mapping Selection dialog, manually map the columns with the fields if needed. Click OK.
9. Now Google Contacts starts importing contacts from the CSV file.
The import can be quick. But if there are thousands of contacts, it may take a while. You can go to https://contacts.google.com/ to verify the import.
ContactsMate allows you to easily import contacts to Google Contacts from sources and files. It also helps you effortlessly get rid of duplicate contacts if duplicate contacts occur after the import.
On Windows PC
1. Download and install ContactsMate. Open it.
Free Download Windows 10 or later
2. Click Add Account in the left sidebar to add your Google account.
3. Allow this app to access your contacts.
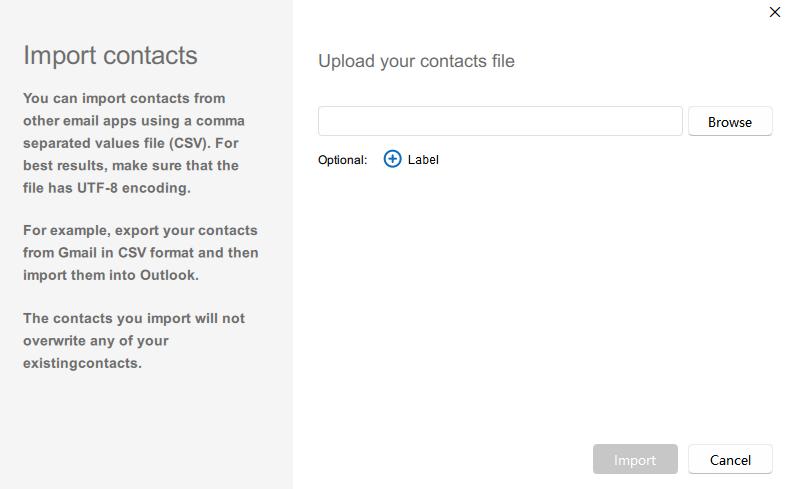
4. Now your Google contacts are in ContactsMate. Click Manage contacts and then Import contacts.
5. Click Browse to import upload your CSV file. Now contacts are imported.
FAQs
How do I import contacts from Excel to Google Contacts?
Google Contacts doesn’t support importing contacts from Excel directly. So you need to use an online converter to convert the Excel file to CSV first. Then import it to Google Contacts. You can also use Cisdem ContactsMate. For more details, view this article.
Will my original contacts be affected after importing CSV contacts?
No. Your original contacts won’t be affected. The CSV contacts you imported will be added as new contact cards. However, some of the contacts may already exist in your Google contact list. Then duplicates appear. You can clean up the duplicates with the built-in Merge & fix feature in Google Contacts.
What’s the most efficient way to import contacts to Google Contacts from CSV?
The most efficient way is to use Cisdem ContactsMate. With it, you can bulk import contacts to Google Contacts without manually editing CSV files. It also helps clean up duplicate contacts, problematic contacts, keeping your contact list organized after importing a large number of contacts.
Conclusion
This article provides step-by-steps instructions to import contacts from CSV to Google Contacts. It also talks about the possible problems one may have with the import and how to fix them. There are two methods available. Ideally, the first method should be good enough. But in reality, it may fail to work. In such as case, the second method will help you.

With a passion for tech and writing, Sarah joined Cisdem, where she focuses on creating articles about using utility tools to enhance file management and simplify contact management.

Adrian Li is Cisdem’s Chief Engineer and serves as the editorial advisor for Duplicate Finder and ContactsMate. His work and insights have been featured in leading tech publications such as Fossbytes, TUAW, Redmond Pie, SafetyDetectives, and BestForAndroid.
Freddy B. Greer
I can easily import CSV to Google contacts with the help of method 2. Thanks for explaining this useful method.