

Cisdem DVD Burner for Windows Advanced Guide
 133
133
 0
0


01. How to Create DVD Chapter Menus on your PC?
When burning videos to a DVD, a well-designed menu doesn’t just make your disc look professional, it also makes navigation easier for viewers. With Cisdem DVD Burner for Windows, you can create menus not only for DVD titles, but also for individual chapters. This guide will walk you through the steps to add and customize DVD Chapter menus on your PC.
Step 1 Add Chapters
If your video includes chapters already, just skip this step.
If not, using the built-in editor of Cisdem Video Converter to add chapters as follows.
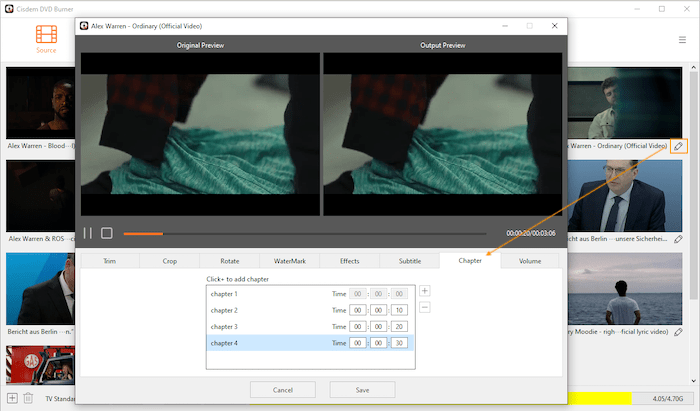
After adding videos into Cisdem Video Converter, click to get into the Edit window, choose Chapter, click + to add a chapter, enter the time interval for the added chapter. You can continue clicking + to add more chapters with the same method. Click Save when you are done.
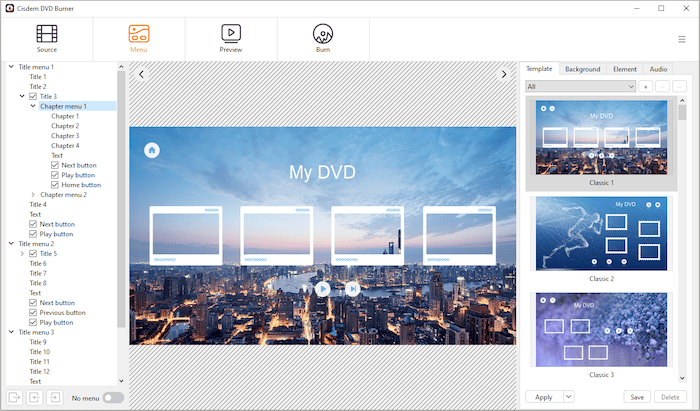
Step 2 Check and Edit chapter menus
Navigate to the Menu tab, on the left panel, check the box before the title with chapters, unfold it, the chapter menus will be displayed. Hihglight the chapter menu on the left panel, you can then change the template, background image/music, frame, texts, thumbnail and buttons on your chapter menus.
a. Template: Highlight a chapter menu, double-click your favorite template, the chapter menu will switch to that template.
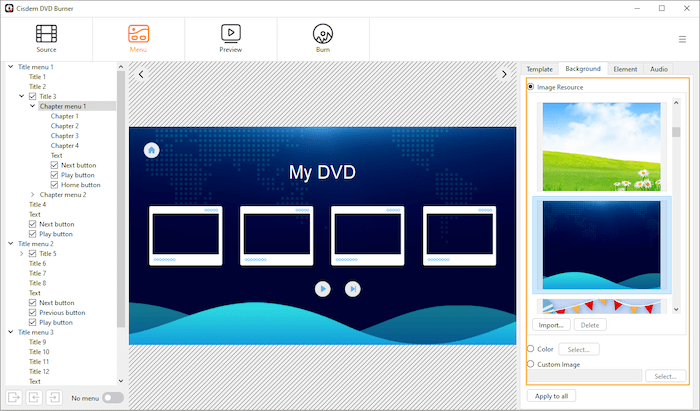
b. Background: On the right panel, navigate to Background, you can change background image by clicking an image from the Resource Image list. You can also use a pure color or a personalized image as your background image, just checking the Color radio button and choose a color or checking the Custom Image button and choose an image from your computer.
c. Element:There are multiple elements on a menu, including frame, texts, buttons and thumbnail. You can edit and organize all the elements as you like.
Firstly, you need to select an element style, Frame only, Text and Frame, Text Only, Artlip only or Artlip and Text. And then you can edit the corresponding elements according to the style you’ve selected.
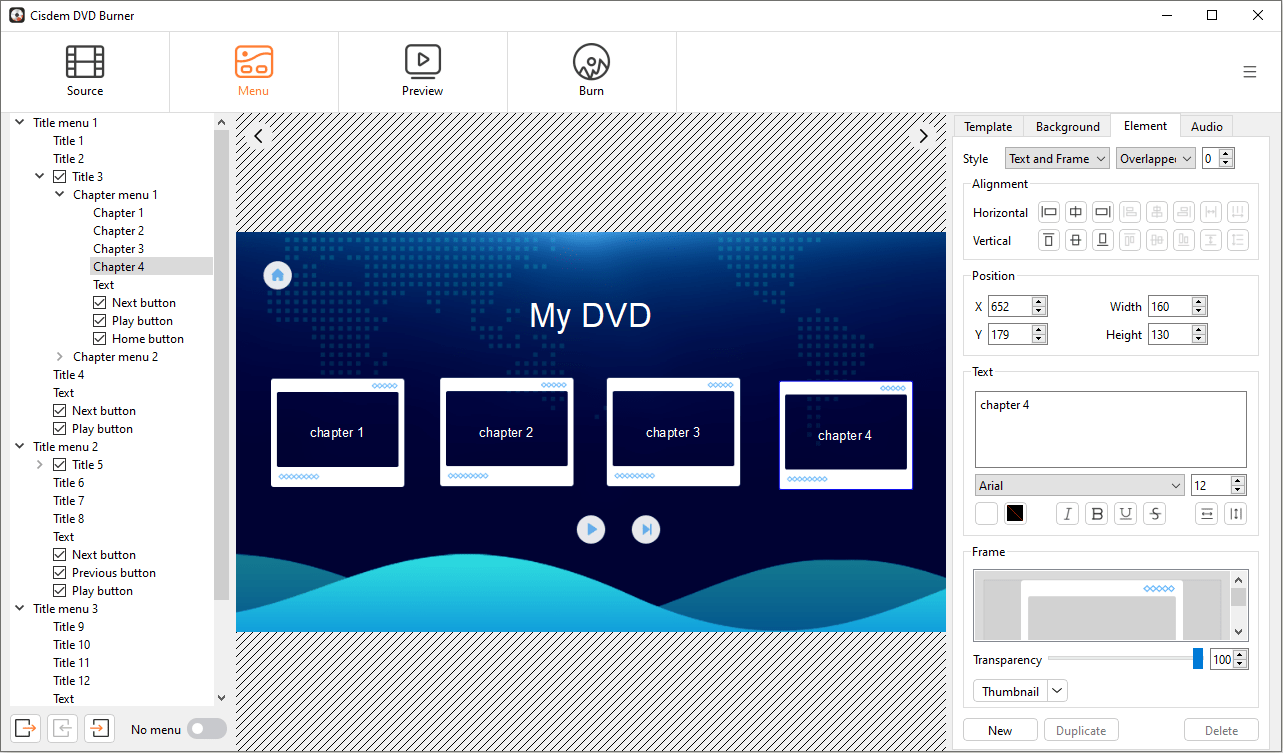
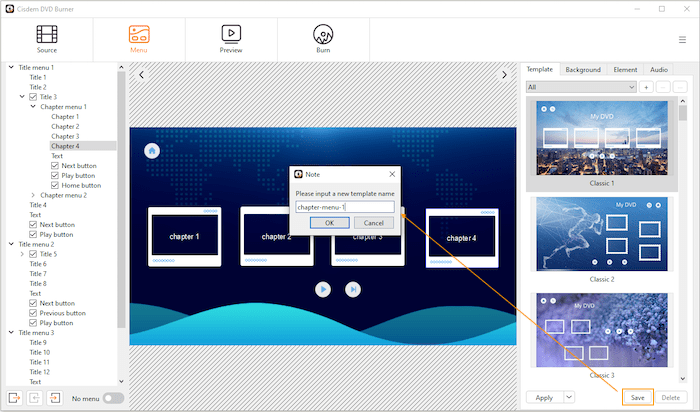
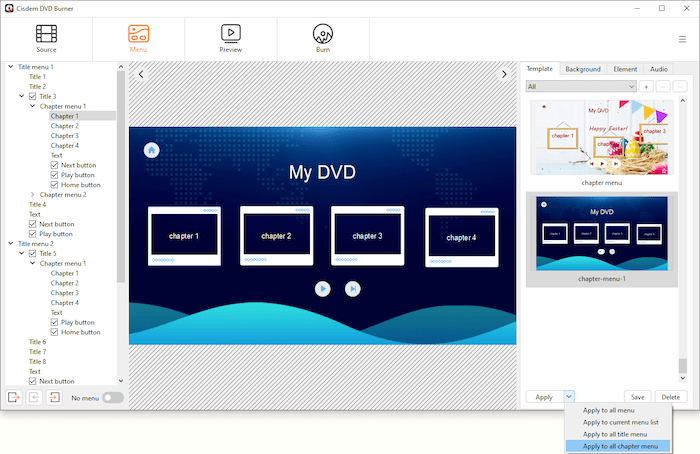
After finish editing one chapter menu, if you want to directly apply it to all the other menus, you can save it as a template. Double click the saved template in the template list, click the Apply button and choose to apply this template to the menus you need.
d. Audio: You can import an audio file from your PC as a background music.
That’s it! The chapter menus have been created and you can preview the chapter menus under the Preview tab and then start to burn your videos with title menus and chapter menus into a DVD.
Conclusion
Creating DVD chapter menus with Cisdem DVD Burner for Windows is a simple yet powerful way to give your discs a polished, professional look while making them easier to navigate. By editing chapters, choosing templates, customizing backgrounds, and editing menu elements, you can design a DVD that feels truly personalized.

Traci Gordon has worked as a tester in a software company for 8 years, she believes that the best software should be a tool that can help users accomplish what they need with the simplest steps.

JK Tam is the lead developer at Cisdem, bringing over two decades of hands-on experience in cross-platform software development to the editorial team. He is now the lead technical approver for all articles related to Data Recovery and DVD Burner.