

Cisdem Data Recovery for Windows User Guide
 1.3K
1.3K
 0
0


Cisdem Data Recovery for Windows a professional tool can help you recover the lost files on internal drive, SD card, NAS drive, enternal drive, etc, otherwise, it can also help you repair corrupted videos and photos. No technology knowledge needed, you can easily get your lost files back with Cisdem Data Recovery in 3 steps.
Getting Started
Download & Install
1. You can download the installation package of Cisdem Data Recovery from the below link.
 Free Download Windows 11/10/8/7
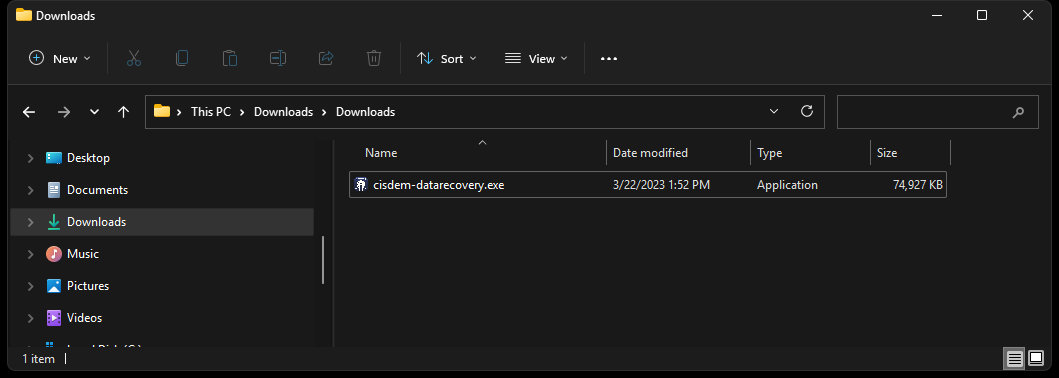
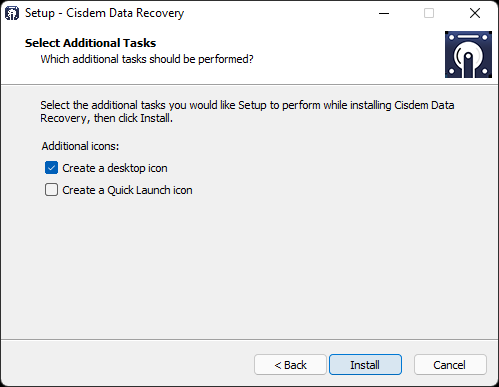
2. Install Cisdem Data Recovery with the downloaded package.
Double-click the .exe file to run it.
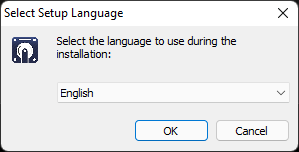
Select a setup language, click OK
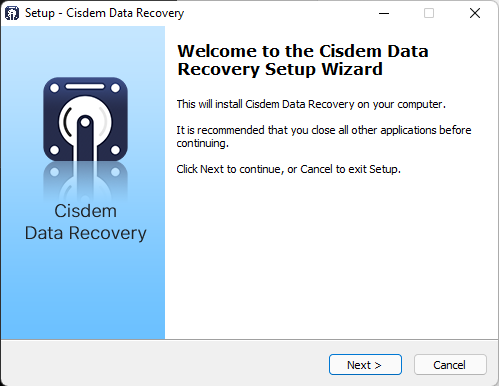
Click Next to continue installing
Select a location to install Cisdem Data Recovery, it is recommended to install Cisdem on another drive rather than the one that you lost data from.
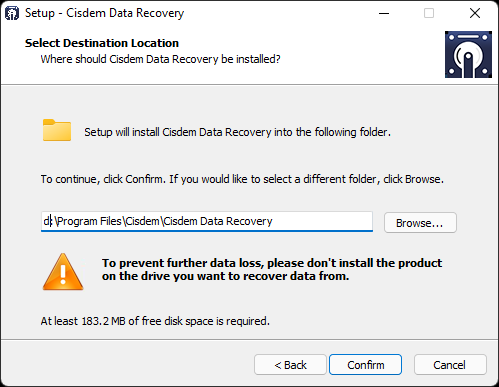
Click Install to compete the installation.
Activation
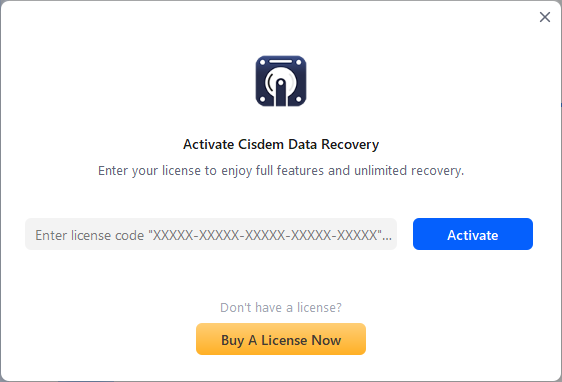
After installing the program, you need to activate the program if you want to use the full version features.
1. Click the key icon at the right upper corner or click  > Activate.
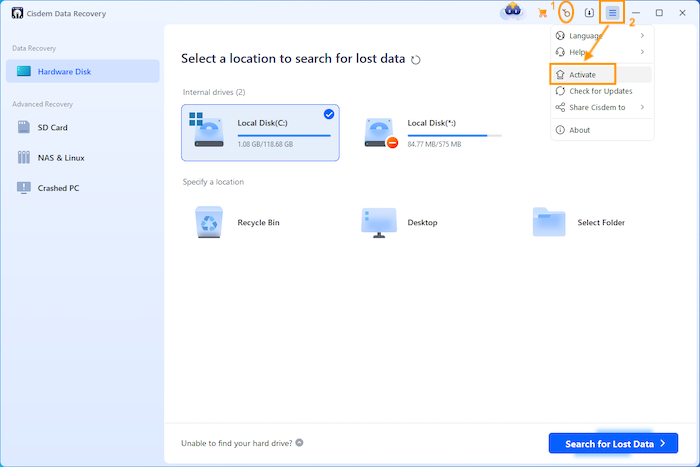
2. Copy and paste your license code into the activation window, click Activate.
Recover Lost Files
It is quite easy to use Cisdem Data Recovery to retrieve your lost data in 3 steps.
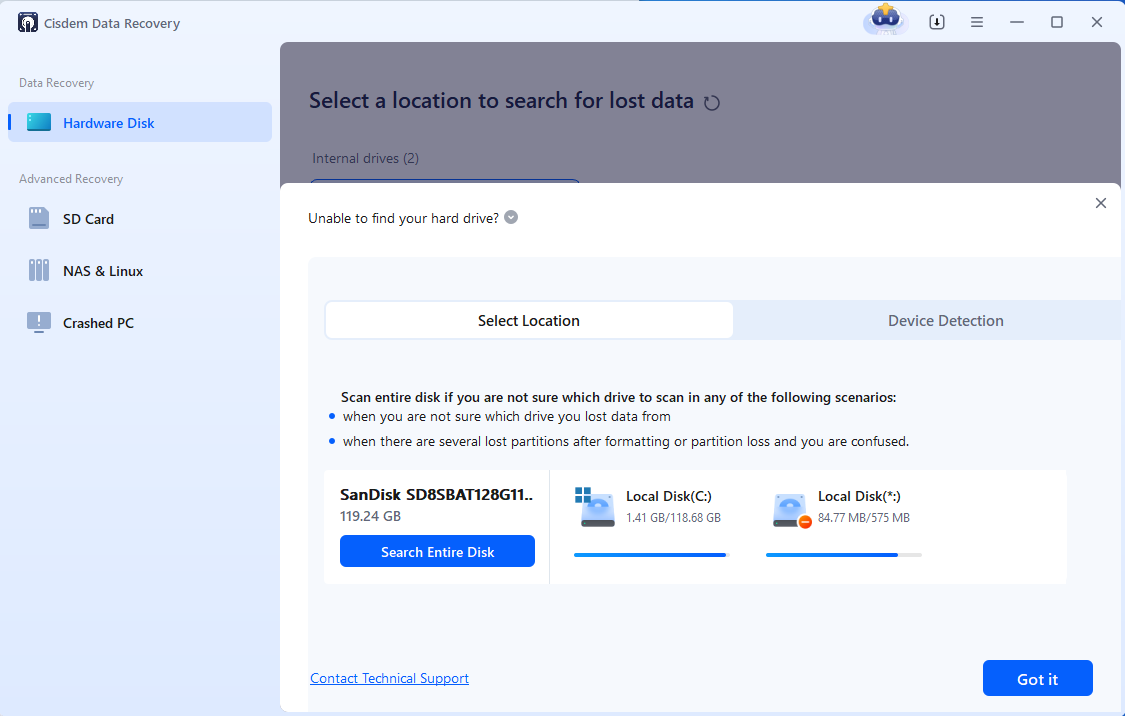
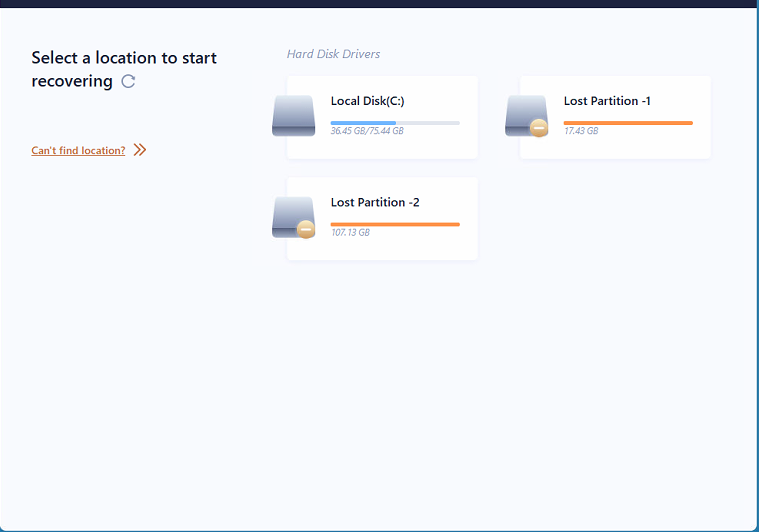
Step 1 Locate
Locate the drive where your data lost from and click "Scan" to start scanning.
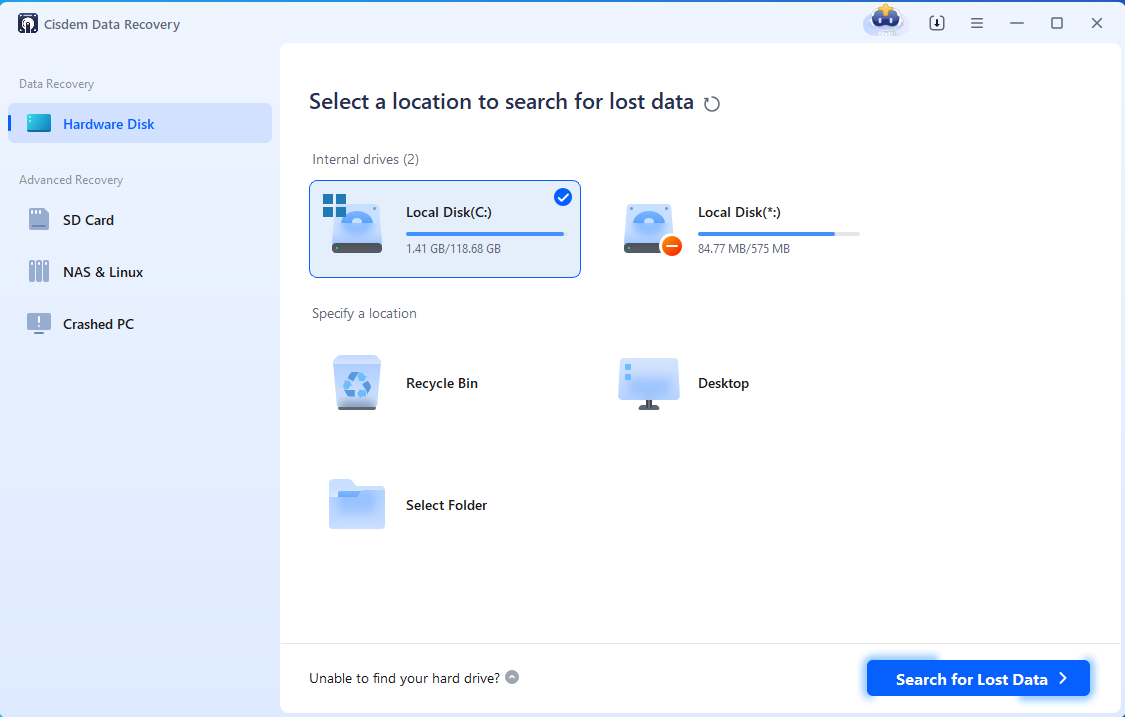
If you cannot locate which drive your data lost from, you can click "Help" on the left side, then scan entire disk instead.
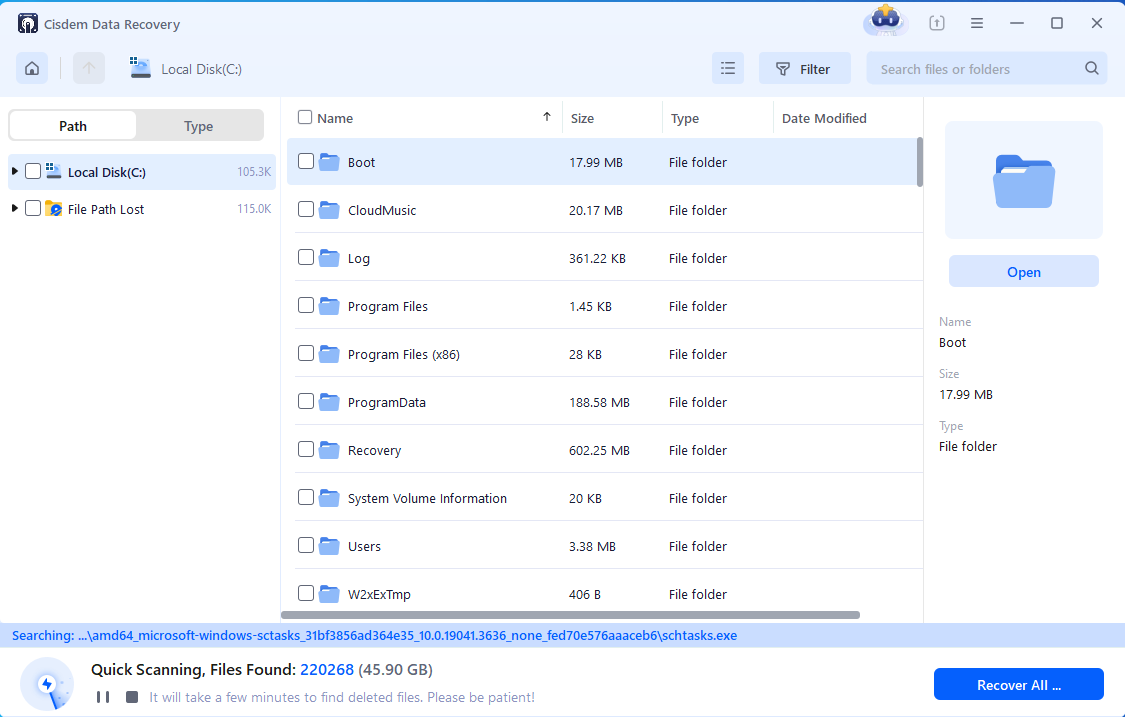
Step 2 Scan
Cisdem will find out all the data that saved on your drive and list them in the result page when the scan completes. You can also check and preview the files it scanned out during the scan process.
Step 3 Recover
Filter, preview and locate the files that you want to recover, click "Recover" button and select a location to recover them.
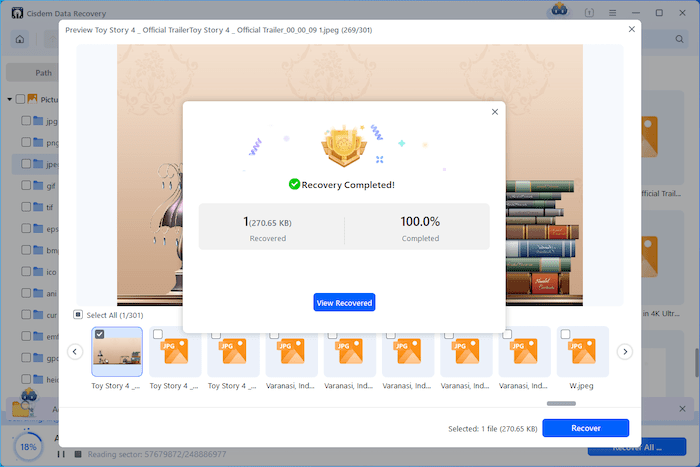
Tips: Please don't recover the lost files to the drive where your data lost from, which will easily result in overwriting the data, you can transfer the files back to the original drive after recovery successfully.
Recover Data from Lost Partition
A lost partition is one that is no longer visible or accessible from your operating system because of a various reasons such as power outage, misoperation, disk failure, etc. Cisdem Data Recovery, as a dedicated data recovery tool, is able to recover data from a lost partition as well.
There are two senories that you need to scan through lost partition with Cisdem Data Recovery.
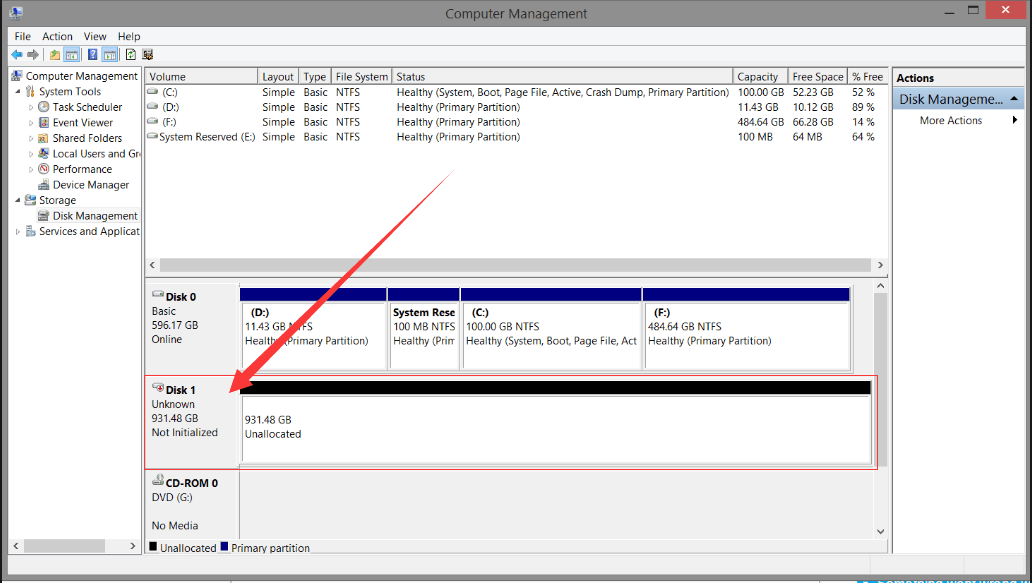
1. Unallocated partition
The entire partition is deleted or lost due to some other reasons, it will be displayed as Lost Partition in Cisdem, and when you go to the Disk Management, this drive will be displayed as Unallocated.

2. No drive letter
The lost partition shows no drive letter in Cisdem, and it cannot be found in Disk Management.

No matter which seneries you are facing, you can just select this lost partition to start scanning, the recover process is same as the regular recover process.
Fix Drive Detection Issues
When you run Cisdem Data Recovery but fail to find the drive that you want to recover from, or the program gets stuck on “Reading Disk Information” screen, you can open Disk Management to check the status of your hard drive.
Please note that if the device cannot be recognized by Disk Managment, Cisdem Data Recovery will not be able to work with it either.
Normally the device will be recognized as "Online", but for some occssions that it will be recognized "not initialized" and "no media", below we will show you how to resolve it when the device is recognized "not initialized" or "no media".
Case 1 The device is "Not Initialized"
Generally, Windows System will pop up a message to ask you to initialize the disk when you connect the uninitialized drive. Please click "Initialize" in the pop-up window or right click the disk in Disk Management to initialize the drive. After that, you will be able to scan the disk successfully. Please note that the Initialization only re-allocates the disk so that it can be detected correctly by the computer. The data is still recoverable after initialization.
However, if your disk failed to be initialized, it is possible that the hard drive has been physically damaged and needs to be repaired first. For this case, please take a screenshot of the error message, and send to support@cisdem.com, our engineers will further confirm the issue.
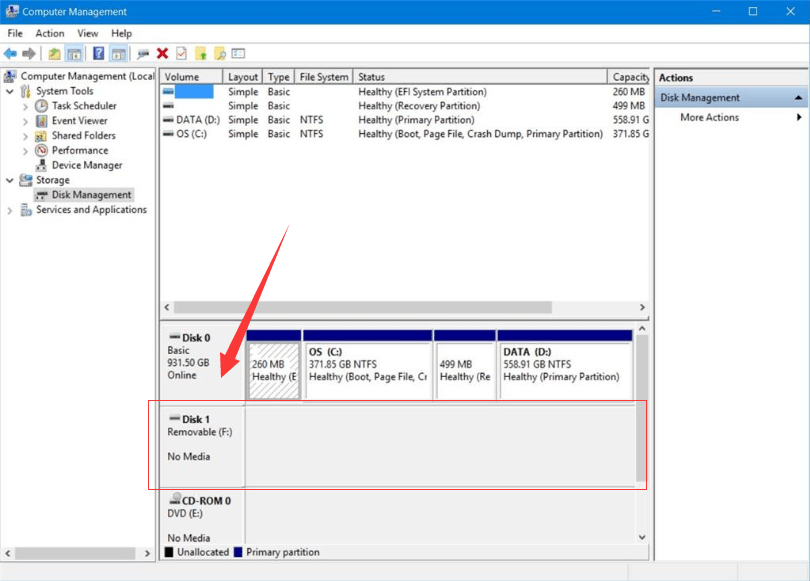
Case 2 The device shows "No Media"
If the hard drive displayed as “No Media” under Disk Management, it might has severe hardware damage. Cisdem Data Recovery is not bale to retrieve the files under this situation, please send the drive to a repair store to fix the hardware damage.
Case 3 The issue with the USB Port or USB Cable
If it is an external device and cannot be detected by Disk Management at all, please check the connections between the external drive and your PC to see if the connection is poor or loose.
1. Try to re-plug the external drive to see if it shows up in Disk Management.
2. Try another USB cable to connect between the external drive and PC.
3. Try to connect the external drive with another USB port on your PC.
4. Try to restart your PC to see if it will show up in Disk Utility.
If none of the methods above works, you probably need a hardware repair service. Please send the drive to the manufacturer or a local hardware maintenance store.
Use Windows Disk Management
Windows Disk Management is a system utility to enable you to view and manage all the drives including Internal/external hard drives and portable hard drives (such as Thumb drives and SD cards) that installed on your computer and paritisions associated with those drives.
It can clearly show the working status of the hard drives on your computer, so sometimes the screenshot of the Disk Managment is helpful for us to locate the issue on hard drive. Below we will show you how to access Disk Management in different Windows OS versions and how to take a screenshot.
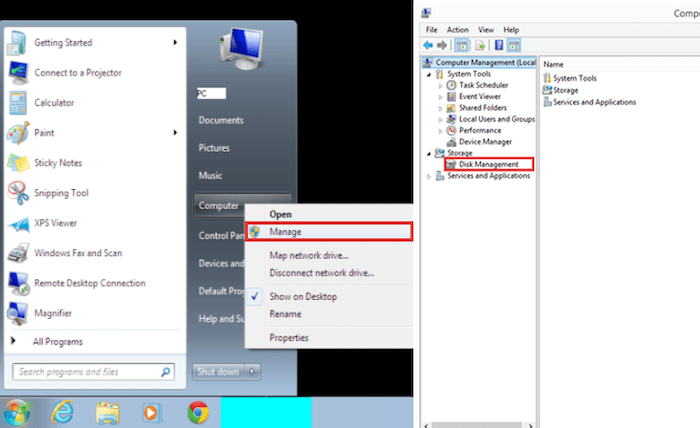
1. How to access Disk Management in Windows 7?
Click Windows start button, find Computer and right click on it, choose Manage, you will locate Disk Management in the following window.
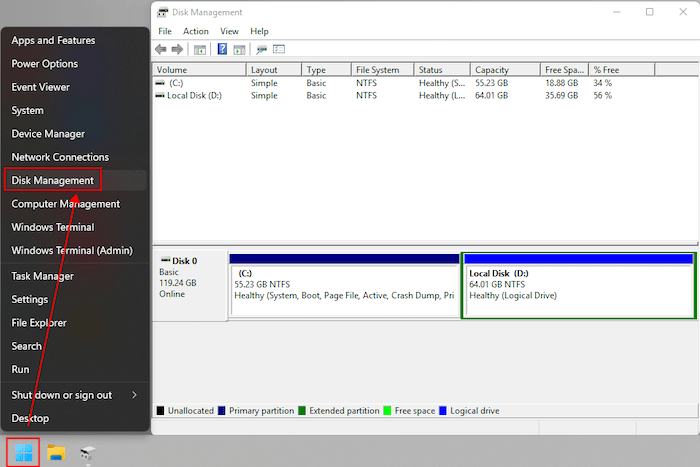
2. How to access Disk Management in Windows 10/11?
Right click Windows start button, choose Disk Management
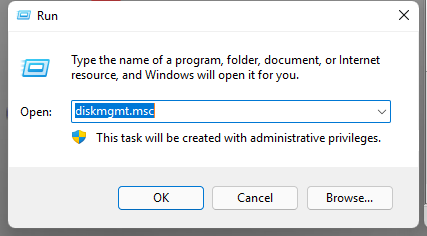
3. A common way to access Disk Management with all 4 Windows OS versions.
Just enter Diskmgmt.msc in Windows run dialog, search box or CMD line, and press Enter to open it.
4. How to take a screenshot?
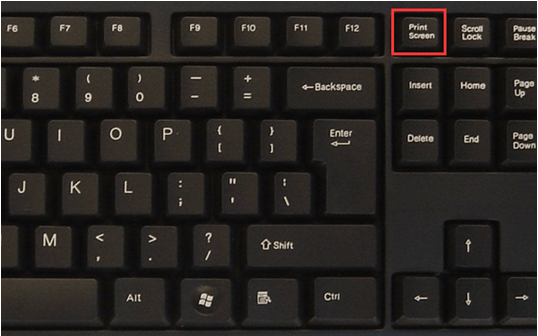
Step 1 Press the Print Screen key on your keyboard to capture the full screen.
Step 2 Locate the Paint app and run it, press Ctrl+V to paste the captured screenshot into the Paint app.
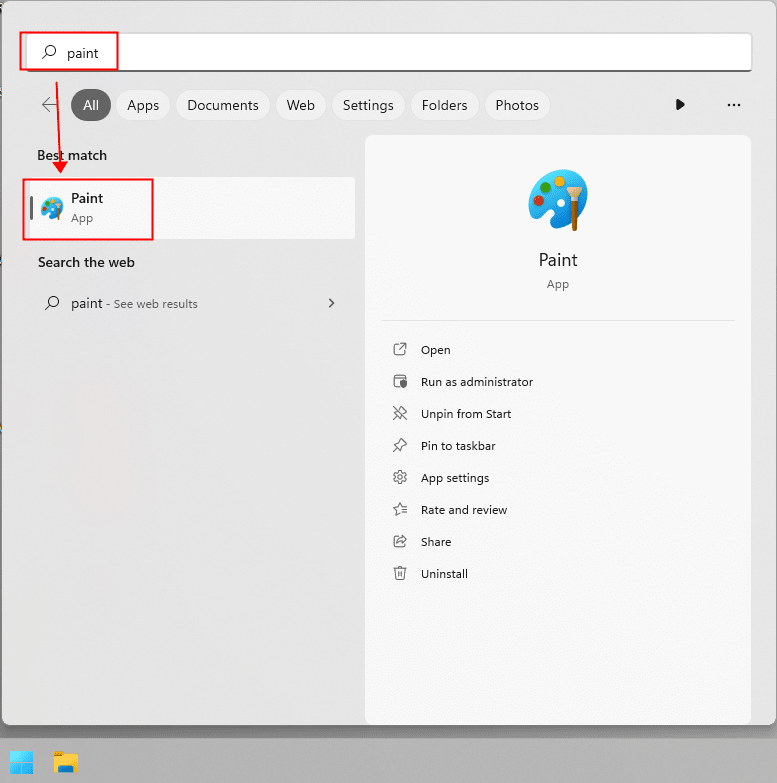
Step 3 Click the save button or directly press Ctrl+S to save the screenshot in Paint app.
Recover Files Safely
If you recover the files back to the original drive, it is possible that the files can be corrupted after recovery, and before we explain to you why this happens, you need to know what happens when a file is saved on a hard drive.
A hard drive is composed of a set of sectors, when a file is saved on a hard drive, actually they are saved on the sectors of this hard drive. Each sector can only hold so much data, so when a sector is full, it will be marked as "occupied", the remaining data will be saved on other sectors.
When you delete a file from a hard drive, those sectors that saved data of the deleted file will be marked as "available", and the data is able to be detected and recovered by Cisdem still. However, when you save the recovered files to this hard drive, it is possible that they will be saved on those "availabe" sectors, and the data on those sectors will be overwritten.
So we recommend you to recover the files to another hard drive to avoid data being overwritten.
NAS Connection Slow
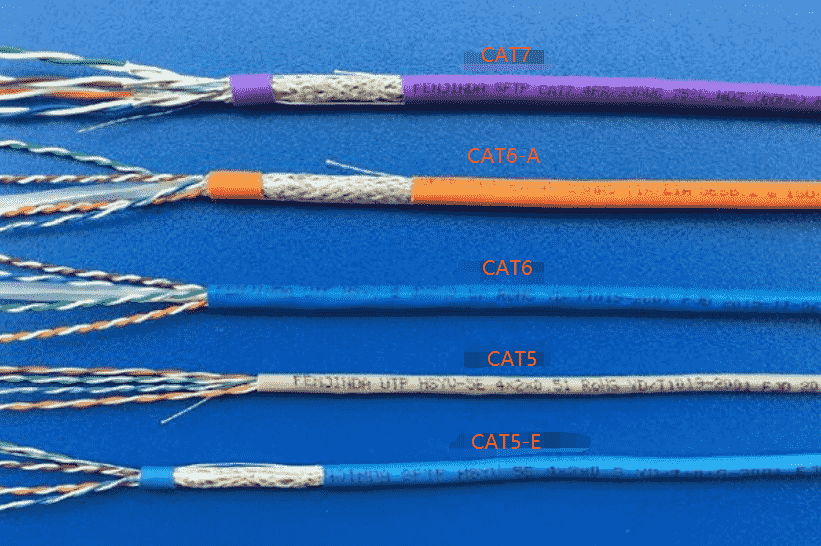
When scan your NAS devices with Cisdem Data Recovery, and find it is way to slow, the most commonly known cause is the computer is conneced to the network via Wifi. Therefore, we recommend you use a network cable, category 6 cable (CAT6 and higher, with a transmission speed of 1000m/s), which can significantly improve the scanning speed when the computer is connected to the Internet via a Cable instead of Wi-Fi.
Nowadays, there are several types of network cables in the market: CAT5, CAT5E, CAT6 and higher. And you can look at the logo on the cable to identify the type of this cable.
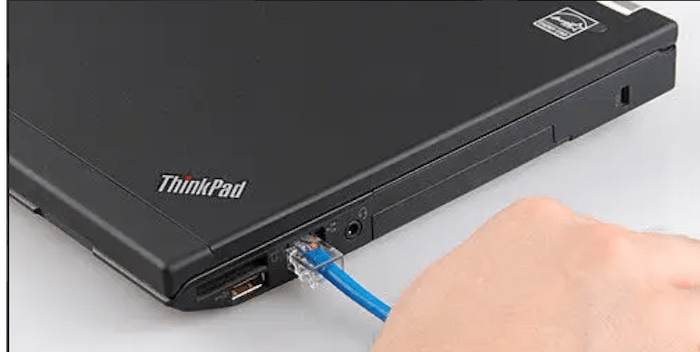
When you have a CAT6 or higher cable at hand, you can just plug in it into the slot of your computer and rescan the NAS device with Cisdem Data Recovery.
NAS Connection Failed
If you encounter a connection failed error while using Cisdem Data Recovery to recover files from a NAS drive, we may provide you a solution here.
Prerequisite
To ensure a successful NAS remote connection, you should at least have SSH enabled (required by remote access) and have a username with ROOT permission (required by volume scan).
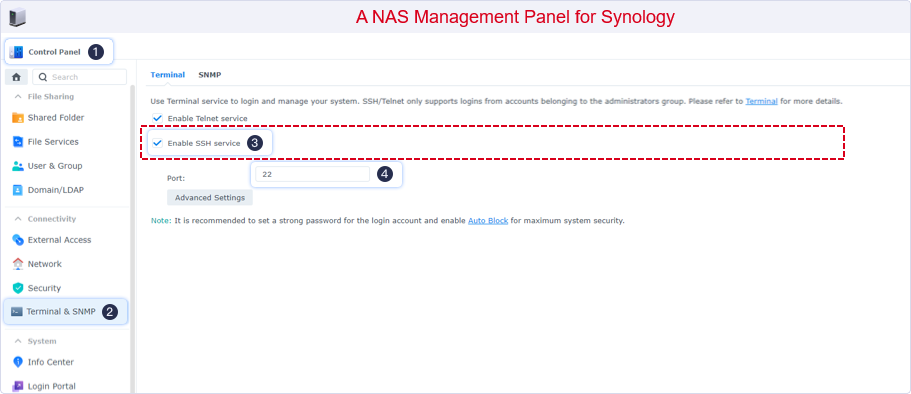
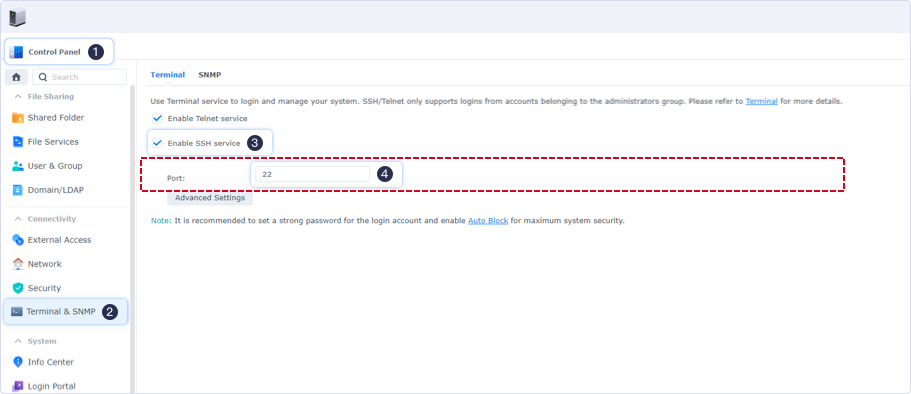
How to Enable Access NAS
Different NAS manufactures have different ways to enable SSH on NAS server. Generally, you are able to locate it at the Control Panel of NAS Management Panel. Reference links for most common NAS manufactures are as follows:

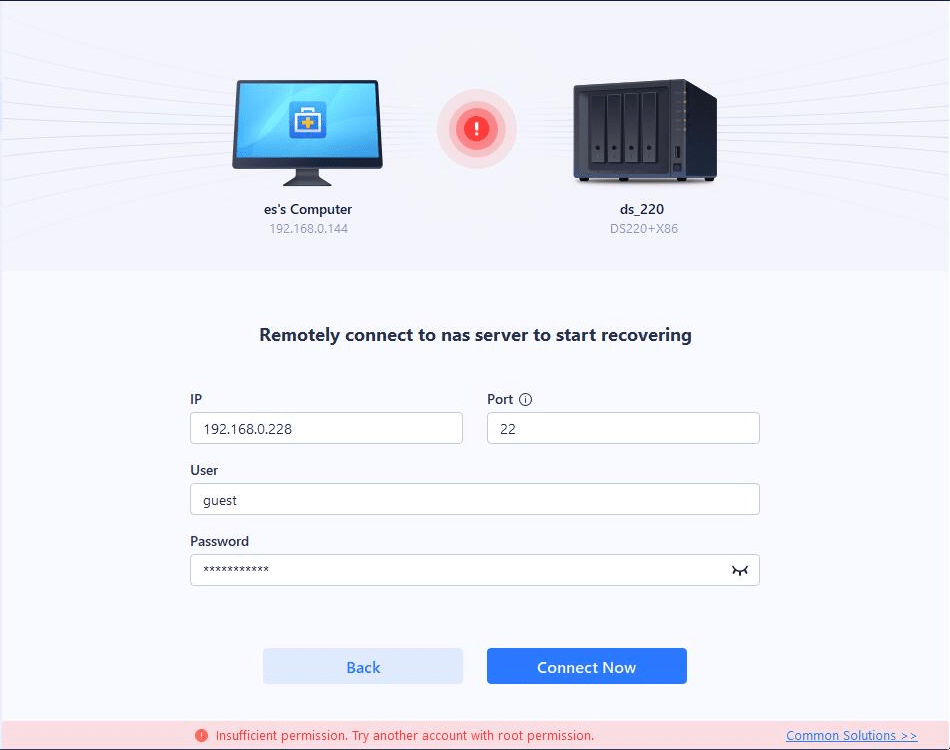
Possible Errors and Solutions
1. Account without sufficient permission/Try with your Administrator account
Solution: Using an Administrator account or account with ROOT permission is necessary.
2. Incorrect IP
Solution: Make sure that you enter the correct IP address. If it still fails, please try to input the domain name to connect NAS.
3. Incorrect password or user
Solution: It is recommended to select clear text display when entering the IP address. Also, make sure your username has ROOT permission.
4. Incorrect IP or port or Disabled SSH service
Solution: If the IP address or the domain name are correct but the software still prompts error, you can look into the port and check SSH service. Generally, the default port for SSH connection is 22.
5. SSH Exception (Error reading SSH protocol banner)
Solution: The port you entered is incorrect. Please further check and try again.
6. SCP Exception (permission denied, please try it again)
Solution:

Step 1 Run Command Line
Step 2 Locate file ‘/etc/ssh/sshd_config’
Step 3 Change ‘PermitRootLogin no / without_password’ to ‘PermitRootLogin yes’
If the same issue persists, please kindly contact our tech support at support@cisdem.com for further assistance.
Recover Data from an Unbootable PC
As we know, it is impossible to install apps on a crashed computer, so how can we recover the lost files from a crashed computer with Cisdem Data Recovery? Don't worry, Cisdem provides an easy way to help you recover all data from the crashed computer.
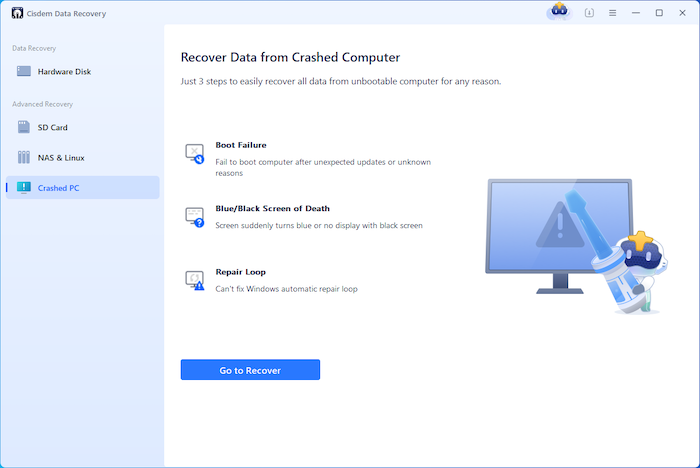
Create a bootable drive
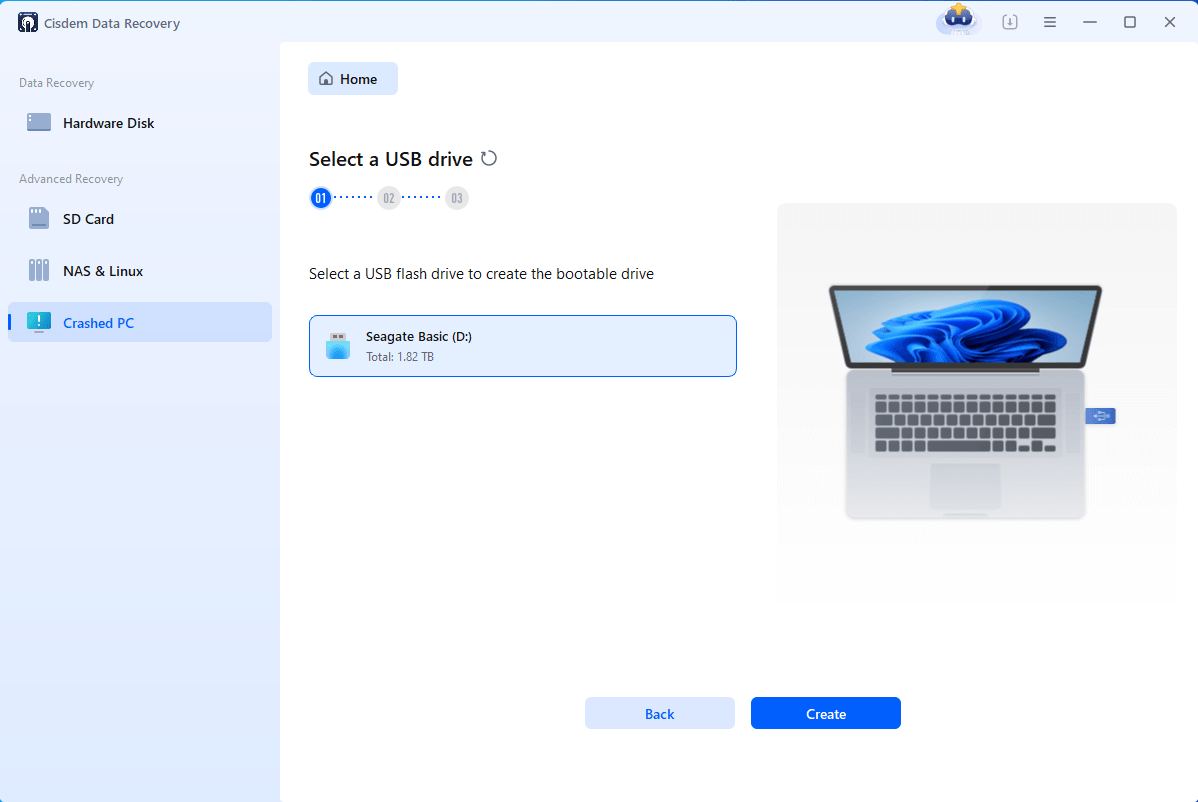
1. Please find a bootable computer, download and install Cisdem Data Recovery, then run it. Select "Crashed PC Recovery" on the left side, and click Go to Recover.
2. Connect a USB drive to your PC, select it and then click "Create" to continue.
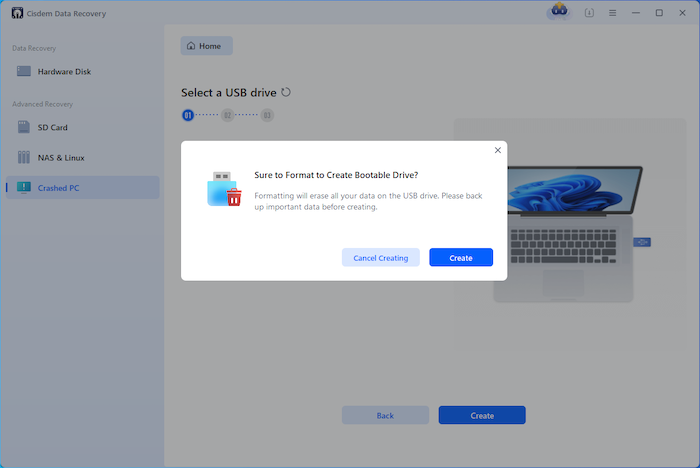
3. To create a bootable drive on this USB drive, the all the data on this USB drive will be erased, please make sure that there is no important files saved on this USB drive, and you can click "Create" to continue after confirmed.
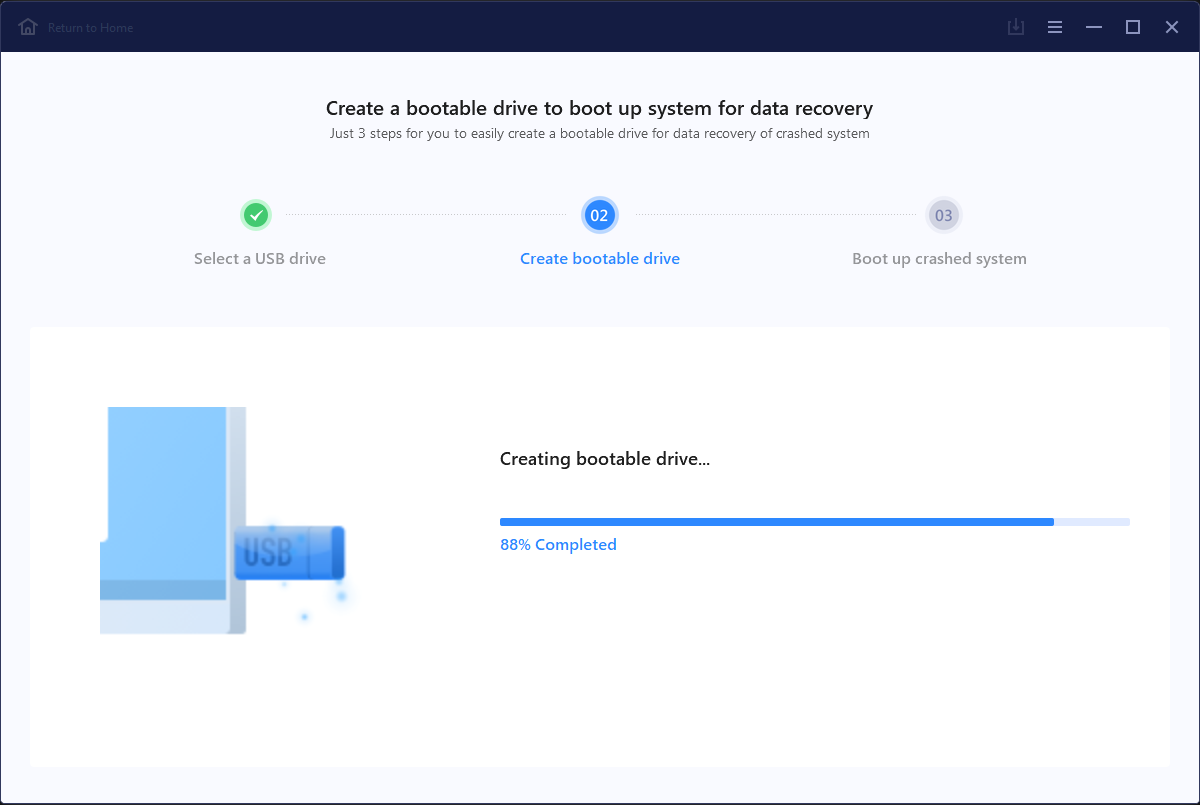
4. Wait until the creation completes, then you can connect this USB drive to the unbootable PC.
Boot from the bootable drive
1. Start the crashed computer and press Hotkey to enter BIOS
Connect the USB drive to the crashed computer, immediately and repeatedly press the BIOS Hotkey after the power on button is pressed.
For different manufactories, the hotkey to enter BIOS is different, here are some examples for some brands of computers:
ASUS: F2 for all PCs, F2 or DEL for motherboards
Dell: F2 or F12
Lenovo/Lenovo (ThinkPads): F1
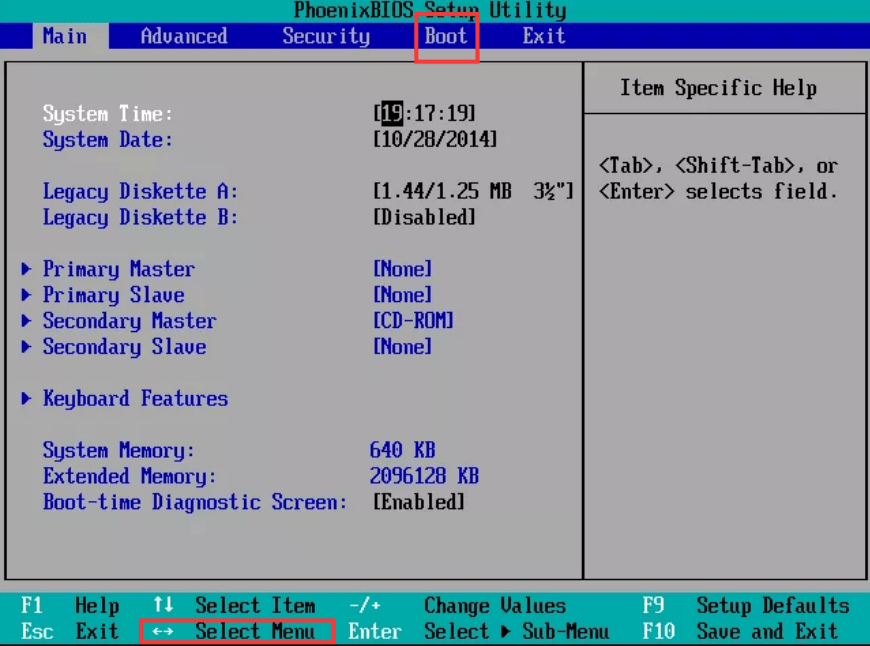
2. Enter BIOS Setup Utility
Continue booting untile the setup utility shows up, please note that the BIOS will be slightly different on different computers, but the operations are similar.
Please follow the instructions to navigate to Boot tab, or maybe Boot Option, Boot Order, Advanced Options, Advanced BIOS Features on specific computers.
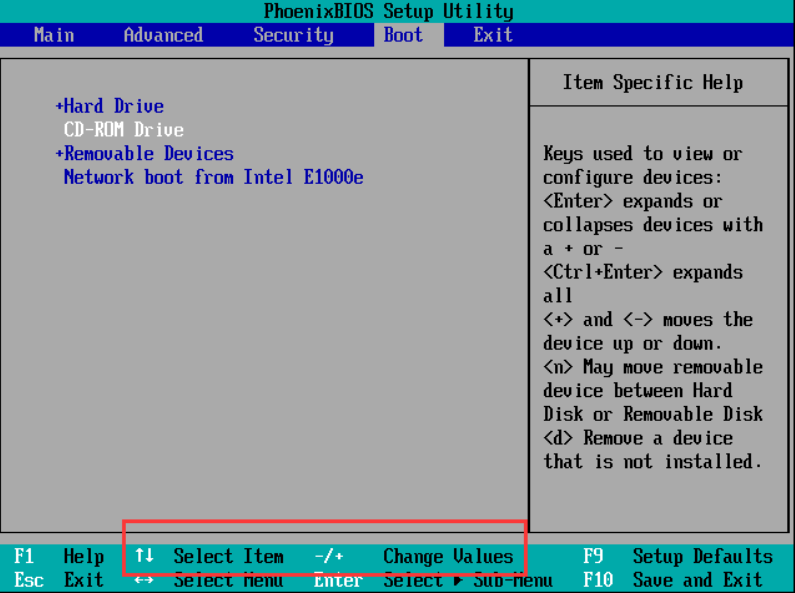
3. Change BIOS Boot Order
When switching to the Boot tab, you will see that the hard drive lists on the top place of the sub-menu, what you need to do is changing the USB drive to the top place. In our example, the values are changed by using the + and - keys.
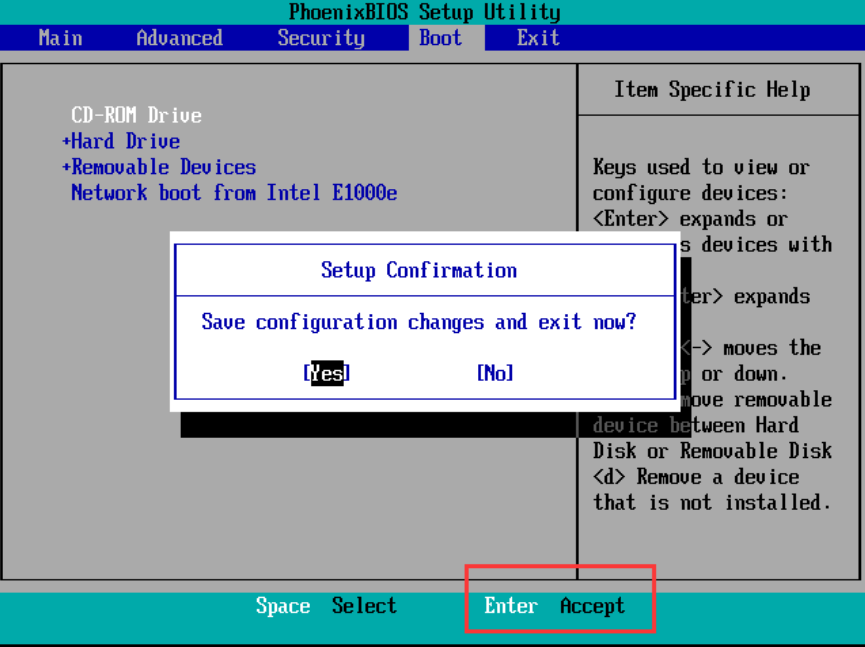
4. Save Boot Order Changes and Exit BIOS
Navigate to Exit/Save and Exit menu to save the boot order changes and exit BIOS, also you can use shortcut key (usually F10) to save and quit BIOS.
5. Recover the Files with the Bootable Media Version
Reboot the computer and it will boot from the USB bootable media automatically. You can scan the disks to recover the lost files.
6. How to change boot order for different brands
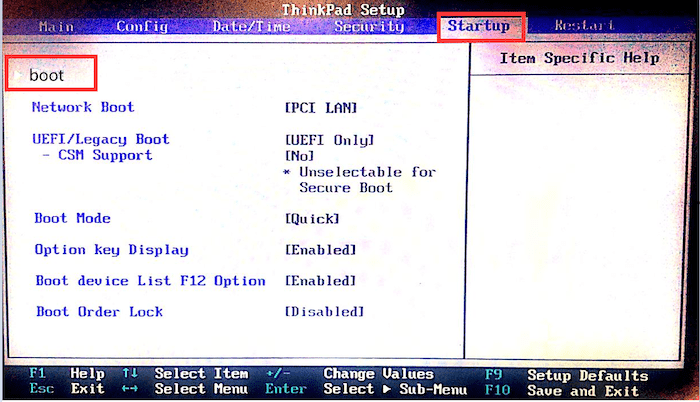
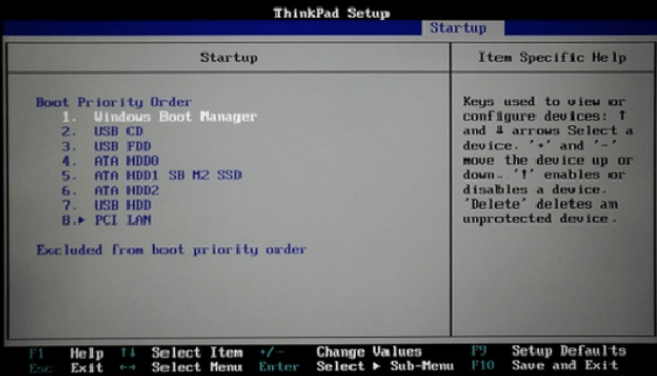
For lenovo (Thinkpads):
After entering into BIOS, please go to Startup > Boot, to select the Boot Priority Order.
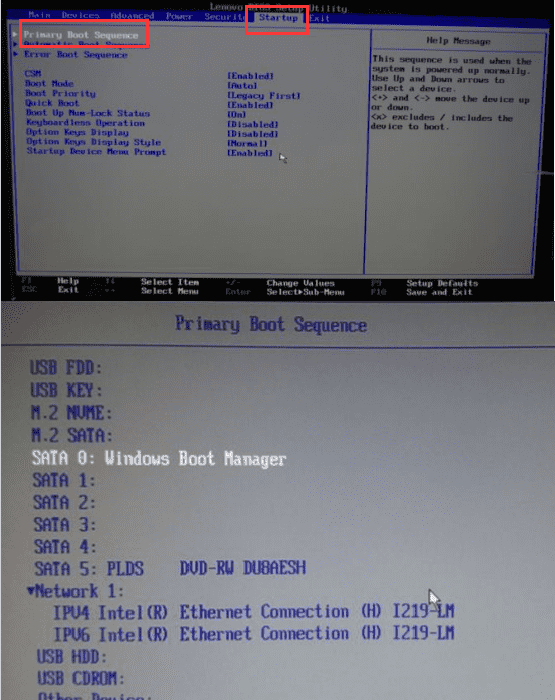
For Lenovo computers:
After entering into BIOS, please go to Startup, select Primary Boot Sequence to edit the boot order.
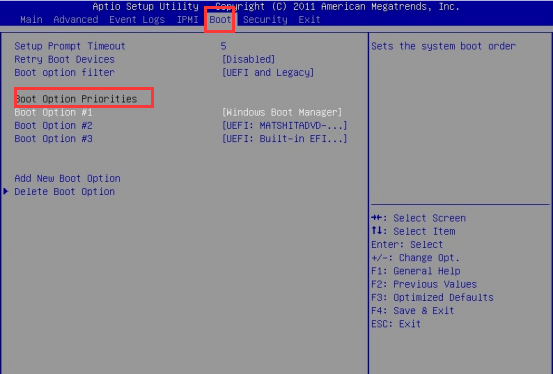
For ASUS computer:
After entering into BIOS, please go to Boot and change the boot order in Boot Option Priorities.
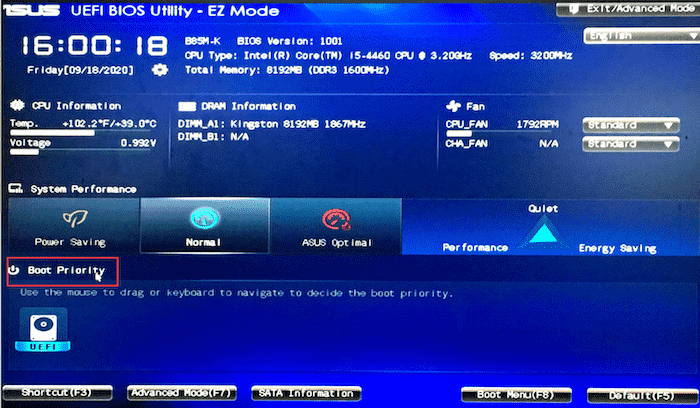
For the latest motherboard, please check this screenshot. You can change the boot order in Boot Priority.
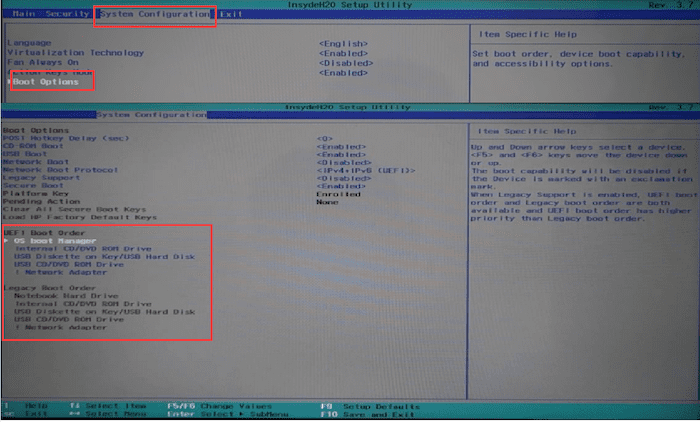
For HP computers:
After entering into BIOS, please go to System Configuration > Boot Options to change the boot order.
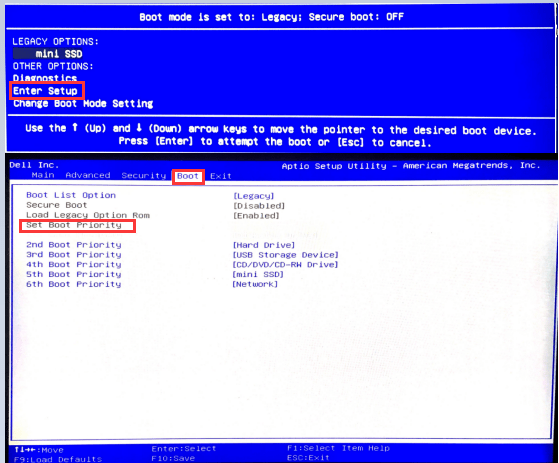
For DELL computers:
After entering into BIOS, please go to Enter Setup > Boot > Set Boot Priority to change the boot order.
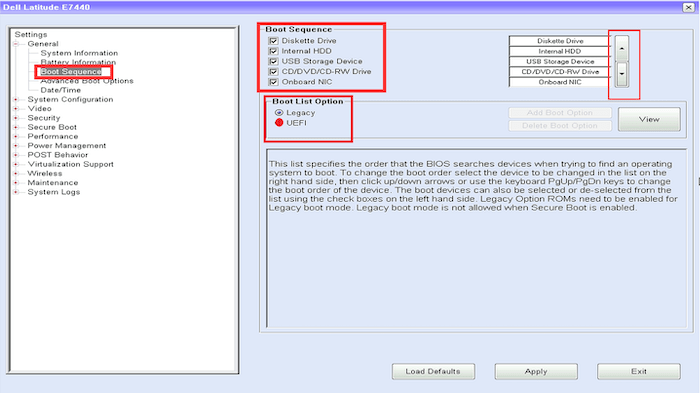
For the latest motherboard, please check this screenshot. You can change the boot order in General > Boot Sequence.
If you still have trouble entering into BIOS or changing boot order, to get the most accurate information, check with your PC’s user manual or contact the manufacturer's support team.
Update Cisdem Data Recovery
We always suggest users to use the latest version of the program.
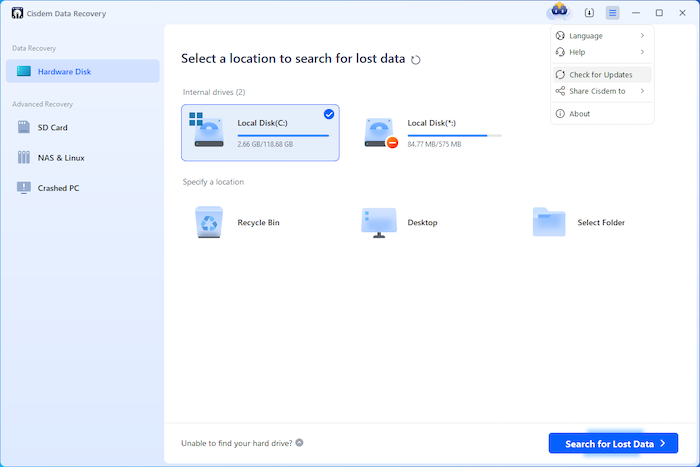
When you launch Cisdem Data Recovery, Cisdem will auto check for updates.
Also, you can click  > Check for Updates to manually update it.

Traci Gordon has worked as a tester in a software company for 8 years, she believes that the best software should be a tool that can help users accomplish what they need with the simplest steps.

JK Tam is the lead developer at Cisdem, bringing over two decades of hands-on experience in cross-platform software development to the editorial team. He is now the lead technical approver for all articles related to Data Recovery and DVD Burner.