


Duplicate Finder
Best Google Photos Duplicate Cleaner


As a teacher who stores hundreds of student photos every semester, I was surprised to find how many duplicate images I had from Google Photos. Cisdem Duplicate Finder helped me clean them up quickly. Now my folders are finally organized again! - Sarah | Teacher
Sarah is a high school teacher who enjoys taking photos of her students, such as school sports events, classroom moments, and student homework photos.
Challenge of having duplicate photos
To capture the perfect moment, Sarah often takes multiple photos of the same scene at school. Over time, her Google Photos library is filled with duplicates. Some of them are identical, some have slight variations in angle, file size, or resolution. They are scattered in different folders. This clutter makes it difficult to find specific photos when she needs to work on a report and leaves her Google Photos running out of space.
Sarah wants to eliminate all identical or similar photos, keeping only the best version. With thousands of photos in her Google Photos library, manually cleaning up these duplicates becomes tedious.
Solution: Using Cisdem Duplicate Finder
Sarah found that while Google Photos automatically prevents exact duplicate photos from being uploaded, it couldn’t detect duplicates with different filenames or near-identical photos. For someone like her, who takes many similar shots, this feature wasn’t enough. She discovered Cisdem Duplicate Finder, which helped her accurately clean them up with ease.
To help other Google Photos users facing the same issue, Sarah shared her experience. The following steps can help computer users find:
- Images in Google Photos that have the same content but different file names.
- Images uploaded from multiple devices with slightly different metadata.
- Similar images taken at different angles or in burst mode.
- Multiple versions of the same image that have been edited, cropped, etc.
Steps to find and remove duplicate files in Google Photos
Step 1. Download Google Photos
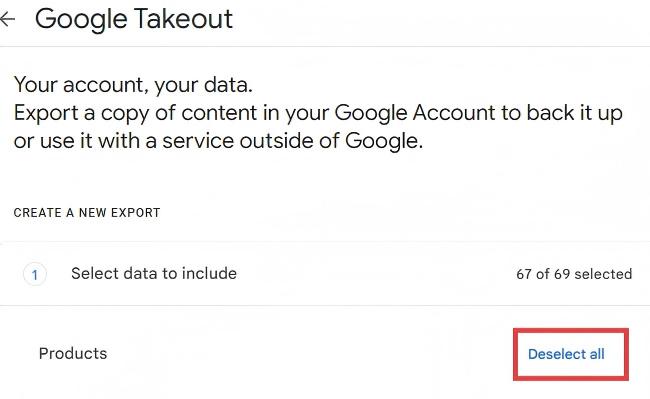
I downloaded all my photos from Google Photos using Google Takeout: I went to https://takeout.google.com/settings/takeout and first clicked Deselect all.
I scrolled down to find Google Photos and checked the box next to it.
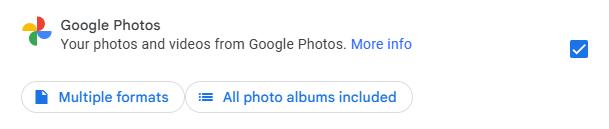
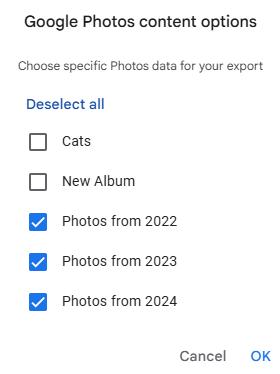
I clicked All photo albums included, and selected the year albums. Then I deselected the other albums created by me, and clicked OK to confirm.
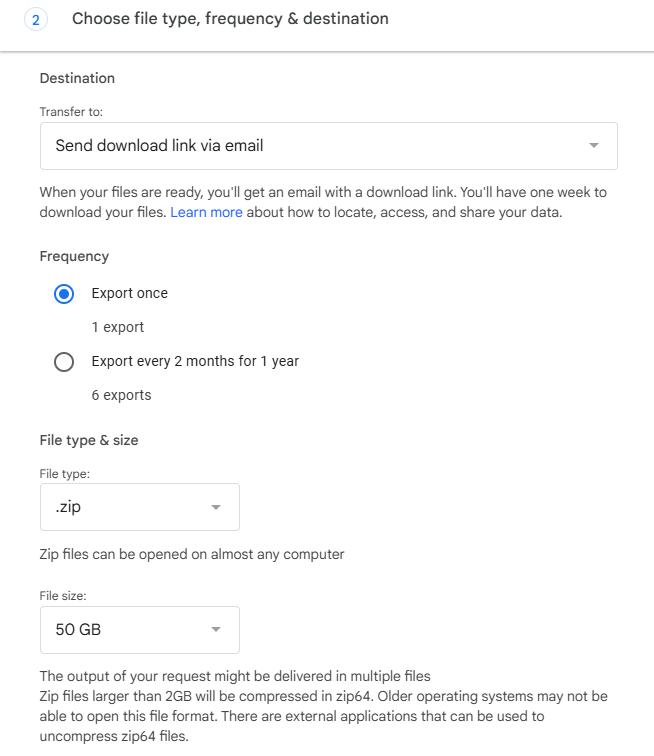
Then I scrolled to the bottom and clicked Next step. Under Destination, I selected Send download link via email. For File type & size, I chose .zip and 50 GB, then clicked Create export.
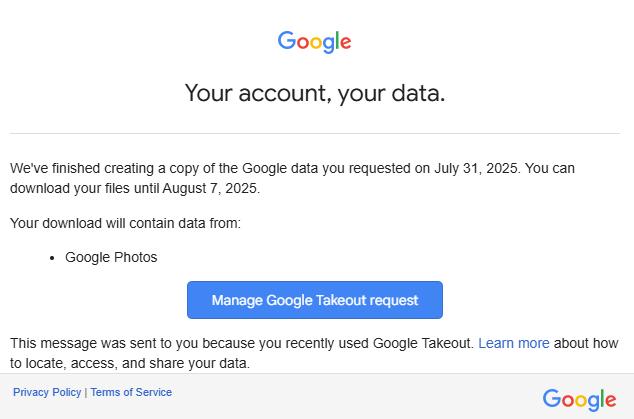
I soon received an email from Google Takeout in my Gmail. I clicked the Manage Google Takeout request button and clicked Download. It asked me to enter my Google account password. Then I clicked Next.
Then I unzipped the downloaded Takeout ZIP file. It was automatically named Takeout and saved in my Downloads folder.

Step 2. Download and install Cisdem Duplicate Finder
After my Google Photo files were downloaded to the Takeout folder, I downloaded and installed Cisdem Duplicate Finder from its official website.
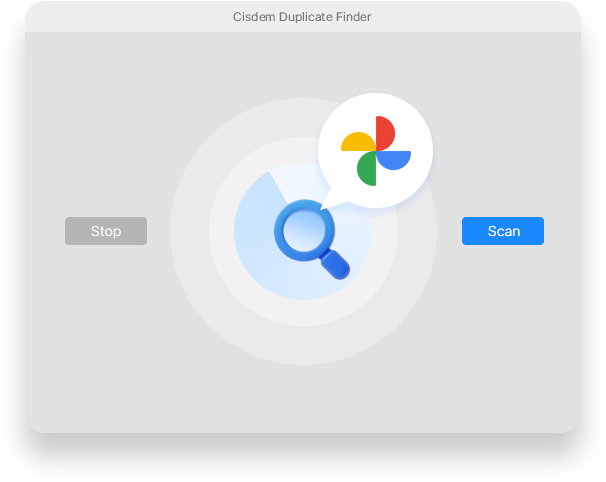
Step 3. Scan for duplicate files
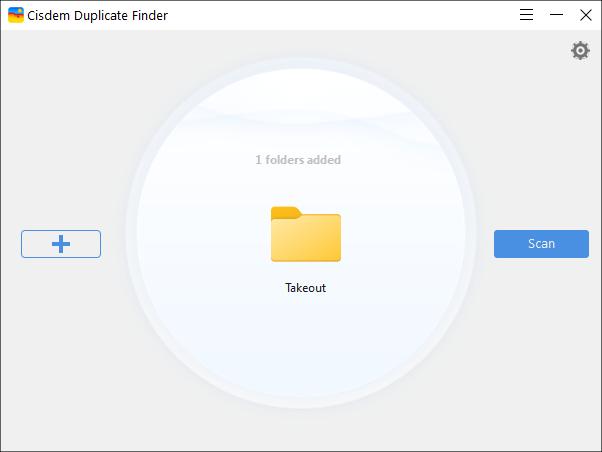
I dragged the Takeout folder into the program.
I clicked the Settings icon in the upper-right corner to adjust a few preferences. The program allowed me to:
- Select the Remove method: I chose Move to Folder and created a folder named Duplicates. So all duplicates in Google Photos would be moved there.
- Exclude certain folders, files, or formats from scanning. I added RAW images to the ignore list to prevent them from being scanned.
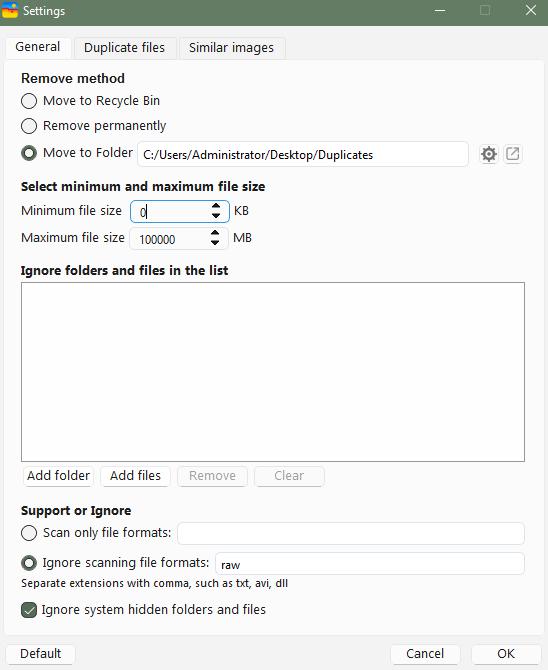
- Select a Scan method: I kept the default option, which randomly read parts of the file for comparison to improve scanning efficiency.
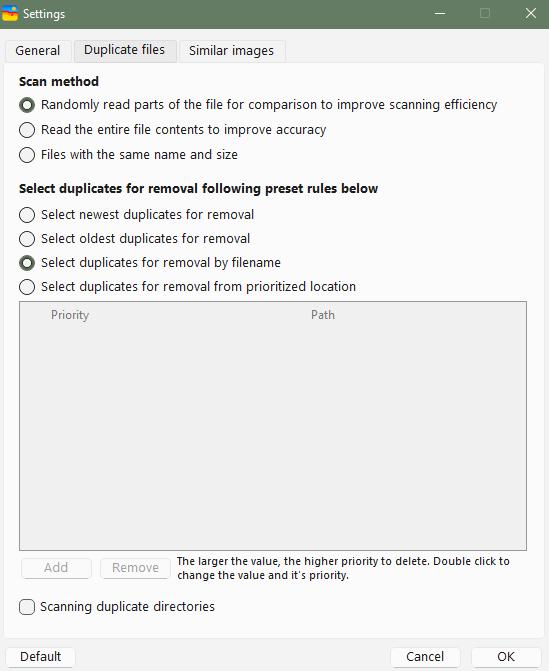
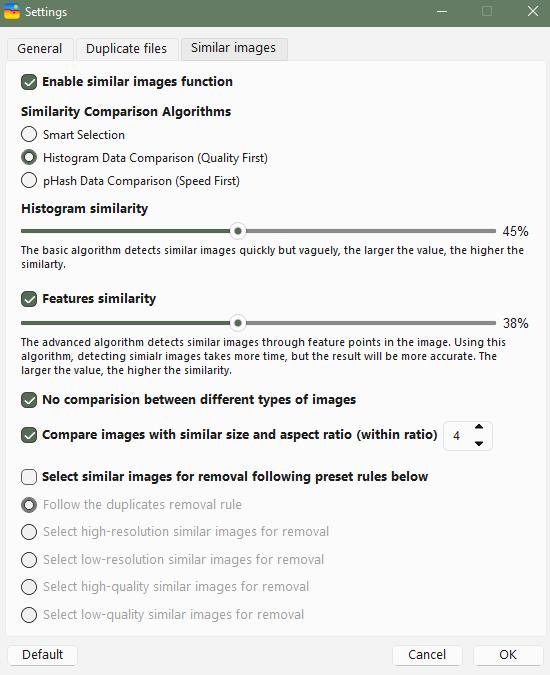
- Enable similar images function: I enabled it and adjusted the sensitivity level for detecting similar images.
Then I clicked Scan to start searching for duplicate files in my Google Photos.
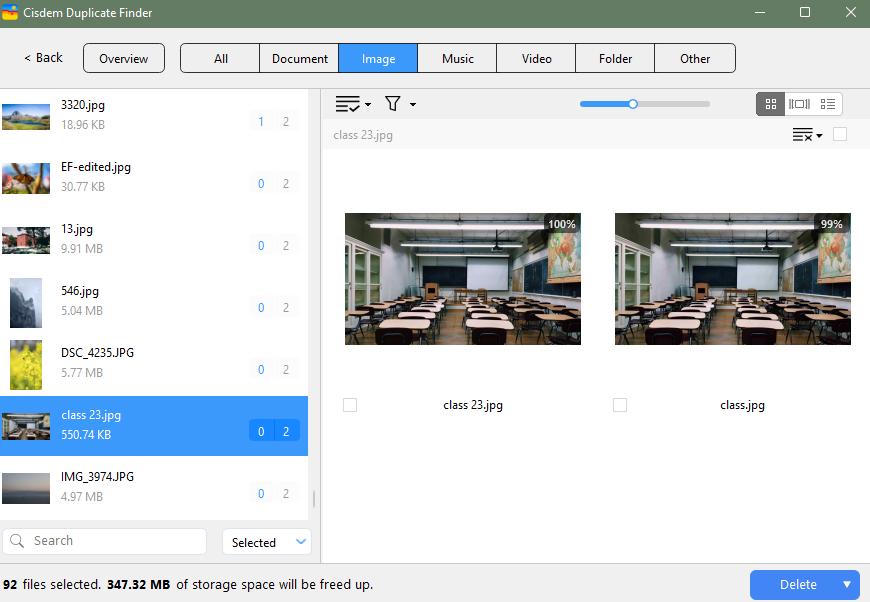
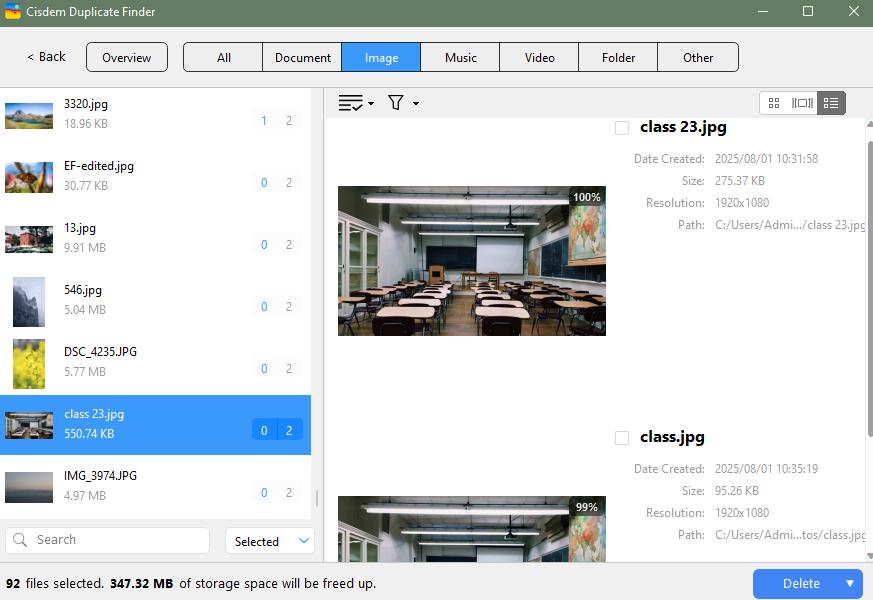
Step 3. Preview duplicate files
In the scan result window, I was able to preview all the detected duplicate photos. I could compare them side by side and view detailed information such as file name, size, and path.
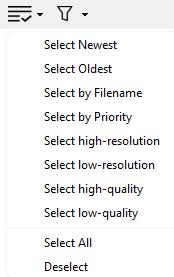
Step 4. Select duplicate files for removal
I used the selection rules to quickly select duplicate photos for removal. There were 8 rules available, and I chose Select high-resolution. The program automatically kept the highest resolution photo in each group and selected the rest for deletion.
Step 5. Remove duplicate files
I clicked Delete and Yes to confirm the deletion. Then all the duplicate photos were moved to the Duplicates folder on my computer.
I went to https://photos.google.com/ and created a new album. I named it New Album.
I dragged all the photos from the Duplicates folder on my computer into the New Album.
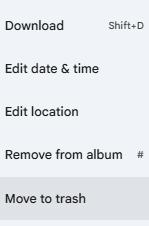
In the New Album, I selected all the photos. Then I clicked the three-dot icon and chose Move to trash.
The duplicates in Google Photos were deleted successfully.
The steps may seem a bit tedious. But follow my step-by-step guide, you’ll be able to accurately delete all duplicate photos from Google Photos with ease.
FAQ
Yes. Cisdem Duplicate Finder provides a selection rule that lets you prioritize specific folders when removing duplicates. Go to Settings > Duplicate files tab. Under Select duplicates for removal following preset rules below, choose the last rule (Select duplicates for removal from prioritized location). Then set the priority value for your folders.
Yes. You can recover the deleted photos in Google Photos’ Trash. They will be permanently deleted after 60 days.
Loved the article, share!

