


 Data Recovery
Best App to Recover Unsaved Word Doc


I'm a student and my assignment in Word format was left unsaved after my Mac experienced a crash, which has led to my need to recover the unsaved file for my final submission at university. When I attempted many times with several tools, Cisdem Data Recovery is the only one helped me recover my unsaved file. - Rebecca | Sophomore
Rebecca, who studies at University of Oklahoma, needs to create reports that analyze a social problem as assignment very often.
Challenge of restoring an unsaved Word document
Rebecca’s iMac suddently froze, the cursor dead on the screen, trapping mid-sentence. She has entrusted her assignment to the autosave feature in Word app. But after the reboot, Word just opened a version from 20 minutes ago, and Rebecca’s critical typing that day was gone too. The deadline for the file submission came one hour later.
Rebecca did not manually save, and she did not know where to find the unsaved version when Word doesn’t open the file automatically. She opened her browser to search for solutions, but got dizzy because she is basically a digital novice. How could she recover an unsaved Word document easily, and as quickly as possible to meed the deadline?
Solution: Using Cisdem Data Recovery
Rebecca checked several data recovery tools, and the practical details she found from Cisdem’s website persuaded her into a try. She did and succeed. With Cisdem Data Recovery, she quickly found back her unsaved Word assignment.
Rebecca wants to share her experience and helps others having the same problem. Below are the steps that she followed, organized by Cisdem. The steps can help Mac users restore unsaved Word documents, and unsaved files in other formats.
Steps to recover an unsaved Word document on Mac
Step 1. Download and install the program.
I downloaded Cisdem Data Recovery for Mac from their official website. It was easy to install the program, just double click on the downloaded .dmg file.
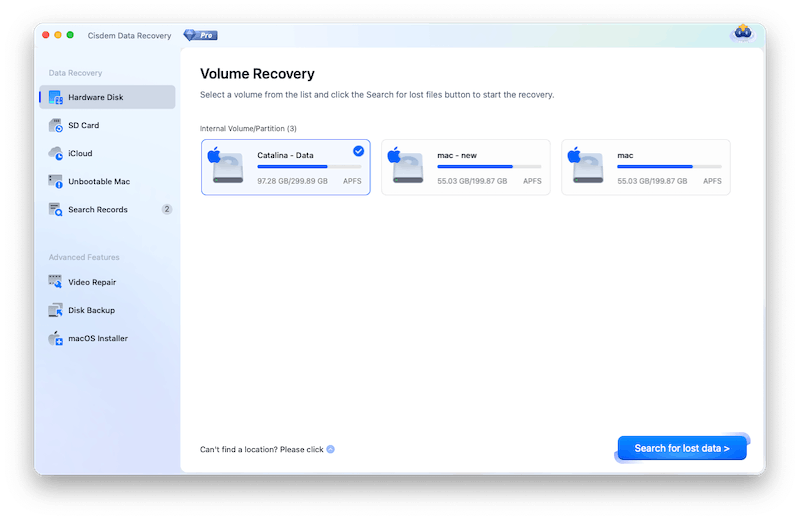
Step 2. Select a hard drive.
I selected the hard drive where my Word document was left unsaved.
Note from Cisdem:
If you want to recover an unsaved Word document from an external hard drive, you should connect the drive to your Mac first, then run Cisdem and it will detect & show up the drive for you to choose.
Step 3. Click Search for lost data to start the scanning.
Then I clicked on the button “Search for lost data” to start scanning the selected drive.
Tip from Rebecca
1. Before starting the scan, I went to Preferences of Cisdem Data Recovery for Mac, and selected Documents file type only. This will save a lot of time on scanning and recovering a wanted document.
2. The scanning time depends on the file capacity of the selected hard drive, the larger the capacity it is, the longer the scanning it will take. But Cisdem was quite fast in my case.
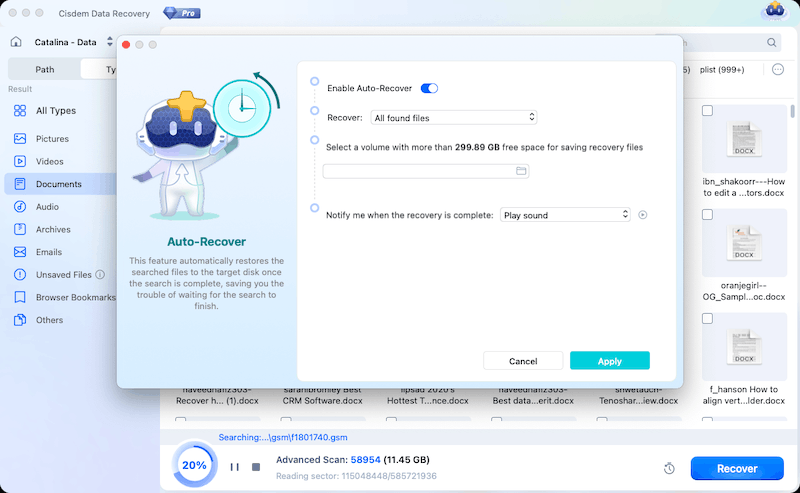
3. You are recommended to let the scanning complete itself if you have enough time, instead of stopping to have a partial scanning. Of course you can pause the scanning anytime when you feel like to and resume at your convenience. Even you can click on the clock icon living on the scanning status bar to enable Auto-Recover, so than you can restore the files to the target disk once the search is complete.
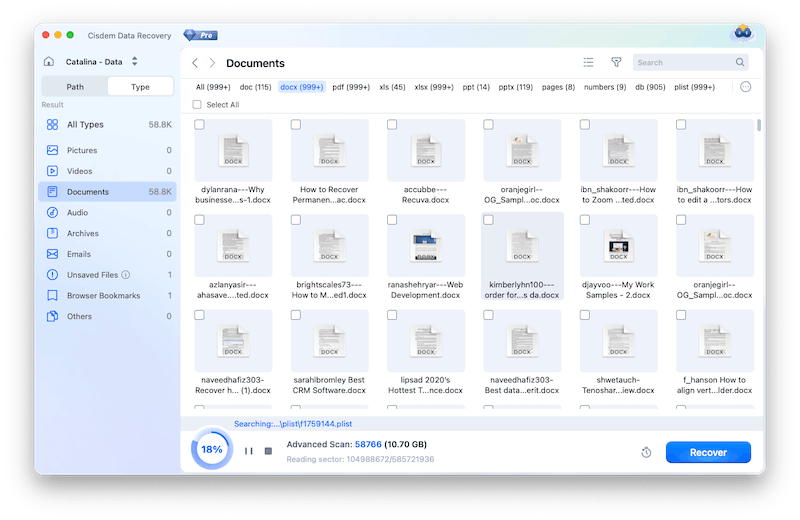
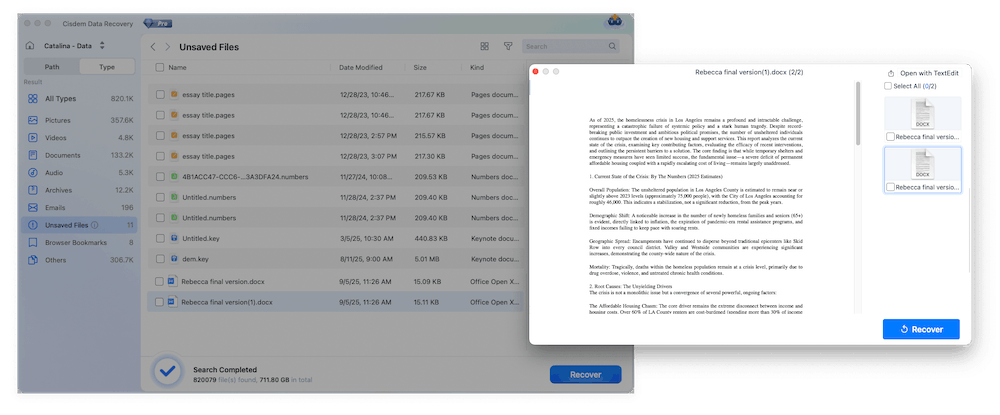
Step 4. Locate and preview unsaved Word document.
Once the scan was done, I saw a results window with 2 tabs:
- Path: list recoverable files according to path: with Directory, without Directory, and offer quick access to Trash, Desktop, Documents, Downloads, Photos, Unsaved Files
- Type: list recoverable files according to file type: All Types, Pictures, Videos, Documents, Audio, Archives, Emails, Unsaved Files, Browser Bookmarks, Others.
That’s to say, I could restore my document from both tabs, by checking the files in Unsaved Files category. After double clicking on the thumbnail of the file, I previewed the document in a large view. I found my unsaved Word document.
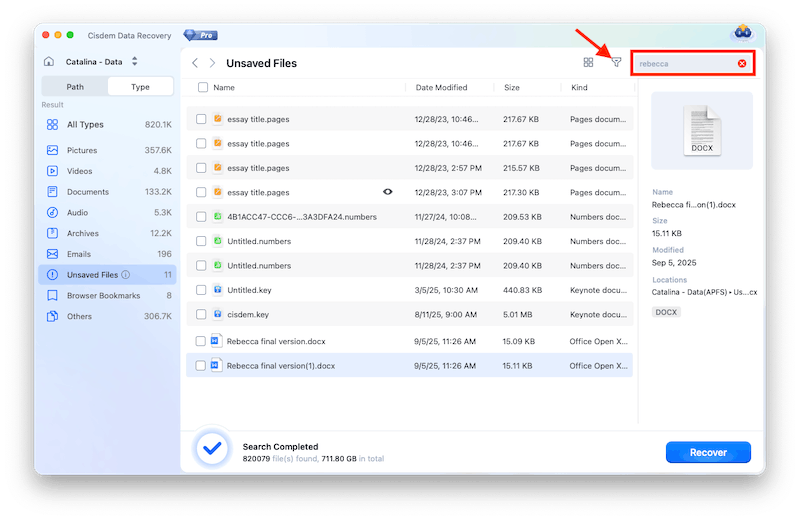
Tips:
If you want to restore an unsaved Word document faster, especially when there are hundreds of or more unsaved files available, you can use the search box or filter tool quickly locate your file.
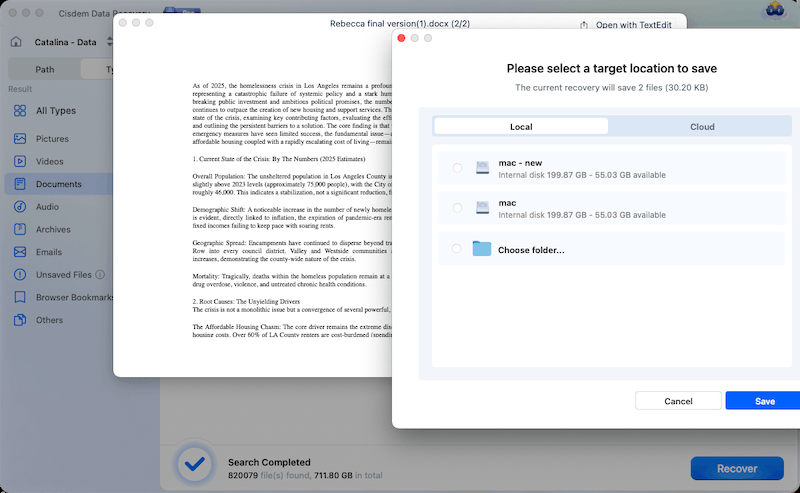
Step 5. Select unsaved Word document to recover.
By checking the box before the unsaved document, I was able to recover the file to my local drive on Mac, also to Cloud. I saved the file to a folder on my desktop. The recovery process was fast and the recovered document was intact, readable with my latest edits in it.
Cisdem Data Recovery for Mac got back my unsaved Word document and I finally met the deadline for assignment submission. I hope my experiences can help anyone in the similar situation to restore an unsaved file.
FAQ
It can recover unsaved documents in Pages, Keynote, Numbers, Word, Excel, PowerPoint, WPS, Photoshop PSD format.
It depends on the capacity of the drive that you’ve selected to scan. To speed up the process, you can select a specific file type in Preferences before scanning, instead of scan all files across the entire drive.
It means that your document is corrupted and needs a repair. Don’t worry, Cisdem Data Recovery for Mac can auto repair a damaged document in the Preview process. You just need to double click to preview the file, the repair will start.
Loved the article, share!

