


 VideoPaw
Best DVD and Blu-ray Ripper


My disc collection was just cluttering up my place. I started using Cisdem VideoPaw to clear it out. It can also digitize copy-protected discs - cool! So far, so good. Can't wait to stream all discs to my Apple TV and NAS. - Benito | Physical media collector
Benito has spent years collecting DVDs and Blu-rays. With over 500 movies and TV shows on disc, his collection had become a huge pile of cases. He wanted to get rid of the discs and watch or share everything on his Apple TV and home NAS.
The challenge
Facing a stack of over 500 physical discs, Benito planned to rip them by working 2-3 hours daily and finish in 3 months. He knew it was a big job, so he spent about 1 week just looking into disc ripping software including Handbrake and MakeMKV.
Benito found that HandBrake processed Blu-ray discs slowly and required extra libraries to bypass encryption. MakeMKV was simpler and preserved the quality perfectly, but it gave him large, less compatible files in MKV format.
The solution
The free software just wasn't cutting it, so Benito ended up going with the paid alternative - Cisdem VideoPaw. It quickly ripped his discs, even with copy protections, into popular formats.
Because Benito's experience is so relatable, the Cisdem team reached out to get his step-by-step process. Below is his share, which we hope will be useful for anyone looking to rip DVDs or Blu-rays. Cisdem has also provided some tips and notes.
Steps Benito took to rip a DVD or Blu-ray disc
Step 1. Go to the ripping interface
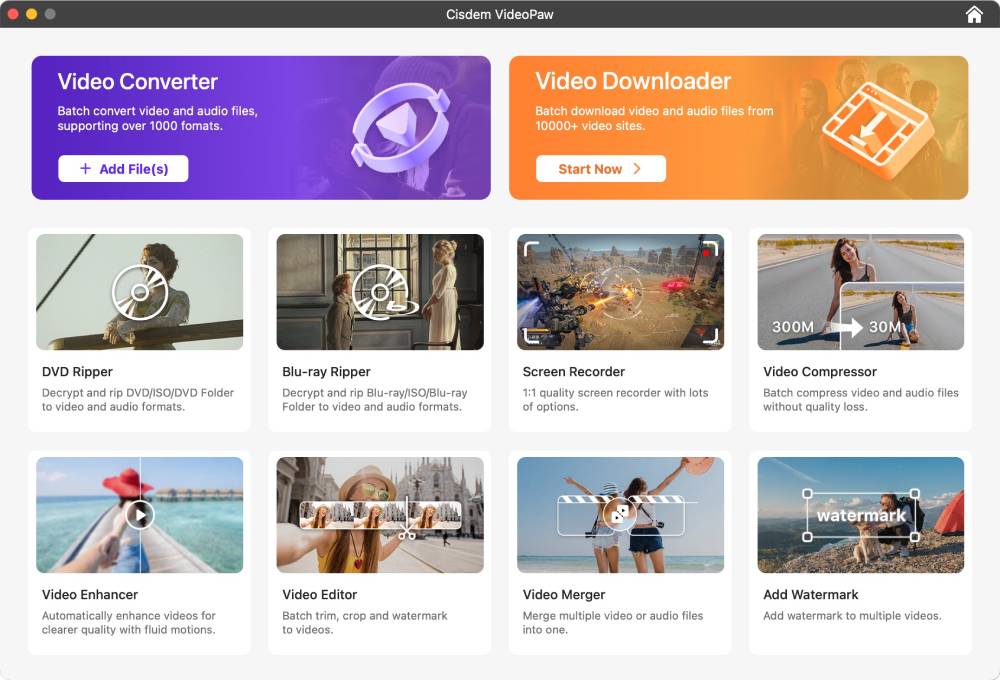
Install Cisdem VideoPaw, then launch it. The first thing I saw was the main Dashboard. It had tiles for all its different features. Click DVD Ripper or Blu-ray Ripper module to start.
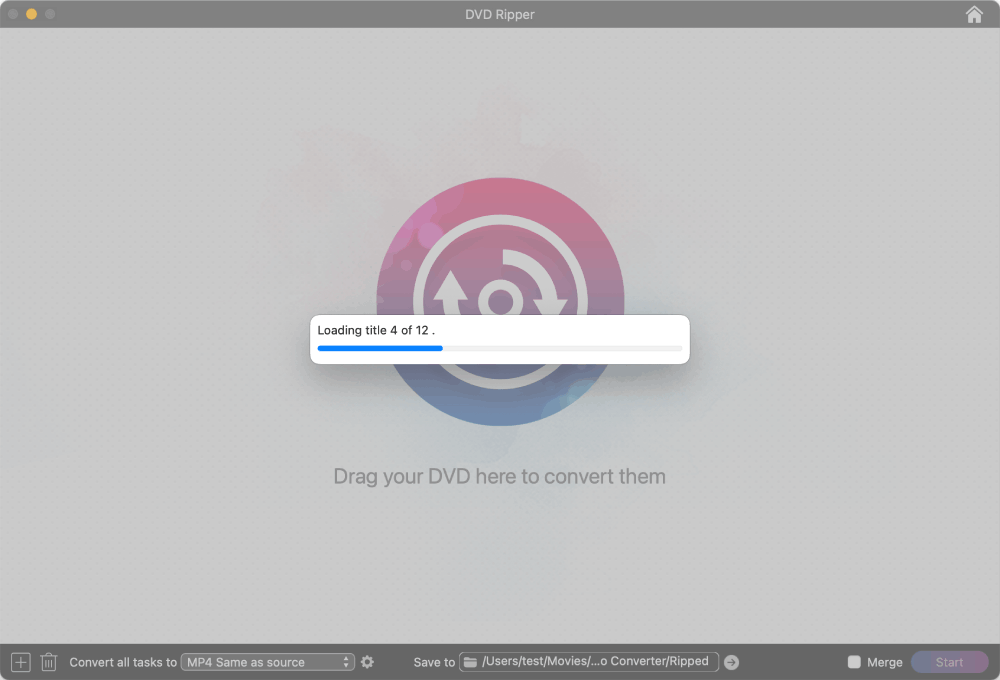
Step 2. Add disc folder
Insert the disc into your optical drive. Once your computer detects it, you can add it to VideoPaw by either:
- Drag the VIDEO_TS (for DVD) or BDMV (for Blu-ray) folder directly into the interface.
- Click the "+" icon in the lower-left corner, select the folder and load it.
Tip from Cisdem:
- A film might include the main title, extras, trailers, and ads. Right-click the title and choose "Play" to view whether the title is the one you need. If not, uncheck the box. To keep only the main movie, right-click any title, select "Uncheck all", and then check the longest title.
- If you want the episodes on a TV series disc to play without interruption after ripping, check the “Merge” option at the bottom.
- The disc titles are named generically, like "title 1" and "title 2". Feel free to click on them to rename.
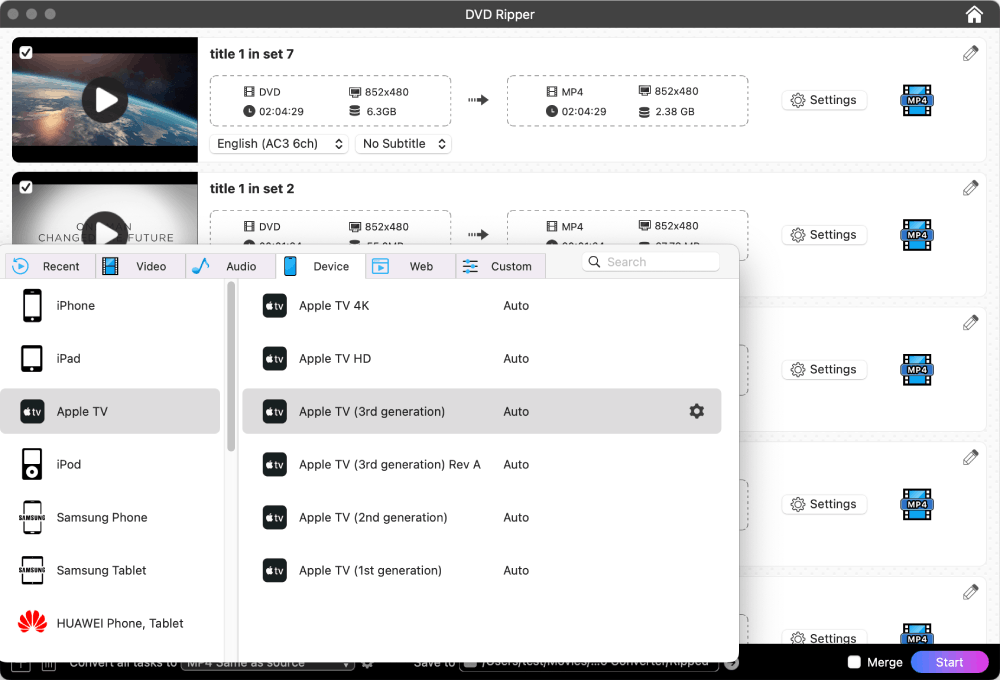
Step 3. Select the target format
Set a format for each title individually by clicking the format icon, or pick one for all with the “Convert all tasks to” button.
You can choose the video/audio format or device/web preset. The most popular and universal video output option is “Video > MP4 > Same as source". This option uses H.264 encoding, which ensures good compatibility and preserves the original parameter settings without compromising image quality.
My goal was to stream on Apple TV, so I went to the "Device" tab and chose Apple TV.
Note from Cisdem:
- You may adjust parameters such as encoder, resolution, and frame rate in the “Settings” window as needed, but new users are advised not to make any changes.
- You can also choose the HEVC MP4 output option. The good thing is the file ends up smaller. The bad thing is it takes longer to rip and may not play on older devices.
Step 4. Select audio and subtitle tracks
Cisdem VideoPaw can automatically detect all audio and subtitle tracks in various languages in a title. If available, choose your preferred language. Note: If you select the subtitles, they will be permanently hardcoded into the ripped video.

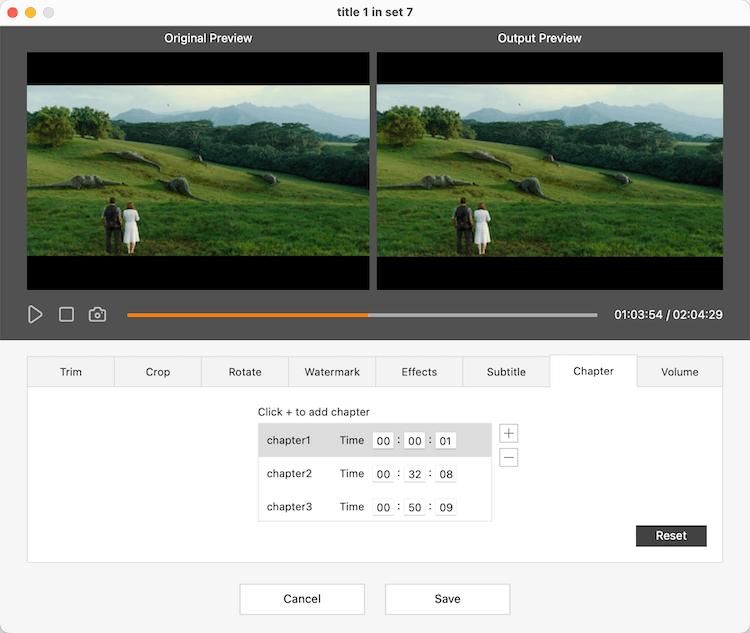
Step 5. Edit the video
You can edit each video before ripping it. Click the pencil icon near the title to open the editing window. I made changes for some discs, for example:
- Trimmed off some of the intro and the ending.
- Added chapters to the long film so that I can quickly jump to the segment I want during playback.
- Adjusted the volume of the original video to make it louder.
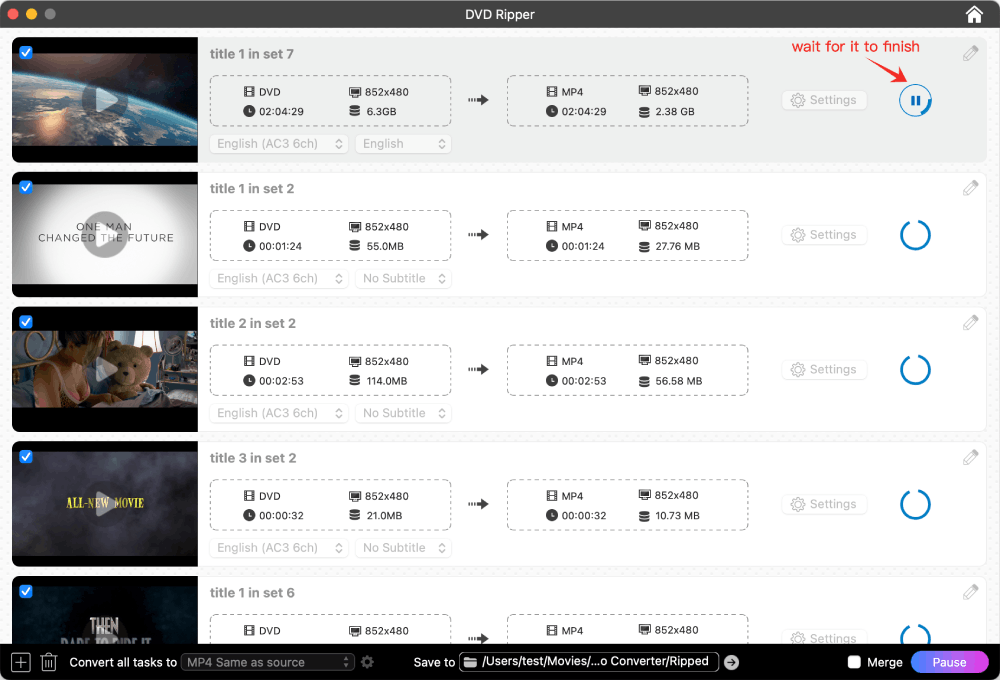
Step 6. Convert disc to digital format
I mounted my NAS on the computer and selected it as the output path. Then, I clicked “Start” to begin ripping a DVD or Blu-ray. The software can efficiently rip a standard disc in 10-30 minutes.
During the process, you can pause the ripping of all or individual titles with a single click. Once resume, it will continue from where it left off.
Disclaimer:
The guide is only for helping you create personal backups of discs you legally own. We strictly prohibit and oppose the distribution of ripped commercial DVDs/Blu-rays or any form of piracy. You bear full responsibility for any legal issues resulting from misuse.
FAQ
Yes, you can use Cisdem Video Converter to convert the disc to H.264 or HEVC MKV, then install Plex or Infuse for playback on Apple TV. However, when you rip a Blu-ray disc via MakeMKV, the resulting MKV video might be encoded with VC-1, which could cause compatibility issues.
There are two ways: - Mount the shared folder on the NAS to your computer, and set it as the destination for the rip. - Save the ripped files to your computer, then transfer them to the NAS.The second option puts less load on the NAS, though it could depend on your hardware.
Standard DVD and Blu-ray discs each use fixed video resolutions. Even if you select 4K as the output resolution, it won't enhance video quality but only make the file larger.
Loved the article, share!

