


Duplicate Finder
Best OneDrive Duplicate Remover


As a photographer, I use OneDrive to store all my photos. Over time, my cloud storage became cluttered. Fortunately, I found Cisdem Duplicate Finder. It identified and removed the duplicate photos, making my OneDrive clean and organized once again! - Emily | Photographer
Emily is a freelance photographer who uses OneDrive to store thousands of photos she has taken and edited.
Challenge of having duplicate photos
Emily has large numbers of photos stored in her OneDrive. Many of them are different versions of the same photo, such as the original photo, the color version, and the cropped version. There are also duplicate photos synced from different devices. This turned her OneDrive into a mess.
Can those duplicate photos be quickly deleted in batches? Emily tried to manually find them. But faced with thousands of photos, this process is time-consuming. She soon realized that she needs a more efficient tool to complete this task.
Solution: Using Cisdem Duplicate Finder
Emily discovered Cisdem Duplicate Finder - an app that accurately detected duplicate photos in OneDrive.It helped her select all but the highest-resolution photo in each group of duplicates to remove.
Emily shared her experience below to help other OneDrive users. OneDrive users can follow this process to deal with duplicate photos, documents, videos, and audio files using Cisdem Duplicate Finder.
Steps to find and delete duplicate photos in OneDrive
Step 1. Download and install the OneDrive app
First, I navigated to the OneDrive download page, clicked Download OneDrive, and installed it on my computer.

Notes from Cisdem:
Windows users can skip step 1 and step 2.
Cisdem Duplicate Finder now supports scanning duplicate files from OneDrive directly without downloading the OneDrive app.
Step 2. Sign in and set up OneDrive
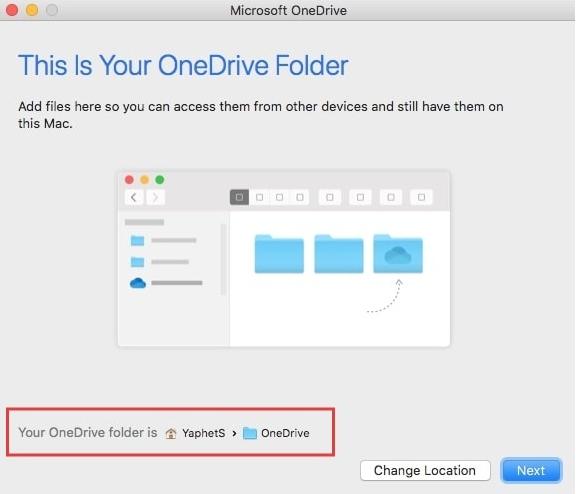
After installation, I signed in with my OneDrive account. In the “This Is Your OneDrive Folder” screen, OneDrive showed me the location of the local OneDrive folder on my computer. Click Next.
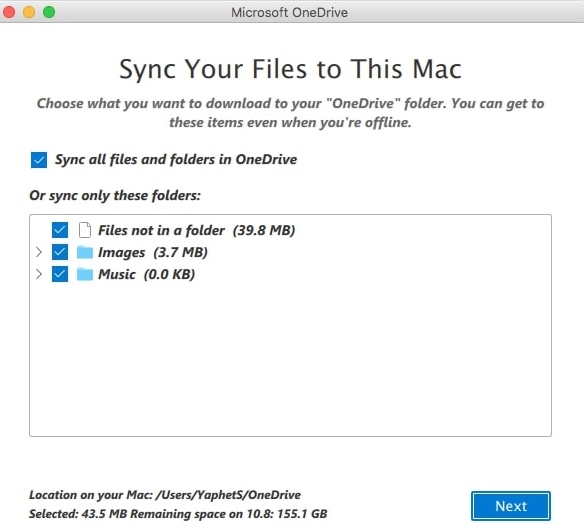
In the next “Sync Your Files to This Mac” screen, I selected Sync all files and folders in OneDrive. Click Next.
Click Open OneDrive Folder.
Step 3. Download and install Cisdem Duplicate Finder
Then, I installed Cisdem Duplicate Finder on my computer. It is compatible with macOS 10.11 or later.
Note from Cisdem:
Cisdem Duplicate Finder is also compatible with Windows 10 and 11. The steps to find duplicate files in OneDrive on Windows are even simpler. For more details, check out this article.
Step 4. Scan for duplicate photos in OneDrive
Open Finder. I directly dragged the OneDrive folder into this program.
Cisdem Duplicate Finder also identifies similar images. Many of my OneDrive photos looked alike but differed slightly in resolution, file size, or format. So I clicked the Settings icon in the upper right corner to make sure the Similar images function was enabled. And then I adjusted the thresholds for comparing images.
Click Scan.
Step 5. Preview the detected duplicate photos in OneDrive
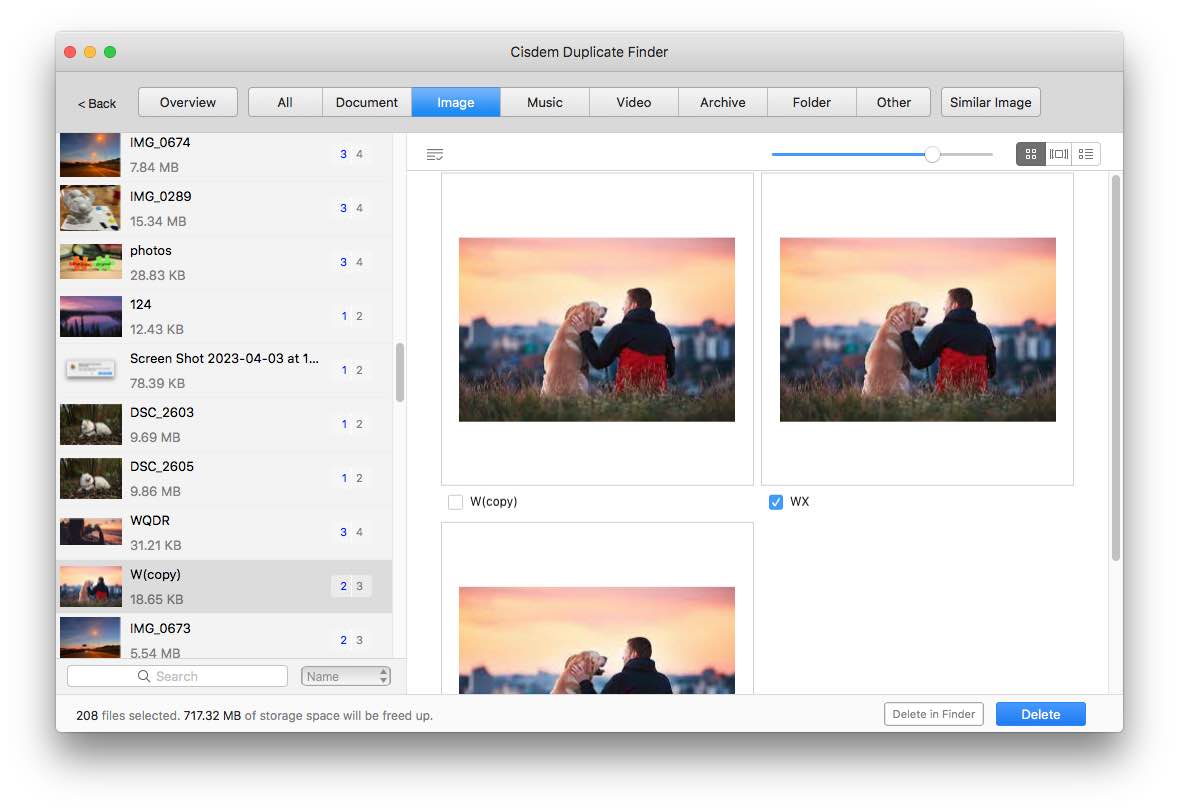
The scan was fast. It took only a few seconds to scan my entire OneDrive folder. In the result window, I clicked the Images tab to view all the detected duplicate photos in OneDrive.
It found over 200 duplicate photos for me, including those with different file names. Identifying all of them manually would have been nearly impossible, but Cisdem did it quickly and accurately. It also allowed me to compare duplicate photos side-by-side, and view photo details.
Step 6. Select duplicate photos to remove
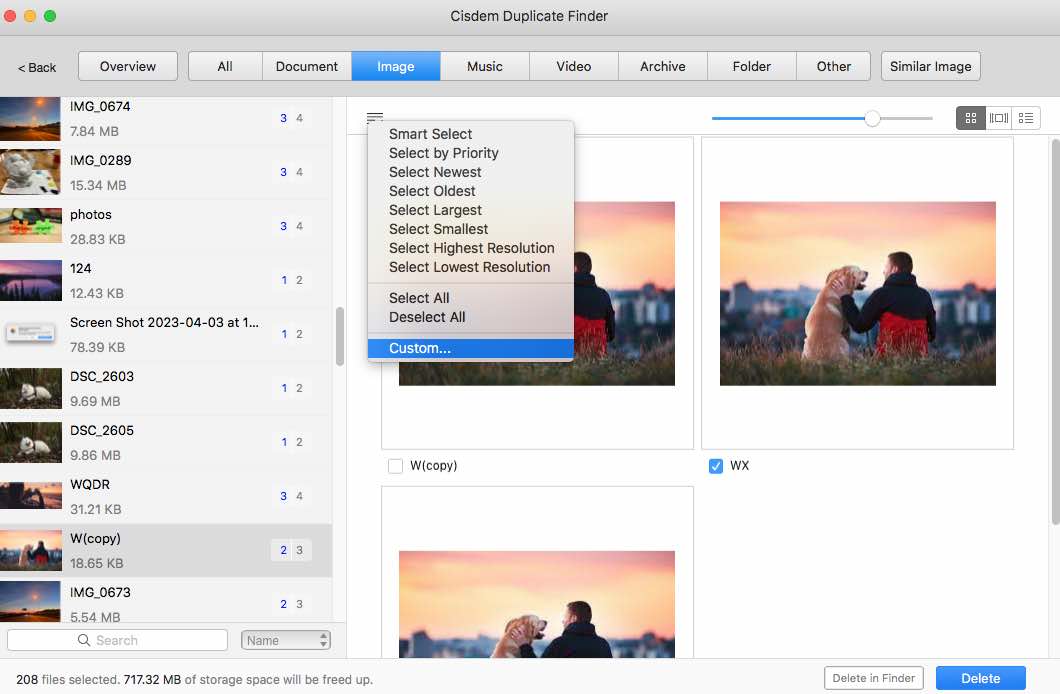
I used the selection rules to help me select duplicate photos to remove. Since I only wanted the highest-resolution photo from each group of duplicates, I clicked the three-line icon in the upper-left corner. Then I chose “Select high-resolution”. It automatically marked the lower-quality duplicates for removal.
Tip from Cisdem:
In addition to “Select high-resolution”, Cisdem Duplicate Finder provides several other selection rules, including “select Oldest”, “Select by Filename”, “Select by Priority”, and more. You can choose the one that best fits your needs.
It also lets you manually select or deselect unwanted photos to delete.
Step 7. Delete duplicate photos from OneDrive
After previewing and selecting the duplicate photos, I clicked the Delete button in the bottom-right corner and confirmed the deletion by clicking Yes.
My OneDrive account automatically synced the changes from the local folder. All the OneDrive duplicate photos were successfully removed.
Cisdem Duplicate Finder really saved me a lot of time in finding duplicates in OneDrive. I hope my experience is helpful for other users.
FAQ
Yes. To scan a specific folder in OneDrive for duplicates, just drag this folder into the program.
Cisdem Duplicate Finder offers 3 removal methods: Move to Recycle Bin/Trash, Move to Folder, and Remove Permanently. By default, the deleted photos are moved to the Recycle Bin/Trash. If you selected Move to folder, you can recover deleted photos from the folder you specified. However, if you selected Remove permanently, the photos cannot be recovered.
Yes, you can also use Cisdem Duplicate Finder to find duplicate files in Google Photos, Dropbox, and other cloud drives.
Loved the article, share!

