


 DVD Burner
Best Software to Burn iPhone Videos to DVD


I don't understand cloud storage, but I know DVDs. Cisdem DVD Burner helped me save the cat videos from my iPhone onto a physical disc I can hold in my hands. Now I don't have to worry about losing them. - Lynn | Pet parent
Lynn is 70 years old and her cat Birdie was her best friend. But Birdie passed away this year, leaving Lynn heartbroken. She has many Birdie’s videos stored on her iPhone, which are her source of comfort, and they mean so much to her.
The challenge
For Lynn, who’s older and not really into technology, it’s a challenge to keep her precious cat videos safe. She was a little worried that her iPhone might break and her data might disappear.
Lynn didn't fully understand cloud storage and didn't fully trust anything she couldn't see. She preferred to save her backups on physical DVDs so she could see and work with them. She wanted to save Birdie's videos to DVD, but she didn't know how.
The solution
After learning about Lynn's struggle, her son helped her find Cisdem DVD Burner - a simple and user-friendly burning tool requiring no technical expertise.
Lynn bought the software, stayed in touch with Cisdem support, Joey, who ultimately helped her successfully burn DVDs tailored to her preferences.
Joy invited Lynn to share her experience to help others facing similar challenges. Lynn readily agreed, and here are her steps.
Steps Lynn took to burn cat videos from iPhone to DVD
Step 1. Transfer iPhone videos to computer
I used a Windows 10 PC and transferred videos as follows:
- Connect iPhone to the PC with a USB cable.
- On iPhone, tap “Trust This Computer”.
- On PC, open “File Explorer” and find the iPhone. Also, create a folder locally to save videos.
- Open the DCIM folder. I've picked out 77 important cat videos (about 251 minutes total). I copied them to my computer.
Step 2. Install Cisdem DVD Burner and add videos
I downloaded the Windows version from the official website, clicked the .exe file and followed the prompts to complete the installation.
Launch the software and import videos to the "Source" window.
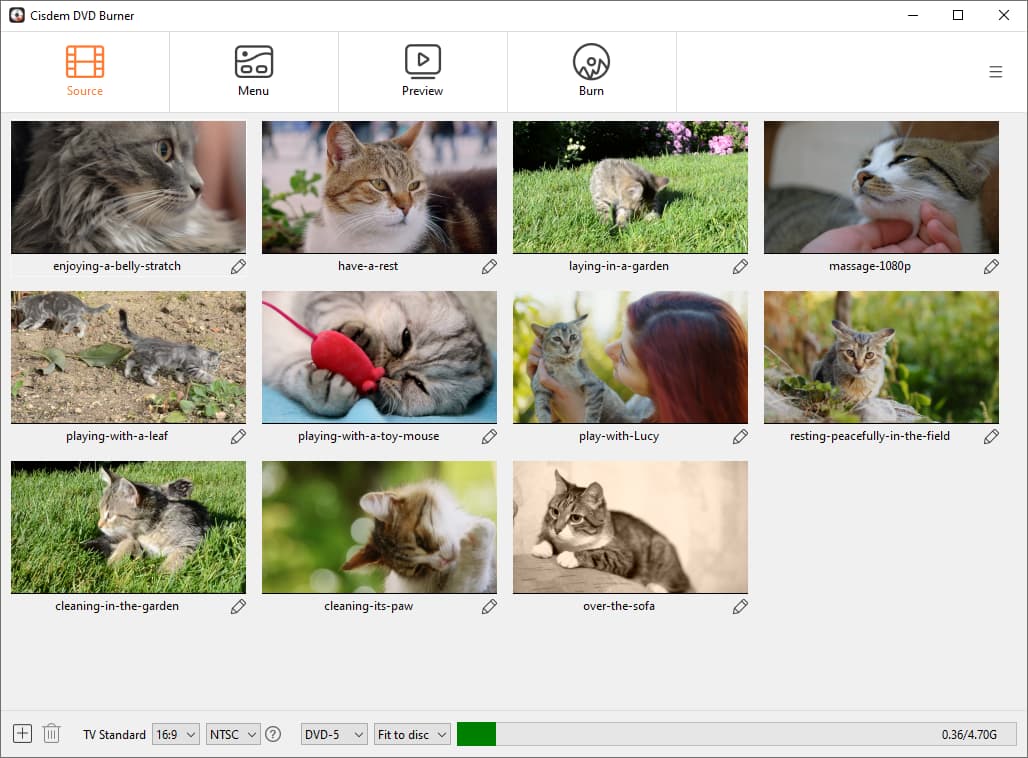
Step 3. Configure DVD parameters
In the lower part of the interface, choose from 6 quality levels.
For lots of videos, you need to figure out your burning plan first so you know how many to add at once. I have 77 videos totaling 251 minutes. Cisdem support suggested that I burn all iPhone videos to a single DVD-9 disc or to two DVD-5 discs in two passes using the "Fit to Disc" or "Normal" options.
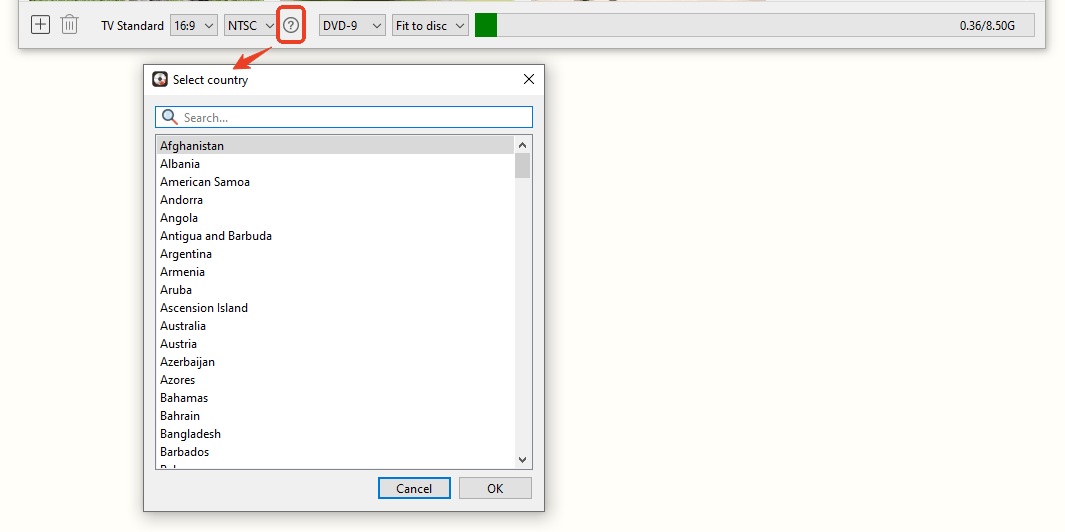
I selected “Fit to Disc” to save all videos to a DVD-9 disc. Also, I chose NTSC from TV standard. If you're unsure which to select, click the question mark icon on the interface and choose your country.
Note from Cisdem:
- If videos stay within the standard DVD’s capacity, "Fit to Disc" option produces better quality, while "Normal" is faster.
- 251-minute videos can be compressed onto a single DVD-5 with the "Fit to Disc" option, but avoid doing so as too much compression will degrade the video quality.
- You can back up your videos using multiple DVD-9s or DVD-5s with the "Best" option. While the video quality will be great, it will increase the cost and number of discs.
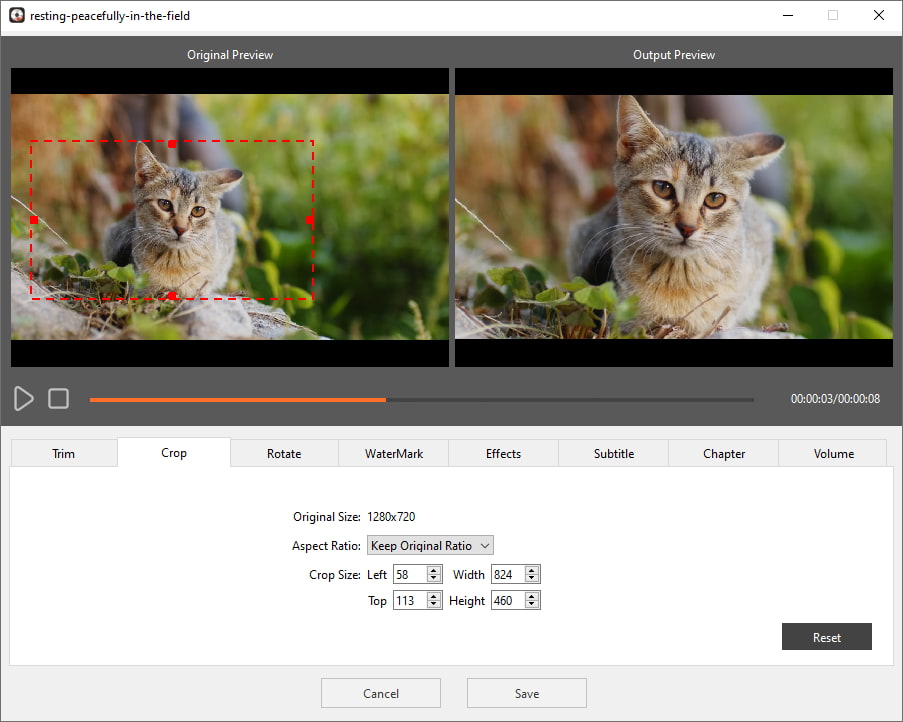
Step 4. Edit iPhone videos
Below each video is a pencil icon. Clicking it reveals 8 basic editing tools and a preview window showing changes in real time. I only made the following adjustments:
- Trim: Cut out unnecessary beginnings or ends of some videos, such as accidentally captured ground or shaking.
- Crop: Crop out unnecessary background distractions, such as the edges of captured furniture.
- Volume: Turn up the volume of some videos (because my hearing is not very good).
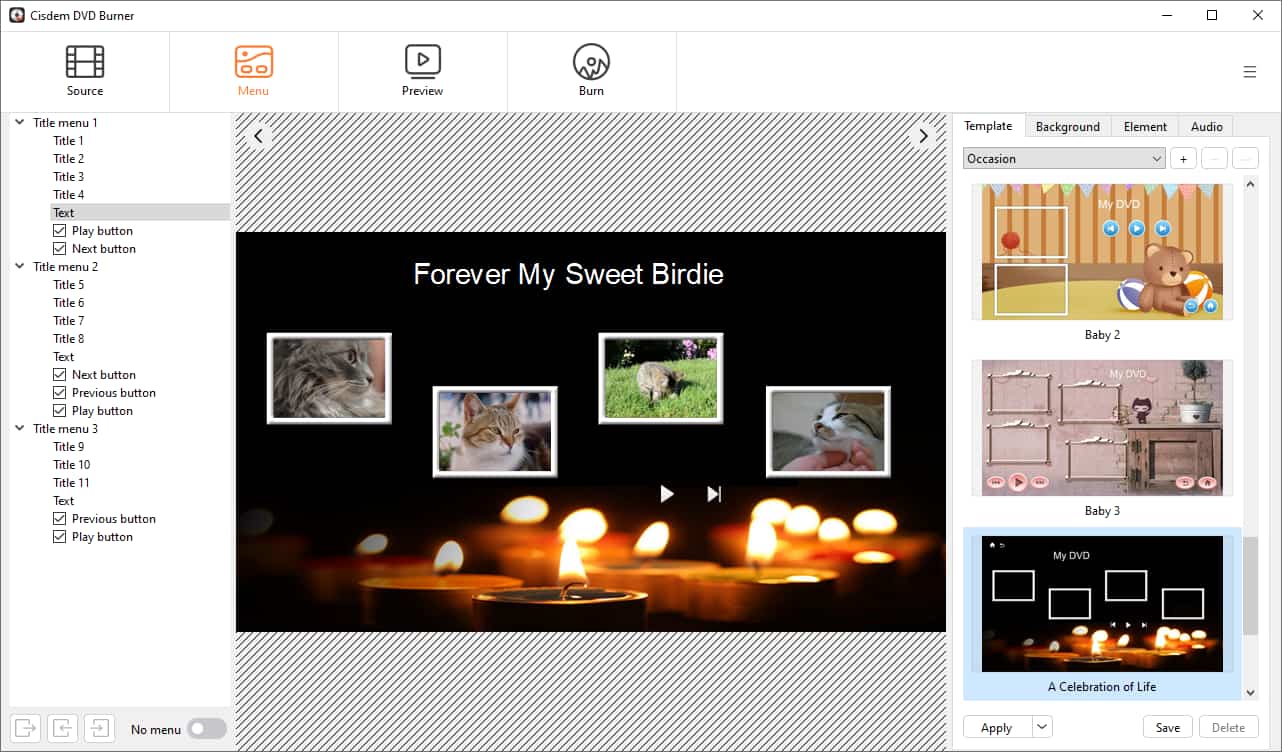
Step 5. Create DVD menu
Template: The software provides a library of templates, and I chose A Celebration of Life from Occasion.
Title: I clicked the text "My DVD" on the menu and changed it to "Forever My Sweet Birdie". I also adjusted its position, font, and size.
Background audio: I uploaded a soft, instrumental music.
Video thumbnail: I've updated the thumbnails for some videos. Go to the “Element” tab and click the video to edit its element. Click "Thumbnail" and then select any frame as the thumbnail.
Note: Cisdem DVD Burner allows you to upload background images, replace buttons, and add button/frame text. I had so many videos that I didn't edit them further.
Step 6. Preview and create a DVD
I previewed the DVD menu, checked that the background music volume was appropriate, and randomly played a few of my edited videos. Then, I entered the “Burn” interface.
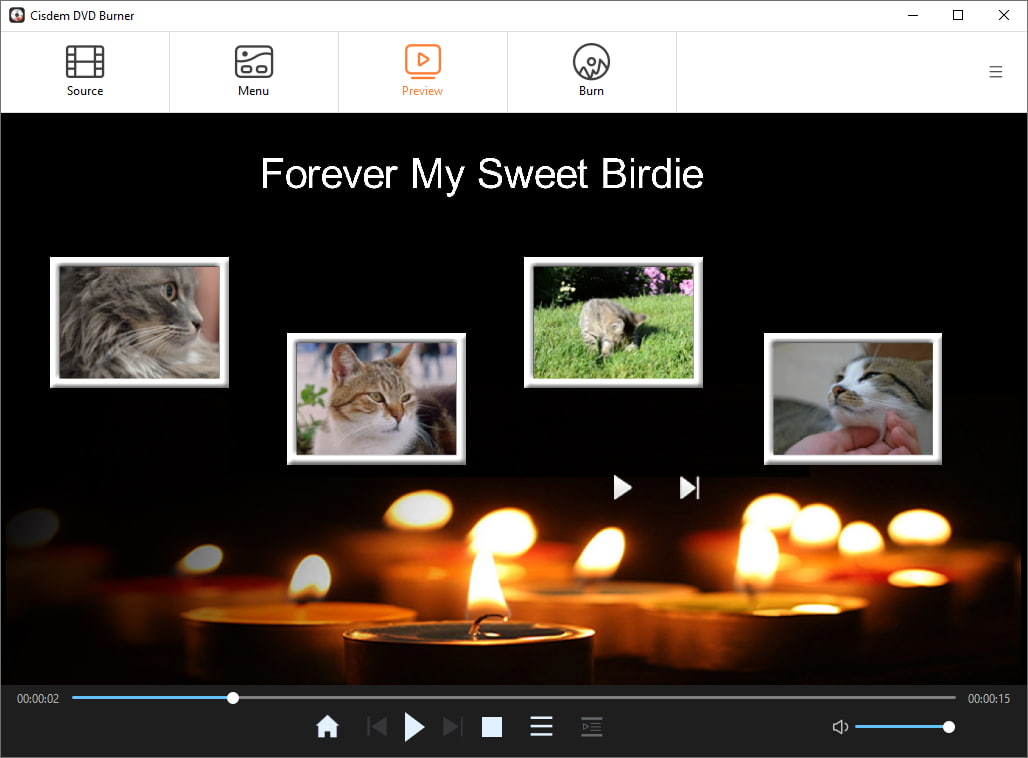
I inserted a brand-new blank DVD-9 disc into my computer's optical drive, kept the default burning settings, which perfectly suited my needs. Finally, clicked the “Burn” button.

FAQ
Yes, the app supports nearly all common video formats, including the HEVC/H.265 codec used by iPhone. No need for prior format conversion. Simply add the files directly for burning.
No, it's usually unnecessary. To avoid interfering with video playback, DVD background music is designed for the menu. Users won’t spend much time on the menu, so multiple tracks aren't required.
You can also burn your videos to a DVD folder or ISO as a backup. The best way is to export the project file so you can edit and burn it later with Cisdem DVD Burner.
Loved the article, share!

