


 VideoPaw
Best App to Record Twitch Live Streams


My epic gaming moments and funny interactions were lost due to Twitch's automatic deletion. I was frustrated until I used Cisdem VideoPaw to perfectly back up my recordings every time. It's incredibly helpful. - Carlton | Part-time game streamer
Carlton enjoys streaming games on Twitch in his spare time. He keeps a chill schedule - 1-3 times a week on Twitch Studio. Sometimes, he'll edit the best moments to share on TikTok.
The challenge
When Carlton tried to edit past VODs, he discovered most of them had been automatically deleted. It turns out Twitch doesn’t keep live streams forever. VODs are saved for 7 days for regular users, 14 days for affiliates, or 60 days for partners, Turbo, and Prime users.
It's not really appropriate to download his own stream after it ends. Twitch live streams usually last for several hours, and if he download it every time, he'll have to wait a long time. It would be easier if he could record while streaming.
Carlton won't consider using OBS for streaming and recording because, as an amateur streamer, he doesn't want to spend time learning such complex software.
The solution
Carlton came across recording feature of Cisdem VideoPaw while looking for a reliable way to save his streams. The program is intuitive and doesn’t take long to figure out. After recording two Twitch live streams last week, Carlton was quite satisfied with it.
To assist fellow part-time streamers, Carlton details his proven workflow below, enhanced with notes straight from Cisdem. You can follow it to easily capture your live or past broadcasts, or even others'.
How to record Twitch live streams locally
Step 1. Head to the Screen Recorder module
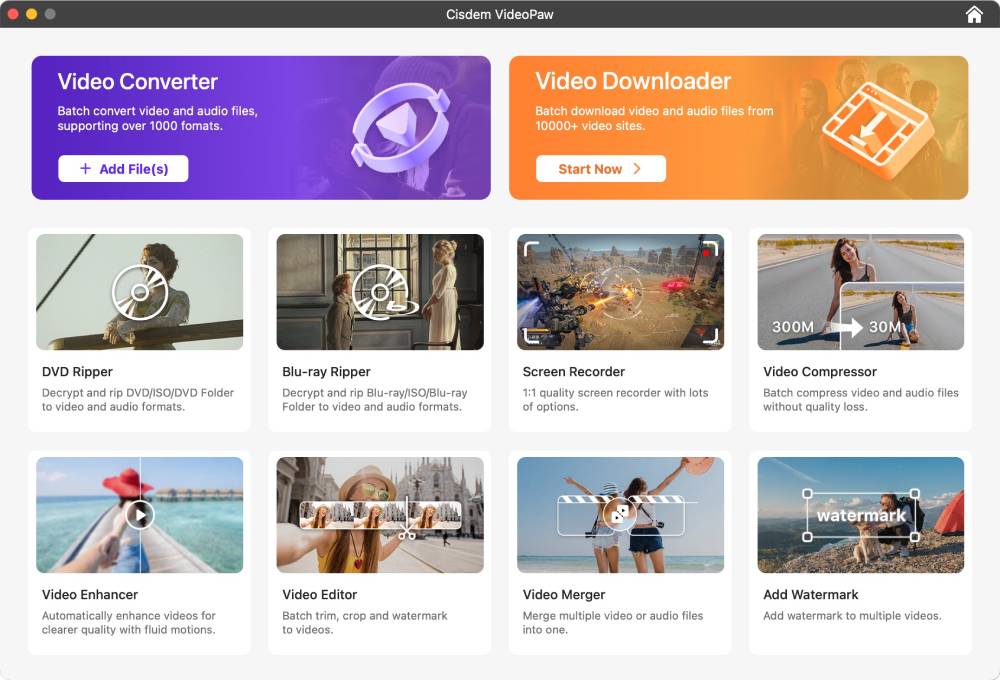
Launch Cisdem VideoPaw. You will see the main dashboard presents all available features in a grid-like layout.Find the card labeled Screen Recorder and click it to proceed.
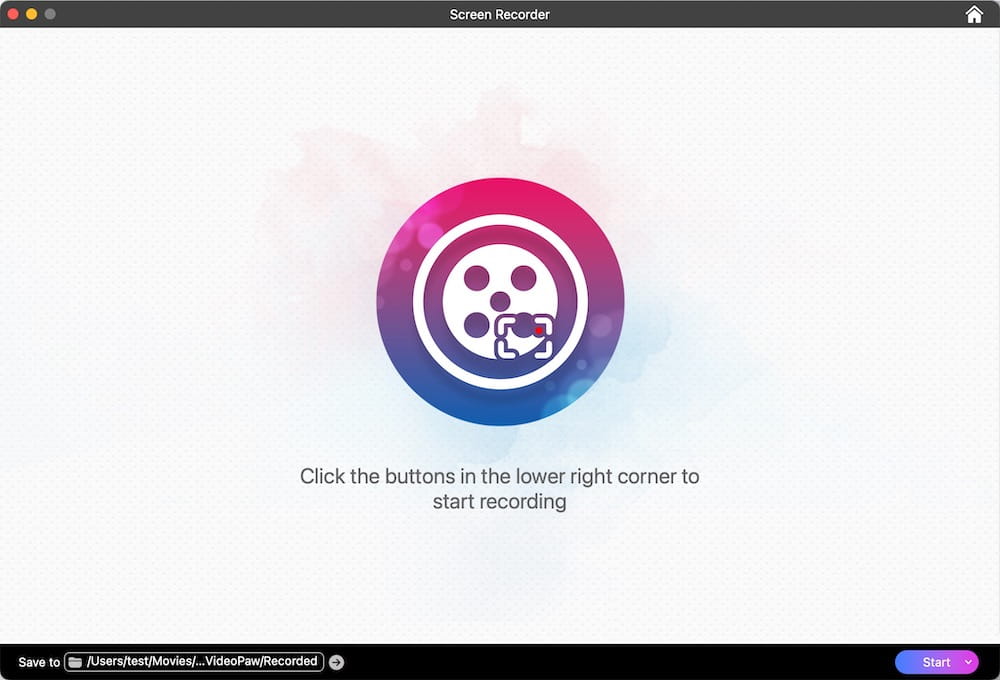
Step 2. Click the "Start" button in the lower left corner
Step 3. Configure a capture area
I opened the game window I wanted to record and dragged the selection box to precisely capture the footage. You can also click the "Custom" drop-down menu to select a specific frame dimensions.
By default, system audio can be recorded. To record your voice and appear in the picture-in-picture, turn on your microphone and camera manually. Since I used Twitch Studio for my microphone and webcam, I’ll keep both disabled in VideoPaw.
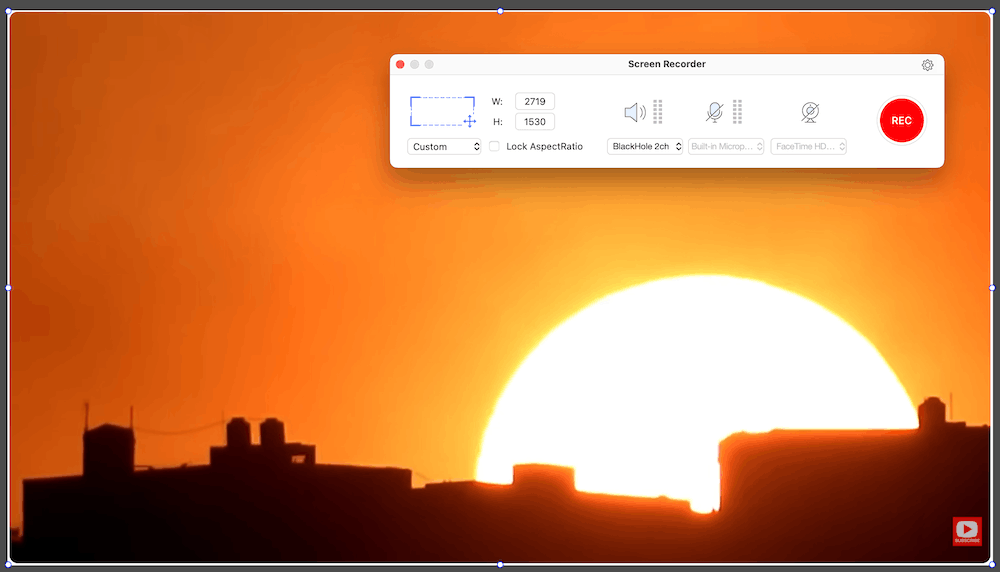
Tip from Cisdem:
Check the “Lock Aspect Ratio” option when you need a fixed frame shape, e.g. 16:9 for YouTube, 9:16 for TikTok. It keeps your recording area proportional and avoids accidental stretching.
Step 4. Set recording parameters
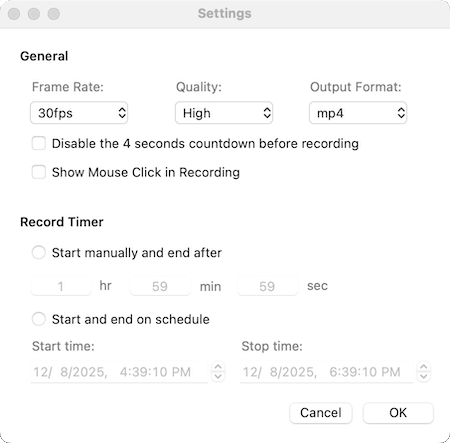
Click the gear icon in the upper right corner of the recording control panel to open "Settings". I set the Frame Rate to 30fps, the Quality to High, and the Output Format to mp4. I also check the “Show Mouse Click in Recording” box. Then click “OK”.
Tip from Cisdem:
- Control the exact recording length, even if you leave your computer, Cisdem VideoPaw will automatically stop recording after the set duration.
- Set a future schedule, then the software will automatically start and stop at your preset times, even when you’re away or busy.
Step 5. Start recording Twitch stream
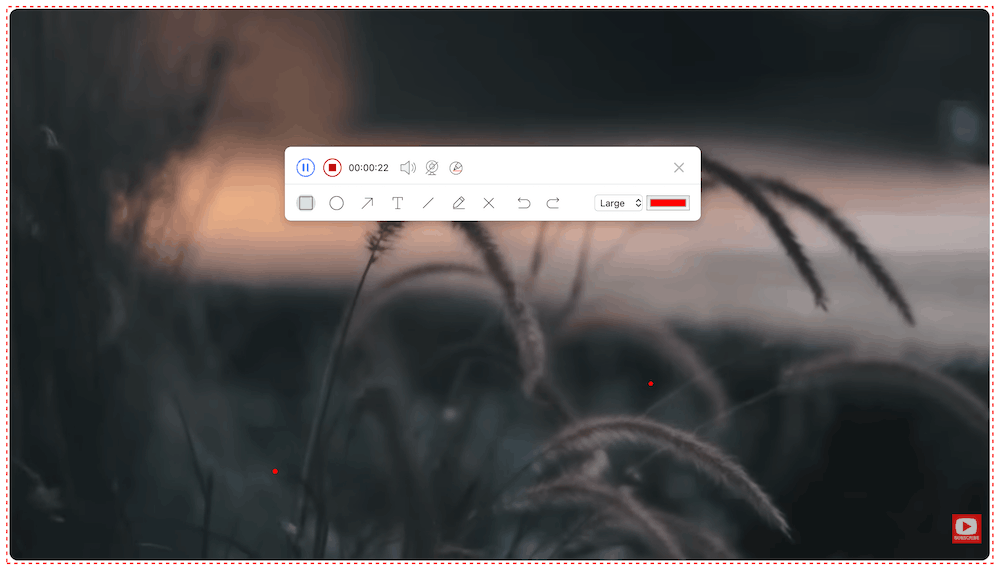
Click the red REC button to start capturing the gameplay. A minimal recording taskbar will appear on your screen. Click the annotation icon to show all tools. On the recording screen, you can add shapes, lines, texts, and drawings.
The app allows you to adjust the size and color of the annotation tools, undo and remove your creative materials. If the recording toolbar is getting in the way, close it. To bring it back:
- On Mac: Head to the menu bar at the top right, click the camera icon, and select "Drawing board".
- On Windows: Find it in the system tray at the bottom-right corner of your screen.
Note from Cisdem:
If it's your first time using the software, a system prompt will appear. Click "Open" to proceed to "System Preferences > Security & Privacy > Privacy", then allow Cisdem VideoPaw to record the contents of your screen.
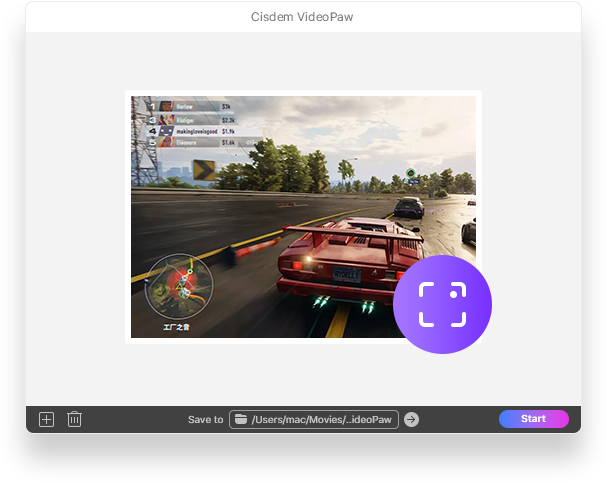
Step 6. Stop and preview
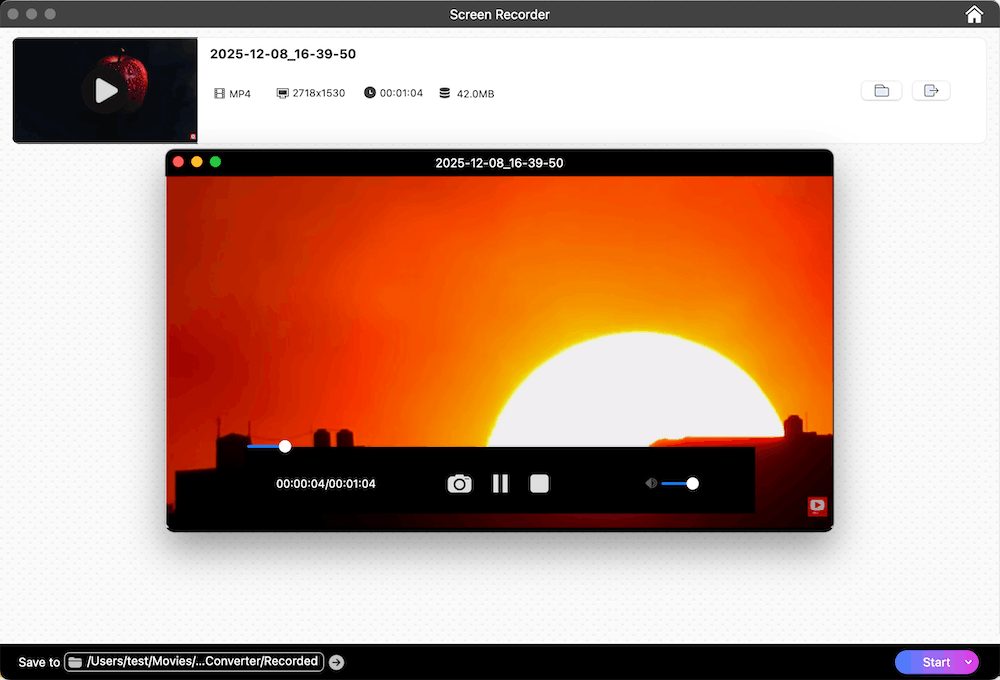
After the game stream ended, I immediately stopped recording. The file I had just recorded was then displayed in Screen Recorder interface. I clicked the play button to view the video, and both the video and audio quality were excellent.
Tip from Cisdem:
The software shows the file size of your recording. If it's too huge, click the send icon (near the folder), choose "Compress”, and the file will be opened in Video Compressor for you to reduce size without quality loss.
FAQ
1. Can't select recording area;2. Twitch Studio only works on Windows PC. While there was once a beta version for macOS, it's no longer supported;3. If Twitch Studio crashes during recording, the recorded content won’t be saved;4. Only capture your own streams on Twitch.
Yes, Cisdem VideoPaw lets you record webcam + microphone, system audio + microphone, system audio only, and microphone only.
No, there are usually technical limitations. For example, recording protected movies on Netflix and Disney+ might result in a black screen.
Loved the article, share!

