


 VideoPaw
Best App to Compress Video for Email


Video links in marketing emails are always being ignored. Embedding videos directly in the email would likely work better, but the file size limits on Gmail have always been such a pain. Cisdem VideoPaw provided the perfect solution with straightforward compression. - Patricia | Marketing manager
Patricia is responsible for marketing at a company. Last month, they was preparing to launch a brand new product. As usual, her team made a short product video and was about to send it out to all customers.
The challenge
Previously, Patricia would upload videos to YouTube and then include a link in the email. However, she found that customers hardly ever clicked on the video links in the emails, especially when using phones. So this time, Patricia wanted to embed the video directly into the email.
Gmail's 25MB limit made their 72MB product video impossible to embed. They tried converting it to a GIF, but it looked terrible. Then they tried aggressively trimming it, but it was still over the limit, and the product story became meaningless.
The solution
When the marketing team ran into trouble embedding videos in emails, Patricia learned about Cisdem VideoPaw's professional video processing capabilities through industry forums. The trial showed them how seamlessly the software preserves video quality while controlling size. So they purchased the software without hesitation.
Drawing from her success, Patricia created this guide to help colleagues overcome similar hurdles. The following steps from her process, structured by Cisdem's editor, have proven effective for shrinking large videos to smaller size without lossing quality.
Steps Patricia Took to compress the product video to under 25MB
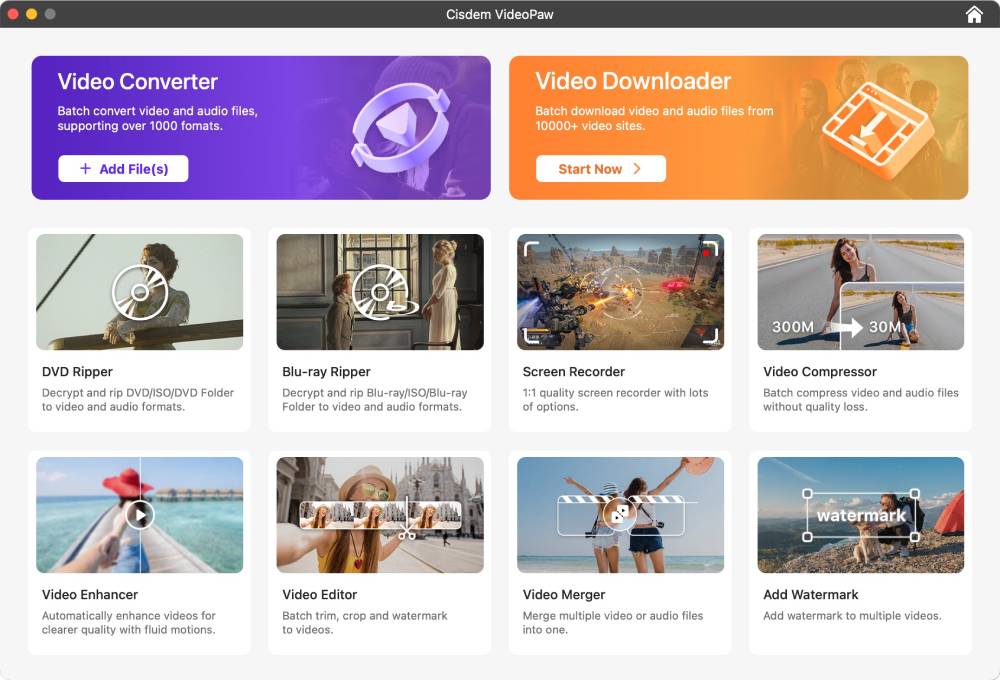
Step 1. Navigate to Video Compressor module
Download and install Cisdem VideoPaw. Once launched, I saw the main dashboard featuring various tool cards. Locate and select the Video Compressor card to enter the dedicated compression interface.
Step 2. Import the video to be compressed
I simply dragged and dropped the product video into the interface. Alternatively, you can click the "+" icon in the lower left corner and add it from a folder on your computer.
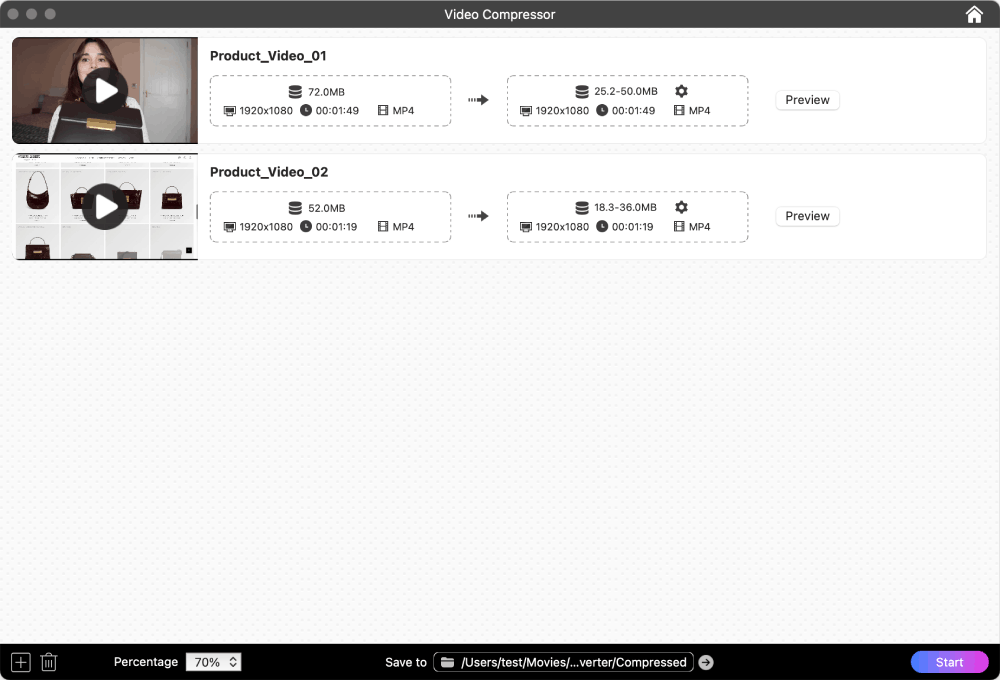
Once the video is imported, you'll be able to see its original size, resolution, duration, and format in the list. The baisc info of our input video is: 72MB, 1980*1080p, 1 minute and 49 seconds, MP4 format.
Tip from Cisdem:
- Cisdem VideoPaw supports batch compression. You can add multiple video files for processing at once.
- To delete a added video, right-click it and select “Delete” or click the trash can icon in the bottom-left corner.
- You can view the original video before compression. Right-click the video and select “Play” or click the play button on its thumbnail.
Step 3. Adjust compression settings
At the bottom of the interface, you can quickly select a compression level like 90%, 80%, and 20% (8 presets). Choosing 90% will preserve the best quality. Choosing 20% will offer the maximum compression.
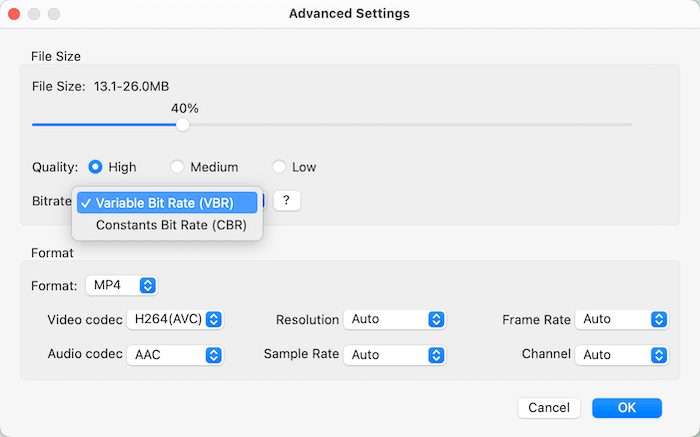
For fine-tuned percentage control beyond these presets, head to the "Advanced Settings" window by clicking the gear icon. My set the compression to 40%, selected “High” for the quality, chose VBR for the bitrate. I kept the format and all its parameters unchanged.
Note:
After setting it up, I was given an estimated file size of 13.1-26MB - not a fixed value, as VBR adjusts the bitrate depending on how complex the video is.
I needed to keep the video under 25MB. I wasn't certain our settings would achieve this, but given the file wasn't large, I could compress one more time to ensure it met the requirement.
I could have chosen CBR if I wanted to quickly confirm the output size.
Note from Cisdem:
- The three quality levels have minimal impact on video size, so we recommend users choose "High".
- Prioritize VBR, as it delivers superior image quality for the same file size. Only consider CBR in specific scenarios where the final file size must be strictly precise.
- Unless you have specific requirements, it's best not to change the format settings, as they have little impact on the video size anyway. Retaining the original options ensures the best quality.
Step 4. Preview the output video
Click the "Preview" button on the compressor's main interface. Check how the product video looks after compression. I’m satisfied with the result.

Note from Cisdem:
Only a 20-second preview is provided to quickly deliver the compression results. 20 seconds is enough to judge if the compression does the job.
Step 5. Compress product video
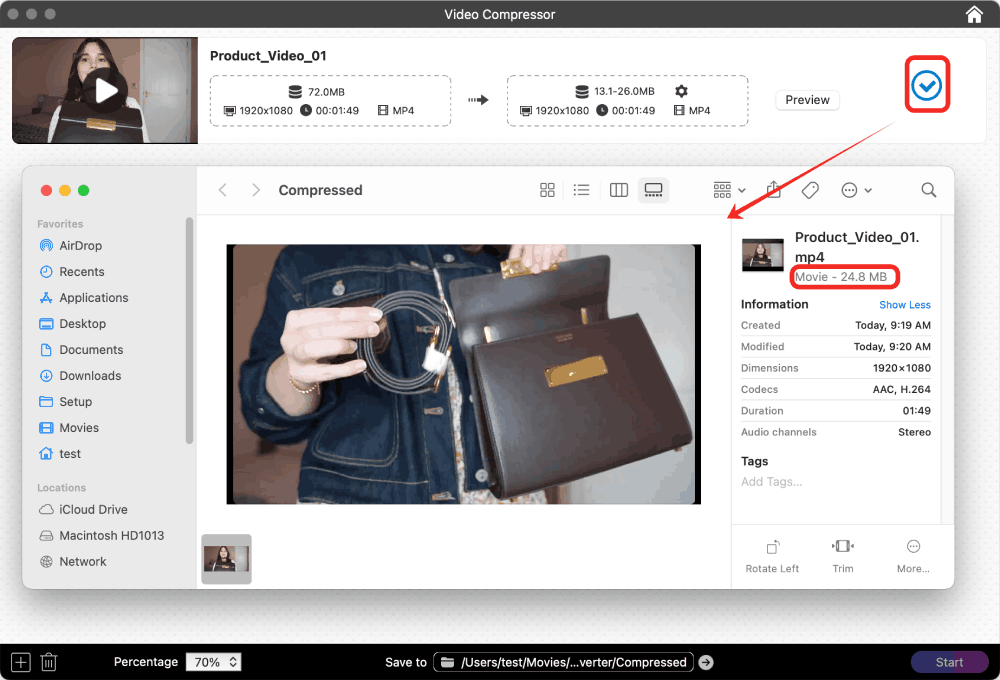
Next to "Save to", select a folder to save the compressed video, then click “Start”. The compression was completed with fast speed. I clicked the blue checkmark icon to quickly locate the file and checked its compressed size - 24.8MB. Perfect!
FAQ
Yes, there’s no resolution limit, so even 8K videos are supported, and you’re free to add videos with any format, codec, size, or whatever else.
If the output format is MP4 or MKV, you can select H.264 or H.265 in the video codec. The former is more compatible with older devices. The latter is smaller with the same quality, but the compression process is slower, especially with large files.
Feel free to compress 1GB videos. Tests show that Cisdem VideoPaw can reduce videos to under 200MB and still keep great picture quality. However, don’t compress 1GB to less than 25MB, which will seriously degrade the video.
Loved the article, share!

