


 DVD Burner
Best App to Burn VHS to DVD


I finally converted grandma's videotapes to DVDs. The process was not difficult. I used Cisdem DVD Burner to quickly burn them to discs. Now she can watch them on TV whenever she wants. That's nice. - Mayra | Granddaughter
Mayra's grandma, nearly 80, lives alone in Florida. Her health isn’t what it used to be. She stays at home most of the time, occasionally watching old VHS videos to pass the time. She enjoys looking back on the past.
The challenge
Grandma‘s VHS tapes have been stored for over 30 years, and many of them have gotten damp. She worries about losing precious home videos one day. And most smart TVs don't have the old VCR port, so watching VHS required a special adapter, which was a hassle.
Mayra decided to help grandma convert the videotapes to DVDs, which was the best way for grandma. But then, another problem came up. DVD burning software only supports burning video files. How could she convert VHS tapes into videos?
The solution
On Reddit, someone suggested Mayra use OBS to record videos from VHS tapes into digital files, and then use Cisdem DVD Burner to burn the videos to DVDs.
It's her first time using these two software programs. Even though the process was a bit of trouble, the results were good. Mayra was happy to share her experience so others could learn. The following steps are provided by Mayra.
Steps Mayra took to convert VHS tapes to DVDs
Step 1. Record VHS tapes to digital videos
Connect the equipment and record the video. You can try:
- Connect the VCR to video capture device via RCA cables.
- Connect the video capture device to your computer via its USB port.
- Launch OBS app. In the "Sources" panel, click the "+" button and add a "Video Capture Device".
- Choose capture device from the list. Then, start recording each tape as a separate MP4 file in OBS.
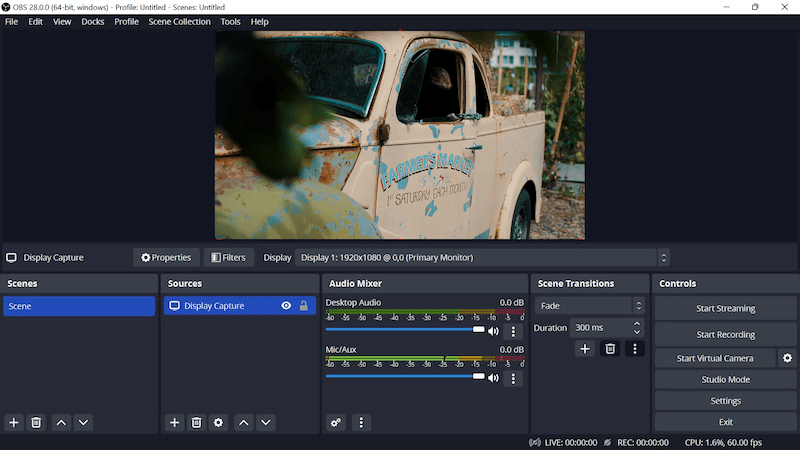
Note from Cisdem:
If the video shows in black & white and has flickering, it’s likely due to the TV standard format mismatch. In OBS’s Video Capture Device settings, select PAL or NTSC matching your VHS tape.
Step 2. Add recorded VHS videos to Cisdem DVD Burner
Download and install the program from the official website. Drag & drop recorded MP4 videos to the “Source” interface. The software allows you to add videos in any format, not just MP4.

Step 3. Configure DVD parameters
There's a disc capacity bar at the bottom of the software. Choose DVD-5, DVD-9, or DVD-10, then batch add multiple videos until the bar turns red.
Since Grandma lives in Florida, NTSC is the appropriate TV standard setting for her.

Note from Cisdem:
Even if your video size slightly exceeds the normal disc capacity, as long as it's within 15%, "Fit to Disc" option will intelligently re-encode and compress all videos to fit on a single disc. The quality will be good, too. Compression like that doesn’t usually make much visual difference on VHS and other SD sources.
Step 4. Edit the videos if necessary
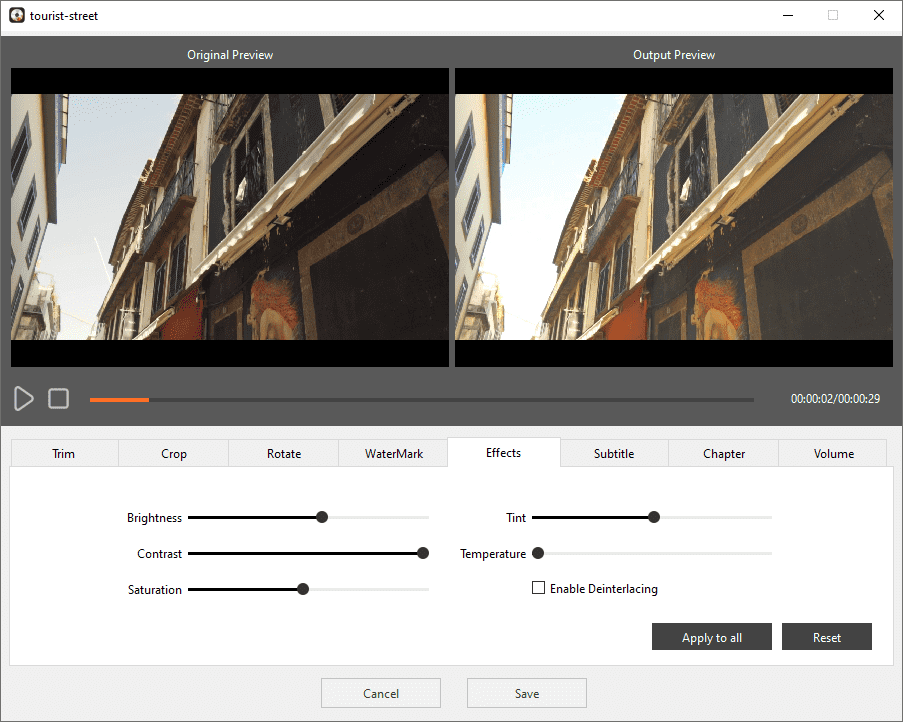
Below each video thumbnail is a brush-like icon. Clicking it allows you to edit the video using 8 different tools. I made the following edits:
- Trim: Some videos start with shaky shots of operating equipment. I dragged the slider to set a new starting point.
- Crop: I trimmed some videos to remove black borders or distorted edges.
- Effects: I adjusted the brightness, contrast, and saturation of some videos to improve the dull picture quality of old VHS tapes.
- Volume: My grandma has trouble hearing, so I turned up the volume on videos.
Note from Cisdem:
Old VHS tapes have a 4:3 aspect ratio. Under the "Crop" tab, be sure to keep the original ratio. Don't stretch to 16:9, as it will distort the people in the frame.
Step 5. Design DVD menu
In the “Menu” interface, choose a template and customize it.
I didn't make many adjustments - Grandma wanted it simple.
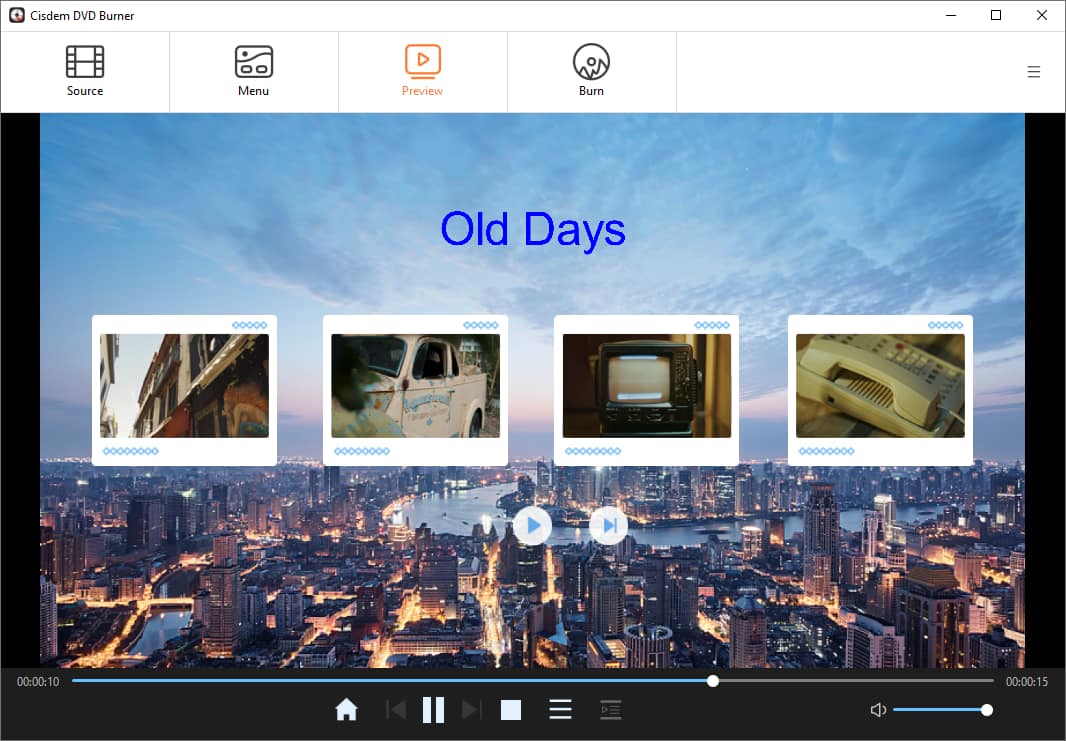
- Chose Classic 1 as the template.
- Changed the DVD title to “Old Days” and added text labels to each video button. I used a large, clear font.
- Imported nostalgic background music.

Step 6. Preview and burn VHS
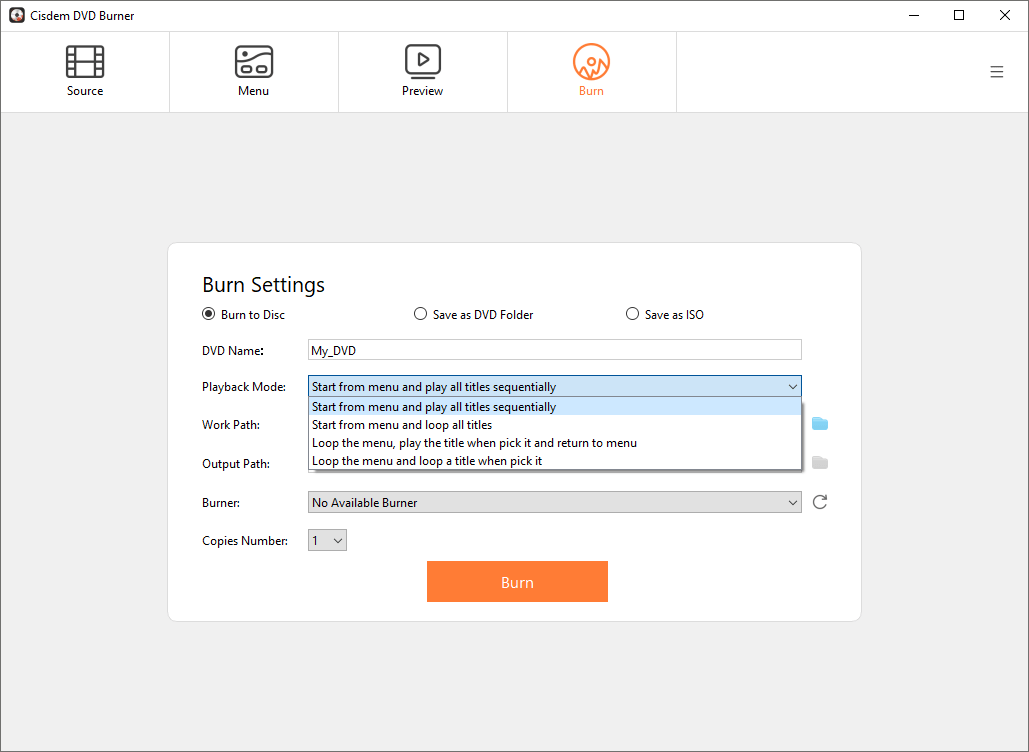
In the "Preview" module, navigate through the simulated DVD player interface to verify that the menu navigation and playback sequence are correct. Then, go to the burn settings.
I didn't need to make any changes and could just start burning. "Start from menu and play all titles sequentially" is the most user-friendly playback mode for my grandma.
VHS recording is a bit more involved, as you need to prepare equipment, cables, and recoding software. Once you have the video files, creating a DVD is quite simple. Be sure to buy the right blank DVDs, and I recommend the Verbatim brand.
FAQ
It's normal. Old VHS tapes have a 4:3 aspect ratio, while modern TVs use 16:9. Just maintain the original aspect ratio when burning. The black bars are there to prevent distortion.
Yes, but any old tapes such as VHS, VHS-C, 8mm, Hi8, etc. will need to be recorded to digital video and then burned to DVD using Cisdem DVD burner.
No. The process simply reads the video from the VHS tape, playing the tape as normal, while the computer records the output signal. It won't damage the original tape.
Loved the article, share!

