


I deleted all photos of my sons in my iCloud, thinking they are saved locally in my Mac. However, they have disappeared from my Mac totally. Tried to find a solution from Apple Discussion, but the threads were posted long ago and closed. As my patience faded, I saw Cisdem Data Recovery via an advertisement on a tech newsletter I’ve subscribed to. Really a right timing to try it, especially when I found the iCloud recovery feature on its official website. And my experience proved it to be a solution, for recovering files from iCloud backup, also recovering data that you’ve deleted in iCloud. - Charles | A Father of 2 Sons
Charles, who is the father of a 7-year-old boy and a 5-year-old boy, uses iCloud Drive and Photos to store all his photos, making sure not a single valuable moment of his boys is ever lost.
Challenge of recovering deleted photos from iCloud
It is easy to recover deleted photos from iCloud, if the photos are deleted in the past 30 days, since they are just moved to Recently Deleted folder. If after 30 days, the files will be automatically purged from Apple’s servers to save storage space, the photos are permanently deleted. In this case, you are nor allowed to access Apple’s server nor put back the files even with a professional data recovery program, unless you once have a local backup of the iCloud photos on your Mac, or from other external storage devices.
Charles felt relieved to try Cisdem Data Recovery, it seemed that Cisdem offered the solution for either of the case.
Solution: Using Cisdem Data Recovery
Finding no help from Apple Discussion, Charles was out of patience. Just then, he switched to his email to reply to a few work messages he'd neglected, and saw a sponsored ad for Cisdem Data Recovery in one of those subscribed tech newsletters. He clicked through, realized that it might be the solution. He tried and recovered with success.
Charles felt lucky to know Cisdem Data Recovery and get back his iCloud photos, so easily. He knew there were iCloud users having the same issue and didn’t know how to handle. Therefore, he shared his steps as follows to recover deleted photos from iCloud using Cisdem. For the reason that the process of recovering deleted photos from iCloud within 30 days is different from that of after 30 days, Cisdem revises and organizes the steps for both situations.
Steps to Restore Deleted Photos from iCloud within 30 Days on Mac
Step 1. Download and install the app.
I clicked through the link https://www.cisdem.com/data-recovery-mac.html, then downloaded the dmg installer to my Mac. After double clicking on the dmg file, it instructed me to drag the icon to Applications folder to install.
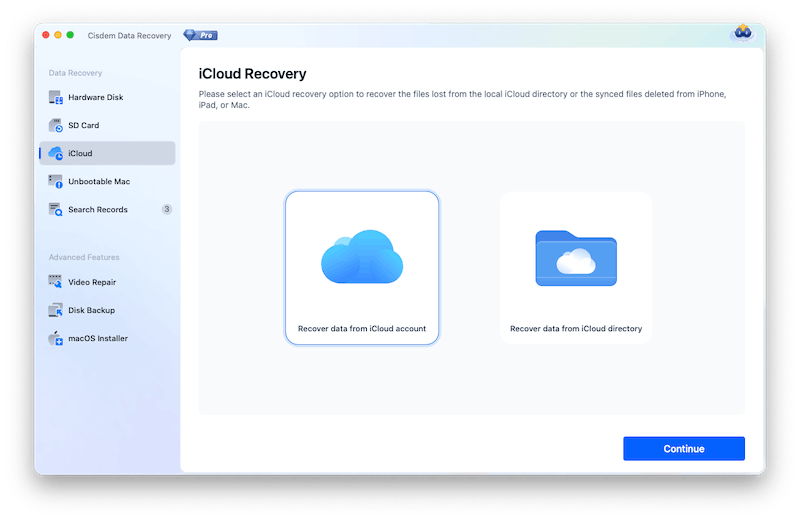
Step 2. Choose an iCloud recovery mode.
I went to iCloud, chose to recover data from my iCloud account.
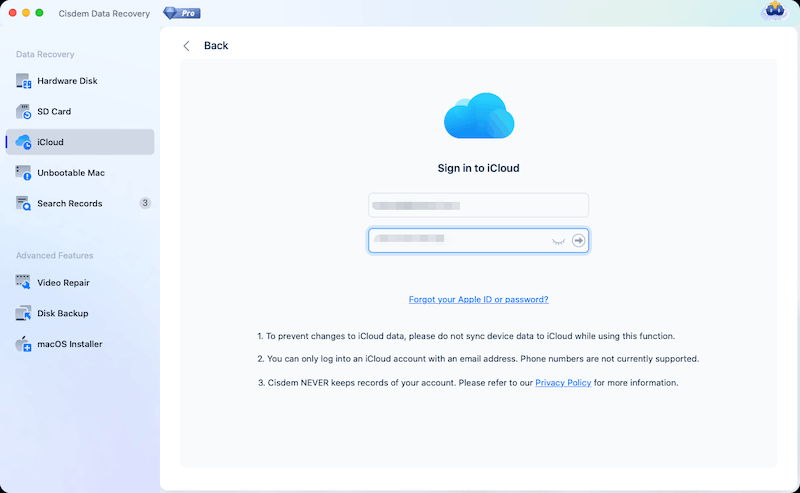
Step 3. Sign into iCloud account.
I entered my user name and password into the account fields, then logged into my iCloud account.
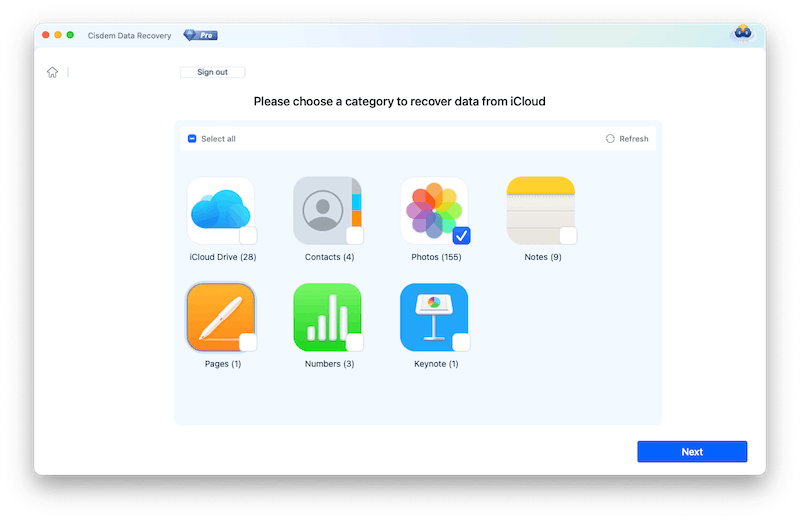
Step 4. Scan iCloud photos.
Then I selected Photos category and clicked Next to scan all my iCloud photos.
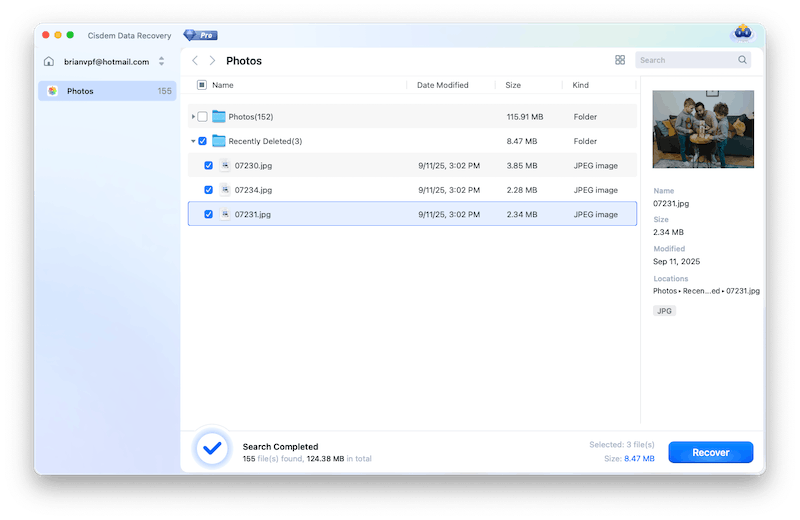
Step 5. Find and preview the iCloud photos.
I went to the Recently Deleted folder and preview the photos to make sure they were the wanted ones.

Step 6. Recover the iCloud photos.
I selected all the photos and saved them to a safe folder.
Step 7. Upload the photos to iCloud again.
Finally, I uploaded the photos to my iCloud Photos again, and all the photos of my sons appeared as expected.

Steps to Restore Deleted Photos from iCloud after 30 Days on Mac
If you once backed up the iCloud photos on your Mac, or to an external hard drive, even though you’ve deleted them later, as long as they are not overwritten, it is still possible to recover.
Step 1. Download and install the app.
I clicked through the link https://www.cisdem.com/data-recovery-mac.html, then downloaded the dmg installer to my Mac. After double clicking on the dmg file, it instructed me to drag the icon to Applications folder to install.
Step 2. Choose the hard drive.
I once had a local backup on my Mac for the deleted iCloud photos, so I chose this internal drive, then clicked Search for lost data to scan.
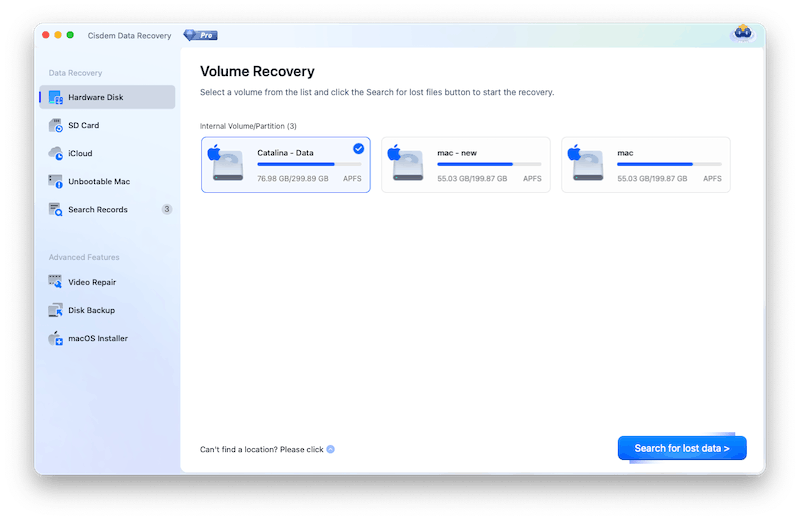
Note from Cisdem:
There are many files on the selected drive, to speed up scanning and recovering, we can select Photos type to scan only.

Step 3. Locate the files on the formatted USB drive.
Once the scanning started, it found a lot of photos. I clicked on Type > Pictures, by scrolling down and previewing the photos, I quickly found some of the deleted photos. And I could double click on the photo to view in full size.

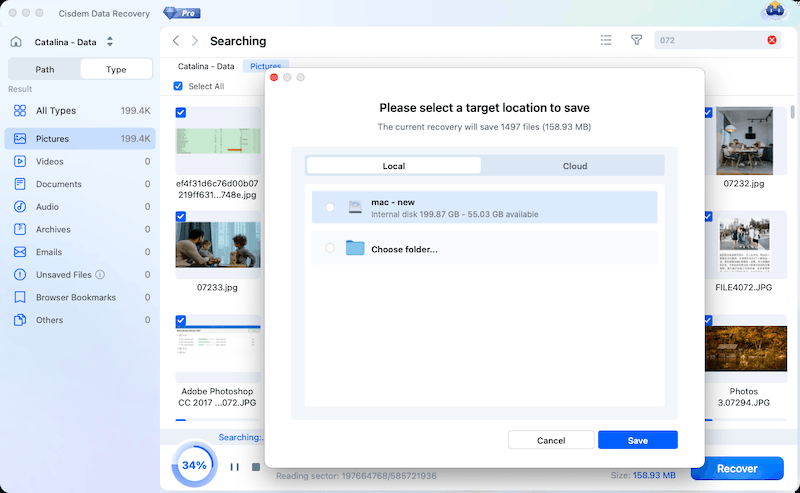
Step 4. Select iCloud photos to recover.
Then I selected all the photos that I want to recover, and click Recover button to save the photos to my Mac first.
Step 5. Upload the photos to iCloud.
Logged into my iCloud account in Safari, then I uploaded the photos back to my iCloud Photos again. All my photos were back.
FAQ
Yes. iCloud keeps recently deleted files in a special folder for 30 days. After that, they are permanently deleted from iCloud, you can only recover them when you have or once have a backup on a storage device.
It is possible. Either via a backup from some place else, or via data recovery programs like Cisdem to restore from a drive once backed up the files, even though they’ve been deleted. As long as the are not overwritten, it is possible to recover.
All kinds of data you’ve stored in iCloud Drive, contacts, photos, notes, Pages document, Numbers sheet, Keynote slide.
Loved the article, share!

