


 VideoPaw
Best App to Upscale 1080p Video to 4K


I felt powerless against YouTube's compression. With Cisdem VideoPaw, I intelligently upscaled my 1080p work to 4K. The AI adds realistic detail, and YouTube rewards it with superior VP9 encoding. I can finally create without worrying about upload quality. - Timothy | Content Creator
Timothy is a new YouTube creator focused on tech review videos. He would upload the completed YouTube videos to his personal channel in 1080p to gain traffic.
The challenge
Timothy noticed that the 1080p videos he uploaded to YouTube had lost quality. According to Reddit experts, YouTube will compress uploaded videos - 1080p videos end up with lower bitrates and less efficient AVC codec, while 1440p and above get much higher bitrates along with more advanced VP9 or AV1 codec.
Much of Timothy’s content involves software reviews, which relies on screen recording. Recording natively in 4K is not a good idea for him, since his monitor is only 1080p, it wouldn't add true detail, just bigger files and higher load on CPU/GPU.
The solution
Timothy found a win-win solution: upgrading 1080p videos to 4K using Cisdem VideoPaw - not only improved the video resolution, but also the quality. Moreover, he often needs to work with videos, and the software can help him record screens, convert, and compress videos as well.
Compression of 1080p video on YouTube used to be a real headache for Timothy. He has now found a workable solution and decided to share it in the hope of helping other creators to upgrade videos to 4K with AI. The following is Timothy's video upscaling process and technical notes from Cisdem for your reference.
Steps Timothy took to upscale 1080p to 4K for better YouTube quality
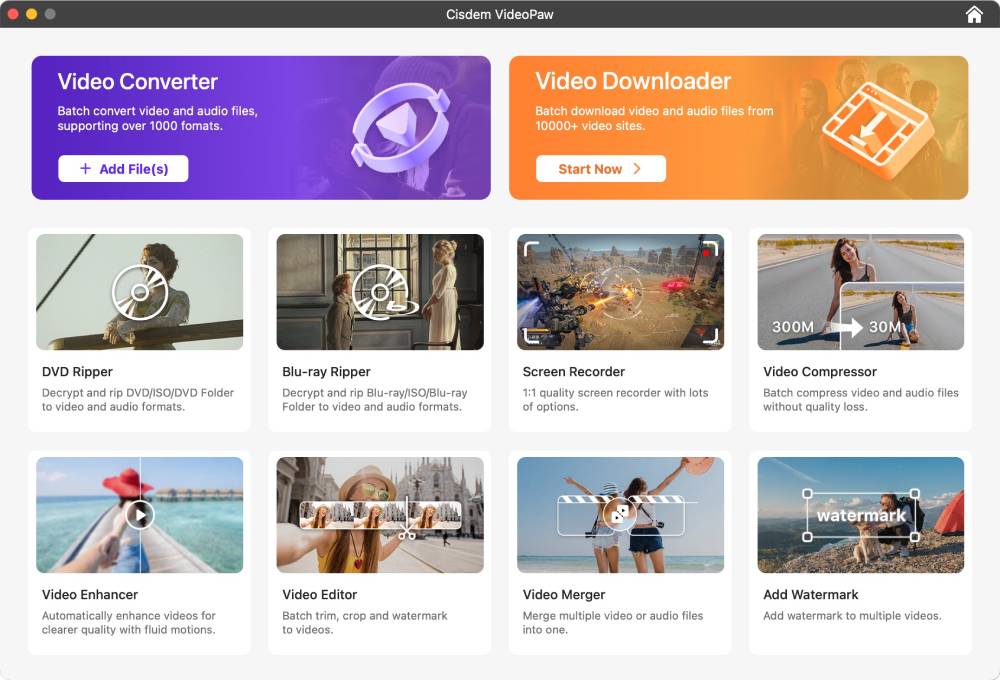
Step 1. Launch Cisdem VideoPaw and choose Video Enhancer
Open the software and locate the Video Enhancer feature on the home screen. Click it from the available tools list to get started.
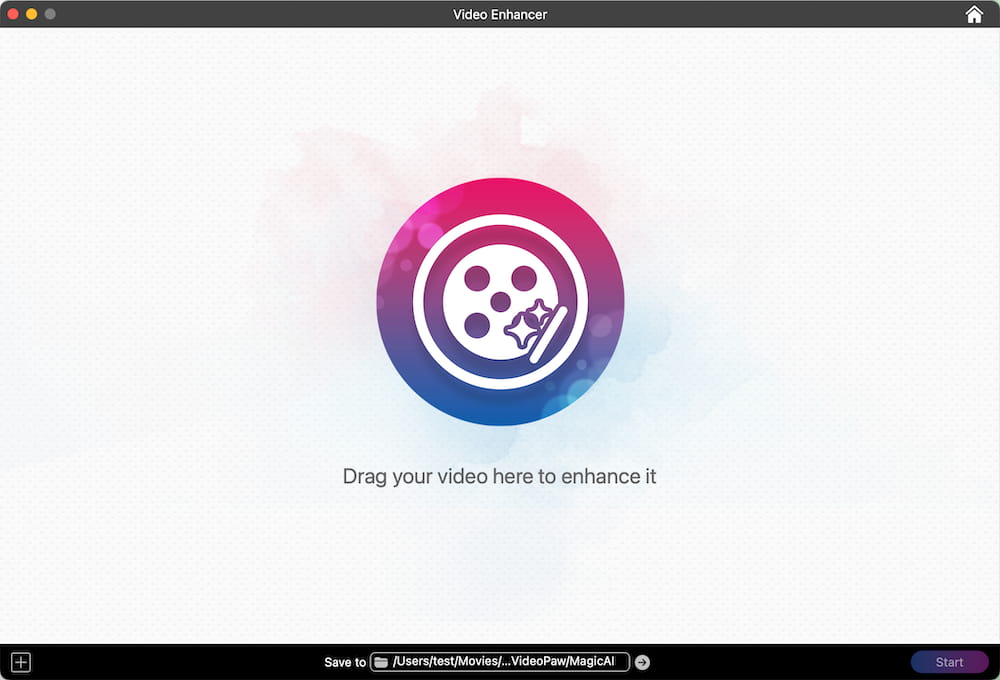
Step 2. Import 1080p video
I dragged the video I wanted to optimize directly into the Video Enhancer interface. There's a plus icon in the bottom left corner and you can also add a video by clicking it.
Note from Cisdem:
- You can add any video, no format restrictions.
- If you've added the wrong video, just drag and drop the correct one onto the interface to replace it.
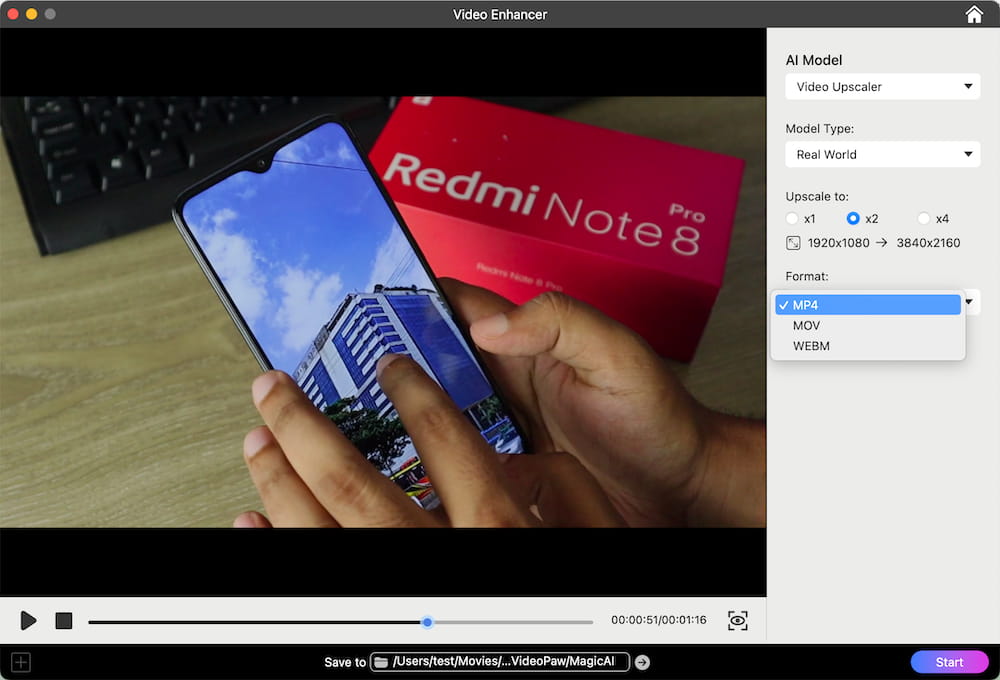
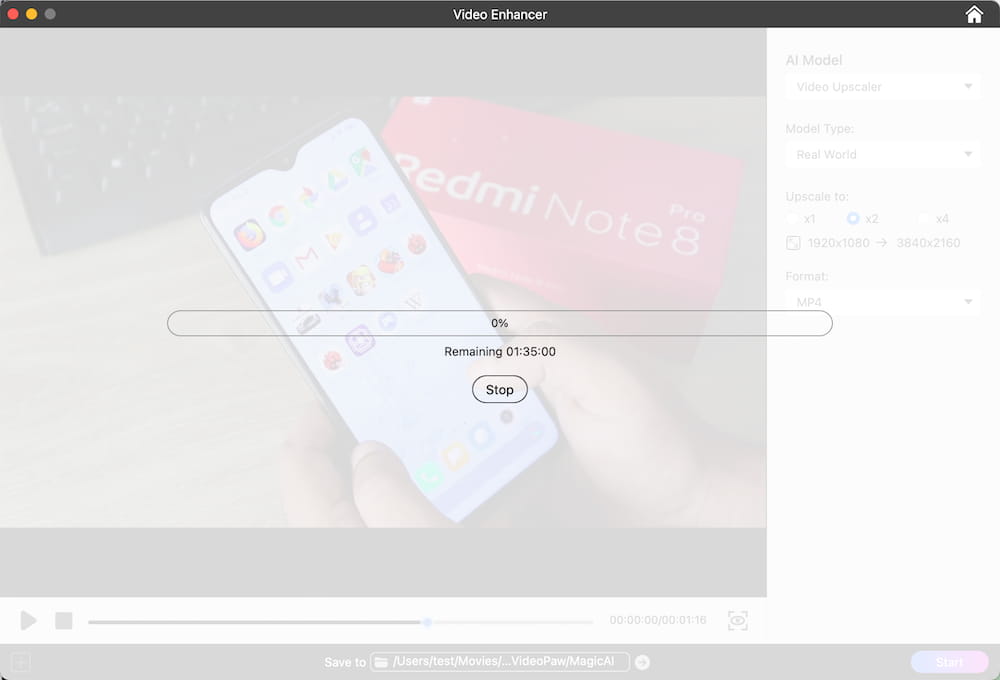
Step 3. Configure AI enhancement settings
I kept all the default settings in the right panel: set Video Upscaler as the AI Model, Real World as the Model Type, upscale to x2, and the output format as MP4. They matched my needs perfectly, so no adjustments were necessary.
I’d suggest you go with MP4 as well. It's the most popular video format, compatible with almost any device and platform, and the file size is relatively small. But if you:
- Need to maintain high quality for re-editing or use on Mac and iOS, choose MOV.
- Prioritize smaller file size or web embedding, choose WEBM.
Note from Cisdem:
- The x2 option is designed to optimize the conversion from 1080p to 4K. But you can’t choose x4 option for 1080p video, as Cisdem VideoPaw doesn’t allow upscaling video to 8K or higher resolutions.
- For animated or cartoon-style videos, select “Speed-oriented Anime” model type to get a better enhancement result.
- If the only goal is noise reduction, choose the Video Noise Removal in the AI Model section. This feature will remove grain, noise, and random artifacts from the video.
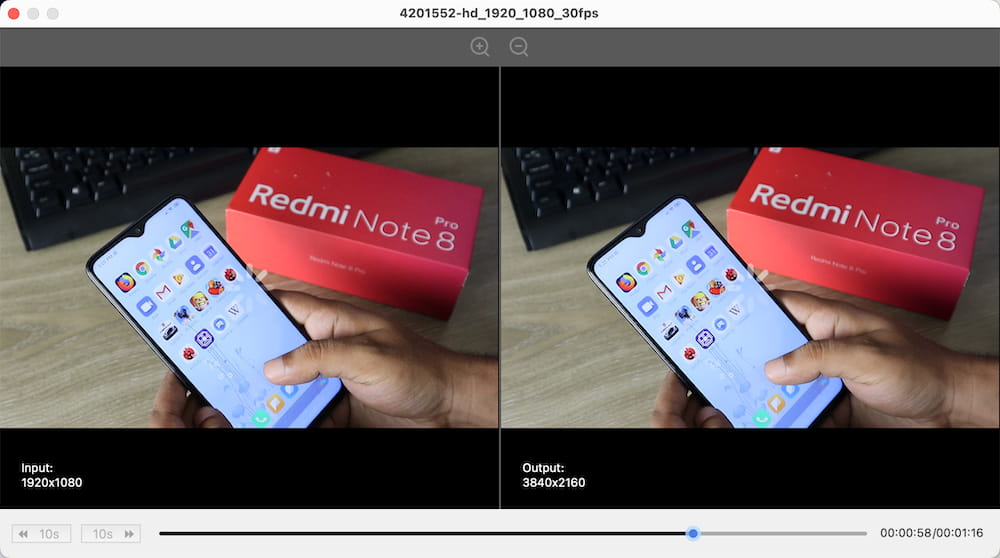
Step 4. Preview before upscaling
Click the eye-like icon to enter the preview panel. In a little while, Cisdem VideoPaw will capture the center frame of the video for you to compare before and after.
I can click on any clip to preview it, but it’ll take a moment to load each time. I can also zoom in and drag to explore the details.
Step 5. Start the enhancement process
Click the "Start" button. The progress bar will show the remaining time. Processing time depends on video length and your system's performance.
After more than an hour, the upsampling ended, and I clicked "Show in Finder" to immediately find the enhanced video. I played the video and checked if the resolution was 4K. Then, I uploaded the 4K video to my channel. YouTube encoded my video with VP9, and the video is crystal clear.
Note from Cisdem:
- Users who haven't purchased it yet can use Cisdem VideoPaw to enhance the first 20 seconds of their videos for free.
- Don’t stop the enhancement process lightly. If you do, you’ll need to restart from scratch.
FAQ
It depends. Simply stretching the video to 4K might actually worsen the image quality. To improve clarity, AI-driven enhancement is required. So, use Cisdem’s video enhancement rather than the conversion tool.
YouTube also encodes 1440p videos with VP9, but Cisdem VideoPaw can't upscale 1080p to 1440p. It only offers x2 and x4 enhancements unless your video is 720p or you just convert the video to 1440p in the conversion module without AI.
Yes, AI upscaling is kinder to anime than to real-world footage. In animated videos, the lines and color blocks are more defined and consistent. AI can handle them more easily, giving your exports that extra crispness without noticeable flaws.
Loved the article, share!

