


Duplicate Finder
Best Apple Music Duplicate Remover


Being a DJ means I’m always digging through my library for the right tracks. I was getting tired of all the duplicate songs cluttering my library. I tried out Cisdem Duplicate Finder to clean up all exact duplicates, and wow, what a difference! Now I can find what I need way faster and spend more time just having fun! - DJ Neon | DJ
Meet DJ Neon, a club DJ with a true love for music and a passion for his career.
Challenge of having duplicate music
DJ Neon puts everything in Apple’s Music app (formerly iTunes) on his MacBook. Over the years, his library has become a mess, cluttered with tons of exact duplicates as well as some redundant versions.
He knows that maintaining an organized library is crucial for quickly finding the right song, but it’s no easy task. When DJ Neon goes through his songs to tackle the mess, it feels like an endless list. He needs a trusted tool to delete all the exact duplicates so he can focus on removing the redundant versions.
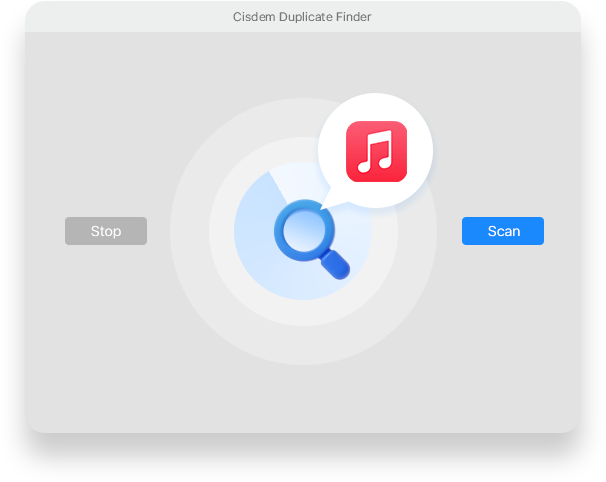
Solution: Using Cisdem Duplicate Finder
When searching for a useful tool, DJ Neon discovered Cisdem Duplicate Finder. This app detects tracks that are exactly the same, regardless of file names, and is exactly what he needs.
In each duplicate group, the app automatically selects all but one track for elimination, saving users from having to do it manually. With this app, he easily cleaned up gigabytes of exact duplicate tracks, confident that he didn’t lose any songs while having identical copies removed.
To help fellow Apple Music users, DJ Neon is glad to share his experience here. Below, you’ll find the steps shared by him along with some notes from Cisdem. If you want to manage other duplicate files, like duplicate photos and videos, these steps are also helpful to check out.
How to remove duplicates from Apple Music
Step 1. Back up your Music library
As a DJ, I always make it a point to back up my Music library regularly. I created a new backup right before using Cisdem Duplicate Finder to scan my library. I highly recommend you do the same!
Step 2. Install Cisdem Duplicate Finder
I downloaded this app from their site and installed it on my MacBook. I noticed it’s also on the App Store, so you can get it from there if you like.
Note from Cisdem:
The Apple Music app is available on Windows as well. Windows users can also use Cisdem Duplicate Finder to handle duplicates in Apple Music, by following similar steps as on Mac.
Step 3. Scan your Music’s Media folder
In Finder, select Music in the left sidebar. Open the Music folder to find the Media folder - that’s where your tracks are stored. Drag this Media folder into Cisdem Duplicate Finder and hit the Scan button.
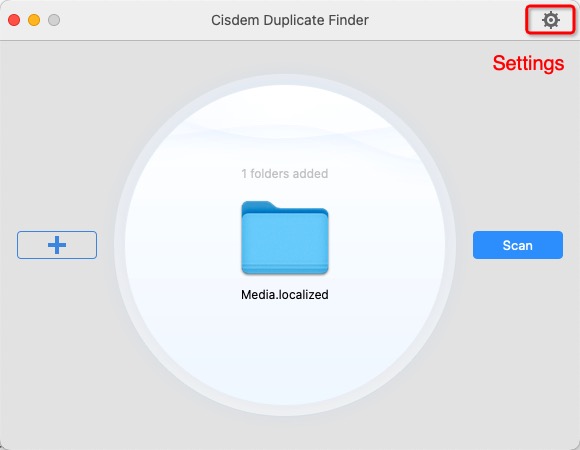
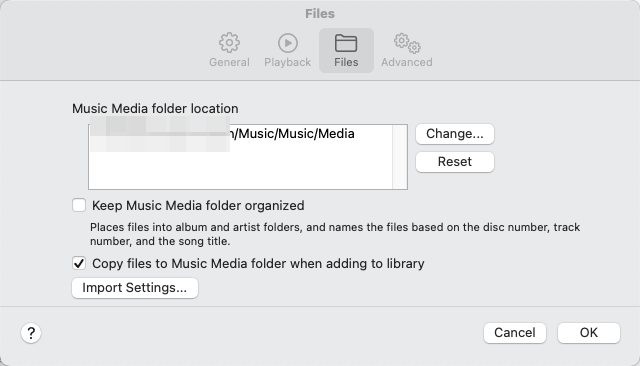
If you have changed the default location of the Media folder and can't remember the new location, you can go to Music’s Settings and check the Files tab.
Note from Cisdem:
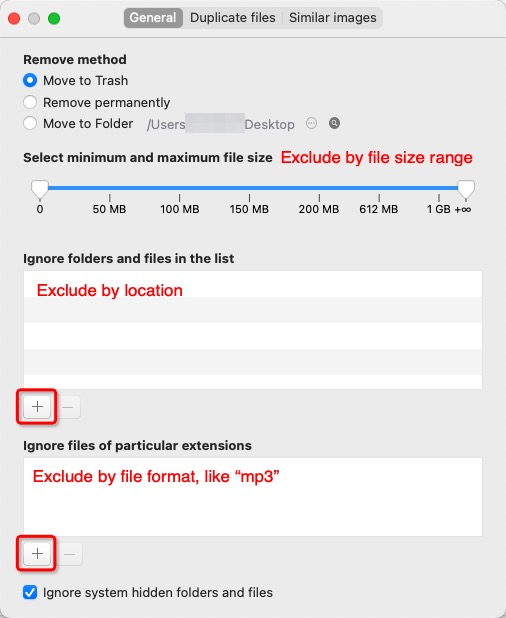
Before clicking Scan, you can customize the scan settings. For example, you can exclude certain songs from scanning by specifying the format or selecting a file size range.
Step 4. Check out your duplicates
Once the scan was complete, the app listed all duplicate tracks in a clean way. I saw a long list of duplicate groups, and selecting a group revealed all the items within it. There are three ways to view duplicates, and the second view even lets you play the songs right in the app!

Step 5. Remove duplicates with one click
Cisdem Duplicate Finder automatically identifies the original files and selects the duplicates for deletion. This feature is super helpful! I took a moment to review a small portion of the selections and found them reliable.
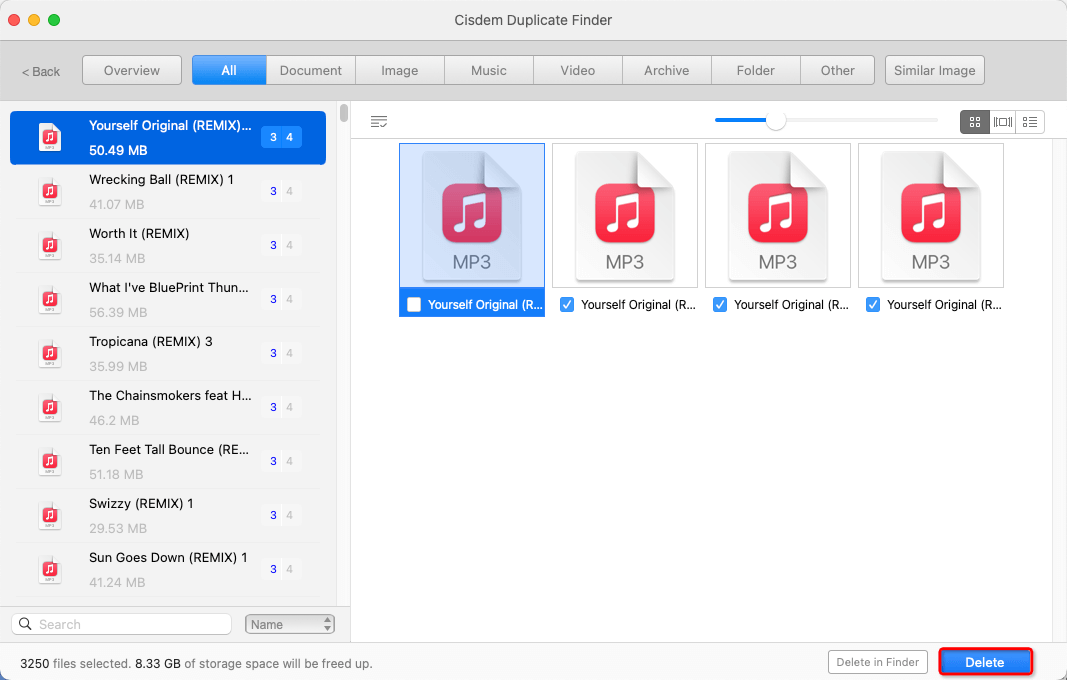
After that, I clicked the Delete button and confirmed the deletion to send all selected items to Trash. Then, I emptied Trash. Just like that, all those exact duplicates were gone!
Notes from Cisdem:
In addition to offering an automatic selection feature, Cisdem Duplicate Finder allows you to manually select or deselect files. It also provides multiple selection rules to apply to selected groups, such as Select Newest, Select Oldest, and Select by Priority (i.e., by folder ).
By default, this Cisdem app deletes selected files by moving them to the Trash (on Mac) or Recycle Bin (on Windows), allowing easy recovery of files if needed. There are two additional deletion methods available: Remove Permanently and Move to Folder.
Step 6. Clean up missing songs
There’s one final step. You will find that removed duplicates appear as missing songs in your Music app. Here’s how to clean them up in a few clicks.
- In your Music app, create a new playlist called All Songs, then drag all songs in your library into this playlist.
- Next, create a new Smart Playlist called Missing Songs. Set up these two rules for this Smart Playlist: “Playlist Is Music” and “Playlist is not All Songs”.
- Finally, select all songs in the Missing Songs Smart Playlist, control-click, and choose Delete from Library.
FAQ
They both can find songs that are exactly the same (without considering their file names). But, Show Exact Duplicate Items can also find the same song’s different versions, for example, one version in 320 kbps and the other in 128 kbps.
Yes. Just connect the external hard drive to your computer before you scan it for duplicates.
Loved the article, share!

