

Cisdem OCRWizard User Guide
 452
452
 0
0


Cisdem OCRWizard is a tool to help you extract texts from images/PDF files, including single or batch images, screenshots, normal PDF or scanned PDF, handwritting, etc. With the advanced OCR technology, it can extract data from images fast and accurately. below is a step by step guide to help you start using this program.
Download & Install
For Mac
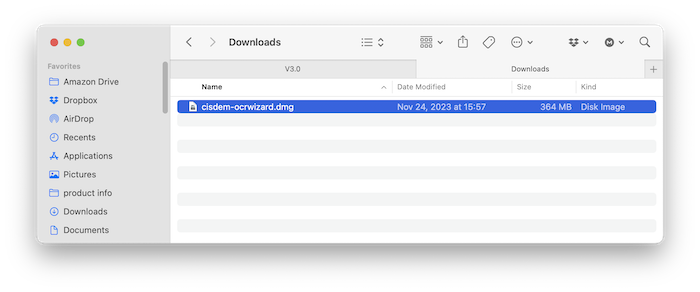
1. You can download the installation package of Cisdem OCRWizard for Mac from here.
 Free Download
2. Install Cisdem OCRWizard with the downloaded package.
Double-click the dmg file.
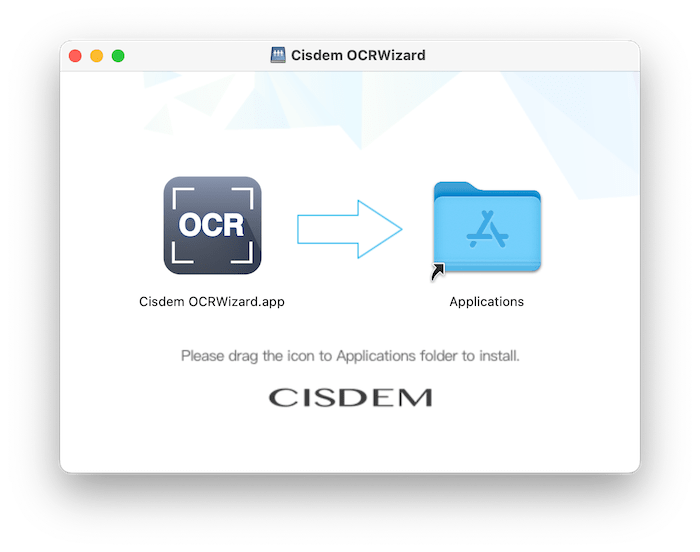
Drag the Cisdem OCRWizard icon to Applications folder.
For Windows
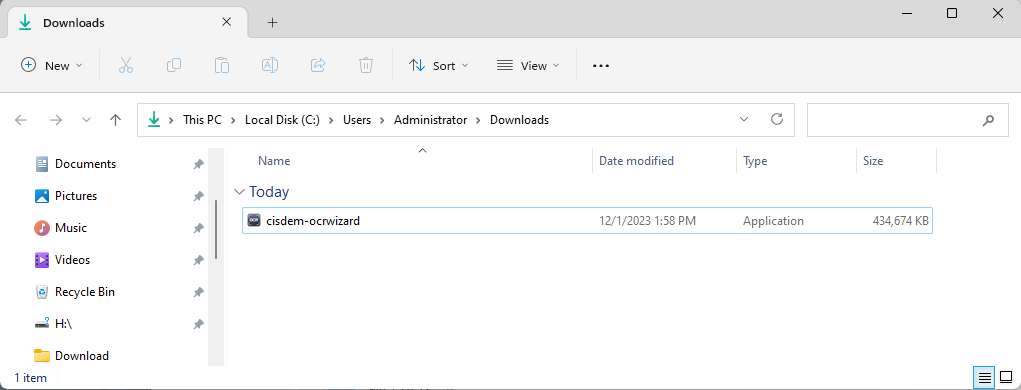
1. You can download the installation package of Cisdem OCRWizard for Windows from the below link.
 Free Download
2. Install Cisdem OCRWizard for Windows with the downloaded package.
Double-click the .exe file to run it.
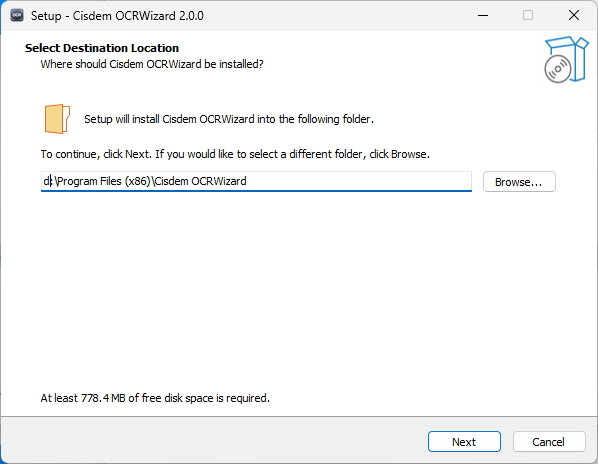
Select a location to install the program (It is recommended to save it under D: drive instead of C: Drive)
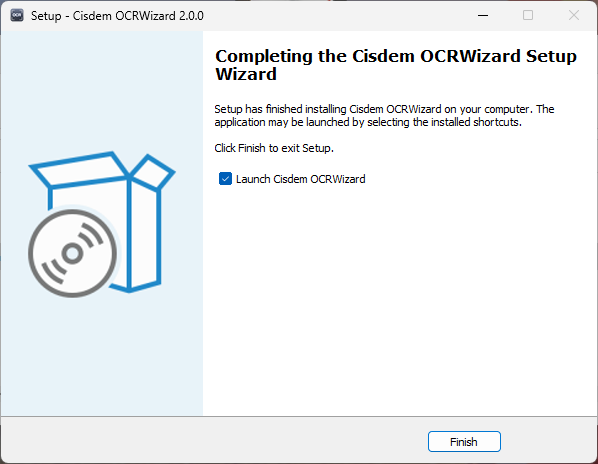
Click Next > Next > Install to continue the installation process, when the below window appears, it means that the program has been installed successfully.
Activation
After installing the program, you need to activate the program if you want to use the full version features.
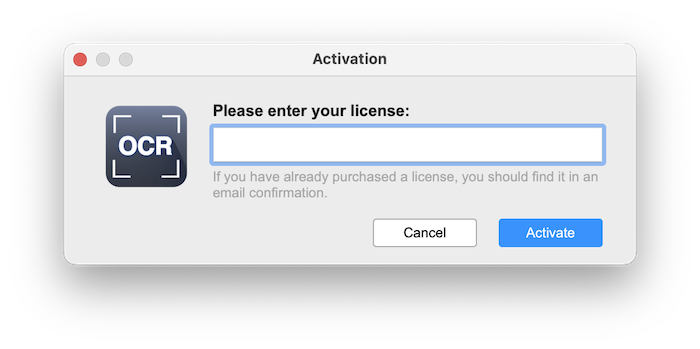
1. Go to Lauchpad or Applications folder, double click Cisdem OCRWizard to run the program, and then click the key icon in the top right corner.
2. Copy-n-paste the license code into the popped-up window, click "Activate".
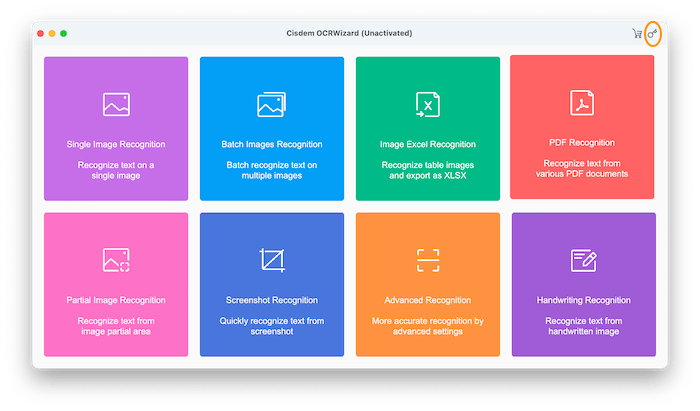
Application Operating
Cisdem OCRWizard offers 8 recognition modules for your OCR workflows, we will introduce them to you one by one.
Single image Recognition
If you want to convert a single image to a text editable format(.txt, .docx or .rtf), you can click Single Image Recognition to get into this module.
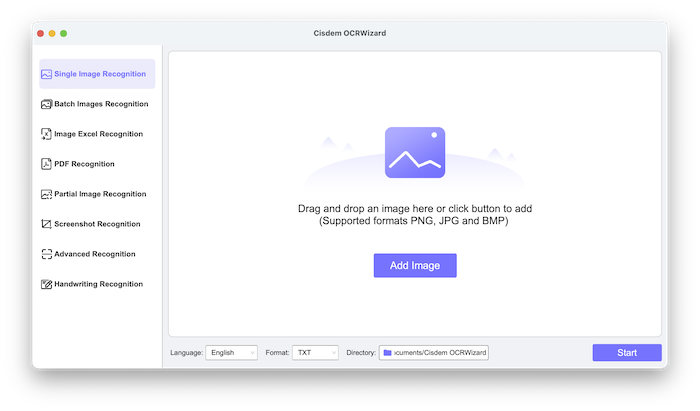
Step 1 Add an Image
You can either drag and drop an image into the blank area or click  to add an image into the program.
Please note that Cisdem only supports the images formats PNG, JPG and BMP;
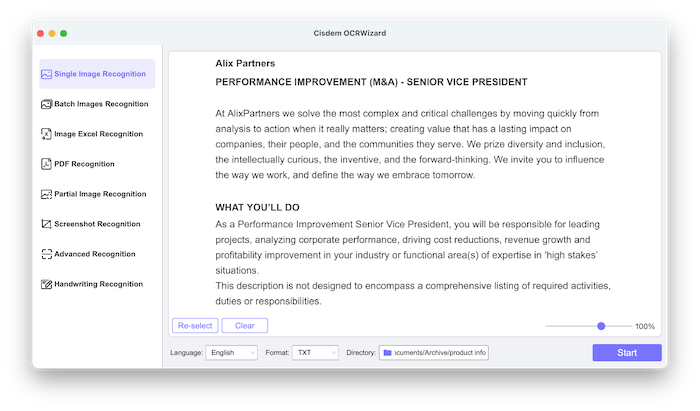
After importing the image, you can click  to change another image or click
 ![]() to remove the added image. Also you can slide on
to remove the added image. Also you can slide on  to zoom in/out the added image.
Step 2 Select a proper language, an output format and a directory to save the converted file, click  to start the recognition.
The texts that recognized from the image will be displayed on the right side for you to preview.
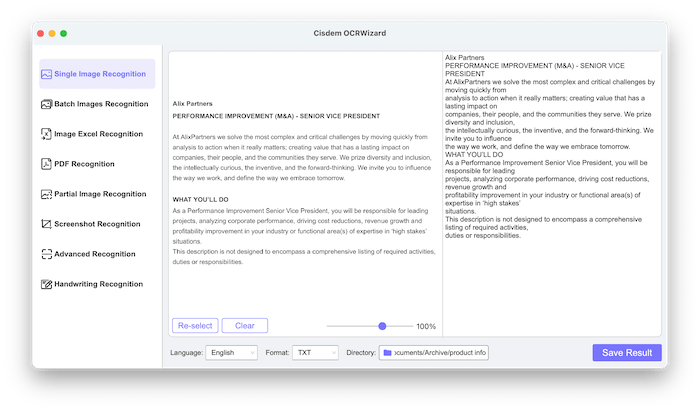
Step 3 Click  to save the recognized text into a file in the format of your choice.
Batch Images Recognition
If you want to batch convert multiple images at once, you can navigate to the Batch Images Recognition.
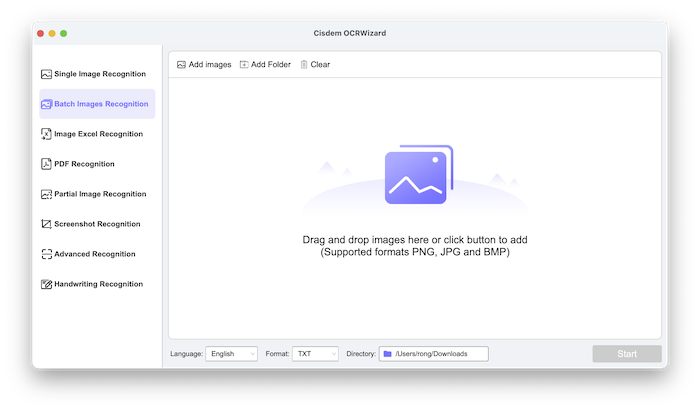
Step 1 Add Images
You can either drag and drop images into the blank area or click  or
or  to import multiple images into the program.
Please note that Cisdem only supports the images formats PNG, JPG and BMP;
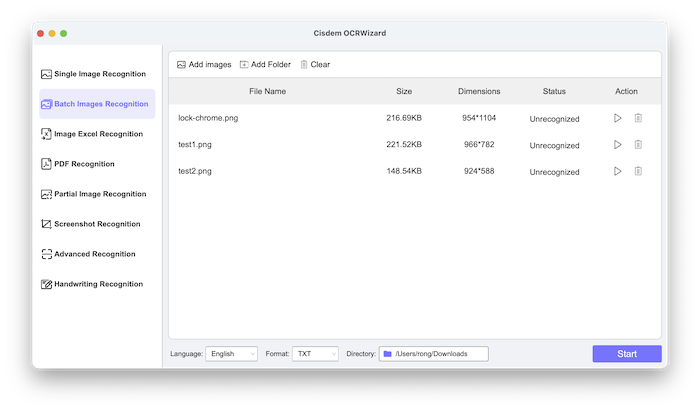
After importing the images, you can click after an image to remove the specific image or directly click
 ![]() to remove all the imported images.
to remove all the imported images.
Step 2 Select a proper language, an output format and a directory to save the converted file, click  after an image to start recognize a specific image or click to recognize all the imported images at once.
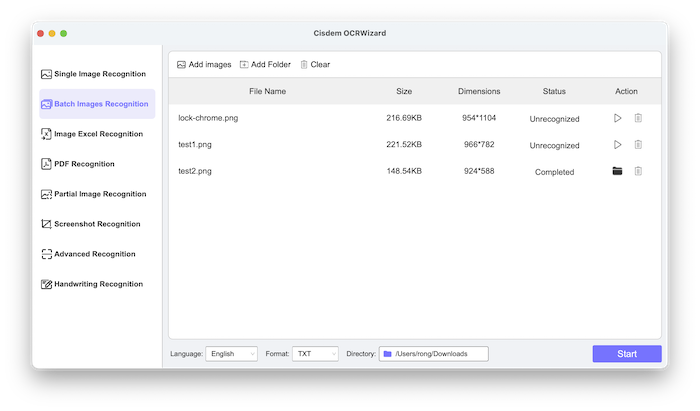
After the recognition completes, you can click  to fast locate the converted file.
Image Excel Recognition
If you want to convert table images to Excel files, you can navigate to the Image Excel Recognition.

Step 1 Add Images
You can either drag and drop images into the blank area or click or to import multiple images into the program.
Please note that Cisdem only supports the images formats PNG, JPG and BMP;
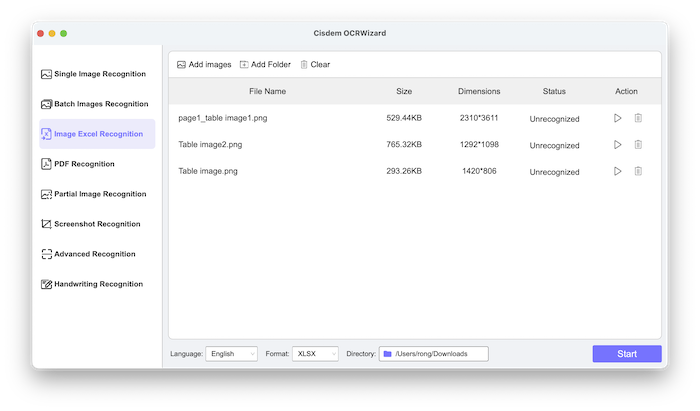
After importing the images, you can clickafter an image to remove the specific image or directly click ![]() to remove all the imported images.
to remove all the imported images.
Step 2 Select a proper language and a directory to save the converted Excel file, click after an image to start recognize a specific image or click to recognize all the imported images at once.

After the recognition completes, you can click to fast locate the converted Excel file.
PDF Recognition
In addition to images, Cisdem OCR Wizard also allows you to extract texts from scanned PDFs/standard PDFs and save as TXT, DOCX and RTF files. If you want to convert a PDF file, you can just navigate to the PDF Recognition.
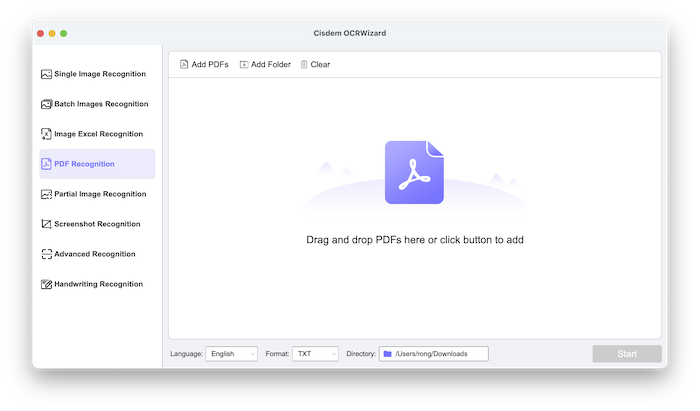
Step 1 Add PDFs
You can either drag and drop PDFs into the blank area or click 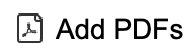 or to import your PDFs into the program.

Step 2 Select a proper language, an output format and a directory to save the converted file, click after a PDF to start recognize a specific PDF or click to recognize all the imported PDFs at once.
After the recognition completes, you can click to fast locate the converted file.
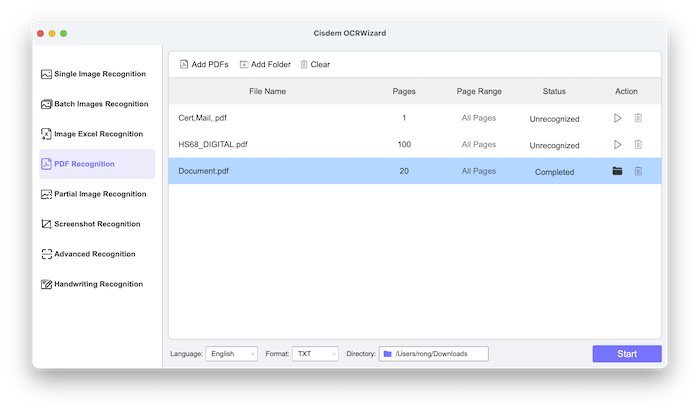
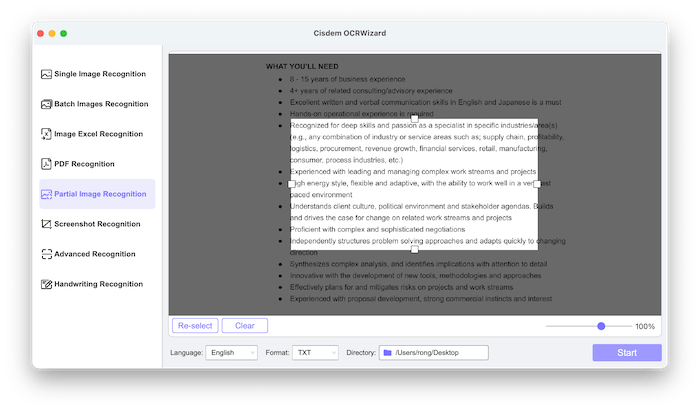
Partial Image Recognition
If you want to extract partial texts from an image and save it in a DOCX/TXT/RTF file, you can navigate to the Paritial Image Recognition.
Step 1 Add an Image
You can either drag and drop an image into the blank area or click to add an image into the program.
Please note that Cisdem only supports the images formats PNG, JPG and BMP;
After importing the image, you can click to change another image or click ![]() to remove the added image. Also you can slide on to zoom in/out the added image.
to remove the added image. Also you can slide on to zoom in/out the added image.
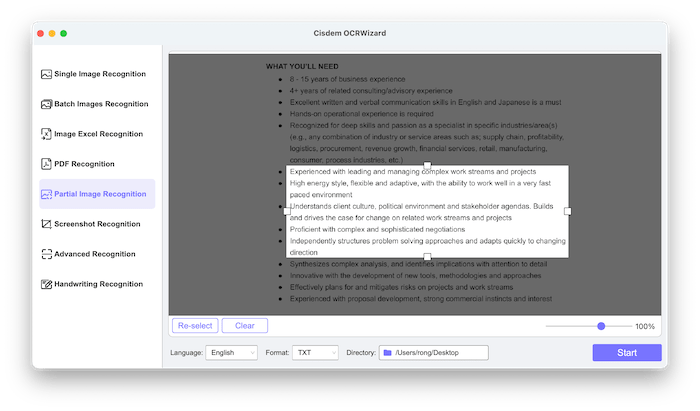
Step 2 Drag the small 4 rectangle icons  to select the area where you want to extract the texts.
Step 3 Select a proper language and output format and a directory to save the converted file, click to start the recognition.
The texts that recognized from the selected image are will be displayed on the right side for you to preview.
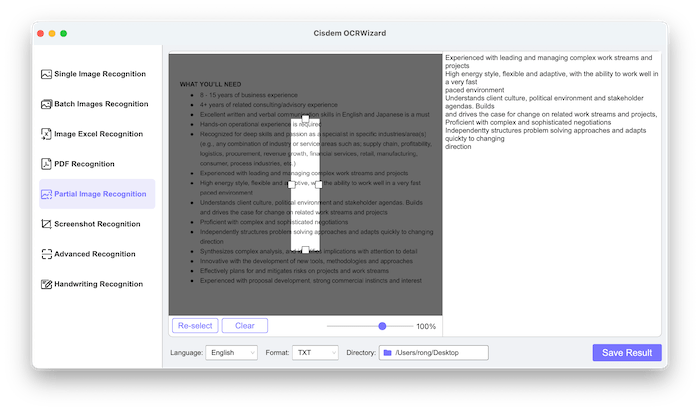
Step 3 Click to save the recognized text into a file in a format of your choice.
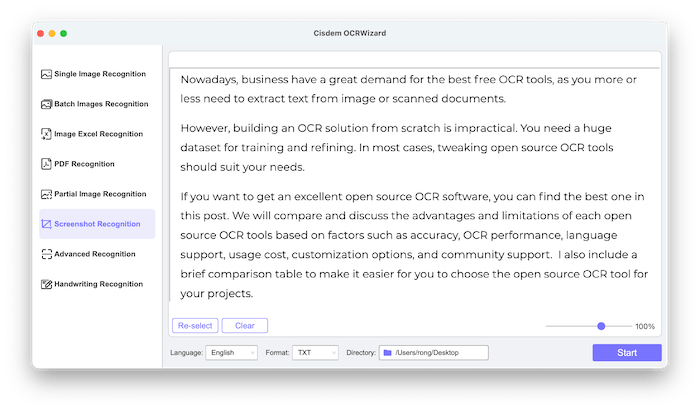
Screenshot Recognition
If you want to extract texts from a screen capture on your computer screen, you can navigate to the Screenshot Recognition.
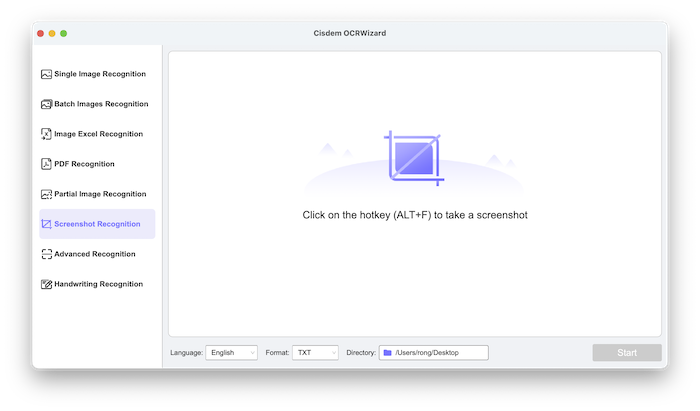
Step 1 Take a screenshot
Press ALT+F to take a screenshot of the screen area where you want to extract text.
After importing the image, if you are not satisfied with the screenshot you've took, you can directly click to take a screenshot again. Or you can click ![]() to remove the added screenshot and press ALT+F to capture a new one. Also you can slide on to zoom in/out the captured screenshot.
to remove the added screenshot and press ALT+F to capture a new one. Also you can slide on to zoom in/out the captured screenshot.
Tips:
1. When you press the hotkeys ALT+F, the window of Cisdem OCRWizard will automatically hide so that you can take a screenshot more convenientlly.
2. For Mac: when you press the hotkeys ALT+F, a window will pop up as the below to ask you to allow Cisdem OCRWizard to access screen recording on your computer.
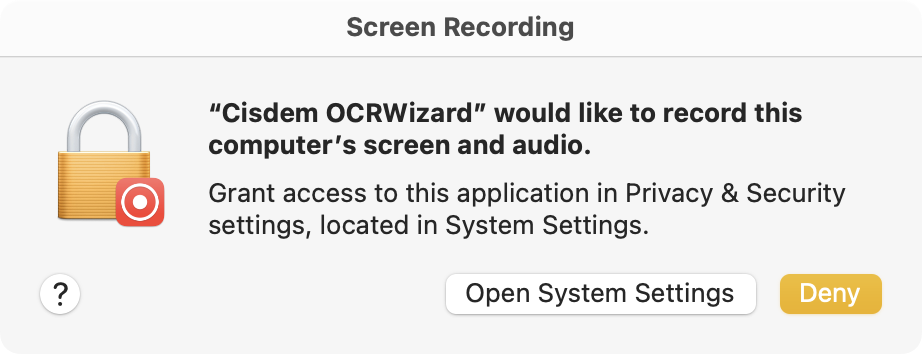
Please click "Open System Settings" and allow Cisdem OCRWizard to access the screen recording on your computer.
Step 2 Select a proper language and output format and a directory to save the converted file, click to start the recognition.
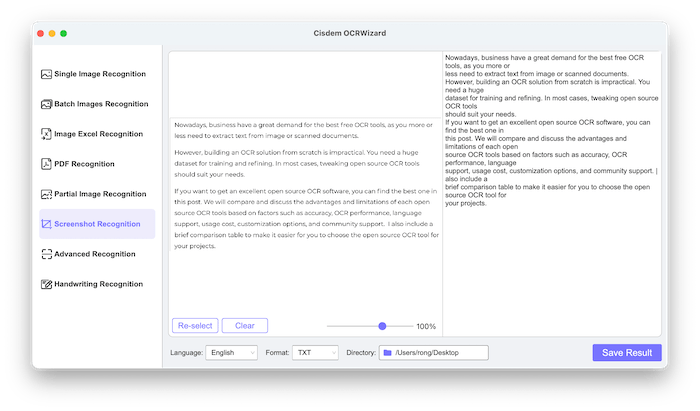
Step 3 Click to save the recognized text into a file in a format of your choice.
Advanced Recognition
If you want to extract texts from selected areas of an image/PDF, you can navigate to Advanced Recognition.
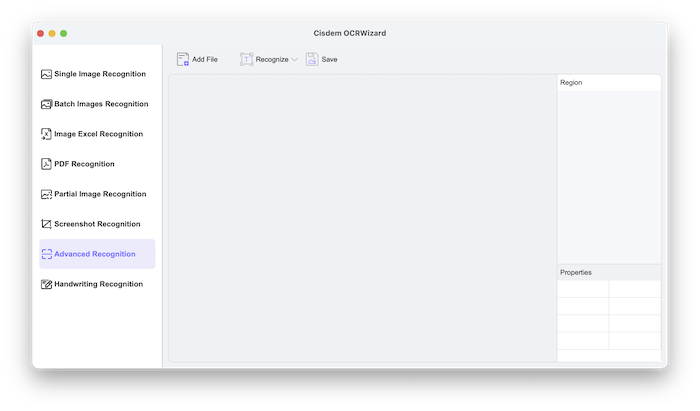
Step 1 Add file
You can either drag and drop or click  to import an image or a PDF into the program.
Please note that Cisdem only supports the images formats PNG, JPG and BMP;
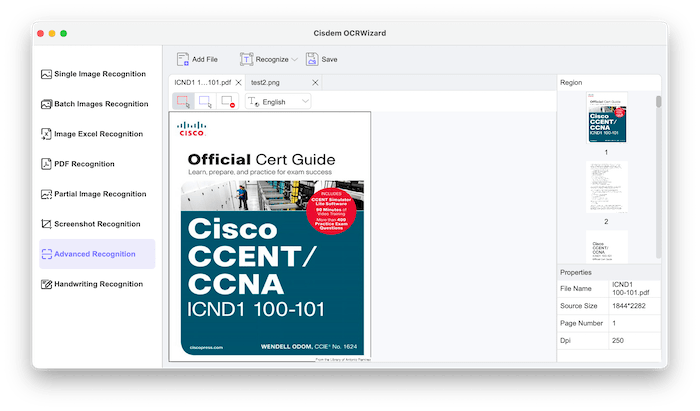
After importing an image/PDF, you can click to add more files, they will be displayed under different tabs. Also you can click the cross icon to close the tab.
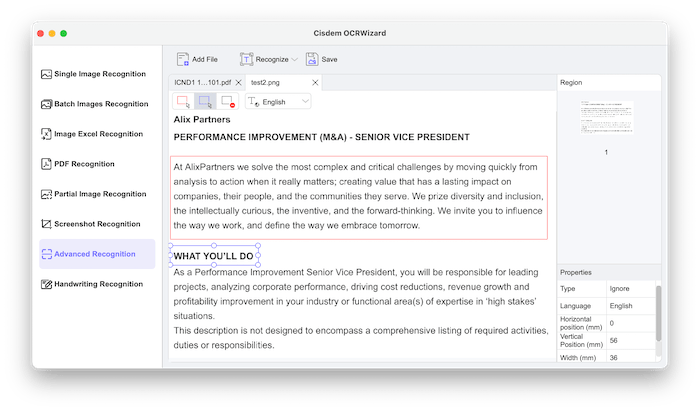
Step 2 Select areas to recognize
 Recognize areas: Click to select this option, it will recognize the areas that you've selected;
 Ignore areas: Click to select this option, it will not recognize the areas that you've selected;
 Cancel areas: Click to select this option, all the selected areas will be cleared.
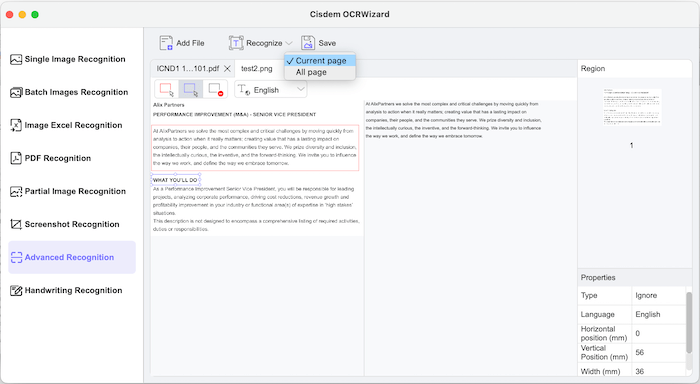
Step 3 Choose to recognize the current page or All pages to start the recognition.
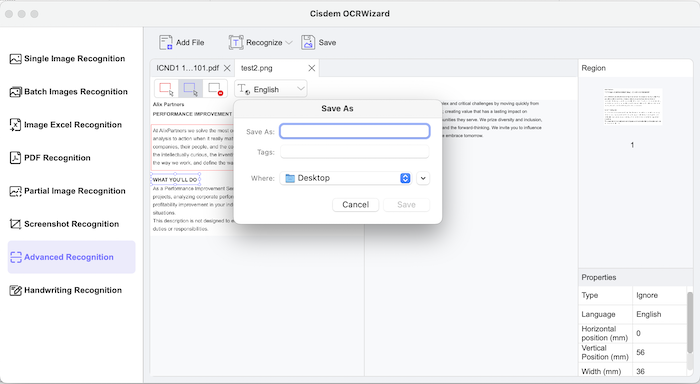
Step 4 Click  , select a location to save the extracted texts in a TXT file.
Handwritting Recognition
If you want to convert a handwirtting image to a text editable format(.txt, .docx or .rtf), you can navigate to the Handwriting Recognition.
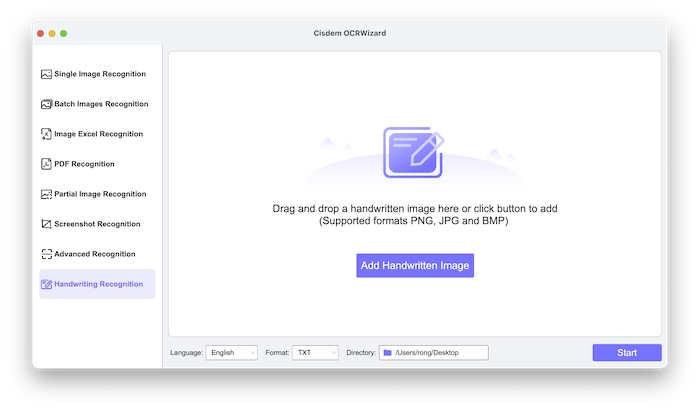
Step 1 Add an Image
You can either drag and drop an image into the blank area or click  to add an image into the program.
Please note that Cisdem only supports the images formats PNG, JPG and BMP;
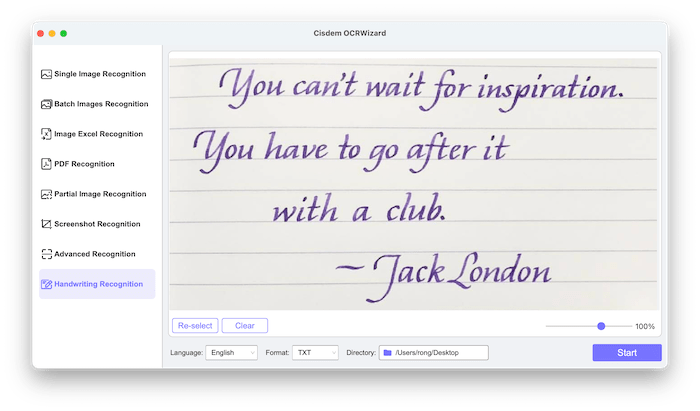
After importing the image, you can click to change another image or click ![]() to remove the added image. Also you can slide on to zoom in/out the added image.
to remove the added image. Also you can slide on to zoom in/out the added image.
Step 2 Select a proper language, an output format and a directory to save the converted file, click to start the recognition.
The texts that recognized from the image will be displayed on the right side for you to preview.
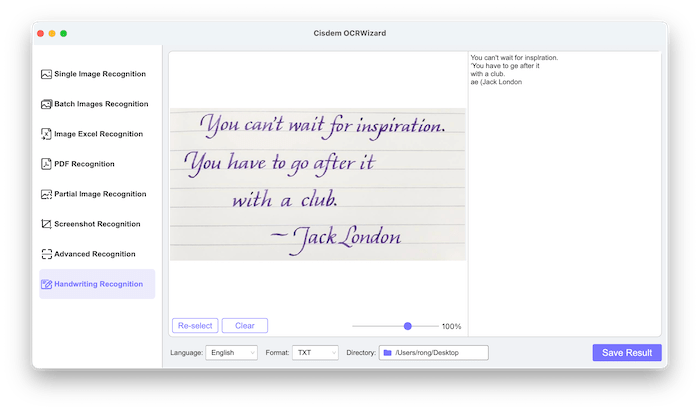
Step 3 Click to save the recognized text into a file in the format of your choice.
Application Updating
We always suggest users to use the latest version of the program.
When you launch Cisdem OCRWizard, Cisdem will auto check for updates.
Also, you can manually click to check for updates.
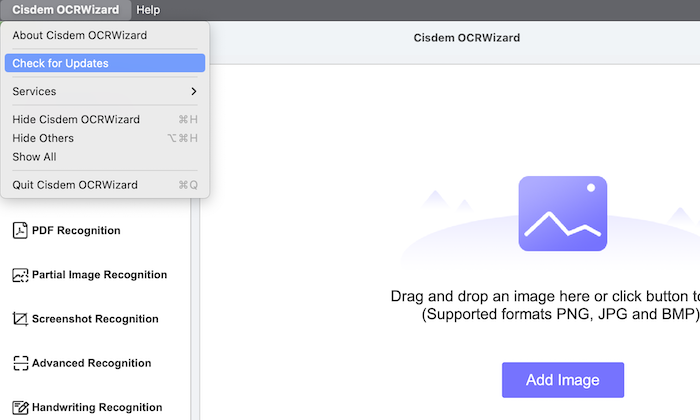
For Mac version, please click Cisdem OCRWizard> Check for Updates
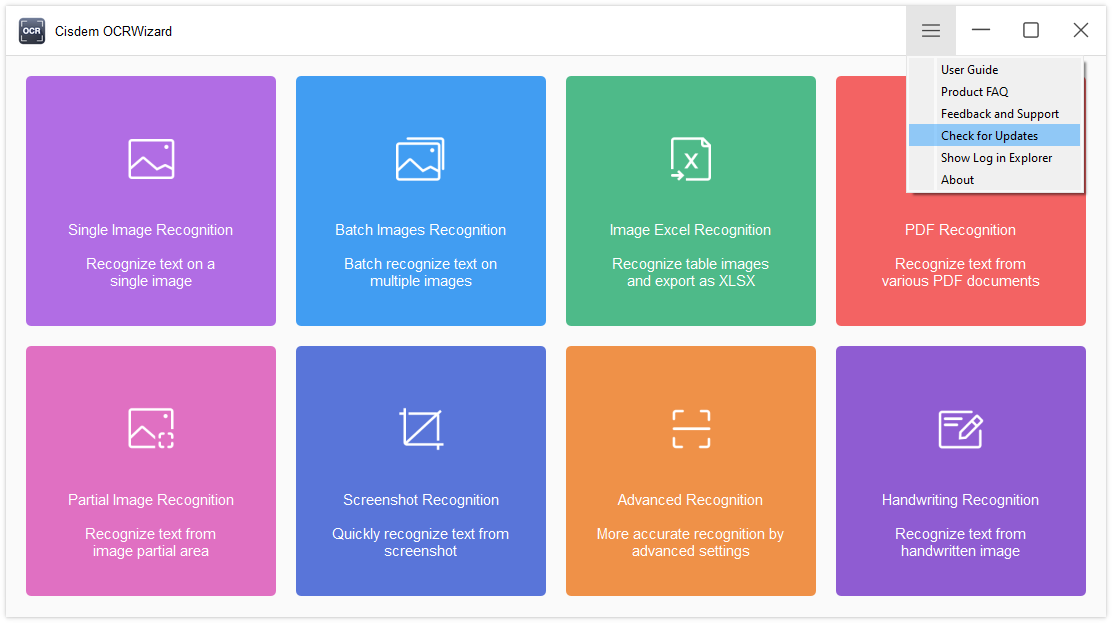
For Windows version, please click  > Check for Updates
Traci Gordon has worked as a tester in a software company for 8 years, she believes that the best software should be a tool that can help users accomplish what they need with the simplest steps.