


 DVD Burner
Best App to Create DVD from Pregnancy Journey Videos


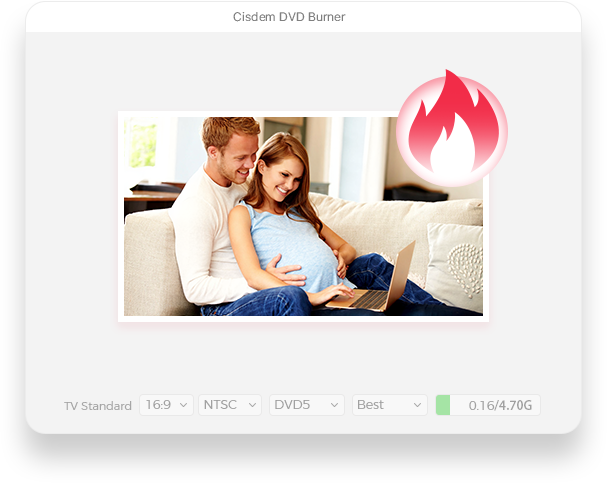
My wife is 7 months pregnant, and I wanted to give her a gift to show how much I cherish every moment of this journey. So I gathered all her pregnancy videos and used Cisdem DVD Burner to create nice DVD discs, surprising her at the baby shower. - James | Dad-to-be
James is going to be a dad, as his wife Angela is 7 months pregnant. James didn’t want to miss a single moment of this extraordinary journey, so he took many videos with phone and camera.
The challenge
James captured hundreds of video clips - from the first prenatal visit and her growing belly to preparing baby clothes and diapers. Like many home users, James also worried about losing all these important life videos if his phone or camera got damaged. How could he turn scattered videos into lasting gifts for his wife and share them with grandparents who aren’t good with gadgets? He needed an effective solution.
The solution
James got advice from his friends. If he wanted to save the videos forever and make a family keepsake out of them, the best way was to burn them onto DVDs. So James started looking for DVD burning software. After trying about 6 different software, he ultimately chose Cisdem DVD Burner, which effortlessly makes DVDs with menu on computer.
Steps James took to create DVD gifts for pregnant wife
Once he got into DVD burning, he said it was pretty straightforward, even for his first try. When asked about his experience, James shared the steps and results.
Step 1. Download Cisdem DVD Burner
I downloaded and installed the app from the Cisdem website. It took less than 2 minutes. You can choose the Mac or Windows version.
Step 2. Add recorded family videos
Launch the app and drag & drop all your video clips into the “Source” window. I needed to transfer the videos I shot from my phone and camera to the computer, then import them.
The app supports batch importing of many videos, and no format conversion is required. I added video clips in one batch in MP4 and MOV formats. It doesn't lag at all.
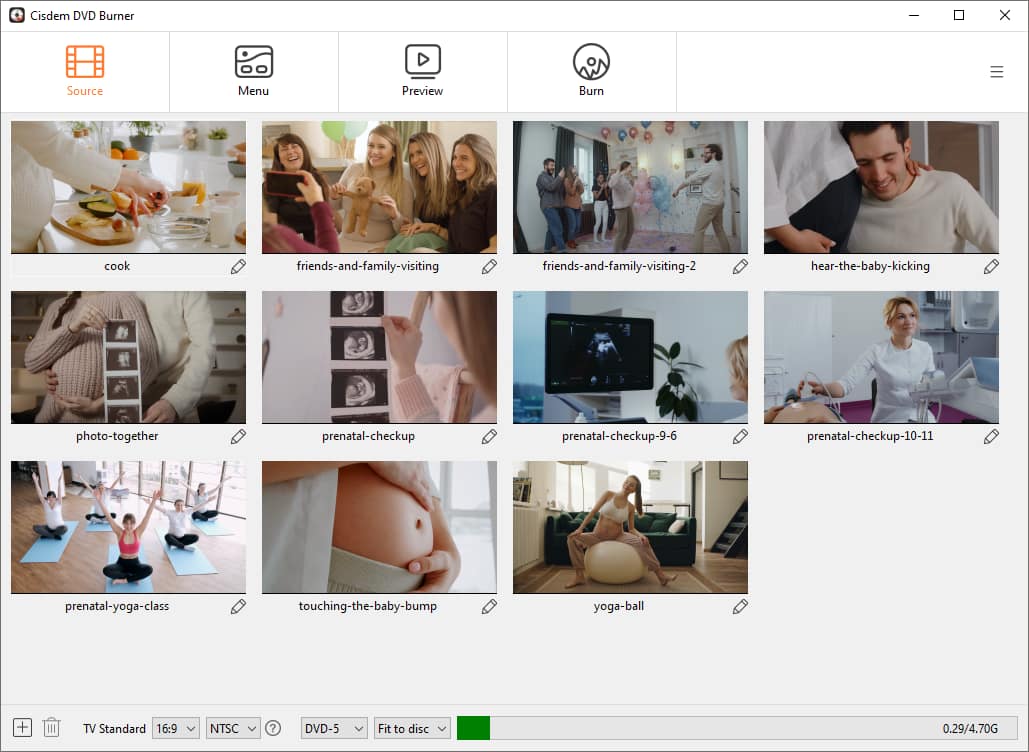
Step 3. Choose DVD type and quality level
I shot a total of 117 video clips totaling about 15 GB, with a runtime of 6 hours, 25 minutes, and 15 seconds.
Following Cisdem customer support's recommendation, I burned the videos onto two DVD-9 discs, selecting “Fit to Disc” as the quality option. It‘s the best value solution. Alternatively, I could burn them onto three DVD-9 discs using the “Best” or “High” option.

Customer support advised me against using the “Fit to Disc” or “Lowest” option to burn all videos onto a single DVD-9 disc or two DVD-5 discs if I couldn't accept poor quality, as it could result in blurry videos and loss of detail.
Tip from Cisdem:
When choosing between DVD-5 and DVD-9, consider the video length and quality needs.
- If your video is less than 2 hours long, DVD-5 is enough for "Fit to Disc" or "Normal" option. Choosing "Best" will cut to 50 minutes from the available time.
- If your video is over 2 hours, use DVD-9 disc. "Normal" holds about 3 hours and 38 minutes, "Fit to Disc" holds more, and "Best" keeps 2 hours and 8 minutes of top quality.
- If the video is only 5-15% over the disc limit, you can use “Fit to Disc” to compress it with almost no visible quality loss.
Step 4. Edit videos (optional)
There's a pencil icon under each video. Click it to start fine-tuning the video. This step is optional.
It provides 8 editing tools, but I only used a few. And I have way too many videos - I won't edit them all.
- I cut off the beginning/end of some videos and only kept the essential parts, which also saves space for DVD disc.
- I converted some vertical videos to horizontal and cropped the black edges to ensure a full-screen display when played on TV.
- The volume of some videos shot with the camera was low, so I adjusted it.

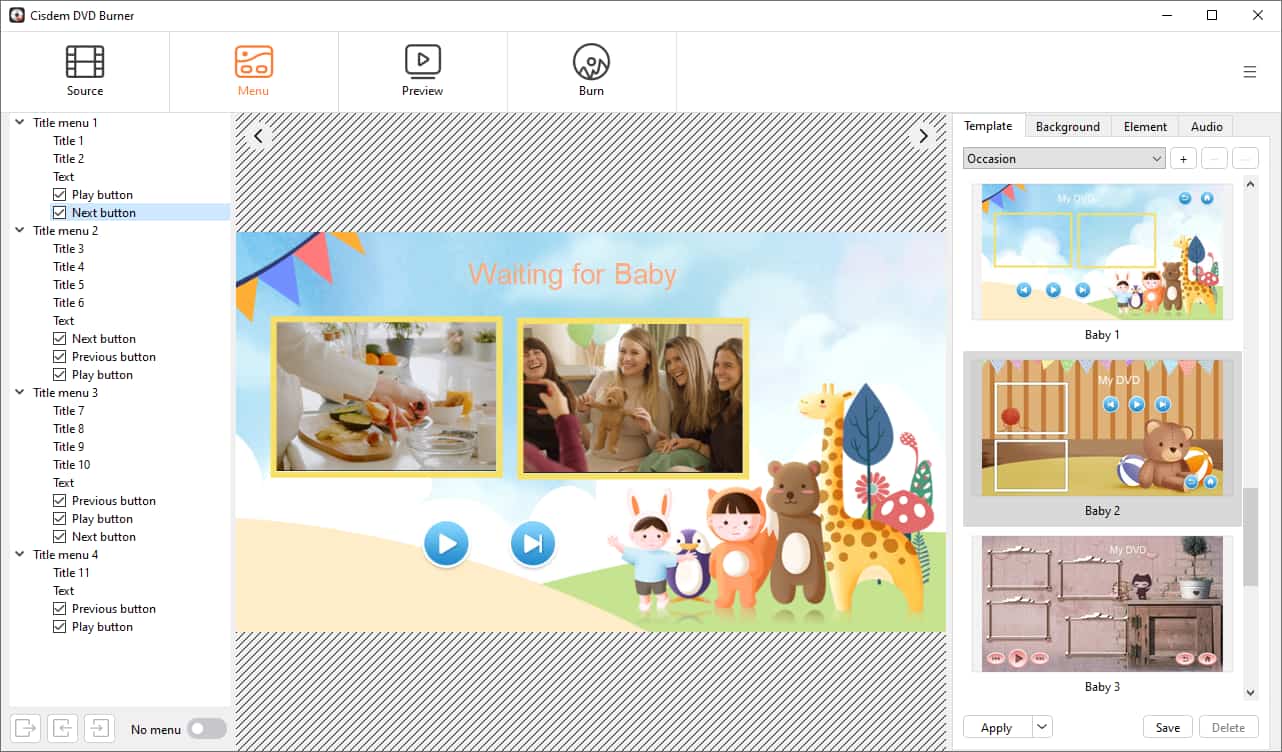
Step 5. Make DVD menu
You can choose a template directly or customize its elements. It is very easy to use.
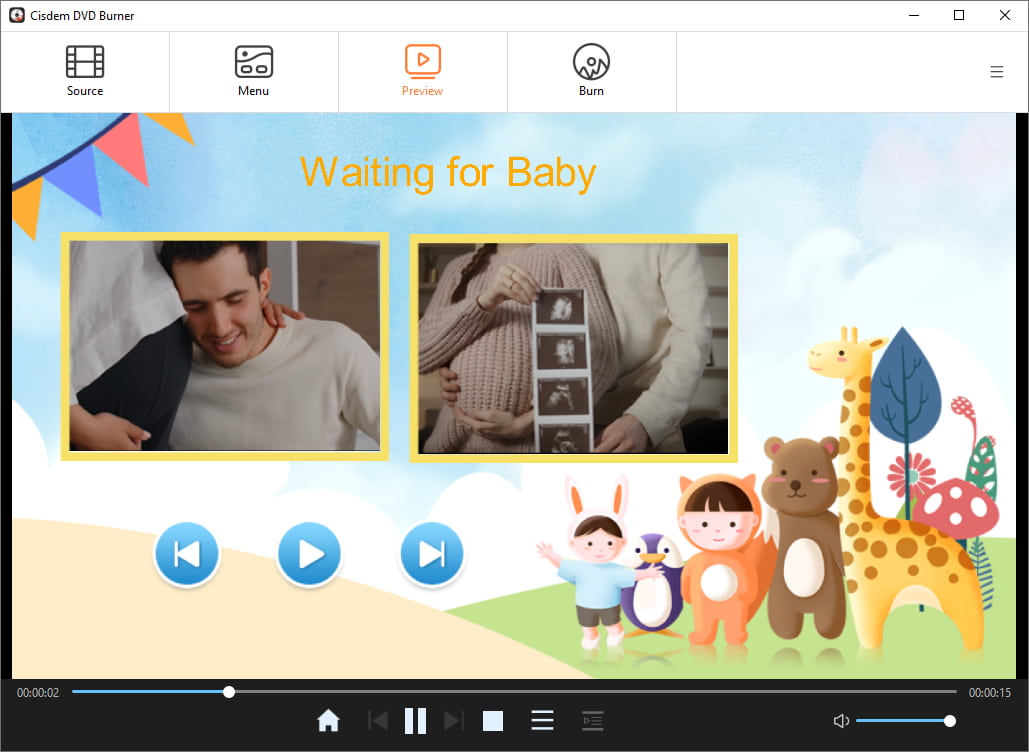
- From the provided templates, I selected Baby 1 under the “Occasion” theme (there are 3 templates related to Baby). You can also import images from your computer to replace the background.
- I changed the DVD title to “Waiting for Baby”.
- I picked a warm instrumental track as background music.
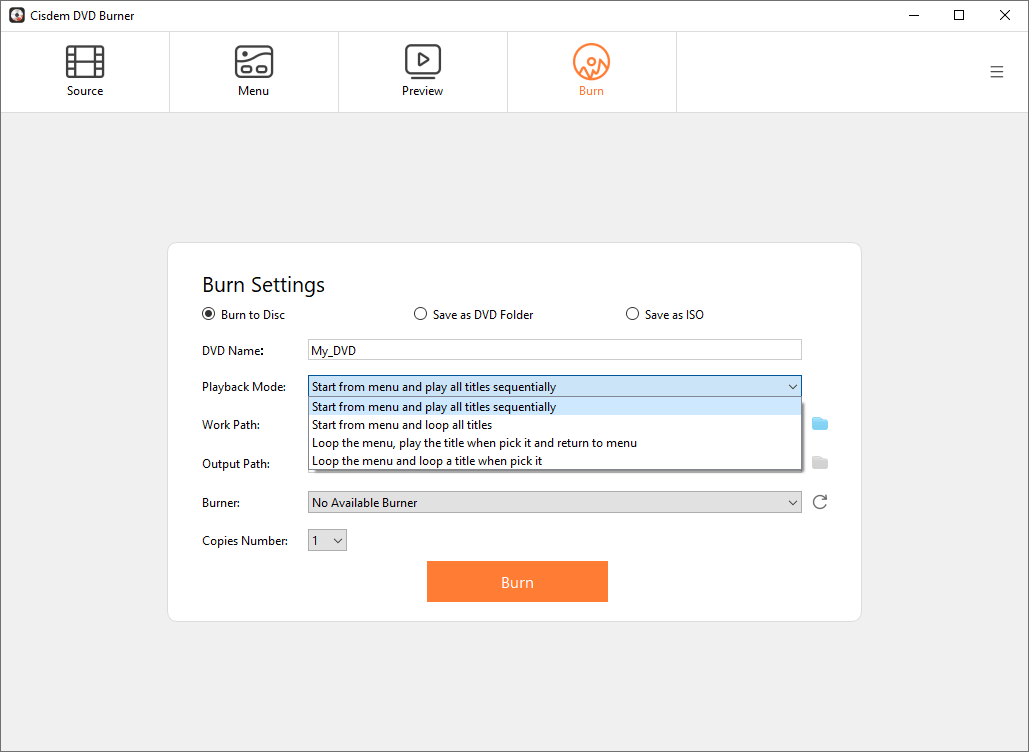
Step 6. Burn DVDs
Preview how the TV playback looks in the "Preview" window. Once you're sure it's correct, go to the "Burn" window to burn the disc.
I burned 56 videos and 61 videos onto two separate blank DVD-9 discs. I kept the playback mode set to “Start from menu and play all titles sequentially", which is the most ideal mode for me.
The results
Each DVD took about an hour to burn, and the results are great. I'm very satisfied with them. While using Cisdem DVD Burner, I also received professional advice from customer support.
FAQ
Yes. Cisdem DVD Burner offers a variety of themed menu templates for holidays, travel, and special occasions, not just for pregnancy and baby.
Absolutely, that's exactly the advantage of Cisdem DVD Burner. It supports virtually all common or uncommon video formats, including MTS and M2TS videos.
Yes. James, the protagonist of this case, had no prior experience with DVD burning either. No technical skills are needed.
Loved the article, share!

