macOS 13 Ventura and macOS 12 Monterey have been released for quite a while, many users may have updated or plan to update to these versions. And the latest macOS 14 Sonoma beta version also came out. Most of the time, we get a perfect Mac update and enjoy all the way to the next update. However, we may run into troubles when updating Mac to Sonoma, Ventura, Monerery, Big Sur or Catalina version.
Among all troubles, "Missing files after Mac update", "I updated my Mac and lost everything" are main complaints. This could be devastating. But relax, with advanced recovery programs and an existing backup, we are able to recover your missing files after mac update to Sonoma, Ventura, Monterey, Big Sur or Catalina, etc.
 Free Download macOS 10.9 or later
 Normally, it won’t delete everything when updating to a new version of macOS, since a macOS upgrade is meant for adding new features, updating Mac apps, fixing bugs, enhancing performance. The whole updating process won’t touch your files saved on Mac drive.
If you updated your Mac and it deleted everything, this can be caused by following:
...
Whatever the reason is, we are here to save you from this disaster. In the following part, we’re going to demonstrate how to recover missing files after Mac update.
First of all, you are recommended to check Mac Trash bin or search the missing files on your Mac before any actions In most cases, Mac update didn’t delete anything from your Mac, it was much likely you moved them to Trash bin or other locations.
Just open your Trash bin and put the missing files back to its original storage location. Or open Finder app, press Command+F to search missing files on your Mac, to check if the files are just moved to other location or have gone forever. If you cannot find them anymore, here are 8 solutions for you to recover or fix this issue.
Recovering lost data from Mac is not a particularly difficult affair. You just need a helpful, dedicated and high-efficiency tool, like Cisdem Data Recovery for Mac. It can recover variety of files whether it’s caused by macOS update, accidental deletion, system crash, sudden power off, emptying recycle bin or other reasons. Apart from Mac internal drive, it can also recover deleted data, formatted and lost files from other removable devices. Even, it allows users to repair videos that cannot be opened due to corruption.
Cisdem Data Recovery Features
Free Download macOS 10.9 or later 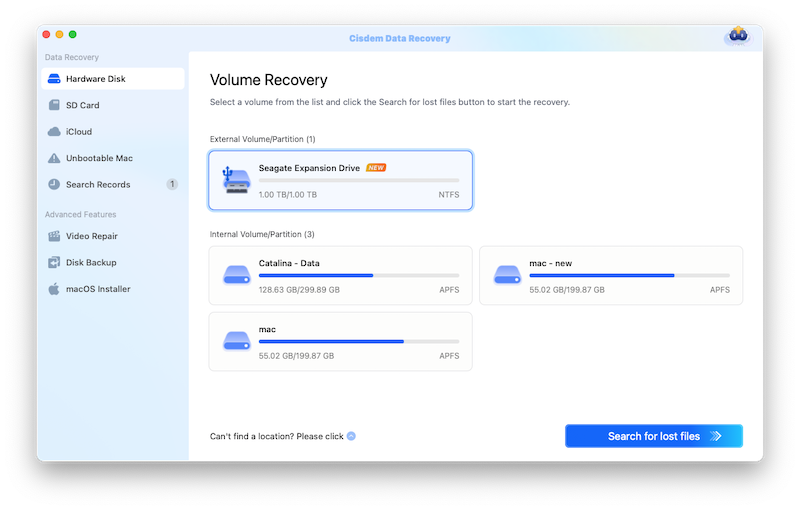


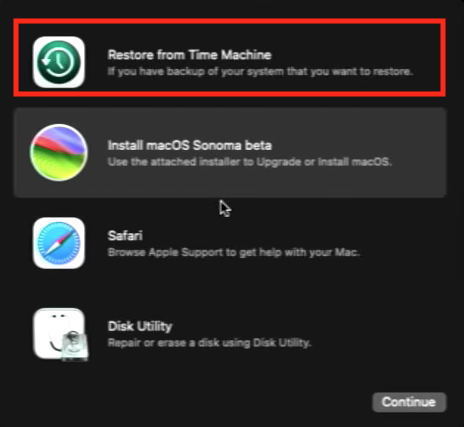
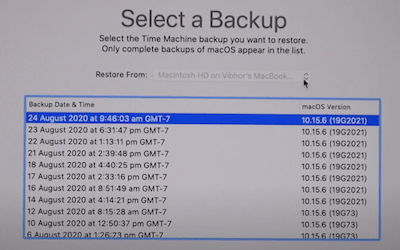
Time Machine is a piece of backup software that was integrated into the Mac operating system, it can be used to back up your files automatically to an external hard drive. Mac update deleted everything? Time Machine can help you recover lost photos, iPhone pictures, documents, calendars, etc. easily. But only if you have backup files as I said.
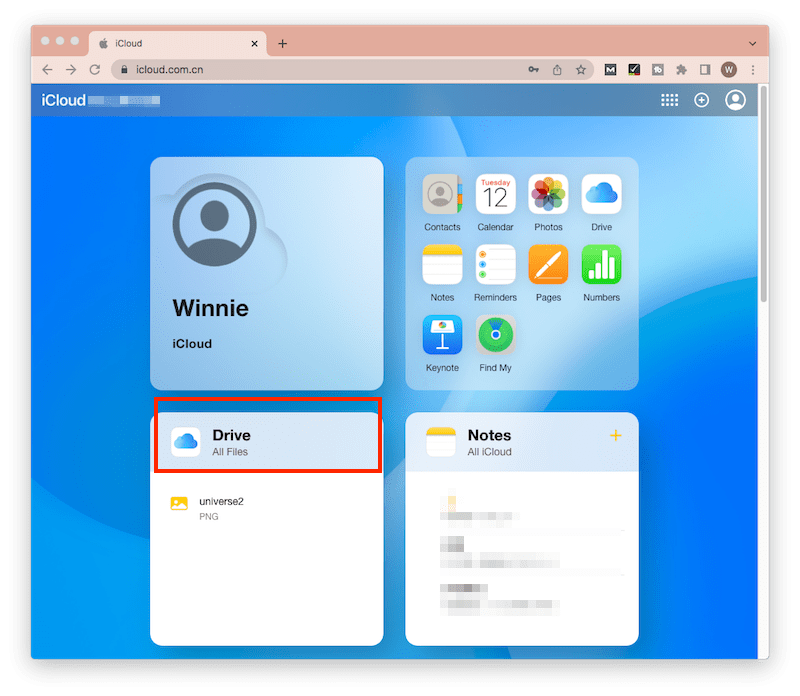
Also you can restore lost files from iCloud backup, if have set up iCloud backup and saved a copy of your Mac files to iCloud regularly.
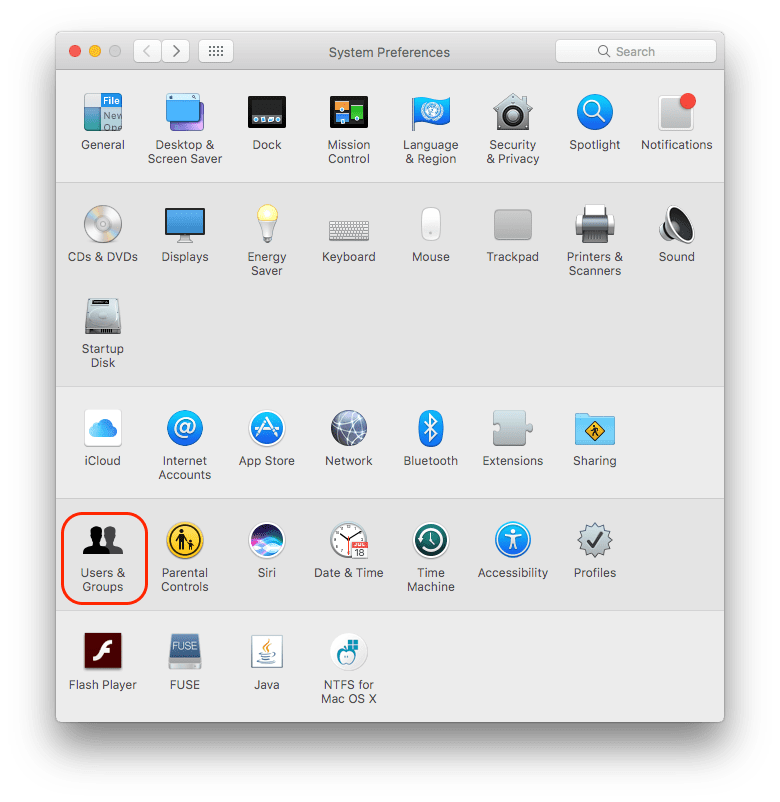
Don’t be surprised that you are recommended to doing so. Yes, I am quite sure you know which account and how you should login into, but sometimes, macOS update just deletes your old user account profile but keeps the home folder, and that’s the reason why your files are gone and missing. In this case, you just need to add your old profile back and login into again.
One great benefit that macOS offers to its users is the expanded storage space on iCloud, if you have turn on iCloud Drive, the missing files after mac update are just moved to your iCloud Drive and you need to turn this feature off.
.png)

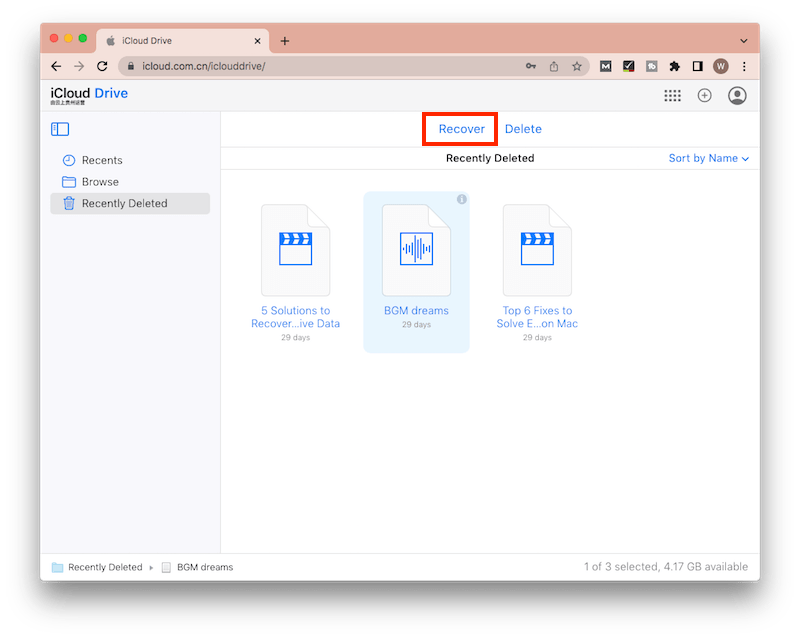
If the box before Desktop & Document Folders is deselected in the fist place, you can try to recover missing files from iCloud backup. That’s to say, you just need to login into iCloud website, choose the files and click the Download icon to save all the missing files onto your mac.
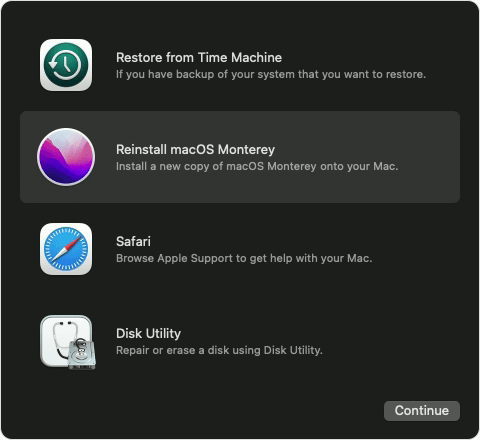
Most of the times, we cannot pinpoint the exact reasons causing missing files after Mac update and it is a challenge to find back the missing files especially when you are not quite proficient at using your Mac. In this case, you are recommended to reinstall the system.
Your Mac works perfectly on current version, but might works in conflicts with a newer macOS version, or the latest beta version comes with some bug. If your Mac keeps losing file after updating to a new version, you are recommended to revert to the previous version until your Mac is ready for such an update.
The last but not the least method to recover data when mac update deleted your files is contacting the Apple Support team. Yes, they are professional and what you need to do is submitting a form online, give a call or write emails as instructed on the contact webpage.
You can take the simple measures below to avoid missing files after mac update to Sonoma, Ventura, Monetery, Big Sur or Catalina:
It is true that you should try different ways to recover the missing files after macOS update, the issue can be easy or difficult, as long as you find the appropriate method to fix it. Generally speaking, if you have backed up your mac, you can easily find back the missing files via Time Machine or other online storage service, otherwise, you are recommended to use Cisdem Data Recovery, which can guarantee that most of the missing files can be restored.

Connie has been writing for Mac productivity and utility apps since 2009. Each review and solution is based on her practical tests, she is aways energetic and trustworthy in this field.


Anthony
Deselecting iCloud Drive truly works. I also followed your third method and rescued my Mac files after upgraded to Ventura.
Jothany
I updated to Catalina beta version yesterday and lost the files, it did worked when i followed your instructions to deselect iCloud drive, thanks very much.