Automatic Repair is a built-in tool on Windows to fix boot issues when a Windows PC cannot start up properly. Since its release, it has helped Windows users fix a lot of problems, but itself brings new issues as well. Most of them are benign and can be just ignored, but some of them are persistent and harmful to our Windows PC, Automatic Repair Loop is one the most annoying one.
In my experience, this happens for reasons like abrupt shutdown, power failure, hardware change, windows registry issues, boot file corruption, missing or damaged system files. To fix Automatic Repair Loop on Windows 11 or 10, we have compiled this guide for you, you will be able to fix even without losing any data on your PC.
 Free Download Windows 11/10/8/7
 Automatic repair keeps looping can rear its head at any time when you start up a Windows PC, but relax, there are 12 fixes to this issue, and we will outline below with all the basics and steps.
Whenever our Windows PC runs into a problem, we are recommended to restart, especially when we have no clue about what causes such a problem. But magically, restarting fix most of the problems. A simple restart just refreshes the system memory, ends every single program and process, giving back your Windows PC a clean and fast state.
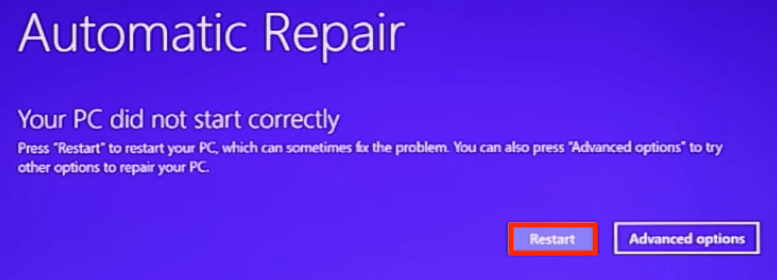
If your Windows PC stuck on automatic repair loop screen, just click the Restart button to reboot.
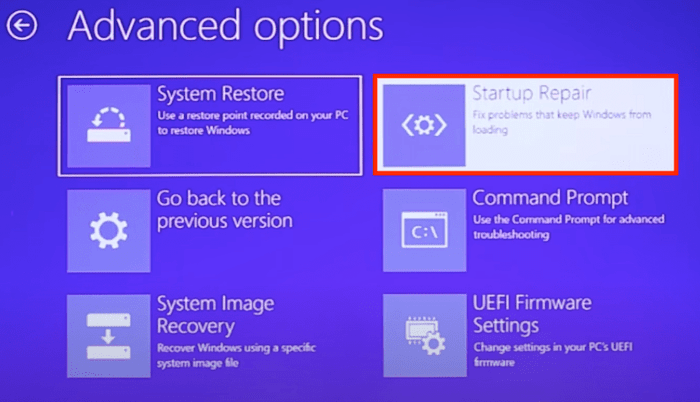
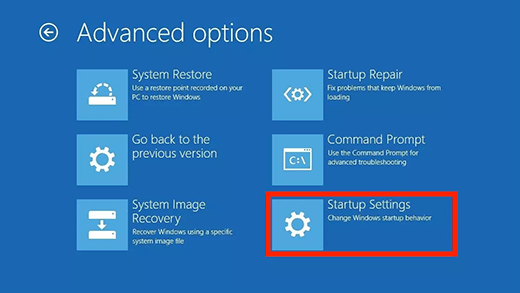
Windows 11 and 10 has a built-in repair tool to fix common start up problems, it is Startup Repair, which can diagnose and repair your PC, then creates a log file to list the startup problems.
The issue of automatic repair going into loop can be caused by hardware changes, you might insert a hard drive, connect to USB drive, battery or AC Adapter that is not compatible with your PC. In this case, you should remove the peripheral devices, then restart it to see if it can start up.
Safe Mode is a diagnostic startup mode that uses a limited set of files and drives. In this mode, a Windows PC is kept in a basic state, it won’t run configuration system files, won’t load most device drives, and only uses standard VGA graphics mode. Safe Mode is used to troubleshoot Windows issues and help you find out the reasons.
If Automatic Repair Loop doesn’t happen in safe mode, it means the default settings and basic device drivers aren’t the reasons causing the issue, then you should try other fixes as follow.
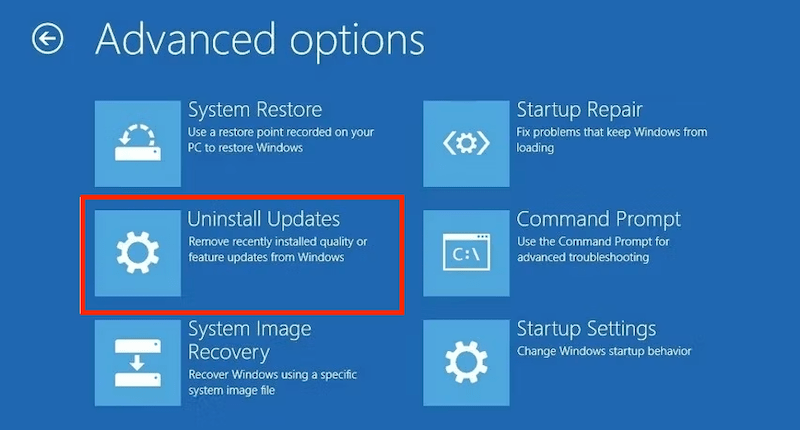
If this Automatic Repair Loop issue just happens after updating operating system on your Windows PC, you should uninstall the update, to remove recently installed quality or feature updates from Windows.

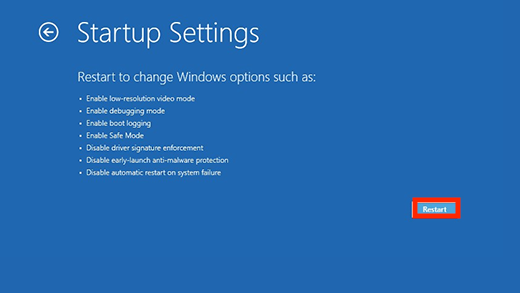
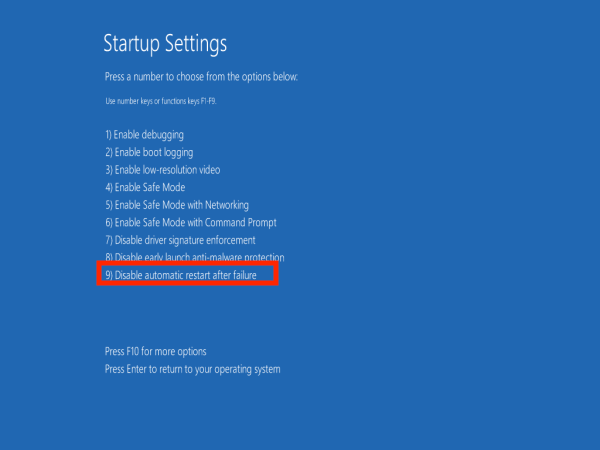
The Early Launch Anti-malware is a built-in driver on Windows 8, 10 and 11 to provide protection against threats at startup, so malware won’t have much change to attack your system. It is useful, but sometimes, it may flag a required driver by mistake and your system cannot work properly without loading this driver. In this case, you need to temporarily disable the Early Launch Anti-malware on your Windows.
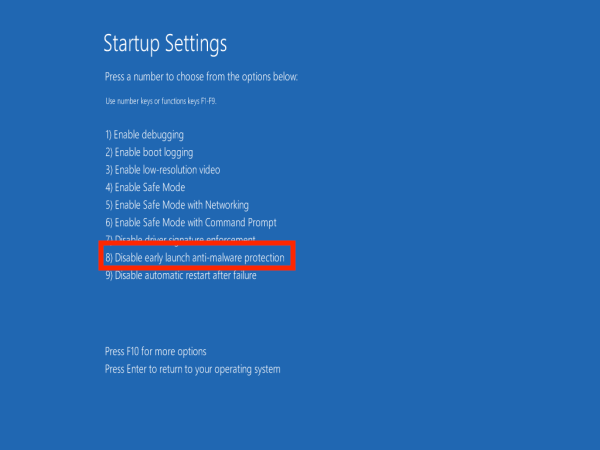
Also, you can disable Automatic Repair at startup if it loops and your screen is stuck. The process is quite similar to that of disabling Early Launch Anti-malware, you just need to choose No. 9 from the Startup Settings.
If this issue insists even after trying all the fixes listed above, you should try the hard reboot using the Emergency restart option, to set your PC back to a clean working environment.

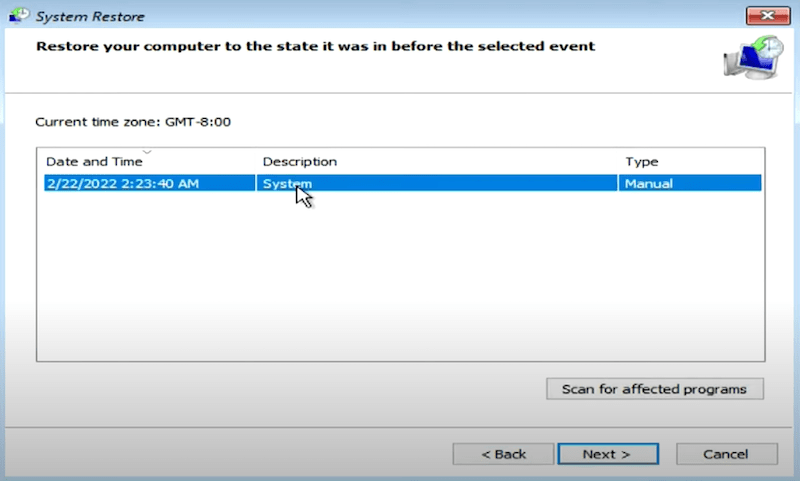
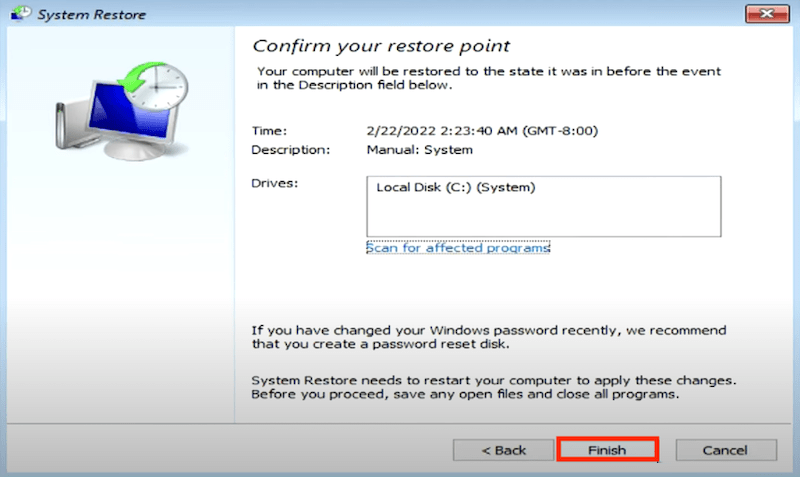
If the issue persists on your Windows even after above fixes, you should use the native tools to restore your system, unless you know commands and want to try the fixes with command prompt in fix 11, 12 and 13. The System Restore tool can fix problems like PC running slow or not responding, it won’t delete your documents, photos and other personal data.

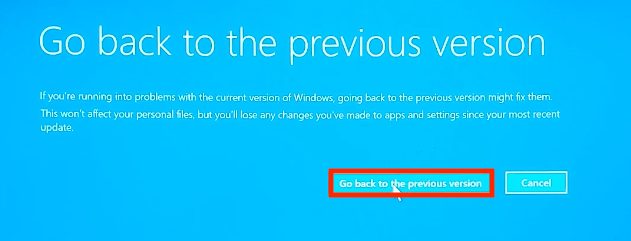
For Windows 10 users, they can also go back to previous Windows version that has no issues when Automatic Repair loop.
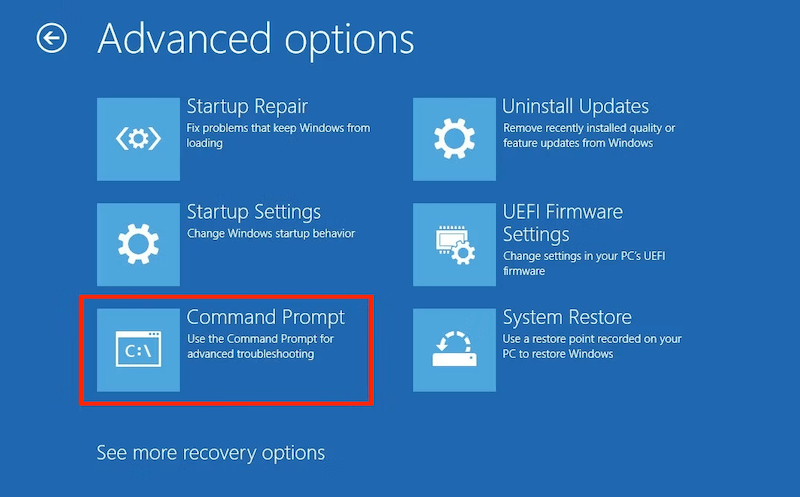
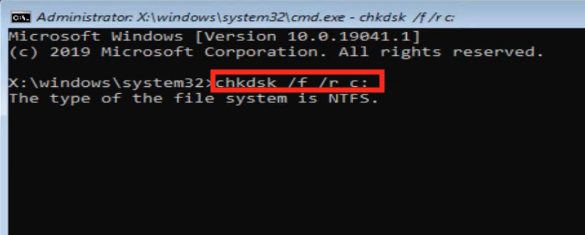
You can also run commands on your Windows PC to check the integrity of your hard drive and fix filesystem related errors that causing the automatic repair loop issue.
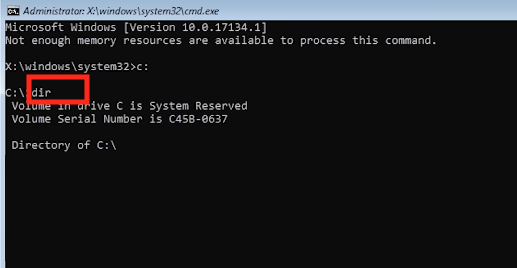
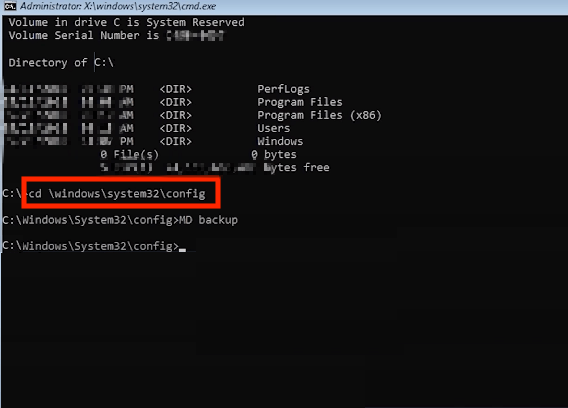
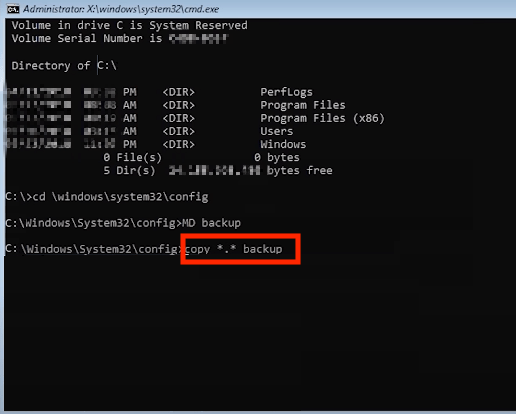
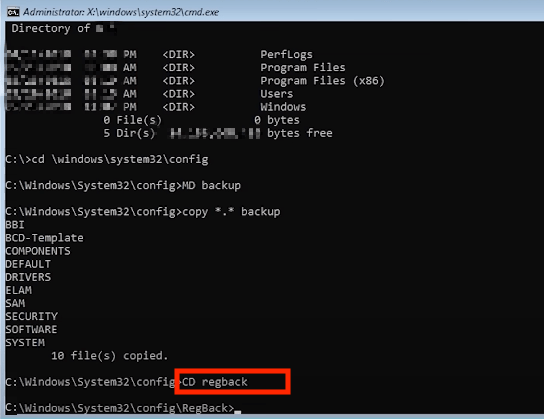
You can revert you registry configuration to the one of you most recent successful startup to fix this issue as well, by changing the Windows Registry with commands.
Notes: I am working on Windows 10, 32 bit, if your startup drive (the one installs operating system) is not C drive, replace C with the drive in step 3, if you use 64 bit Windows, replace 32 with 64 in step 5.
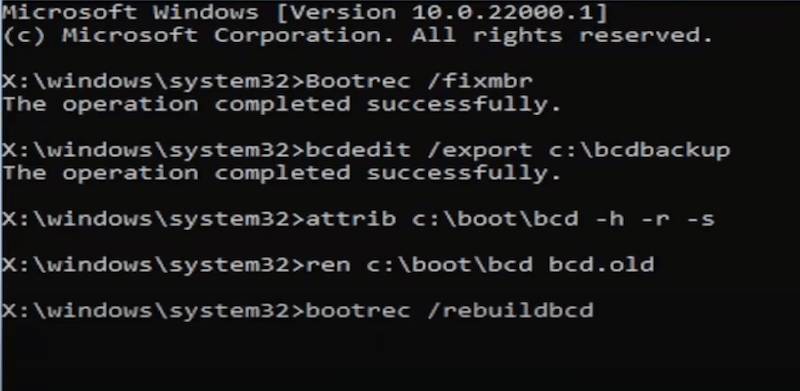
Boot Configuration Data contains parameters that decides how to boot your Windows, if there is any issues at startup, it may be caused by corrupted configuration file, and by rebuilding BCD, you will be able to fix the automatic repair loop issue.
If C drive is not your startup drive, replace C with your startup drive in the step 4, 5, 6.
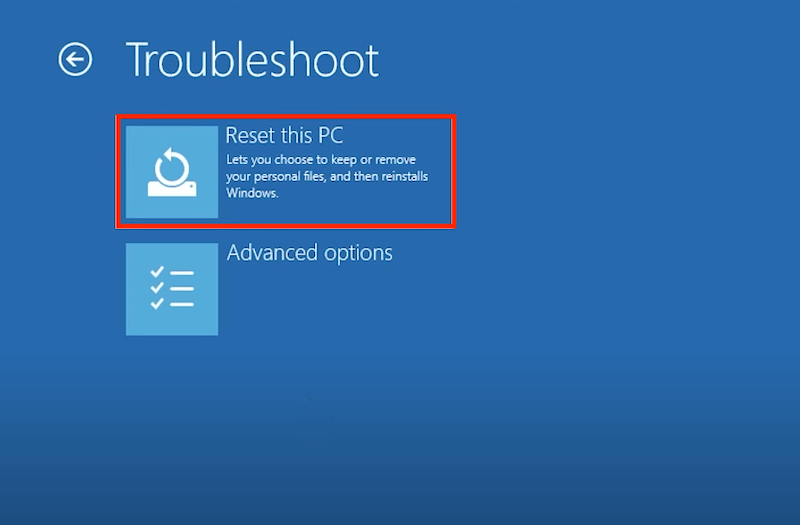
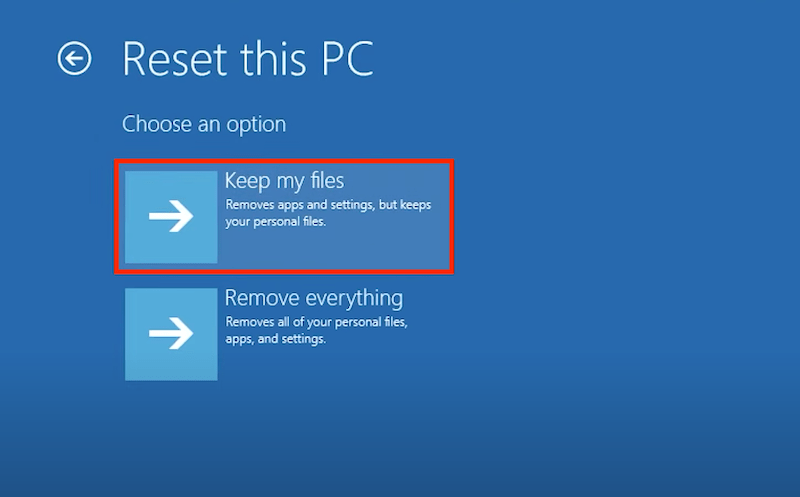
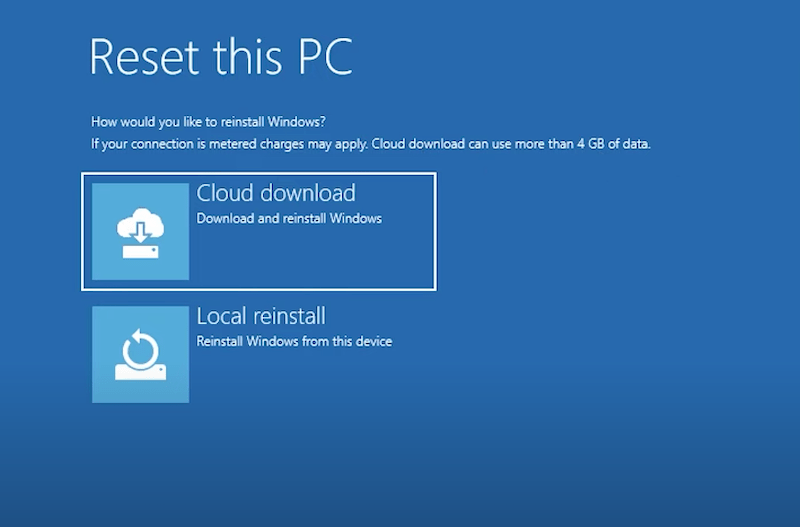
If none of above fixes get the issue solved, you will have to reset Windows and set everything on your Windows back to original state, this will be the last resort as a self-assistant fix before paying for an expert.
If you are not a skilled Windows users, or you don’t want to risk your PC by running the commands that you don’t understand at all, you should contact technical support from Windows, or visit a local store, even hire an expert to fix the issue without further devastating problems to your PC.
Lost data due to automatic repair loop or in the fixing of this issue? Relax, we have you covered to fix automatic repair loop without losing data, by using Cisdem Data Recovery.
Cisdem Data Recovery has been around since 2014 and becomes one of the best data recovery services in 2020s, due to its super fast file scanning and analyzing, also because of its excellent support on restoring nearly all file types, file systems, storage devices. There is also a "Repair" feature, allowing users to repair damaged documents, videos and photos.
It is available on both Windows and macOS, supporting the latest OS versions.
Free Download Windows 11/10/8/7 


Hope this guide allow Windows users to breathe a sigh of relief, as there is nothing frustrated than running into a boot problem and stopping you from accessing to your files. But this just gives us a lesson, always back up your files, so whenever you try to fix a Windows issue, you won’t worry about data loss.

Connie has been writing for Mac productivity and utility apps since 2009. Each review and solution is based on her practical tests, she is aways energetic and trustworthy in this field.


