macOS QuickTime Player is an indispensable tool for users to record screen videos on Mac. But leaving a screen recording unsaved or mistakenly deleting is one of the most annoying parts, after spending such a long time on capturing the activities on your screen.
Don’t fret, this guide will make it easier to find and recover unsaved or deleted QuickTime recordings on your Mac with ease.
 Free Download macOS 10.9 or later
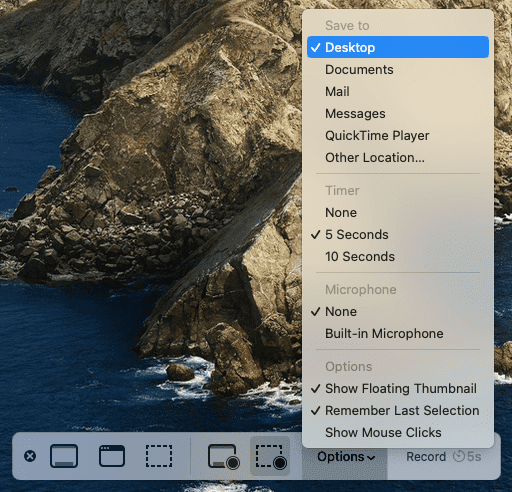
 There are 2 locations to save a screen recording on Mac: the selected location and the autosave location.
On macOS earlier than Big sur, after the screen recording, you will be asked to choose a location to save the screen recording. While on macOS Big Sur or later, the screen recording is saved to Desktop by default, you can check the Save or Options to find where you screen recordings are saved:
Across all macOS versions, QuickTime has the autosave feature to store screen recordings automatically, but the autosave location is a bit different.
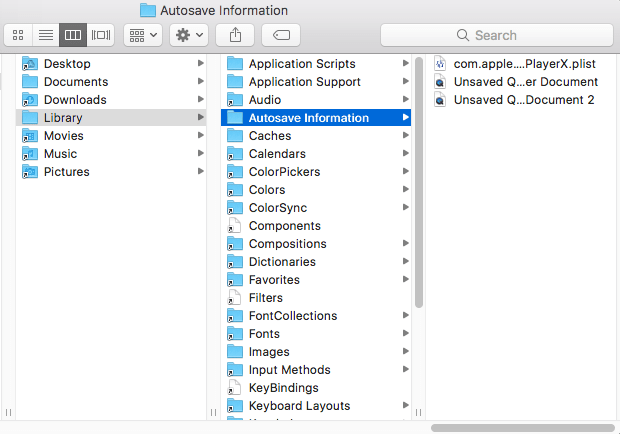
In macOS Catalina and earlier macOS X, the location where QuickTime screen recordings are auto saved is:
~/Library/Containers/com.apple.QuickTimePlayerX/Data/Library/Autosave Information/
Users have to click the Save button to save the recordings on Catalina or earlier. That’s the reason why many users may leave a screen recording unsaved and have to recover from the autosave folder.
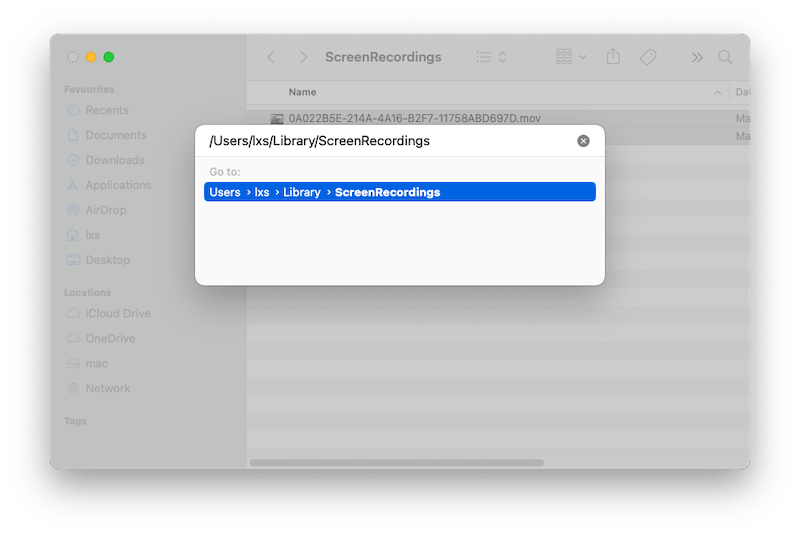
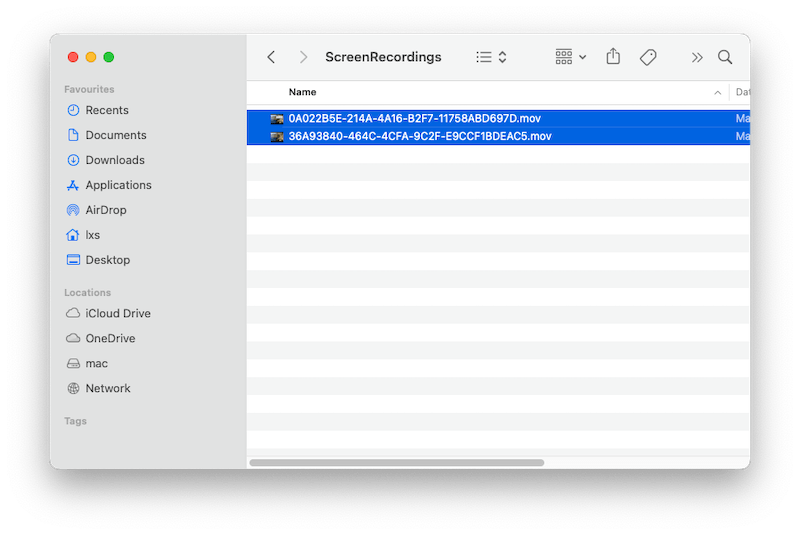
And since the release of macOS 11 Big Sur, the location where QuickTime screen recordings is saved has been changed to:
~/Library/Containers/ScreenRecordings/
By default, screen recordings on macOS Big Sur or later is auto saved to Desktop. You don’t even need to click Save button after finishing a recording, which means the chances that you leave a recording unsaved is quite low, maybe you just don’t know where it is saved on your Mac.
You are recommended to check the Desktop first if you cannot find a screen recording, basing on the knowledge where are screen recording saved on your Mac.
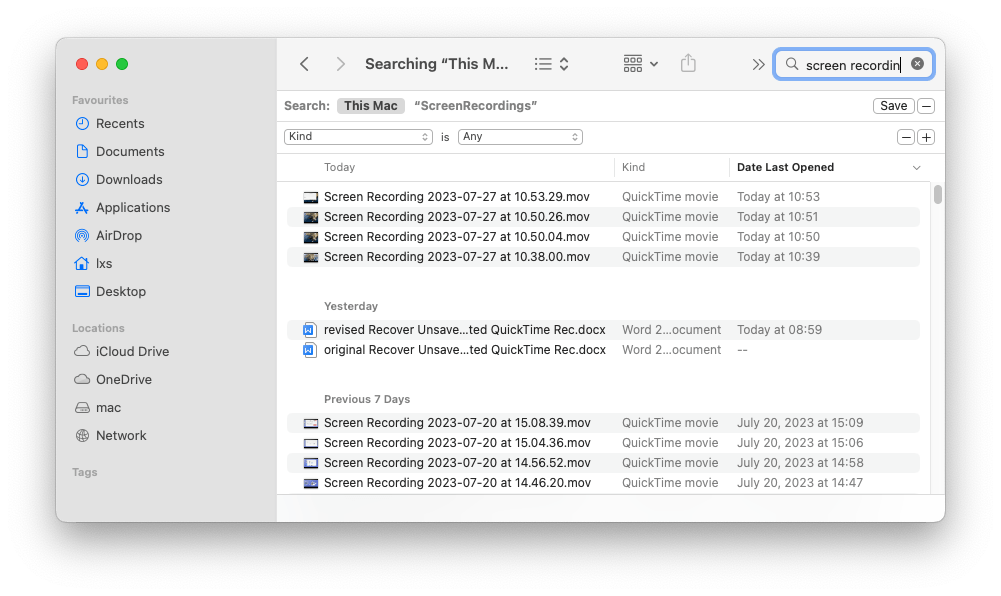
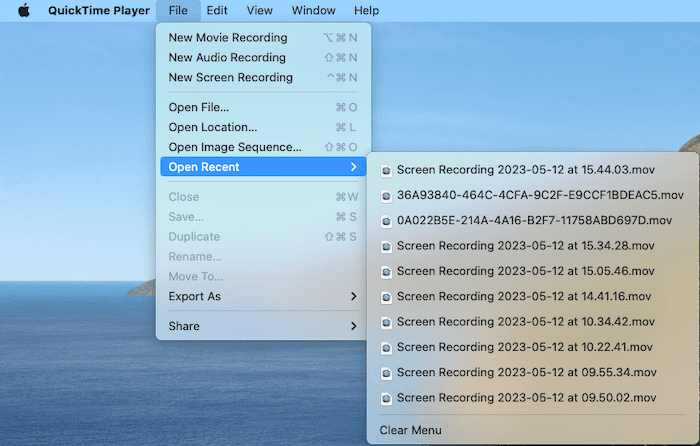
If failed, here’s another way. You may have realized that unsaved QuickTime screen recordings will be saved in file name starting with "unsaved" on macOS earlier than 10.15, or “screen recording” on macOS 10.15 or later. Therefore, we can search and find a screen recording according to file name, by using Spotlight.
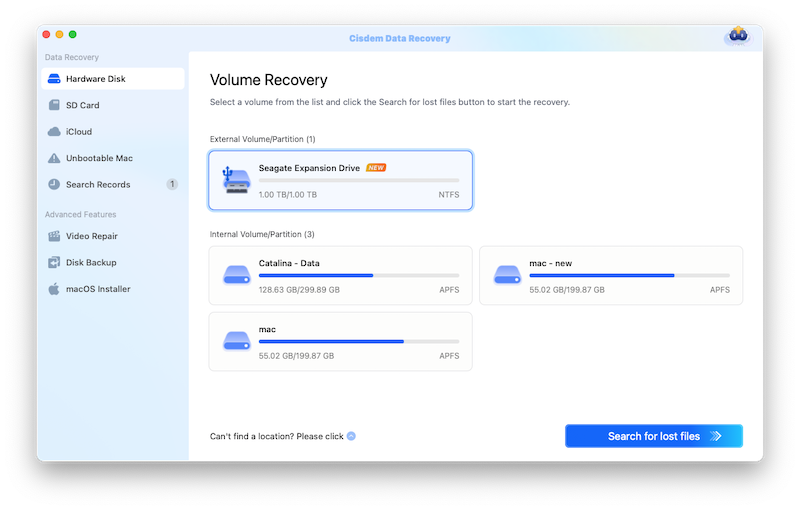
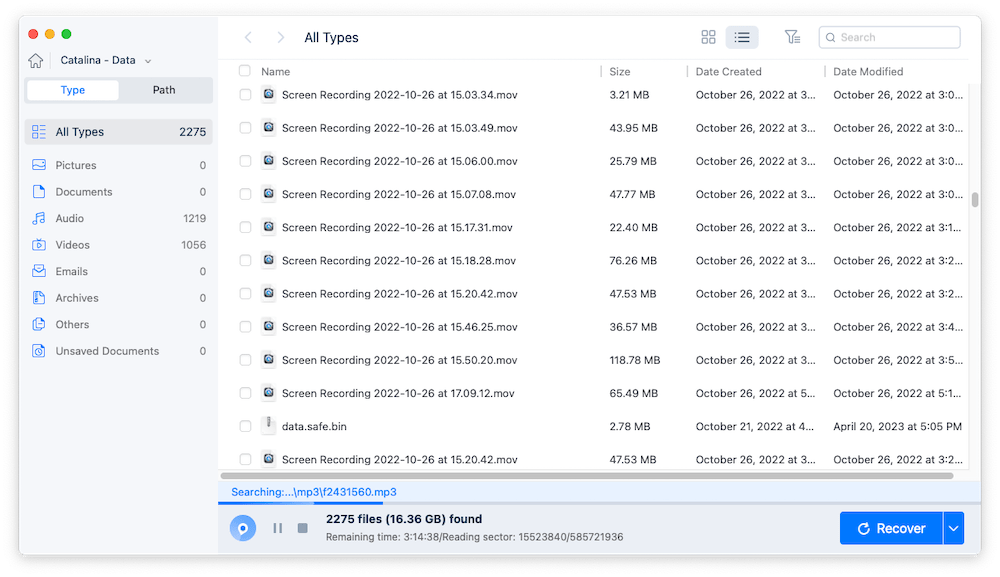
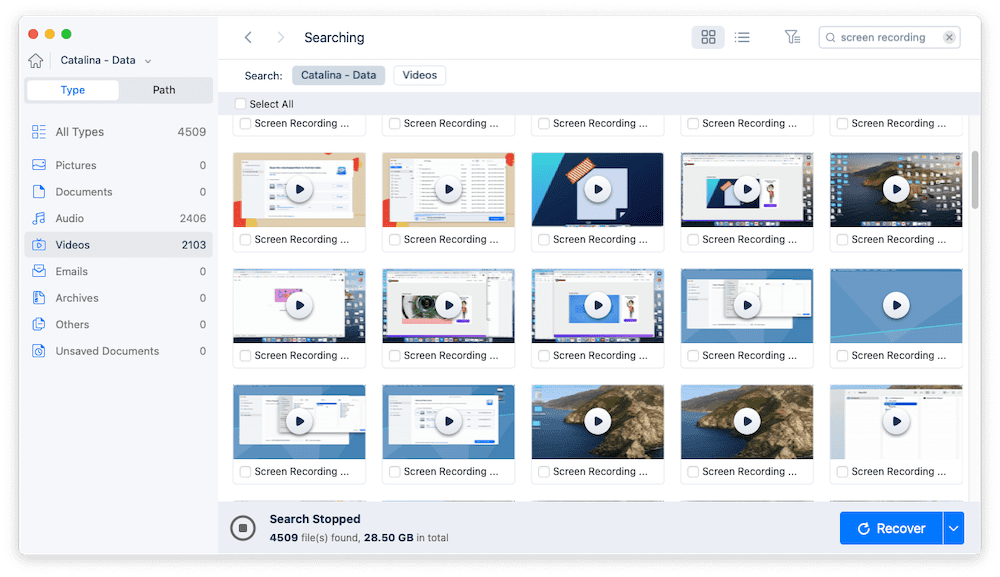
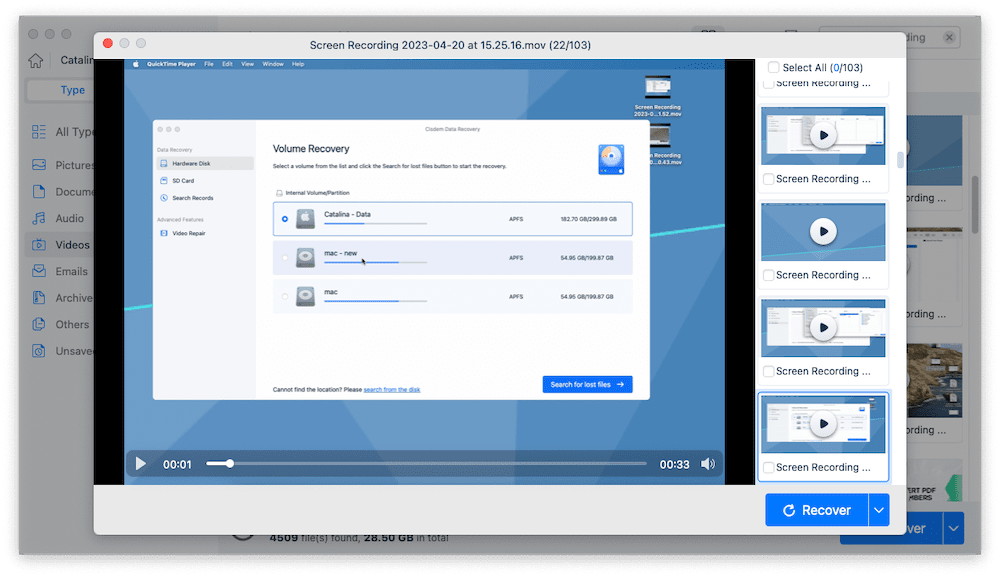
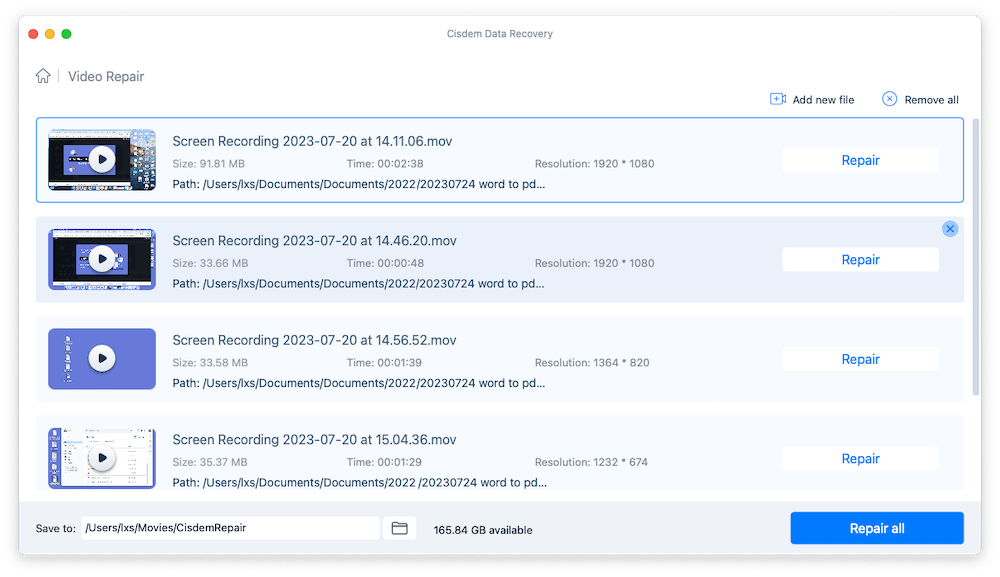
If you want to find and recover an unsaved, deleted or even a damaged screen recording on Mac, here is the easiest way, using a professional file scanning and recovering tool.
Cisdem Data Recovery is an ideal choice, which is designed to scan and recover 200+ types of files, including QuickTime recording videos, audios, MP4, AVI, M4V, MKV, MP3, WAV, WMA, DOCX, DOC, XLSX, XLS, PPTX, PDF, JPG, PNG, GIF, PDF, ZIP, RAR, EXE, etc. Even if your QuickTime recordings are corrupted and cannot be played, Cisdem can repair them fast and well.
Cisdem applies to different situations, no matter your files are mistakenly deleted, formatted, or lost due to virus attack, system crash, partition loss, hard drive damage, mount failure or other human errors, no matter the files are stored on internal hard drive or external hard drive. In addition, it allows users to preview the files before finding them back.
Main Features of Cisdem Data Recovery
Free Download macOS 10.9 or later 
Also, you can refer to the following YouTube tutorial, starting from 02:05.
An unsaved QuickTime recording may be caused by sudden power off, app quite unexpectedly, or others. Indeed, there are extra 3 methods to recover an unsaved QuickTime screen recording, but the recovery is still a matter of luck, it depends on many factors. Anyway, they are worth a try, since these methods won’t make the situation worse nor do harm to your Mac.
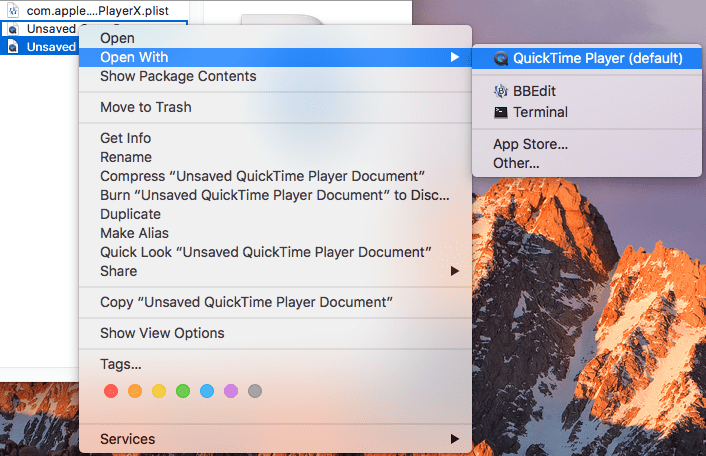
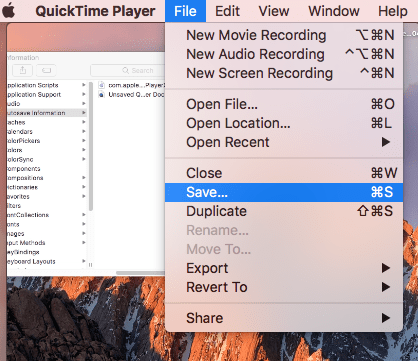
One of the greatest benefits macOS brings to Mac users is its AutoSave feature, which will auto save your files before your click the Save button in different macOS applications, like Preview, QuickTime Player. That’s to say, if you can find the AutoSave location of QuickTime Player files, we might be able to recover an unsaved QuickTime recording.
According to the 2nd part, the QuickTime autosave location on on Big Sur and later is different from the location on Catalina and earlier, so the steps will be different as well.


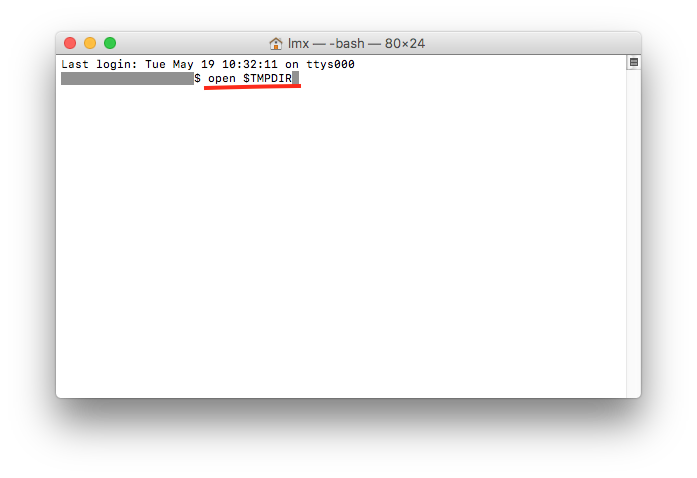
Another method to recover unsaved QuickTime recordings is using Temporary folders, it is again a matter of luck, but basing on my successful experience to find back my unsaved files before, you are recommended to have a go.

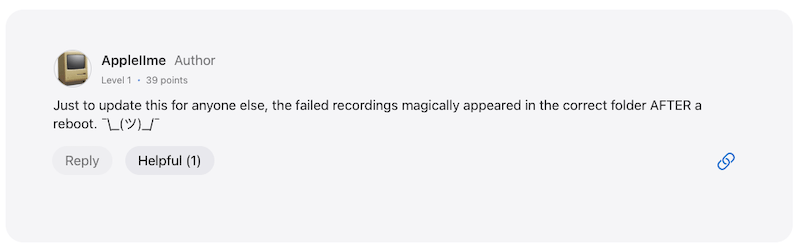
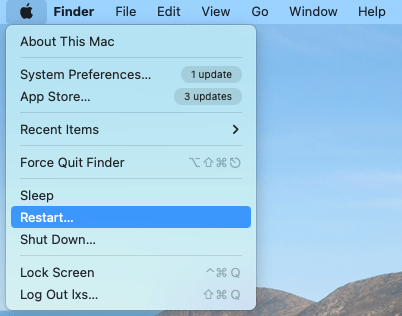
The last but not the least important method to recover unsaved QuickTime recordings is to reboot the app or your Mac, it sounds weird, but sometimes it just works like a magic, as some Mac users have restored unsaved QuickTime files successfully with a reboot.

Without installing a professional data recovery, we can still recover deleted or lost QuickTime recordings on Mac, here we have 3 ways listed as follows.
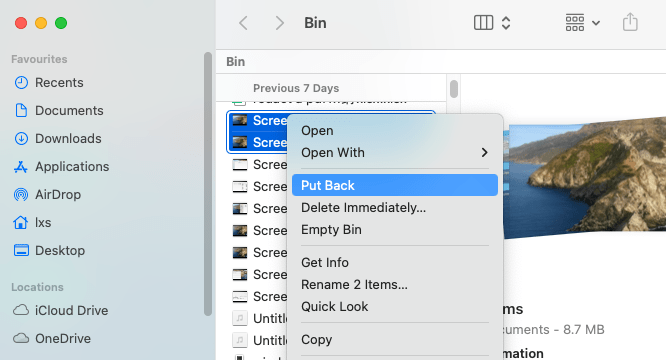
The deleted QuickTime recordings will be moved to Trash bin and kept there until you empty the trash bin, if haven’t purged it, you can put back the deleted QuickTime recordings to original folder.
Besides finding lost or disappeared QuickTime using Spotlight, there is another method to quickly recover a recording on your Mac, if you have opened the recording once in the QuickTime app.
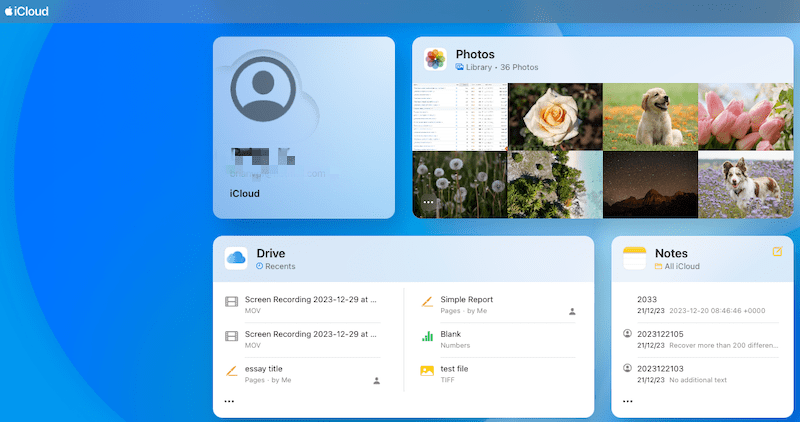
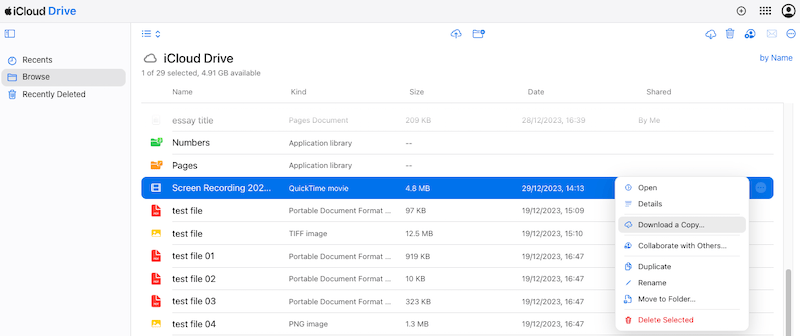
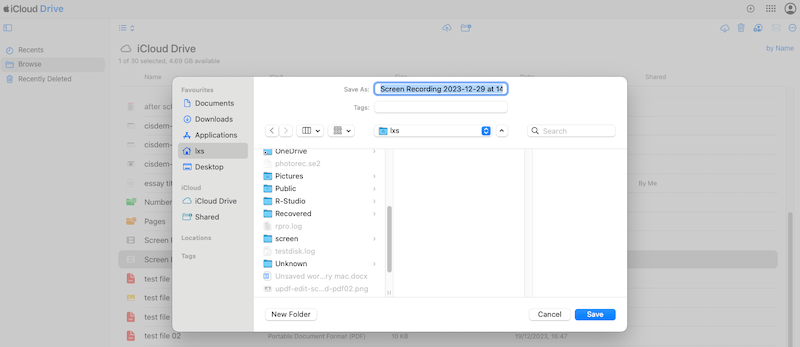
If you have backed up the QuickTime recording to iCloud drive, you can restore from iCloud backup by logging into icloud.com.
QuickTime keeps unsaving your recordings? Here we have some tips to fix "QuickTime Screen Recording Didn’t Save on Mac".
We are always recommended to update to the latest version when macOS and its apps release a new version, because they come with enhance performance and fix prior bugs. If your QuickTime doesn’t work properly, check if there is an update, if the problem persists after an update, maybe it is time to update your macOS to the latest one too.
A QuickTime recording is never small in size, we need to leave enough space for a newly created recording video, otherwise, the program will quit unexpectedly. This also proves that we should have a good habit of Mac cleanup, files backup, etc.
When one or several heavy programs run on your Mac and use high CPU, it becomes harder to other applications working properly, your Mac responds slowly or some programs just stop working. Therefore, before a QuickTime recording starts, we should quite those Apps that use high CPU as many as possible.
QuickTime Player can perform multiple tasks at the same time, playing or recording videos, but if you want to avoid unsaved QuickTime recordings, we’d better focus one task at one time, to gear your QuickTime player up for current recording task.
With macOS AutoSave feature, things do become easier when talking about unsaved file recovery, this is also true for unsaved QuickTime audio and screen recording recovery, though it is a matter of luck, we have to try. But to find and recover QuickTime recordings that are unsaved, deleted, lost or missing, with high recovery rate, a tool like Cisdem Data Recovery is the best solution.

Connie has been writing for Mac productivity and utility apps since 2009. Each review and solution is based on her practical tests, she is aways energetic and trustworthy in this field.


Marian
Thank you so much! I had a 36 minute screen recording that disappeared after recording. This step helped me: " Then copy and paste ~/Library/ScreenRecordings/ as following, press Enter. "
Barbie
Helpful tips. I found Temporary folder a nice place to recover unsaved files from. You guys can have a go if your unsaved QuickTime recordings were created not long ago.
Miruna
Thank you for the help! I did interviews and the recordings weren't saved in the usual place so I panicked for a good while until I found this article.
BernardBiz
Thank you very much for the information provided I'm very impressed