“I have bought a new Mac recently and My old MacBook Pro stopped working last week. I lost many tracks on Mac, but musics are still on my iPhone. Now I want to transfer all my musics from my iPhone to my Mac. Is there any way I could do to simply transfer my iPhone music to Mac or iTunes library? Grateful for helpful responses.”-- JayBeast
iPhone is one of the most popular mobile phone, but also it is a perfect music player for almost all iPhone users. With it, people can get their favorite music from the online store easily and enjoy them anytime and anywhere. However, with the increasing number of music on iPhone, many iPhone users may want to copy music from iPhone to Mac for freeing up more free space on iPhone. After we talked about transferring iPhone photos to Mac, today, let’s talk about how to transfer music from iPhone to Mac.
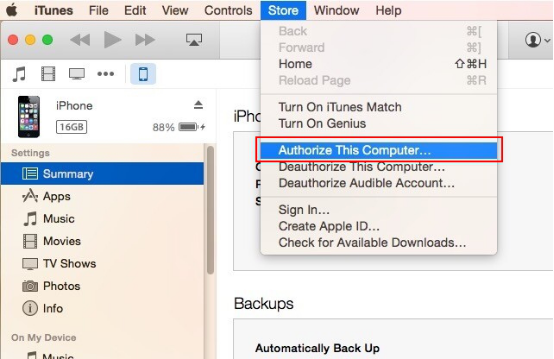
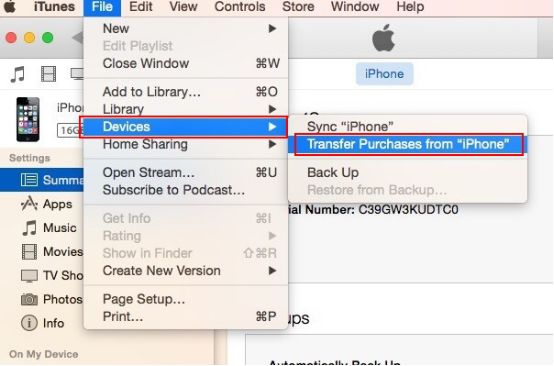
iTunes allows you to transfer purchased music from iPhone to Mac or from Mac to iPhone. It’s workable but the transferred songs are only limited to iTunes or Apple App Store purchased songs. Below are the detailed steps to sync your purchased music from iPhone to Mac using iTunes.
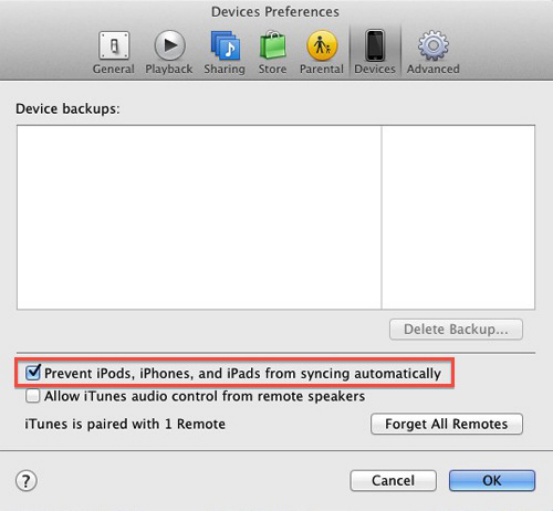
tips: One thing you should keep in mind is that you can't depend on iTunes to transfer non-purchased music, including songs ripped from CDs, downloaded via an app or from websites on iPhone, from iPhone to Mac.
As mentioned above, you can’t use iTunes to transfer non-purchased music from iPhone to Mac. If you're searching for an easy way to transfer all those non-purchased music from your iPhone to Mac, you should try a tool like Cisdem iPhone Cleaner to do that. It enables you to transfer the non-purchased music as well as the purchased ones to Mac. Below are the steps for how to copy music from iPhone to Mac with PhoneClean. You can download and try it to see how it works. And follow the below instructions to handle the tool as you like.
 Free Download macOS 10.8 or later
  Free Download Windows 11/10/8/7
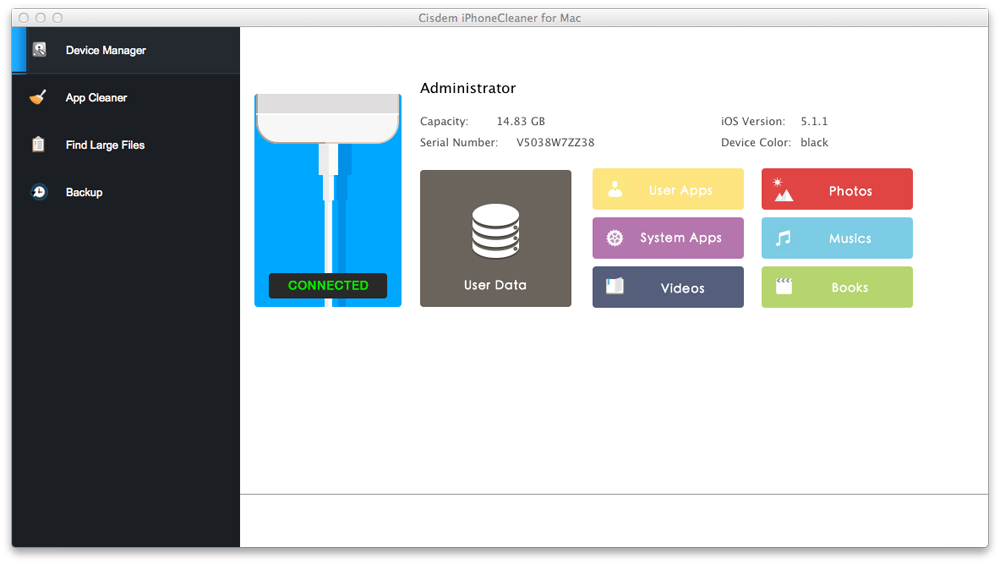

tips: If you want to add the music to iTunes, you can launch iTunes, choose File > Add File to Library or Add Folder to Library, locate the music file or folder, and click Open. Then all music from your iPhone are added to your iTunes library. And you can use PhoneClean to transfer all your iDevice’s music, videos, photos, reminders, messages, etc to Mac.
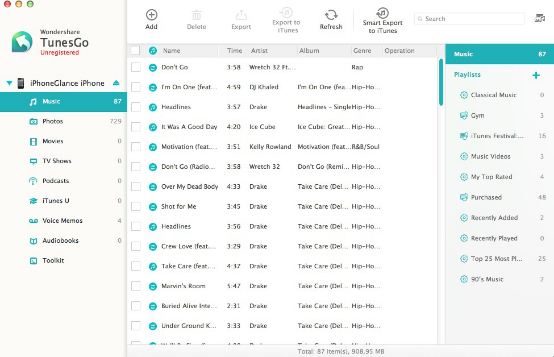
If you want to sync your music from any device to Mac, you should try a professional third-party transfer tool like Wondershare TunesGo. It allows you to transfer your iTunes media files (Music, Playlists, Movie, Podcasts, TV Shows, iTunes U and more) without limits. Below are the steps for how to sync music from iPhone to Mac with Wondershare TunesGo (Mac).
Download free trial of Wondershare TunesGo for Mac!
tips: You can transfer no more than 10 songs from your device to another with the trial version. If you want to use Wondershare TunesGo without any limits, you can buy a lifetime license per Mac for $59.95.

Megan has an impressive deal of experience with Mac software and has the ability to explain tech stuff in a simplified, straightforward and easy to understand way.


Duke
nice article, it would be better if more free ways are provided to transfer contents between iPhone and Mac.