Everyone who possesses Mac computers must be familiar to QuickTime, which is famous for a default player on Mac developed by Apple with simplicity configuration and multipurpose functionality. It always provides a visual and sound enjoyment for the public.
In this post, we intend to introduce a few awesome ways on how to convert QuickTime to MP4 on Mac to make it widely compatible and easy-streaming for other software, devices or platforms. If you have interests, please read on for more details.
 Free Download macOS 10.12 or later
  Free Download Windows 11/10/8/7
Although QuickTime player supports a large bundle of video/audio formats or codecs, like MPEG-1, MPEG-2, MPEG-4, AVI, 3GPP AND 3GPP2, AVCHD, DV, MP4, AU, AIFF, iTunes Audio, WAV, SD2, SND, AMR, etc., when it comes to the QuickTime video format, MOV is the first one occurring to people’s mind, which is the default file format of QuickTime Player.
MOV is derived from QuickTime File Format (QTFF) since 1988 designed by Apple, which includes Apple QuickTime Movies encoding requirements and data compression specifications in the .mov file extension. It contains one or more tracks to save the videos, audios, subtitles and other related data. Therefore, converting QuickTime to MP4 Mac is close to converting MOV to MP4 Mac.
No, the current QuickTime Player can only export the loaded video to MOV format. But for those who have installed and purchased QuickTime Player Pro before can make QuickTime file to MP4 in a few clicks. If necessary, please follow the steps below.

However, QuickTime Player is a discontinued software and QuickTime Player Pro is not available on the market any more. For users who don’t have QuickTime Player Pro, we have also prepared more methods below to ensure smooth conversions.
Cisdem Video Converter is a preeminent QuickTime converter to help people convert QuickTime to MP4 in bulks at one click while preserving high quality. Except for MP4, it also prepares many other video or audio formats for people to choose, even including presets for third-party software or devices, like YouTube, iTunes, iPhone, Android, etc.
Furthermore, it gathers outstanding editing features to customize the video looking in the app, including cutting the long video into several ones or merging several clips into a large one, adjusting the video effects by enlightening, darkening or other actions, adding external subtitles and more.
Plus, if you are prowess in software, you are also allowed to rearrange the encoding parameters from multiple elements to meet your advanced needs. Besides, this powerful tool can also help you perform other tasks effortlessly, such as ripping DVD with copy protection or downloading online videos from any websites.
Free Download macOS 10.12 or later Free Download Windows 11/10/8/7
Download the latest Mac version of Cisdem Video Converter on your computer.
Open it, directly drag and drop all QuickTime files to the program. All of them will be displayed in the default interface for converting with separate video thumbnails. Note: you can click on the front video thumbnail to activate the icon for playback.
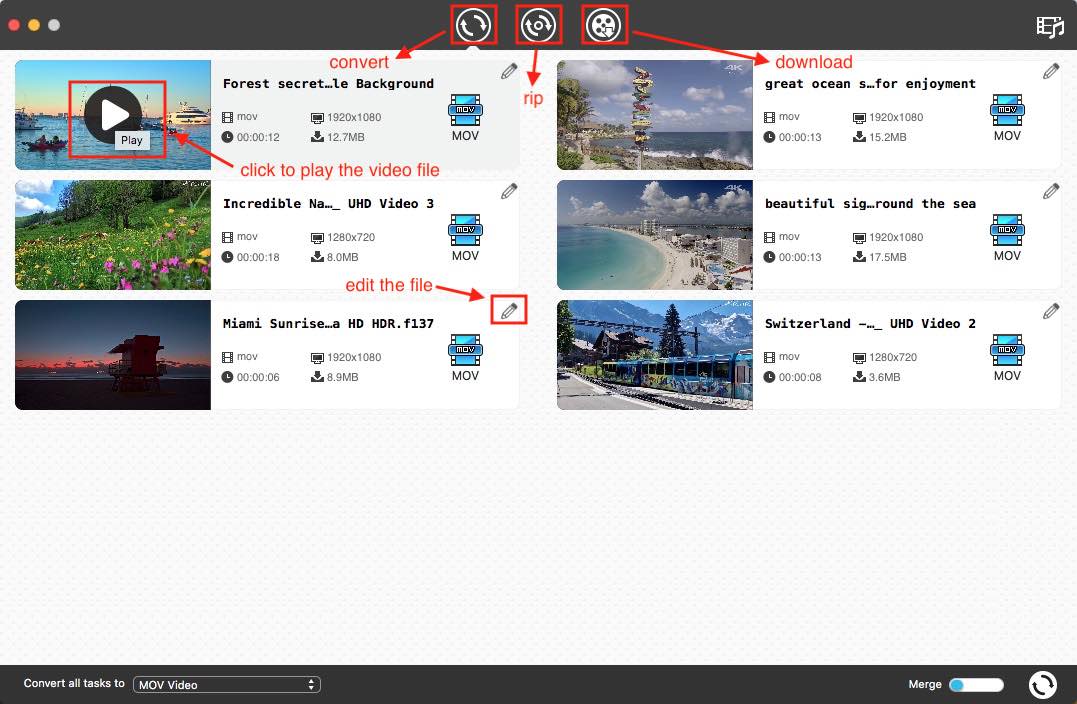
Click the “pencil” icon, which pops up a new window for you to edit the video through trim, crop, rotate, video effects, watermark, subtitles and volume. Once done, click “Save” to go back to the main interface with your settings.

People can set the output format in two ways by clicking the “Convert all tasks to” button or the highlight format button on the video thumbnail. As the name shows, the former can choose the output format for all files in one click, while the latter can only set the format one by one.
Click either one, then it shows another window covered with various video and audio formats. To choose MP4, click “General Video” to find “MP4” as the output format.

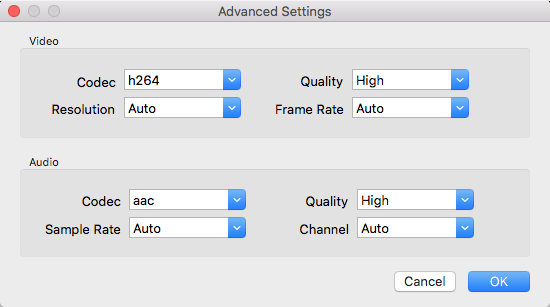
If you are an experienced user, you can also click the “gearwheel” icon next to the selected MP4 format, then you can make an advanced setting to the file encoders as the following shows.
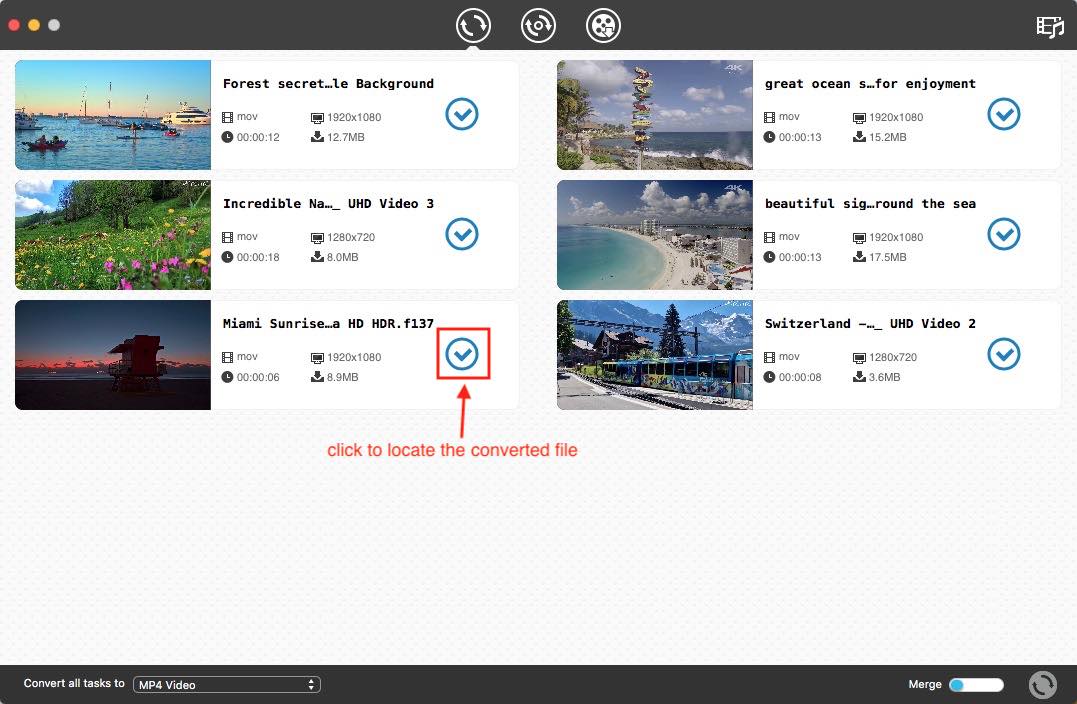
Finally, click “Convert” icon on the bottom right corner to get the new MP4 files immediately. After finishing, click the “checkmark” icon to locate them on your device.
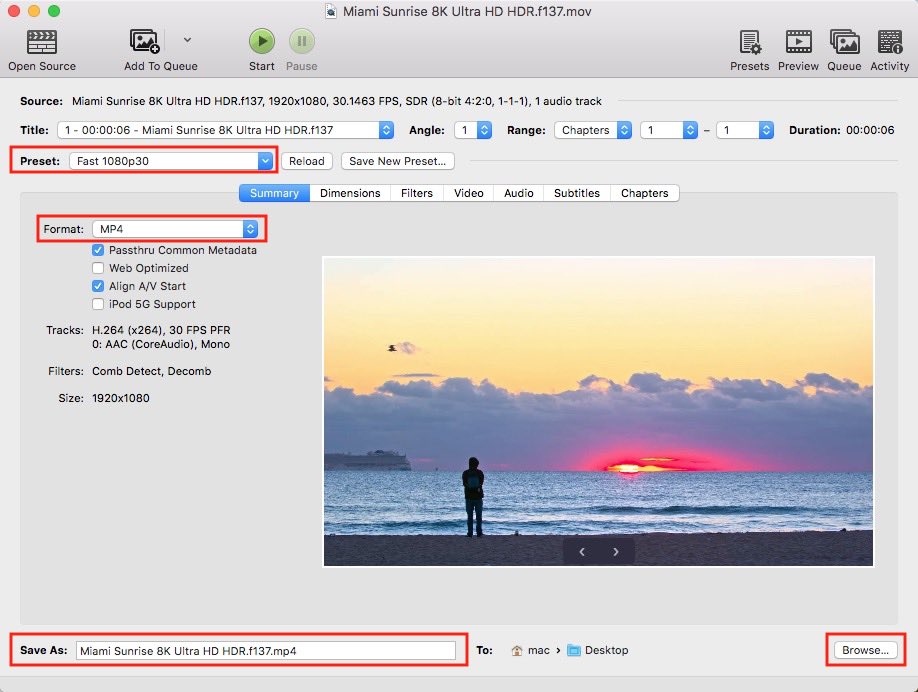
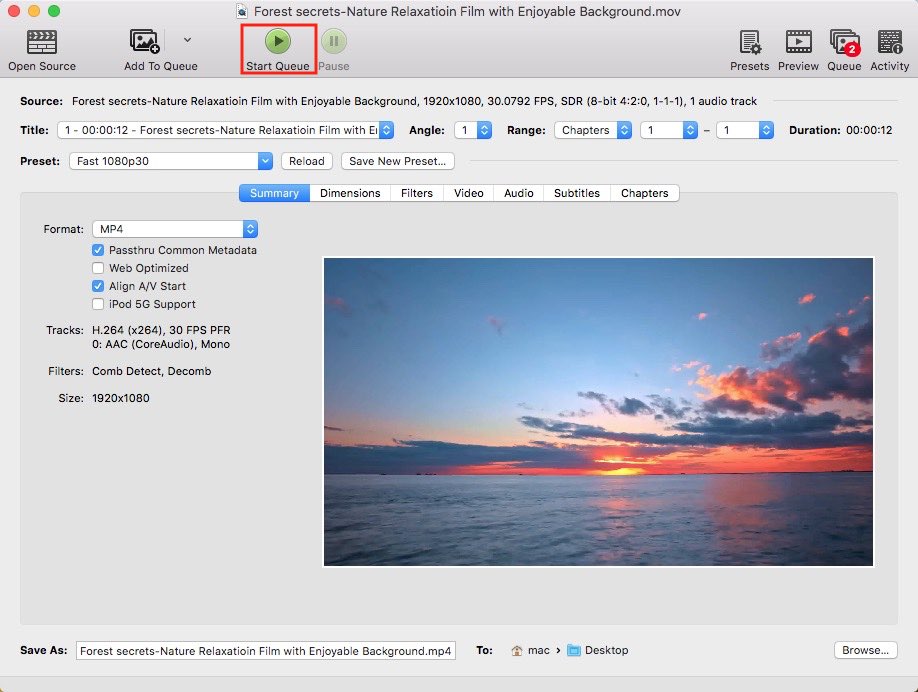
If you are looking for a free solution, HandBrake is a great option that is an open-source tool to deal with video files. It offers some basic editing features to modify the video via crop, resolution, borders, deinterlance, video/audio encorders, frame rate, sample rate, etc. Moreover, it can preview the result frame by frame.
Moreover, although it can’t handle videos in batches, it offers an additional “Add to Queue” features, which can add all target files to a queue. You can even set Notification”, “Quit Handbrake”, “shut down computer” or any other activities in advance, so that you don’t have to wait in front of the computer all the time when you have multiple videos to convert.
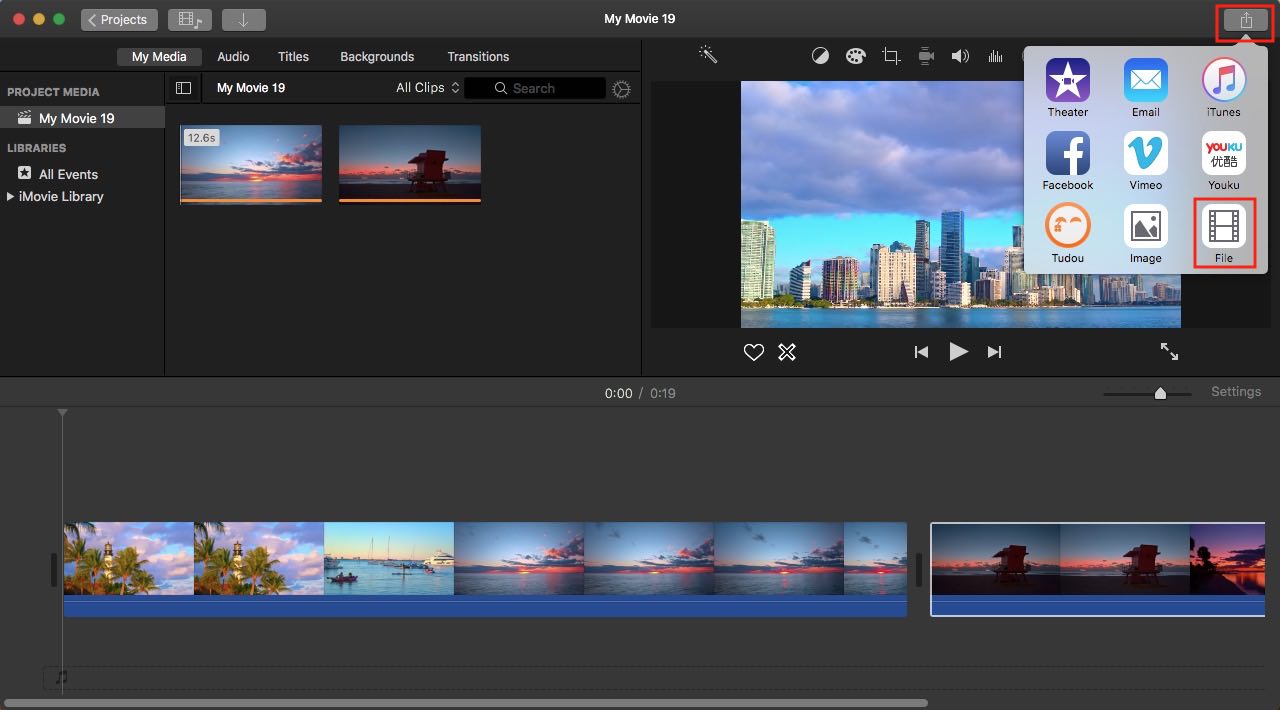
iMovie is familiar by most Mac users, which is widely known as a media editor and is pre-installed on computer. Except for editing the added files, iMovie can also transfer the added files to MP4 format. Plus, if you have demanding in combining multiple files, you can add all of them to the program directly.
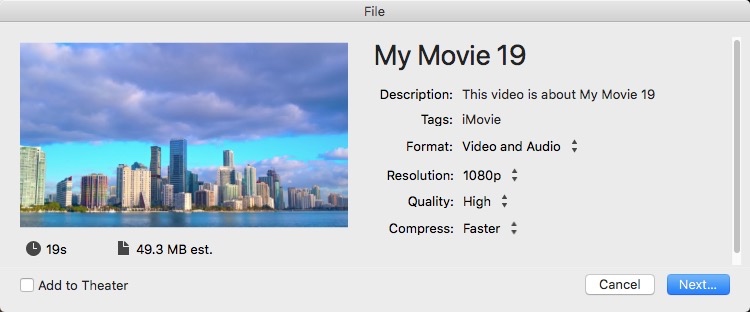 Note: don’t set the Quality as “Best (ProRes)”, which will export the video as MOV format.
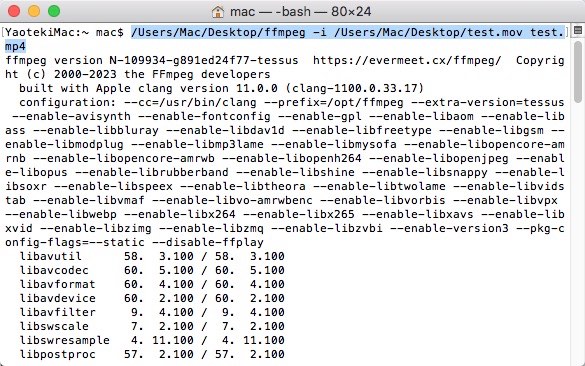
FFmpeg is also a great and accessible tool for users to convert QuickTime to MP4 for free, which is an open-source software that supports converting various videos and audios with according command lines. However, since it doesn’t possess a graphic interface, it needs the assist of Terminal on your Mac to perform tasks.
Some people tend to convert QuickTime to MP4 online, because they may don’t want to install additional software on their computer. Suffice to say, online services are usually easy to get in hands due to the simple interface. However, they generally lack of advanced features for editing, and most of them need to upgrade to the pro version to gain more conversion volumes.
For your convenience, we have selected two useful online QuickTime to MP4 converters for Mac by considering from all-rounded aspects.
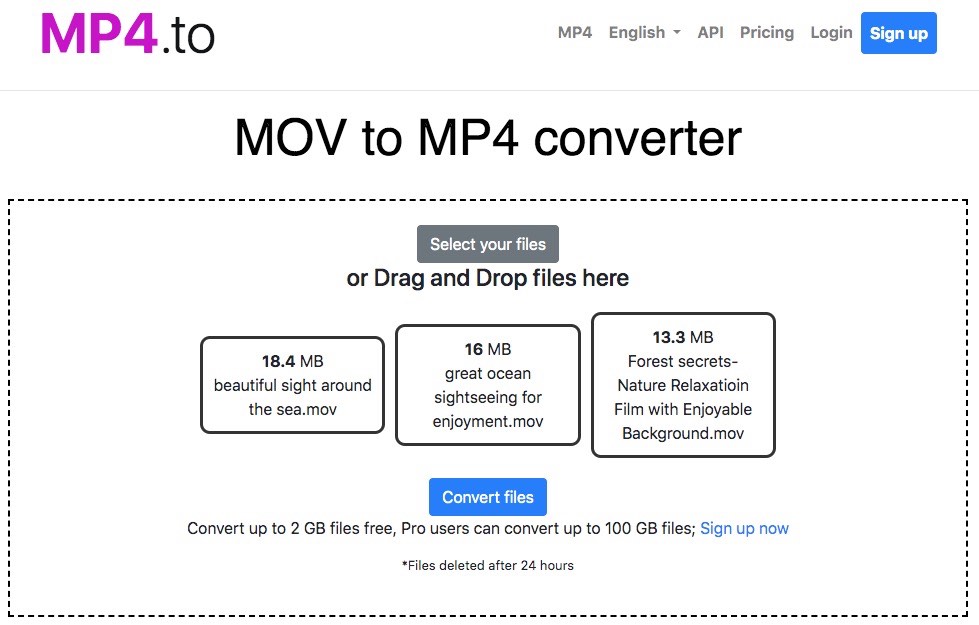
MP4.to is dedicated on dealing with MP4 related conversions, either converting MP4 to other formats or converting other formats to MP4. Also, it provides 100+ languages on the web page, allowing people to choose a preferred one. What makes it more excellent is that it supports converting files up to 2 GB for free, which defeats most online tools.
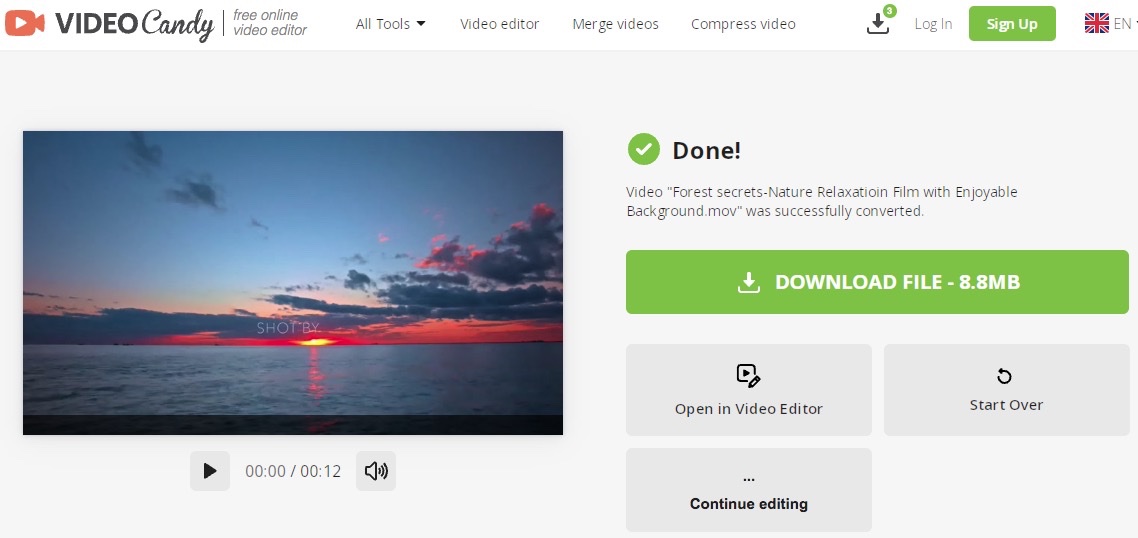
VideoCandy.com is the other online service recommended to the needed. Actually, it is an online video editor, which provides an extra function to convert to MP4, MKV, AVI, MOV, MP3 and GIF. Moreover, it allows people to make use of the existing features to edit the converted files, including trimming, merging, cropping, compressing, and more, which is suitable for the people who want customization features.

This article illustrates 6 ways on how to convert QuickTime to MP4 on Mac and divides them into 2 parts for people’s convenience. Many people wonder whether there is quality loss after converting QuickTime to MP4. To be honest, MP4 is a highly compressed video formats, and the quality loss is unavoidable to cause.
In this regard, using the best video converter is the best recommended method, because it allows you to reorganize the encoding codcs and keep high quality, plus, you can also choose “4K - MP4 video” option to minimize the quality compromise.

Megan has an impressive deal of experience with Mac software and has the ability to explain tech stuff in a simplified, straightforward and easy to understand way.


